

This post contains affiliate links. As an Amazon Associate, I earn from qualifying purchases. This comes at no extra cost to you.
Appetizers easy finger food is exactly what Ham and Cheese Sliders are: soft rolls layered with sliced deli ham and Swiss cheese, brushed with a seasoned butter topping, then baked at 350°F for about 20 minutes. This recipe makes 6 servings and gives you warm, melty sliders with a golden top and a savory finish. I tested these for a quick family meal with Theo, and the batch came out neatly sliced, easy to serve, and gone fast from the baking dish.
The first bite of Ham and Cheese Sliders is all about contrast: tender rolls, salty ham, creamy cheese, and a buttery crust with poppy seeds and onion. Hana here, and I trust this recipe because I keep it simple, measure carefully, and rely on the same method I use for reliable home baking and easy party food appetizers.
These Ham and Cheese Sliders are a strong fit when you need game day food, tailgate food, or Super Bowl food that does not require a long prep list. The oven does the work, and the foil helps the cheese melt evenly before the tops finish golden.
Table of Contents
- Why do Ham and Cheese Sliders work so well?
- What ingredients do you need for Ham and Cheese Sliders?
- How do you make Ham and Cheese Sliders step by step?
- Frequently Asked Questions About Ham and Cheese Sliders
- What should you serve with Ham and Cheese Sliders?
- How do you store and reheat Ham and Cheese Sliders?
- What easy swaps can you make in Ham and Cheese Sliders?
- What expert tips help Ham and Cheese Sliders bake well?
Why do Appetizers Easy Finger Food work so well?
Appetizers Easy Finger Food works because Ham and Cheese Sliders are fast, reliable, and easy to portion for 6 servings. The rolls bake together as one set, the butter topping adds flavor in one step, and the foil helps the cheese melt before the tops brown.
- They save time. The prep takes 10 minutes, so the oven does most of the work. That makes Ham and Cheese Sliders practical for busy nights or party food appetizers.
- They serve a crowd neatly. Six servings come from one baking dish, and each slider is easy to pick up. That format works well for football food and game day food tables.
- They taste balanced. The ham brings salt, the Swiss cheese adds mild richness, and the Dijon mixture cuts through with brightness. The result is layered flavor without extra fuss.
- They fit many occasions. Ham and Cheese Sliders work for tailgate food, Superbowl snacks, and a simple family meal. When I set them out for Theo, the small size made serving easy and cleanup quick.
The butter mixture is the reason these sliders taste finished instead of plain. Melted butter carries the Dijon mustard, Worcestershire sauce, poppy seeds, dried minced onion, garlic powder, and salt into the tops of the rolls, so every bite tastes seasoned.
The texture matters too. The bottom stays soft, the cheese melts into the ham, and the tops bake to a light golden finish once the foil comes off.
What ingredients do you need for Ham and Cheese Sliders?
Ham and Cheese Sliders use 10 simple ingredients that bake into one pan of warm, savory sandwiches. The recipe depends on soft slider rolls, sliced deli ham, Swiss cheese, and a melted butter topping made with Dijon mustard, Worcestershire sauce, poppy seeds, minced onion, garlic powder, and salt.
- 12 slider rolls or Hawaiian sweet rolls, split horizontally
- 1/2 pound sliced deli ham
- 6 slices Swiss cheese
- 1/2 cup unsalted butter, melted
- 1 tablespoon Dijon mustard
- 1 tablespoon Worcestershire sauce
- 1 teaspoon poppy seeds
- 1 teaspoon dried minced onion
- 1/4 teaspoon garlic powder
- 1/4 teaspoon salt
The rolls matter because they hold everything together without falling apart after baking. Swiss cheese is the other key ingredient because it melts smoothly and keeps the filling creamy instead of greasy.
For local game day foods near me, I think of Ham and Cheese Sliders as the dependable choice when you need something budget-friendly and easy to transport. They also fit alongside a sandwich tray or prepared-food counter spread if you are comparing options for group size and kid-friendly snacks.
How do you make Ham and Cheese Sliders step by step?
Ham and Cheese Sliders come together in one baking dish, one butter bowl, and about 20 minutes in the oven. The method is simple: split the rolls as a whole set, layer in the ham and Swiss cheese, brush on seasoned butter, then bake covered and uncovered until the tops turn golden.
You might also enjoy our pepperoni cheese crisps easy low.
Step 1 — Heat the oven and prepare the dish
Preheat the oven to 350°F (175°C). Lightly grease a baking dish or line it with foil so the sliders lift out more easily after baking.
Step 2 — Set the rolls in place
Without separating the rolls individually, slice the entire set of rolls in half horizontally. Place the bottom halves in the prepared dish so the sliders stay aligned and easy to assemble.
Step 3 — Add the ham and cheese
Layer the ham evenly over the bottom halves, then place the Swiss cheese on top of the ham. Add the top halves of the rolls to finish the sandwich layer.



Step 4 — Mix the seasoned butter
In a small bowl, whisk together the melted butter, Dijon mustard, Worcestershire sauce, poppy seeds, dried minced onion, garlic powder, and salt. This mixture should look smooth and well blended so it spreads evenly over the rolls.
Step 5 — Coat the tops
Spoon or brush the butter mixture evenly over the tops of the rolls, letting some drip down the sides. That extra butter helps season the bread all the way around and supports even browning.
Step 6 — Bake until melted and golden
Cover the dish with foil and bake for 15 minutes. Remove the foil and bake for 5 to 7 minutes more, until the tops are golden and the cheese is melted.
Step 7 — Slice and serve
Slice and serve warm. Ham and Cheese Sliders are easiest to cut after a short rest, and the warm filling holds together better when served right away.
For more ideas, check out our french dip sliders.
Frequently Asked Questions About Ham and Cheese Sliders
Can I make Ham and Cheese Sliders ahead of time?
Yes, Ham and Cheese Sliders can be assembled ahead and baked later. Keep the butter mixture separate until you are ready to bake so the rolls stay soft and do not absorb too much liquid.
Why do you bake them covered first?
Baking them covered for 15 minutes helps the cheese melt and heats the sliders evenly. Removing the foil for the last 5 to 7 minutes lets the tops turn golden without drying out the filling.
Can I use different cheese in Ham and Cheese Sliders?
Yes, but Swiss cheese is the best match for the listed recipe. It melts smoothly and keeps the flavor mild enough to let the ham and Dijon butter stand out.
How do I keep the bottoms from getting soggy?
Use the exact butter amount and bake in a properly preheated 350°F oven. Splitting the rolls as one set and baking them in a lightly greased dish also helps the structure hold.
Are Ham and Cheese Sliders good for party food appetizers?
Yes, Ham and Cheese Sliders are ideal for party food appetizers because they are baked in one dish and served warm. The 6-serving batch is easy to scale by doubling the recipe for larger groups.
What should you serve with Ham and Cheese Sliders?
Ham and Cheese Sliders pair well with simple sides that balance the buttery rolls and savory filling. For a game day spread, I like choosing one crisp side, one creamy dip, or another handheld option so the table feels complete without becoming complicated.
For a casual party, serve these sliders with crunchy vegetables and a light dip to offset the richness. If you are browsing local game day appetizer platters near me, think in terms of mix-and-match foods like wings, dips, nachos, and sandwich trays that fit your group size and budget.
Looking for something similar? Try our soft pumpkin cookies with cream.
- Crunchy chips or sliced vegetables. A crisp side adds contrast to the soft rolls and melted cheese.
- Pickles or pickled vegetables. The tangy bite cuts through the butter topping nicely.
- A simple green salad. This keeps the meal balanced when Ham and Cheese Sliders serve as dinner.
- Other party trays. A sandwich tray or dip platter makes the table feel fuller for football food and Super Bowl food gatherings.
When I plan for Theo and a few guests, I keep the rest of the menu easy so the sliders stay the main focus. That way the Ham and Cheese Sliders remain the warm centerpiece instead of competing with too many dishes.
How do you store and reheat Ham and Cheese Sliders?
Ham and Cheese Sliders store well for short-term leftovers if you cool them first and pack them tightly. Refrigerate them in an airtight container for up to 3 days, and reheat them covered so the bread stays soft while the filling warms through.
For the best texture, reheat in a 350°F oven until the centers are hot and the tops feel warm again. A covered bake works best because it prevents the rolls from drying out before the cheese loosens.
If you need freezer storage, wrap the baked sliders tightly and freeze them after cooling completely. Thaw in the refrigerator before reheating so the butter topping and cheese warm more evenly.
What easy swaps can you make in Ham and Cheese Sliders?
Small swaps can change the flavor of Ham and Cheese Sliders without changing the recipe structure. I keep substitutions minor so the rolls, ham, cheese, and butter topping still bake together in the same 350°F method.
- Use regular dinner rolls instead of Hawaiian sweet rolls. The sliders taste less sweet and a little more bready, which works well if you want a softer savory profile.
- Swap the Swiss cheese for another mild melting cheese. The flavor becomes slightly less nutty, but the texture still stays smooth and creamy.
- Use yellow mustard if Dijon is not available. The flavor turns sharper and simpler, while the butter topping still seasons the rolls well.
I keep these swaps modest because the butter mixture already does a lot of flavor work. The original Ham and Cheese Sliders formula is balanced, so a small pantry adjustment is usually enough.
What expert tips help Ham and Cheese Sliders bake well?
A few careful details make Ham and Cheese Sliders bake evenly and slice cleanly. The biggest difference comes from how you handle the rolls, how evenly you brush the butter, and how closely you watch the final 5 to 7 minutes.
- Keep the rolls attached while slicing. This helps the bottom and top halves stay aligned, which makes assembly faster and neater.
- Whisk the butter mixture well. Even mixing spreads the Dijon, Worcestershire sauce, and seasonings across all 12 rolls more evenly.
- Let some topping drip down the sides. That extra butter seasons the edges and gives the sliders a more even finish.
- Watch the uncovered bake closely. The difference between golden tops and overbrowned tops can be just a minute or two in a hot oven.
These details matter because Ham and Cheese Sliders are simple enough that technique shows up in the final texture. A well-brushed top, melted cheese, and a lightly golden finish give you the best result from this quick 20-minute bake.
Ham and Cheese Sliders
Equipment
- baking dish
- small bowl
- Whisk
- pastry brush
- aluminum foil
- Oven
Ingredients
- 12 slider rolls or Hawaiian sweet rolls (split horizontally)
- 1/2 pound sliced deli ham
- 6 slice Swiss cheese
- 1/2 cup unsalted butter (melted)
- 1 tbsp Dijon mustard
- 1 tbsp Worcestershire sauce
- 1 tsp poppy seeds
- 1 tsp dried minced onion
- 1/4 tsp garlic powder
- 1/4 tsp salt
Instructions
- Preheat the oven to 350°F (175°C). Lightly grease a baking dish or line it with foil.
- Without separating the rolls individually, slice the entire set of rolls in half horizontally and place the bottom halves in the prepared dish.
- Layer the ham evenly over the bottom halves, then place the Swiss cheese on top of the ham. Add the top halves of the rolls.
- In a small bowl, whisk together the melted butter, Dijon mustard, Worcestershire sauce, poppy seeds, dried minced onion, garlic powder, and salt.
- Spoon or brush the butter mixture evenly over the tops of the rolls, letting some drip down the sides.
- Cover the dish with foil and bake for 15 minutes. Remove the foil and bake for 5 to 7 minutes more, until the tops are golden and the cheese is melted.
- Slice and serve warm.
Notes
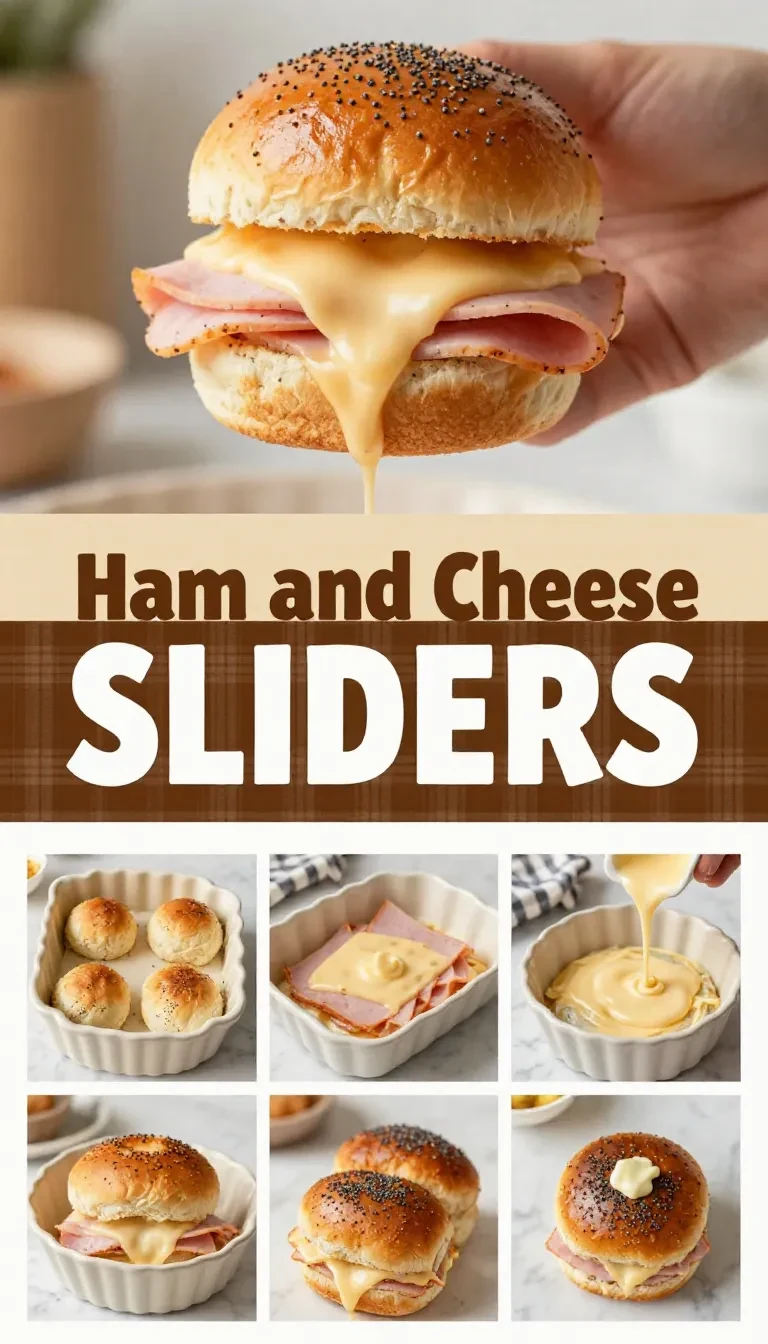
Loved this recipe? Save it to your favorite Pinterest board so you can easily find it later! ✨




Comments are closed.