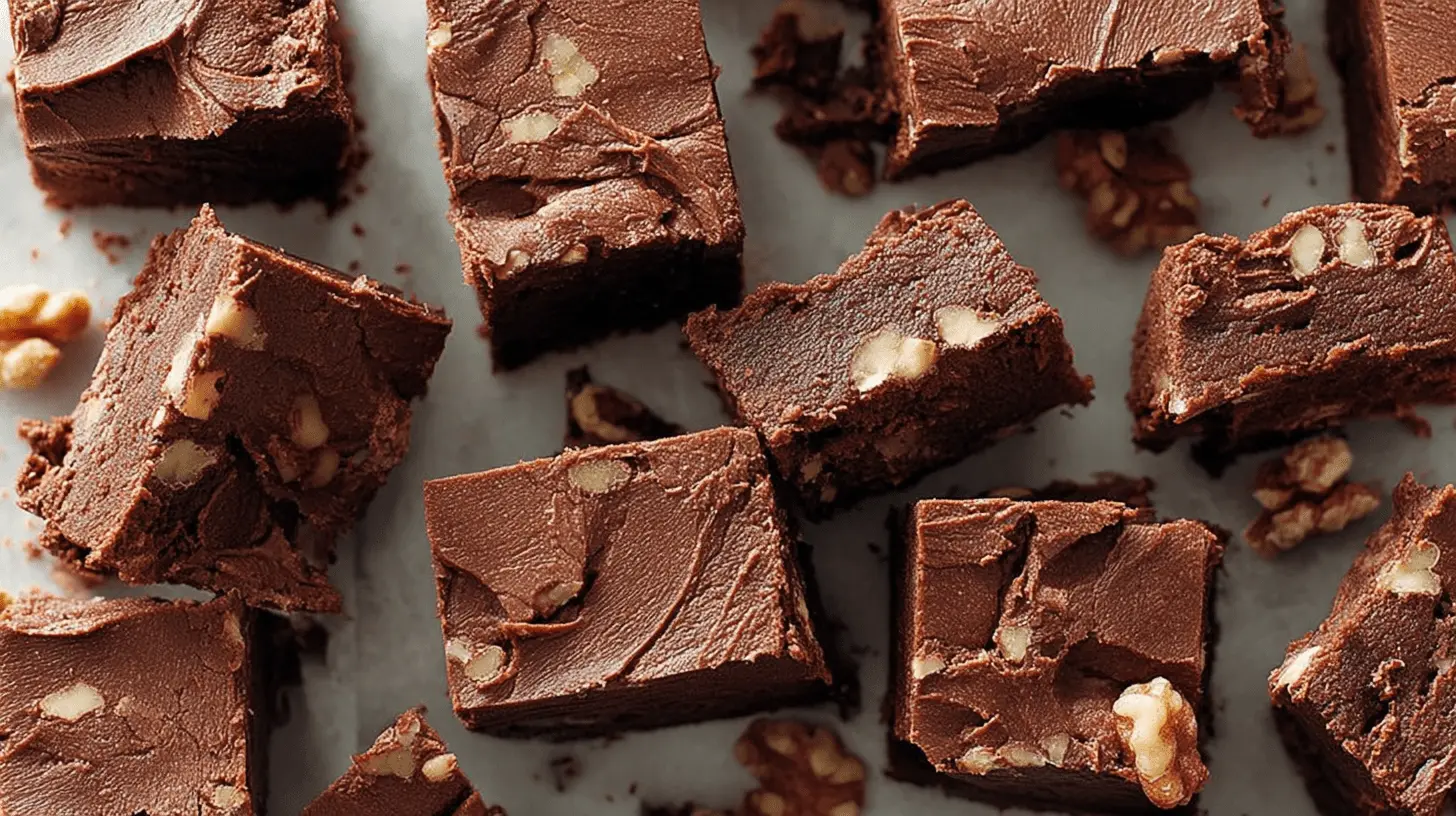
Welcome to Emma Williams Ava’s kitchen, where we transform simple ingredients into irresistible indulgences. Prepare to discover the ultimate recipe for Chocolate Dessert Bars – a treat that promises rich, fudgy perfection in every bite. This straightforward method ensures satisfying results, making it an ideal choice for both novice and experienced bakers. Perfect for chocolate lovers, these decadent bars will become a go-to for any occasion, from casual gatherings to special celebrations. Achieve that sought-after fudgy texture every time with our expert guidance, embracing the joy of baking.
Table of Contents
Why You’ll Love These Chocolate Dessert Bars
You will adore these Chocolate Dessert Bars for many compelling reasons, embodying our brand’s commitment to culinary excellence and accessibility. They perfectly bridge professional techniques with home cooking convenience, making baking a pleasure.
- Incredibly Rich and Wonderfully Fudgy: Each bar boasts a deep chocolate flavor and a melt-in-your-mouth fudgy texture that is truly irresistible.
- Simple, Straightforward Baking Process: Our recipe streamlines the steps, ensuring a smooth and enjoyable baking experience even for beginners.
- Uses Readily Available Ingredients: You likely have most of these pantry staples on hand, making these decadent chocolate bars accessible anytime.
- A Guaranteed Crowd-Pleaser Dessert: These universally loved treats disappear quickly, making them perfect for potlucks, parties, or family desserts.
- Versatile for Customization: Easily adapt this base recipe with your favorite mix-ins or toppings, allowing for endless creative variations.
Ingredients
Gather your high-quality ingredients to create truly exceptional Chocolate Dessert Bars. Using good-quality cocoa and chocolate makes a noticeable difference in flavor and overall richness.
- 1½ cups (180g) all-purpose flour
- ¾ cup (65g) unsweetened cocoa powder, sifted
- 1½ cups (300g) granulated sugar
- ½ cup (100g) light brown sugar, packed
- 1 cup (226g) unsalted butter, melted
- 3 large eggs, at room temperature
- 2 teaspoons pure vanilla extract
- 1 teaspoon fine sea salt
- 1 cup (170g) semi-sweet chocolate chips, plus more for topping
- ½ teaspoon baking powder
Notes & Substitutions
Thoughtful substitutions and notes help adapt this recipe to various needs and preferences, maintaining the integrity of these delightful chocolate dessert bars. These tips ensure reliability and excellent results.
- Flour: For a gluten-free option, use a 1:1 gluten-free all-purpose baking blend. Measure carefully for best consistency.
- Cocoa Powder: Opt for Dutch-processed cocoa powder to achieve a darker color and a mellower, less bitter chocolate flavor in your fudgy squares. For more on how Dutch-processed cocoa powder differs from natural cocoa in baking, this article explores the science behind cocoa processing.
- Butter: If unsalted butter is unavailable, use salted butter and reduce the added fine sea salt to ¼ teaspoon. You can also substitute with an equal amount of vegetable oil for moisture.
- Eggs: Room temperature eggs emulsify better with melted butter and sugar, resulting in a smoother, more cohesive batter for the ultimate chocolate dessert bars. Learn more about why room temperature eggs are beneficial in baking.
- Chocolate: Experiment with dark, milk, or white chocolate chips, or a combination, to vary the sweetness and complexity of the flavor profile. Consider chocolate chunks too.
- Salt: A sprinkle of flaky sea salt on top before baking enhances the chocolate’s depth and adds a delightful textural contrast. It’s a professional touch.
Equipment
Having the right tools simplifies the baking process and contributes to consistent results for your delicious Chocolate Dessert Bars. These essential items ensure ease and efficiency in the kitchen, fostering culinary excellence.
- A 9×13 inch baking pan is perfect for achieving the ideal thickness and quantity of your rich treats.
- Parchment paper makes for easy removal and cleanup, preventing sticking and preserving the bars’ delicate structure.
- You will need two large mixing bowls for combining wet and dry ingredients separately, promoting organized preparation.
- A whisk effectively blends dry ingredients and incorporates air into the wet mixture, ensuring a smooth batter for these impressive chocolate bars.
- A rubber spatula is essential for gently folding and scraping down the sides of the bowl, preventing overmixing.
- Accurate measuring cups and spoons ensure precise ingredient ratios for perfect, reliable chocolate dessert bars.
- A wire cooling rack allows optimal air circulation, ensuring even cooling and preventing any sogginess.
How To Make Chocolate Dessert Bars
Follow these detailed steps to create truly exceptional Chocolate Dessert Bars, bringing professional techniques into your home kitchen. Precision and care are key for that perfect fudgy texture.
- Step 1: Preheat Oven and Prepare Pan. Position an oven rack in the middle of your oven. Preheat your oven to 350°F (175°C). Line a 9×13 inch baking pan with parchment paper, ensuring an overhang on the sides for easy lifting later. Lightly grease any exposed parts of the pan. This careful preparation prevents sticking and ensures clean removal of your chocolate bars.
- Step 2: Melt Butter and Combine Sugars. In a large microwave-safe bowl, melt the unsalted butter. Add the granulated sugar and light brown sugar to the melted butter immediately. Whisk vigorously for about one minute until thoroughly combined and smooth. This initial step begins to dissolve the sugar, creating a moist and flavorful base for your fudgy treats.
- Step 3: Whisk in Eggs and Vanilla. Add the large eggs, one at a time, to the sugar-butter mixture, whisking well after each addition until fully incorporated. Stir in the pure vanilla extract. Continue whisking for another minute until the mixture appears light in color and slightly thickened. This aeration helps create a tender crumb and contributes to the fudgy texture of the chocolate dessert bars.
- Step 4: Sift Together Dry Ingredients. In a separate medium bowl, whisk together the all-purpose flour, sifted unsweetened cocoa powder, fine sea salt, and baking powder. Sifting the cocoa powder prevents lumps, ensuring a smooth, uniform batter. This precise combination of dry ingredients forms the structural base of these delightful chocolate bars.
- Step 5: Gently Fold Dry into Wet. Gradually add the dry ingredient mixture to the wet mixture, using a rubber spatula. Fold gently until just combined. Be careful not to overmix the batter; overmixing can develop the gluten too much, leading to cakey rather than perfectly fudgy chocolate dessert bars. Stop as soon as no dry streaks remain.
- Step 6: Stir in Chocolate Chips. Fold in 1 cup of semi-sweet chocolate chips until they are evenly distributed throughout the batter. This ensures delightful pockets of melted chocolate in every bite, adding to the richness and decadence of these incredible chocolate dessert bars.
- Step 7: Spread Batter Evenly in Pan. Pour the thick batter into the prepared 9×13 inch baking pan. Use your rubber spatula to spread the batter evenly to all corners, creating a uniform layer. Sprinkle additional chocolate chips or a touch of flaky sea salt over the top for an appealing finish, if desired.
- Step 8: Bake Until Edges Are Set. Bake for 25-30 minutes. The edges should appear set and slightly firm, but the center should still look slightly soft and gooey when gently jiggled. A toothpick inserted into the center should come out with moist crumbs, not wet batter. This is crucial for achieving truly fudgy chocolate bars.
- Step 9: Cool Completely on Rack. Remove the pan from the oven and immediately place it on a wire cooling rack. Allow the chocolate dessert bars to cool completely in the pan before cutting. This crucial step can take at least 2-3 hours, or even longer, as cooling helps the bars set properly and develop their dense, fudgy texture.
- Step 10: Cut into Squares and Serve. Once thoroughly cooled, use the parchment paper overhang to carefully lift the entire slab of chocolate bars out of the pan. Place it on a clean cutting board. Use a sharp, clean knife to cut the bars into 24 even squares. Serve and enjoy your homemade fudgy chocolate dessert bars!
Pro Tips for Perfect Chocolate Dessert Bars
Mastering these techniques elevates your baking, ensuring consistently perfect Chocolate Dessert Bars every time. These expert tips come from years of culinary experience, bridging professional insights with home baking.
- Do Not Overmix the Batter: Overmixing develops gluten, which can lead to a cakey texture instead of the desired fudgy richness. Mix until just combined.
- Use Good Quality Chocolate: The flavor of your chocolate dessert bars heavily relies on the quality of chocolate chips and cocoa powder. Invest in premium brands.
- Avoid Overbaking for Fudginess: Pull the bars from the oven when the edges are set but the center still jiggles slightly. This ensures a moist, fudgy interior.
- For Clean Cuts, Chill Thoroughly: For perfectly neat squares, chill the cooled slab of chocolate bars in the refrigerator for at least 30 minutes before cutting.
- Sprinkle with Flaky Sea Salt: A touch of flaky sea salt on top before or after baking beautifully contrasts the sweetness and enhances the deep chocolate flavor.
- Line Pan with Parchment: Always line your pan with parchment paper, allowing an overhang. This prevents sticking and makes lifting the entire batch easy.
Serving, Storage, and Variations
Maximize your enjoyment of these delectable Chocolate Dessert Bars with creative serving suggestions, proper storage, and exciting flavor variations. These ideas empower you to personalize your treats.
Serving Suggestions
Elevate your fudgy chocolate dessert bars experience with these delightful pairings, perfect for any occasion.
- Serve warm with a scoop of premium vanilla bean ice cream for a classic, comforting treat that melts in your mouth.
- Dust with a delicate layer of powdered sugar for an elegant presentation that adds visual appeal.
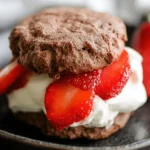
- Enjoy with fresh raspberries or sliced strawberries to add a touch of fruity brightness and cut through the richness.
- Pair with a cold glass of milk, or a robust cup of coffee, for a satisfying snack or indulgent dessert.
Storage Instructions
Keep your chocolate dessert bars fresh and delicious for longer with these storage tips, ensuring their reliability.
- Store the cooled bars in an airtight container at room temperature for up to 3-4 days, maintaining their perfect texture.
- For longer preservation, freeze individual chocolate bars tightly wrapped in plastic wrap to prevent freezer burn.
- Frozen bars will keep well in the freezer for up to 3 months, perfect for future cravings or unexpected guests.
- Thaw frozen bars at room temperature for about an hour before serving for optimal texture and flavor.
Flavor Variations
Unleash your creativity and customize your chocolate dessert bars with these delicious additions, making them uniquely yours.
- Add ½ cup of chopped nuts like walnuts, pecans, or almonds for extra crunch and a delightful nutty flavor.
- Swirl in spoonfuls of caramel sauce, peanut butter, or hazelnut spread into the batter before baking for a rich twist.
- Incorporate 1-2 teaspoons of espresso powder into the dry ingredients to subtly deepen the chocolate flavor without tasting like coffee.
- Top cooled chocolate bars with a rich cream cheese frosting or a simple chocolate ganache for an extra layer of decadence and elegance.
Nutrition Information
Enjoy these homemade Chocolate Dessert Bars knowing the general nutritional breakdown. This information helps you make informed choices while indulging in a delicious treat, reflecting our brand’s transparency.
| Component | Amount (per 1 brownie) |
|---|---|
| Calories | 277 |
| Fat | 13g |
| Saturated Fat | 8g |
| Cholesterol | 68mg |
| Sodium | 248mg |
| Carbohydrate | 39g |
| Sugars | 29g |
| Fiber | 1g |
| Protein | 3g |
Note: These values are estimates and may vary slightly based on specific ingredient brands and preparation methods. Our recipe for these chocolate dessert bars emphasizes homemade goodness you can trust, providing a more wholesome option than store-bought.
Frequently Asked Questions (FAQ)
Find quick answers to common questions about baking and enjoying these delightful Chocolate Dessert Bars. We aim to empower your baking journey with reliable information.
Why are my chocolate bars cakey instead of fudgy?
Overmixing the batter or overbaking are common culprits. Mix until just combined and remove them from the oven when the center is still slightly soft.
Can I use a different size pan for these chocolate dessert bars?
A different pan size will alter baking time and thickness. For best results, use a 9×13 inch pan as specified in the recipe.
How do I know when they’re done baking?
The edges should be set, but a toothpick inserted into the center should come out with moist crumbs, not wet batter. This indicates perfect fudginess.
Can I add nuts or candy to these bars?
Absolutely! Fold in ½-1 cup of chopped nuts, candy pieces, or dried fruit with the chocolate chips for added flavor and texture variation.
How long do these bars keep fresh?
Stored in an airtight container at room temperature, these chocolate dessert bars remain fresh and delicious for 3-4 days, perfect for enjoying throughout the week.
Are these suitable for freezing?
Yes, these bars freeze beautifully. Wrap individual bars tightly and store them for up to three months; thaw at room temperature before serving for optimal enjoyment.
Final Thoughts
We hope you thoroughly enjoy creating and indulging in these rich, decadent Chocolate Dessert Bars. This simple yet refined recipe yields impressively satisfying results, bridging the gap between professional quality and approachable home baking for everyone.
Whether you’re sharing them with loved ones or savoring a moment of personal indulgence, these fudgy treats are sure to bring joy and connection. Bake a batch today and experience the delight of perfect homemade chocolate dessert bars, a true testament to the joy and reliability of baking with Emma Williams Ava.
Ultimate Fudgy Chocolate Dessert Bars
Equipment
- Baking pan
- Mixing bowls
- Whisk
- Saucepan (or microwave-safe bowl)
Ingredients
Main Ingredients
- 1 cup Chocolate
- 1/2 cup Butter
- 1 cup Sugar
- 1/2 cup All-purpose flour
- 2 large Eggs
Instructions
Preparation
- Preheat your oven to 350°F (175°C) and grease and flour a 9×13 inch baking pan.
- In a heatproof bowl, melt the chocolate and butter together over a double boiler or in the microwave. Stir until smooth.
- Whisk in the sugar and then the eggs one at a time until fully incorporated into the chocolate mixture.
- Gently fold in the all-purpose flour until just combined, being careful not to overmix the batter.
- Pour the batter into the prepared baking pan and bake for 25-30 minutes, or until a toothpick inserted into the center comes out with moist crumbs. Let cool completely before cutting into bars.
Notes

Emma is the lead recipe developer and creative voice behind Empirefoodie. With a BSc in Pastry Arts from The Restaurant School at Walnut Hill College, she bridges the gap between professional culinary techniques and approachable home cooking. Based in sunny Florida, Emma combines her classical training with a passion for comfort food to create reliable, family-friendly recipes that anyone can master. When she isn't baking, she's exploring new flavors to bring to your table.
Comments are closed.