

This post contains affiliate links. As an Amazon Associate, I earn from qualifying purchases. This comes at no extra cost to you.
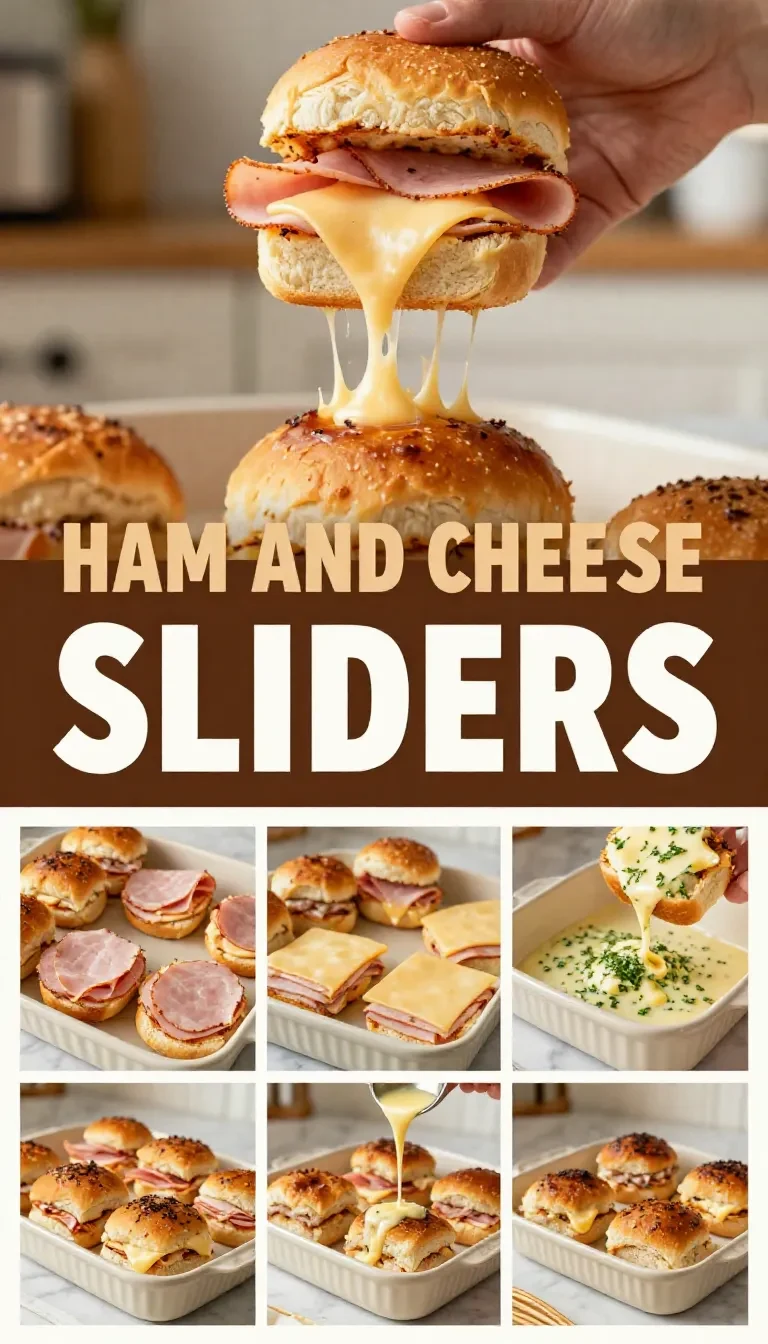
Appetizers easy finger food is Ham and Cheese Sliders baked in a 9×13-inch dish with soft rolls, deli ham, Swiss cheese, and a buttery Dijon topping, ready in 35 minutes and served as 12 warm sliders. This quick recipe gives you a crisp, golden top, melted cheese, and an easy way to feed a hungry group without complicated prep.
I trust this version because I am Hana, a home baker and founder of EmpireFoodie.com, and I tested these Ham and Cheese Sliders in my own kitchen with the same ingredient list and timing. The result was tender rolls, salty ham, and a glossy butter topping that soaked into the crevices without making the bread soggy.
The first bite is soft in the center with a lightly crisp top, and the Swiss cheese turns creamy enough to hold the ham together. The Dijon, Worcestershire sauce, garlic powder, and onion powder add a savory edge that keeps every slider tasting balanced, not heavy.
Table of Contents
- Why do Ham and Cheese Sliders work so well?
- What ingredients do you need for Ham and Cheese Sliders?
- How do you make Ham and Cheese Sliders step by step?
- What questions do people ask about Ham and Cheese Sliders?
- What mistakes should you avoid with Ham and Cheese Sliders?
- What should you serve with Ham and Cheese Sliders?
- What pro tips help Ham and Cheese Sliders turn out better?
- What swaps can you make in Ham and Cheese Sliders?
Why do Ham and Cheese Sliders work so well?
Ham and Cheese Sliders work well because they combine soft rolls, savory ham, and melted Swiss cheese with a buttery topping that bakes into the bread in 25 minutes. The whole batch serves 12, so this is a smart choice for Party Food Appetizers, Game Day Food, and Super Bowl Food when you need fast food that holds together neatly.
- They are fast to assemble. I can layer the rolls, ham, and cheese in about 10 minutes, then let the oven do the rest. That short prep window helps when I am managing other Super Bowl Snacks at the same time.
- They serve a group without extra fuss. One 9×13-inch pan gives 12 sliders, which makes portion planning simple for Tailgate Food or a mixed snack table. If I am feeding several guests, I count on 2 sliders per person alongside other bites.
- The topping adds flavor and color. The melted butter mixture bakes into the tops and around the edges, so the rolls turn golden instead of dry. The poppy seeds and parsley also give the sliders a finished look that feels special without extra work.
- They reheat well for short holding times. If I need to prep ahead for a party, I assemble the dish and bake it close to serving time for the best texture. That keeps the cheese soft and the tops from losing their crisp edge.
For a game-day spread, I like these sliders because they fit beside other Football Food without competing for attention. They are substantial enough to feel satisfying, but they still leave room for dips, chips, and other Yummy Appetizers.
What ingredients do you need for Ham and Cheese Sliders?
Ham and Cheese Sliders use 11 simple ingredients, and every one plays a clear role in the final texture and flavor. The rolls give softness, the ham and Swiss cheese build the filling, and the butter mixture turns into a savory glaze that helps the tops bake up golden in a 350°F oven.
- 12 slider rolls or Hawaiian sweet rolls
- 12 slices deli ham
- 12 slices Swiss cheese
- 1/2 cup unsalted butter, melted
- 1 tablespoon Dijon mustard
- 1 tablespoon poppy seeds
- 1 teaspoon Worcestershire sauce
- 1/2 teaspoon garlic powder
- 1/2 teaspoon onion powder
- 1 tablespoon finely chopped parsley, optional
- Nonstick cooking spray or extra butter for greasing the baking dish
The rolls matter because they are baked as one whole sheet before slicing, which helps the sliders stay connected and easy to serve. I also rely on the melted butter mixture because it carries the Dijon mustard and seasonings into the bread, giving each Ham and Cheese Sliders bite a balanced savory finish.
How do you make Ham and Cheese Sliders step by step?
Ham and Cheese Sliders come together by layering the rolls, ham, and cheese, then brushing on a seasoned butter mixture before baking at 350°F. The process takes 10 minutes of prep and 25 minutes of baking, and the foil-covered first bake keeps the rolls soft while the final uncovered bake browns the tops.
Step 1 — Heat the oven and prepare the pan
Preheat the oven to 350°F (175°C). Lightly grease a 9×13-inch baking dish with nonstick cooking spray or extra butter so the sliders release cleanly after baking.
Step 2 — Build the bottom layer
Without separating the individual rolls, slice the whole package in half horizontally and place the bottom half in the prepared baking dish. Keeping the rolls connected makes the Ham and Cheese Sliders easier to assemble and slice later.
Step 3 — Add the ham and cheese
Layer the ham evenly over the bottom rolls, then top with the Swiss cheese slices. Place the top half of the rolls over the cheese so the filling stays tucked inside while the sandwich bakes.

Step 4 — Mix the buttery topping
In a small bowl, whisk together the melted butter, Dijon mustard, poppy seeds, Worcestershire sauce, garlic powder, and onion powder. I whisk until the mixture looks smooth and evenly speckled, because that helps the seasoning distribute across the tops of the sliders.
Step 5 — Coat the rolls
Pour the butter mixture evenly over the tops of the sliders, using a spoon or brush to spread it into the crevices. Sprinkle with parsley if using, since that little bit of green gives the Ham and Cheese Sliders a fresh look.
Step 6 — Bake until hot and golden
Cover the dish loosely with foil and bake for 15 minutes. Remove the foil and bake for 5 to 10 minutes more, until the tops are golden brown and the cheese is melted.
Step 7 — Rest, slice, and serve
Let the sliders cool for a few minutes, then slice and serve warm. That short rest helps the cheese set slightly, so the Ham and Cheese Sliders cut more neatly and hold together better on a party tray.
What questions do people ask about Ham and Cheese Sliders?
These questions cover the most common timing, prep, and serving concerns for Ham and Cheese Sliders. Each answer is concise, practical, and based on the same 12-slider baking method, so you can plan a snack table or meal with confidence.
Can I make Ham and Cheese Sliders ahead of time?
Yes, you can assemble Ham and Cheese Sliders ahead of time and bake them later. For the best texture, cover and refrigerate the pan briefly, then add the butter topping close to baking so the rolls stay soft and the tops still brown well.
How do I keep the sliders from getting soggy?
Keep the sliders from getting soggy by greasing the dish lightly, layering the ingredients evenly, and baking them uncovered at the end. The 15 minutes under foil soften everything first, while the final 5 to 10 minutes of uncovered baking dries the tops just enough.
How many Ham and Cheese Sliders should I plan per guest?
Plan on 2 sliders per guest when these are served with other snacks. For a fuller meal, 3 sliders per guest is a better estimate, and 12 sliders from one pan makes scaling easy for a party spread.
Can I hold Ham and Cheese Sliders for a party?
Yes, you can hold Ham and Cheese Sliders briefly after baking, then serve them warm. I usually let them rest a few minutes, slice them, and keep them covered for a short time so the cheese stays melty and the tops do not dry out.
What makes the topping taste so good?
The topping tastes balanced because the butter carries Dijon mustard, Worcestershire sauce, garlic powder, onion powder, and poppy seeds into the bread. That mix gives the Ham and Cheese Sliders a savory, slightly tangy finish instead of plain buttered rolls.
What mistakes should you avoid with Ham and Cheese Sliders?
Avoiding three small mistakes helps Ham and Cheese Sliders bake up neatly in 35 minutes. The most common issues are uneven layering, too much moisture, and skipping the final uncovered bake that gives the tops their golden color.
- Do not separate the rolls before slicing. Keeping them connected makes the layers more stable, and the finished sliders slice into tidy portions. It also helps the butter mixture stay on top instead of running all over the pan.
- Do not skip the foil during the first bake. The foil traps heat and softens the filling in the first 15 minutes. Without it, the tops can brown too quickly before the cheese has fully melted.
- Do not rush the resting time. A few minutes of cooling helps the cheese settle, which makes the Ham and Cheese Sliders easier to cut. If I slice too soon, the layers can slide apart on the serving board.
What should you serve with Ham and Cheese Sliders?
Ham and Cheese Sliders pair well with simple sides that balance the rich butter topping and melted cheese. I like to build a snack table with one crunchy item, one creamy item, and one fresh or salty side so the whole spread feels complete without extra work.
- Crunchy chips or pretzels. These add texture next to the soft rolls, which keeps each bite interesting. They are especially helpful for Game Day Food because they are easy to set out in bowls.
- Pickles or pickle spears. The sharp, briny bite cuts through the butter and cheese, so the Ham and Cheese Sliders taste lighter between bites. That contrast is useful when the rest of the menu leans rich.
- A simple dip or cheese snack. If I am planning a bigger party tray, I sometimes add our pepperoni cheese crisps easy low for a crunchy, salty side that keeps the menu varied. The crisp texture works well beside soft sliders.
- Another warm sandwich bite. For a heartier spread, I pair these with our french dip sliders when I need two different slider recipes for a crowd. That gives guests a choice without forcing me to make a complicated menu.
For Super Bowl Food, I plan the Ham and Cheese Sliders so they anchor the table but do not overload it. With 12 sliders, I can count on this pan to cover the sandwich slot while other Party Food Appetizers fill in the rest.
What pro tips help Ham and Cheese Sliders turn out better?
A few small habits make Ham and Cheese Sliders bake more evenly and serve more cleanly. These tips are practical, quick, and based on how the rolls, cheese, and butter mixture behave in the oven.
- Brush the topping into the crevices. This helps the butter mixture reach the seams between the rolls, where flavor can otherwise be missed. It also keeps the tops evenly coated instead of patchy.
- Use room-temperature serving timing, not cold filling. If the ham and cheese are very cold, the sliders may need a little extra bake time in the center. Letting the pan sit briefly before baking helps the cheese melt more evenly.
- Test your oven on the final browning stage. Some ovens brown faster than others, so watch the last 5 minutes closely. The goal is a golden top and fully melted cheese, not a dark crust.
- Scale the pan with your guest count in mind. One batch makes 12 sliders, which is ideal for a smaller group or as part of a larger snack spread. For bigger parties, I make more than one pan so the sliders finish close together and stay warm.
What swaps can you make in Ham and Cheese Sliders?
Minor swaps can keep Ham and Cheese Sliders familiar while adjusting flavor or texture. I keep the structure the same—rolls, ham, cheese, and butter topping—because that balance is what gives this recipe its reliable result in a 9×13-inch pan.
- Use standard slider rolls instead of Hawaiian sweet rolls. Standard rolls make the sliders less sweet and a little more neutral in flavor. The texture stays soft, but the overall taste shifts toward the ham and cheese.
- Swap parsley for extra plain topping. If you skip the parsley, the sliders still bake well and taste the same. The finished top just looks a little simpler and less speckled.
- Use extra butter for greasing if you are out of spray. This keeps the dish from sticking and does not change the flavor much. It is a practical pantry move that still fits the recipe exactly.
When I make Ham and Cheese Sliders for Theo, I stick close to the original ingredient list because the balance is already right. That keeps the bread soft, the cheese melted, and the topping flavorful without extra steps.
Ham and Cheese Sliders
Equipment
- 9x13-inch baking dish
- Mixing bowl
- Whisk
- Knife
- foil
Ingredients
- 12 slider rolls or Hawaiian sweet rolls
- 12 slice deli ham
- 12 slice Swiss cheese
- 1/2 cup unsalted butter (melted)
- 1 tbsp Dijon mustard
- 1 tbsp poppy seeds
- 1 tsp Worcestershire sauce
- 1/2 tsp garlic powder
- 1/2 tsp onion powder
- 1 tbsp finely chopped parsley (optional)
- nonstick cooking spray or extra butter (for greasing the baking dish)
Instructions
- Preheat the oven to 350°F (175°C). Lightly grease a 9x13-inch baking dish.
- Without separating the individual rolls, slice the whole package of rolls in half horizontally and place the bottom half in the prepared baking dish.
- Layer the ham evenly over the bottom rolls, then top with the Swiss cheese slices. Place the top half of the rolls over the cheese.
- In a small bowl, whisk together the melted butter, Dijon mustard, poppy seeds, Worcestershire sauce, garlic powder, and onion powder.
- Pour the butter mixture evenly over the tops of the sliders, using a spoon or brush to spread it into the crevices. Sprinkle with parsley if using.
- Cover the dish loosely with foil and bake for 15 minutes.
- Remove the foil and bake for 5 to 10 minutes more, until the tops are golden brown and the cheese is melted.
- Let the sliders cool for a few minutes, then slice and serve warm.
Notes
Loved this recipe? Save it to your favorite Pinterest board so you can easily find it later! ✨




Comments are closed.