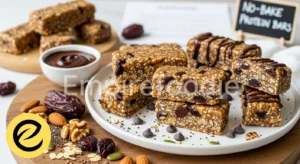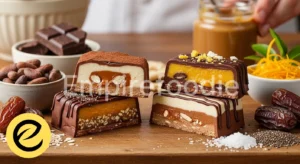

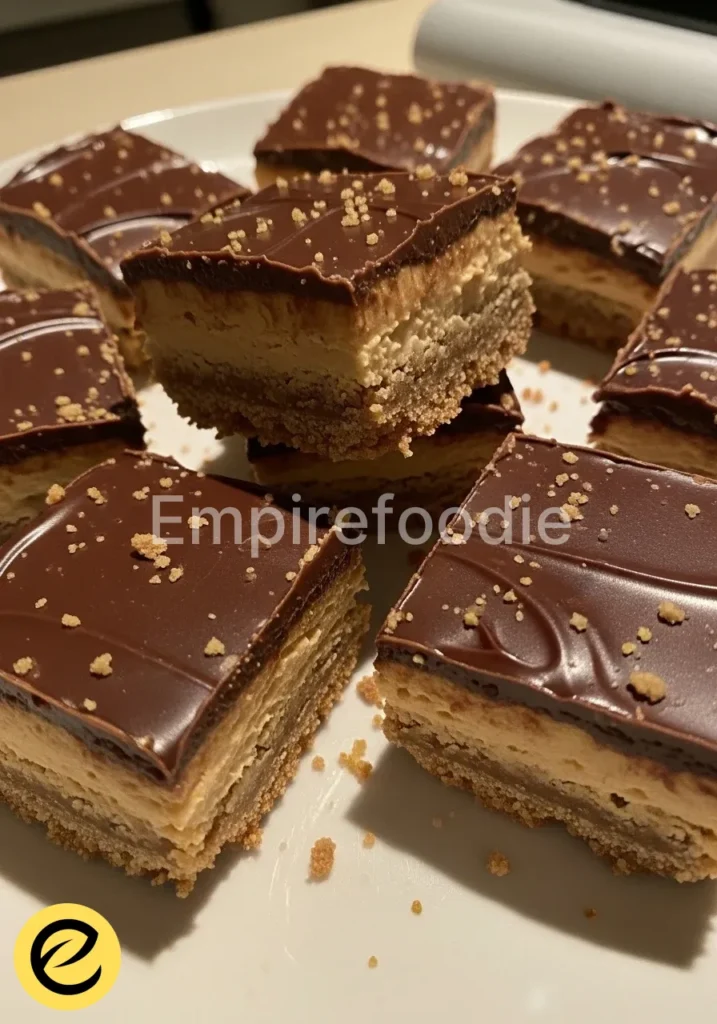
There’s a certain magic in a treat that instantly transports you back to simpler times, to grandma’s kitchen filled with warmth and the comforting scent of baking. These peanut butter bars are exactly that – a slice of pure, unadulterated nostalgia. Imagine a buttery, crumbly base that melts in your mouth, topped with a rich, creamy peanut butter layer, and finished with a dreamy chocolate ganache.
Each bite offers the perfect balance of salty and sweet, soft and slightly chewy, making them an irresistible farmhouse favorite. This beloved recipe for peanut butter bars brings joy and a taste of home, perfect for sharing or savoring a quiet moment with a cup of tea.
Table of Contents
Why You’ll Love These Peanut Butter Bars
As a grandmother who cherishes the heritage of farmhouse baking, I can tell you these peanut butter bars are more than just a dessert; they are a legacy. Their simplicity and heartwarming flavor make them a treasured part of any family gathering. These bars truly embody comfort and joy, just like a warm hug from someone you love.
- Unforgettable Flavor: Experience the perfect harmony of rich peanut butter and decadent chocolate, a truly classic combination that satisfies every craving.
- Effortless Preparation: No complex techniques or fancy equipment needed. This recipe for peanut butter bars comes together quickly with minimal fuss.
- Wholesome Goodness: Using quality ingredients, these bars offer a delightful treat that you can feel good about sharing with your loved ones.
- Crowd-Pleasing: From potlucks to family dinners, these peanut butter bars consistently disappear first, making them a guaranteed hit.
Ingredients You’ll Need
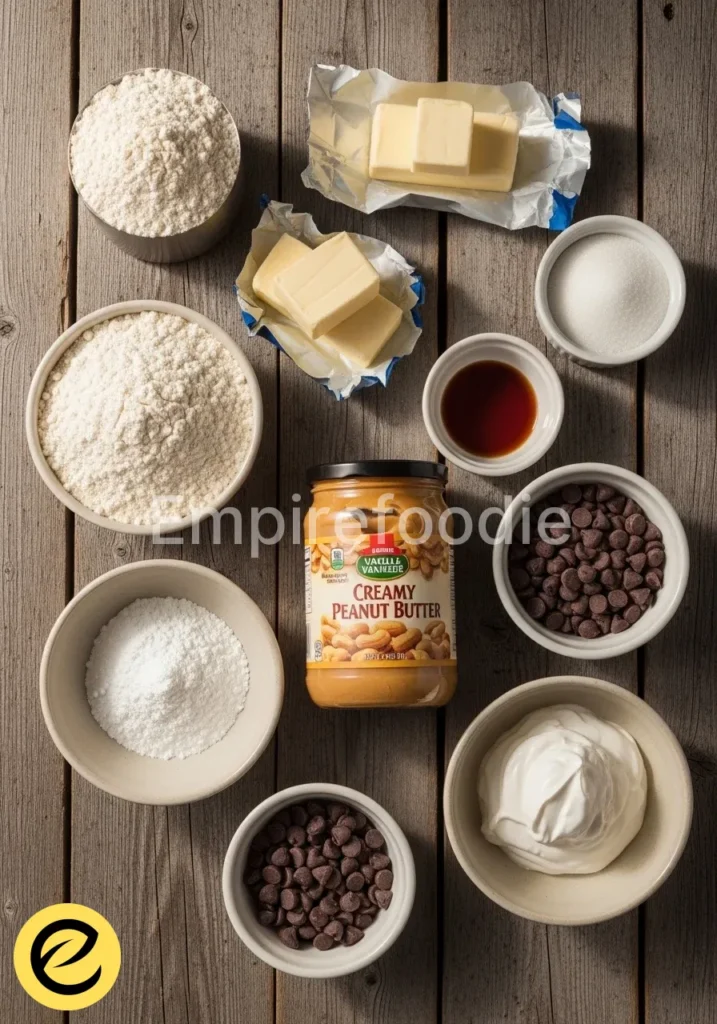
Gathering your ingredients is the first step in creating these delightful peanut butter bars. Just like selecting the freshest produce from the garden, choosing quality components makes all the difference in the final taste and texture. I always say, good food starts with good ingredients, and these bars are no exception.
- For the Crust:
- 2 cups all-purpose flour: Unbleached all-purpose flour creates a tender, buttery base for our peanut butter bars.
- 1 cup unsalted butter: Softened to room temperature, good quality butter lends richness and a melt-in-your-mouth texture.
- 1/2 cup granulated sugar: Provides the perfect touch of sweetness to balance the salty peanut butter.
- 1 teaspoon vanilla extract: A hint of pure vanilla elevates the overall flavor of the crust.
- 1/4 teaspoon salt: Just a pinch to enhance all the other flavors.
- For the Peanut Butter Layer:
- 1 cup creamy peanut butter: Choose a natural, creamy peanut butter for the best texture and flavor. It’s the star of these peanut butter bars!
- 1/2 cup unsalted butter: Softened, this helps create a smooth, rich peanut butter filling.
- 2 cups powdered sugar: Essential for achieving that silky-smooth, melt-in-your-mouth texture in the filling.
- 1 teaspoon vanilla extract: Deepens the sweet and nutty notes.
- For the Chocolate Topping:
- 1 cup semi-sweet chocolate chips: High-quality chocolate chips melt beautifully for a glossy, decadent topping.
- 1/2 cup heavy cream: Provides the luscious, pourable consistency for our ganache.
- 1 tablespoon unsalted butter: Adds extra shine and richness to the chocolate layer.
Substitutions & Variations
Note: This video is for demonstration purposes and may use a slightly different method.
Just like a patchwork quilt, a recipe can always be adapted with a few creative touches. While these peanut butter bars are perfect as they are, sometimes you want to make a dish your own, or cater to different dietary needs. Here are a few healthy, mindful swaps you can consider to keep these peanut butter bars a beloved treat for everyone.
- For the Flour: You can substitute up to half of the all-purpose flour with whole wheat pastry flour for a slightly nuttier flavor and added fiber. Gluten-free all-purpose flour blends also work wonderfully to make these peanut butter bars friendly for those with sensitivities.
- For the Butter: Plant-based butter alternatives perform beautifully in both the crust and the peanut butter layer, maintaining that rich taste. For a dairy-free chocolate topping, use full-fat coconut cream (chilled overnight, scoop out the thick cream) instead of heavy cream.
- For the Sugar: Reduce the granulated sugar in the crust by a quarter for a less sweet option. In the peanut butter layer, you can experiment with a portion of powdered erythritol or monk fruit sweetener, adjusting to taste.
- For the Peanut Butter: While these are called peanut butter bars, you can certainly try almond butter or cashew butter for a different flavor profile. Always opt for natural, unsweetened varieties.
- Add-ins: Fold in a handful of chopped walnuts or pecans into the peanut butter layer for added crunch and nutrients. A sprinkle of sea salt flakes over the finished chocolate topping enhances the flavors beautifully.
Equipment You’ll Need
Baking these peanut butter bars doesn’t require a lot of specialized equipment. Just like my grandmother used to say, a few good, sturdy tools are all you need to create something wonderful. These are the essentials that will help you whip up these fantastic peanut butter bars with ease.
- 9×13 inch baking pan: A standard glass or metal baking pan is perfect for these bars.
- Parchment paper: Lines the pan for easy lifting and clean slices.
- Large mixing bowls: Several bowls are handy for preparing the different layers.
- Electric mixer (handheld or stand mixer): Makes quick work of creaming butter and sugar, and mixing the peanut butter layer.
- Rubber spatula: Essential for scraping down bowls and spreading layers evenly.
- Saucepan: For gently heating the heavy cream for the chocolate ganache.
- Whisk: To ensure a smooth, lump-free chocolate topping.
- Measuring cups and spoons: For accurate ingredient proportions.
Step-by-Step Instructions
Creating these peanut butter bars is a simple, joyful process, a culinary journey that always fills my kitchen with a comforting aroma. Follow these steps carefully, and you’ll soon have a batch of the most delicious peanut butter bars, ready to bring smiles to everyone around your table.
- Prepare Your Pan: First, preheat your oven to 350°F (175°C). Line a 9×13 inch baking pan with parchment paper, leaving an overhang on the sides. This creates “handles” for easy removal of the peanut butter bars later. Lightly grease the parchment paper if desired.
- Make the Crust: In a large mixing bowl, cream together the softened butter and granulated sugar with an electric mixer until light and fluffy. Beat in the vanilla extract. Gradually add the all-purpose flour and salt, mixing on low speed until just combined and a crumbly dough forms. Do not overmix.
- Press the Crust: Press the crumbly dough evenly into the bottom of the prepared baking pan. Use the back of a spoon or your clean hands to create a firm, compact layer.
- Bake the Crust: Bake the crust for 15-18 minutes, or until lightly golden brown around the edges. Remove from the oven and let it cool completely on a wire rack while you prepare the next layer for your peanut butter bars.
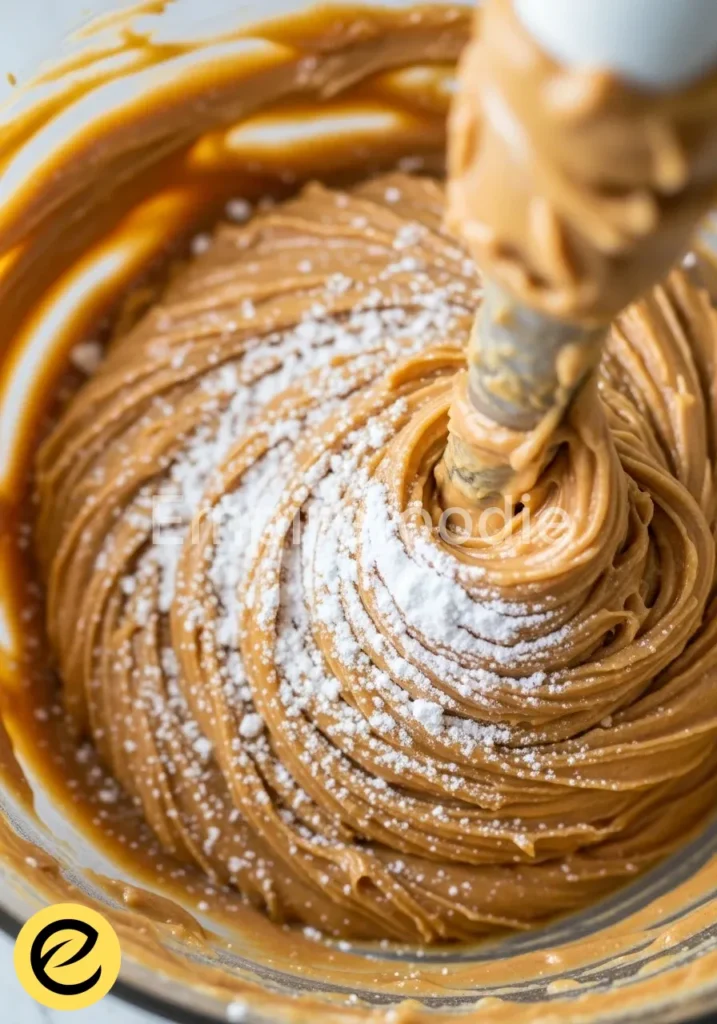
- Prepare the Peanut Butter Layer: In a separate large mixing bowl, combine the creamy peanut butter and softened butter. Beat with an electric mixer until smooth and well combined. Gradually add the powdered sugar, one cup at a time, beating until fully incorporated and smooth. Stir in the vanilla extract. The mixture should be thick and creamy, perfect for your peanut butter bars.
- Spread the Peanut Butter Layer: Once the crust is completely cool, evenly spread the peanut butter mixture over the baked crust. Use a rubber spatula to smooth the surface. Place the pan in the refrigerator for at least 30 minutes to allow the peanut butter layer to firm up. This step is crucial for neat slices of your peanut butter bars.
- Make the Chocolate Topping: In a small saucepan, heat the heavy cream over medium-low heat until it just begins to simmer around the edges. Do not boil. Remove from heat and immediately pour the hot cream over the chocolate chips and tablespoon of butter in a heatproof bowl. Let it sit undisturbed for 5 minutes to melt the chocolate.
- Whisk the Ganache: After 5 minutes, whisk the chocolate and cream mixture gently until it’s smooth, glossy, and completely combined, forming a rich ganache.
- Pour the Topping: Remove the chilled peanut butter bars from the refrigerator. Pour the warm chocolate ganache evenly over the peanut butter layer. Gently tilt the pan to ensure full coverage.
- Chill to Set: Return the pan to the refrigerator and chill for at least 2-3 hours, or until the chocolate topping is completely set. For best results, chill overnight.
- Slice and Serve: Once fully chilled and set, use the parchment paper overhang to lift the entire slab of peanut butter bars from the pan. Place on a cutting board. Use a sharp, warm knife (run under hot water and wipe dry) to cut the bars into desired squares or rectangles. Enjoy your homemade peanut butter bars!
Pro Tips for Success
Baking is truly an art and a science, and these little tricks, passed down from my own grandmother, will ensure your peanut butter bars turn out perfectly every single time. They elevate a good recipe to an unforgettable one.
- Room Temperature Ingredients: Always ensure your butter and peanut butter are at true room temperature. This allows them to cream together smoothly with the sugar, creating a light and airy texture in both the crust and the peanut butter layer. Cold ingredients lead to lumpy mixtures.
- Don’t Overmix the Crust: Mix the flour into the butter mixture only until just combined. Overmixing develops the gluten in the flour, which can lead to a tough, chewy crust instead of a tender, crumbly one for your peanut butter bars.
- Cool Completely: Allow the baked crust to cool entirely before adding the peanut butter layer. A warm crust will melt the butter in the peanut butter mixture, resulting in a greasy, unstable layer. Patience here is key for perfect peanut butter bars.
- Chill Thoroughly: Do not rush the chilling process for any of the layers. Chilling the peanut butter layer helps it set firmly before the warm ganache is added. Chilling the finished bars until fully firm makes for clean, neat cuts and prevents a messy experience. Overnight chilling is ideal for these peanut butter bars.
- Warm Knife for Cutting: For perfectly clean slices, especially through the chocolate topping, run your knife under hot water, wipe it dry, and then make your cut. Repeat this process for each slice. This warms the blade, allowing it to glide through the chocolate without cracking or dragging.
- Quality Peanut Butter: Opt for a good quality, creamy peanut butter that doesn’t have a lot of added sugar or oils. Natural peanut butter (that you stir) often works best for flavor and texture, though regular creamy varieties are fine. Avoid crunchy peanut butter unless you specifically want that texture.
Storage & Reheating Tips
These peanut butter bars are so delightful, they rarely last long in my home! But when you do manage to squirrel some away, proper storage ensures every bite remains as fresh and delicious as the first. This way, you can extend the joy these peanut butter bars bring.
- Countertop Storage: You can store these peanut butter bars at room temperature in an airtight container for up to 2-3 days. Make sure they are in a cool, dry place away from direct sunlight, especially if your kitchen is warm, as the chocolate can soften.
- Refrigerator Storage: For longer freshness and a firmer texture, store the peanut butter bars in an airtight container in the refrigerator for up to one week. The chocolate and peanut butter layers will firm up considerably when chilled, providing a delightful chew.
- Freezer Storage: These peanut butter bars freeze beautifully! Wrap individual bars or small batches tightly in plastic wrap, then place them in a freezer-safe airtight container or heavy-duty freezer bag. They will keep well for up to 2-3 months.
- Reheating (Thawing): To enjoy frozen peanut butter bars, simply remove them from the freezer and let them thaw at room temperature for 30-60 minutes, or in the refrigerator overnight. There’s no need for actual “reheating” in the microwave or oven, as these bars are best enjoyed chilled or at room temperature.
What to Serve With This Recipe
While these peanut butter bars are a complete treat on their own, pairing them with the right accompaniments can elevate the experience, offering a lovely balance to their sweetness. When I serve these at family gatherings, I always think about how to complement their rich flavor without overpowering it.
- A Warm Beverage: A classic pairing is a hot cup of coffee or a comforting mug of tea. The slight bitterness of coffee beautifully cuts through the sweetness of the peanut butter bars, while a herbal tea offers a gentle contrast.
- Cold Milk: For a truly nostalgic treat, serve these peanut butter bars with a tall glass of cold milk. It’s a simple, perfect combination that children and adults alike adore.
- Fresh Fruit Salad: To balance the richness, a light and refreshing fruit salad featuring berries, melon, or sliced apples provides a vibrant, healthy counterpoint. The natural sweetness and acidity of the fruit cleanse the palate.
- Vanilla Bean Ice Cream: For an extra indulgent dessert, a small scoop of good quality vanilla bean ice cream alongside a peanut butter bar is simply heavenly. The melting ice cream and firm bar create a delightful textural contrast.
- A Light Green Salad: Believe it or not, a simple, lightly dressed green salad can be a refreshing precursor to these bars, especially if serving them after a meal. It prepares the palate for the rich dessert to come.
Frequently Asked Questions (FAQ)
Can I use crunchy peanut butter for these peanut butter bars?
While this recipe for peanut butter bars traditionally calls for creamy peanut butter to achieve a smooth, uniform texture in the filling, you can certainly use crunchy peanut butter if you prefer. Just know that it will introduce a noticeable nutty crunch to the peanut butter layer, which some people absolutely love! It’s a delightful variation that adds extra texture.
Do I need to refrigerate these peanut butter bars?
Yes, I highly recommend refrigerating these peanut butter bars. Chilling is essential for the chocolate topping to set properly and for the peanut butter layer to firm up, making the bars much easier to slice neatly. Once set, you can store them in an airtight container in the refrigerator for up to a week. For a firmer texture and longer shelf life, always keep them chilled.
Can I make these peanut butter bars ahead of time?
Absolutely! These peanut butter bars are an excellent make-ahead dessert. You can prepare the entire batch up to 2-3 days in advance and store them in an airtight container in the refrigerator.
This allows the flavors to meld beautifully and ensures they are perfectly chilled and firm for serving, making them ideal for parties or holidays. They also freeze wonderfully for longer storage.
Final Thoughts
These peanut butter bars are more than just a recipe; they are a taste of home, a connection to the kitchens of my ancestors. Every bite evokes memories of family gatherings, shared laughter, and the simple joy of farmhouse baking. May these bars bring as much warmth and happiness to your family as they have to mine, creating new, cherished memories with every delicious square.
Nutrition Information (per serving)
Please note that these values are estimates and can vary based on specific ingredients and portion sizes. This is for one typical bar when cut into 24 pieces.
| Calories | 350 kcal |
| Total Fat | 25g |
| Saturated Fat | 13g |
| Cholesterol | 45mg |
| Sodium | 90mg |
| Total Carbohydrates | 30g |
| Dietary Fiber | 2g |
| Total Sugars | 20g |
| Protein | 5g |

peanut butter bars
Ingredients
Method
- Preheat oven to 350°F (175°C) and line a 9×13 inch baking pan with parchment paper.
- In a large mixing bowl, cream together the softened butter and granulated sugar until light and fluffy. Beat in the vanilla extract.
- Gradually add the all-purpose flour and salt until just combined.
- Press the dough into the bottom of the prepared baking pan and bake for 15-18 minutes until golden brown.
- Let the crust cool completely on a wire rack.
- In a separate bowl, combine creamy peanut butter and softened butter, mixing until smooth.
- Gradually add powdered sugar and stir in vanilla extract until creamy.
- Spread the peanut butter mixture evenly over the cooled crust and chill in the refrigerator for at least 30 minutes.
- Heat heavy cream in a saucepan until simmering, then pour over chocolate chips and butter in a heatproof bowl.
- After 5 minutes, whisk until smooth to make the ganache.
- Pour the ganache over the peanut butter layer and chill for 2-3 hours until set.
- Lift the bars from the pan using parchment overhang and cut into squares.