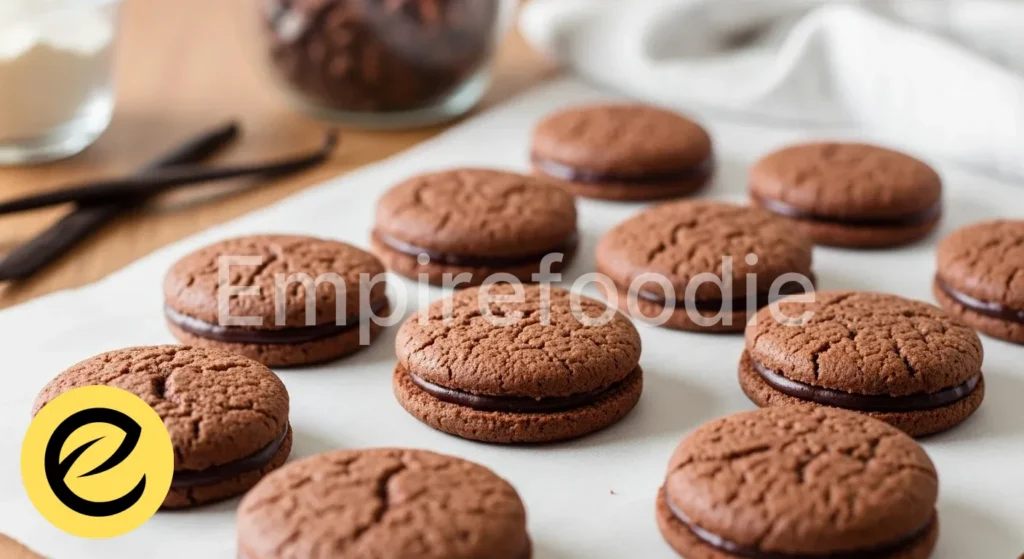
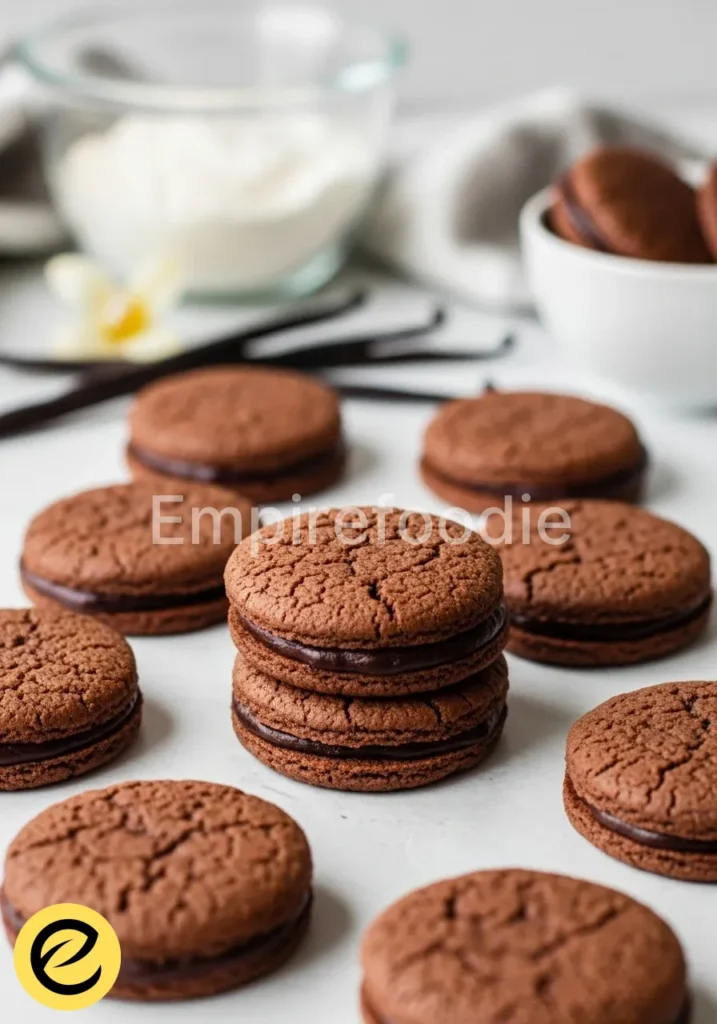
Imagine the aroma of rich cocoa and sweet vanilla filling your kitchen, promising a treat that transcends the everyday. This recipe for the best chocolate biscuits delivers a symphony of tender crumb and intense chocolate flavor, a true testament to elevated comfort food.
Crafted with precision and a touch of culinary artistry, these biscuits are surprisingly simple to master, ensuring a delightful experience for both the seasoned baker and the home cook. Prepare to indulge in what many will call the best chocolate biscuits they have ever tasted, perfect for any occasion.
Table of Contents
Why You’ll Love This Recipe
- Unmatched Flavor Profile: Experience deep cocoa notes perfectly balanced with sweet undertones, making these the best chocolate biscuits.
- Effortless Preparation: Designed for home bakers, this recipe simplifies the process without compromising on gourmet quality.
- Wholesome Indulgence: Enjoy a satisfying treat crafted with quality ingredients, offering a moment of pure bliss.
Ingredients You’ll Need
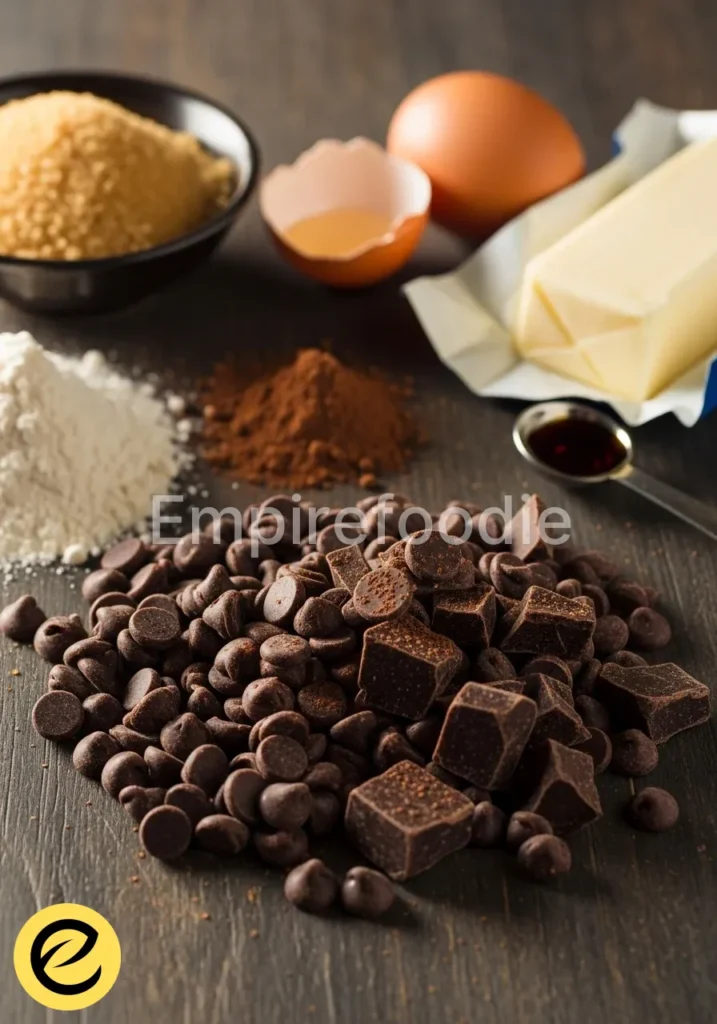
Crafting the best chocolate biscuits begins with selecting exceptional ingredients. Quality truly matters here, as each component contributes to the final texture and depth of flavor. Think of these as the building blocks for your culinary masterpiece, ensuring every bite is a delightful experience.
- All-Purpose Flour: 2 ½ cups (Sifted for lightness, providing the perfect structure for these delightful biscuits.)
- Unsweetened Cocoa Powder: ¾ cup (High-quality, Dutch-processed cocoa powder for a deep, rich chocolate flavor that defines the best chocolate biscuits.)
- Granulated Sugar: 1 cup (Fine sugar dissolves easily, contributing to a tender crumb and balanced sweetness.)
- Baking Powder: 1 tablespoon (Ensures a light, airy texture and helps the biscuits rise beautifully.)
- Baking Soda: 1 teaspoon (Reacts with the cocoa to enhance the lift and create a slightly chewy interior.)
- Salt: ½ teaspoon (A crucial enhancer, balancing the sweetness and deepening the chocolate notes.)
- Unsalted Butter: 1 cup (2 sticks), chilled and cubed (High-fat butter is essential for flakiness and rich flavor in these amazing biscuits.)
- Buttermilk: ¾ cup (Cold buttermilk is key for tenderness and a subtle tang that complements the chocolate.)
- Large Egg: 1, beaten (For an egg wash, creating a beautiful golden-brown crust and promoting even baking.)
- Chocolate Chips or Chunks: 1 cup (Choose high-quality semi-sweet or dark chocolate for the most satisfying melty pockets in your best chocolate biscuits.)
Substitutions & Variations
Note: This video is for demonstration purposes and may use a slightly different method.
Elevating your baking often involves thoughtful adjustments. While this recipe delivers the best chocolate biscuits, you can certainly adapt it to suit dietary needs or introduce new flavor dimensions. For healthier swaps, consider using a whole wheat pastry flour blend (50/50 with all-purpose) to boost fiber without compromising tenderness.
You can also experiment with natural sweeteners like maple syrup or honey, though adjustments to liquid content may be necessary. For dairy-free versions, opt for a high-quality plant-based butter and a homemade buttermilk substitute (plant-based milk with a tablespoon of lemon juice or vinegar). Introduce a pinch of cayenne pepper for a subtle spicy kick, or add orange zest for a vibrant citrus note, transforming these into truly unique chocolate biscuits.
If you’re looking to elevate your baking even further, consider exploring our recipe for The Best Chewy White Chocolate Cookies. These adaptable cookies are perfect for introducing new flavors or dietary adjustments.
Equipment You’ll Need
Having the right tools at hand streamlines the baking process and helps you achieve professional-level results in your home kitchen. Precision is paramount, even for the most comforting treats. Gather these items to ensure your journey to making the best chocolate biscuits is smooth and enjoyable.
- Large Mixing Bowl: For combining dry ingredients and mixing the dough.
- Pastry Blender or Food Processor: Essential for cutting butter into the flour mixture, creating flaky layers.
- Measuring Cups and Spoons: For accurate ingredient measurements.
- Rolling Pin: To achieve an even thickness for your biscuit dough.
- Biscuit Cutter (2.5-3 inch): Creates uniform, perfectly round biscuits.
- Baking Sheets: Two large baking sheets ensure adequate space for even baking.
- Parchment Paper: Prevents sticking and makes cleanup a breeze.
- Wire Rack: For cooling the biscuits completely, preventing sogginess.
- Pastry Brush: For applying the egg wash.
- Small Bowl: For whisking the egg wash.
Step-by-Step Instructions
Mastering the art of biscuit making lies in understanding the subtle nuances of each step. Follow these instructions meticulously to ensure every batch of the best chocolate biscuits emerges from your oven with perfect texture and flavor. Precision in technique transforms simple ingredients into an extraordinary treat.
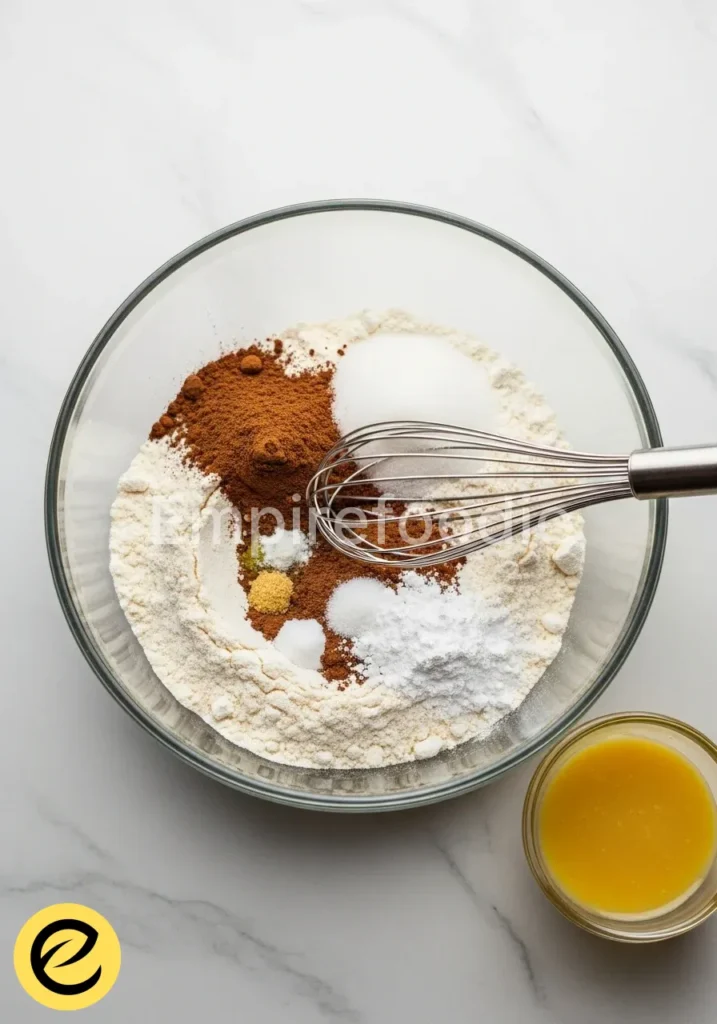
- Prepare Dry Ingredients: In your large mixing bowl, thoroughly whisk together the sifted all-purpose flour, unsweetened cocoa powder, granulated sugar, baking powder, baking soda, and salt. Ensure no clumps remain. This dry mixture forms the base of your best chocolate biscuits.
- Incorporate Butter: Add the chilled, cubed unsalted butter to the dry ingredients. Use a pastry blender to cut the butter into the flour mixture until it resembles coarse crumbs with some pea-sized pieces remaining. Alternatively, pulse in a food processor for quick results, being careful not to overmix.
- Add Buttermilk: Create a well in the center of the butter-flour mixture. Pour in the cold buttermilk. Stir gently with a fork or your hands until just combined. The dough will be shaggy; avoid overworking it, as this develops gluten and can lead to tough biscuits.
- Fold in Chocolate: Gently fold in the chocolate chips or chunks until evenly distributed throughout the dough. Again, minimal handling is key to achieving tender chocolate biscuits.
- Shape the Dough: Turn the shaggy dough out onto a lightly floured surface. Gently pat or roll the dough into a ¾-inch thick rectangle. Fold the dough in thirds (like a letter), then gently pat or roll it out again to ¾-inch thickness. Repeat this folding and rolling process 2-3 more times. This layering technique contributes to the flakiness of the best chocolate biscuits.
- Cut the Biscuits: Using a 2.5-3 inch biscuit cutter, press straight down into the dough. Avoid twisting the cutter, as this seals the edges and prevents the biscuits from rising properly. Gather the scraps, gently re-pat, and cut out additional biscuits until all dough is used.
- Prepare for Baking: Arrange the cut biscuits on parchment-lined baking sheets, leaving about 1 inch between each. Preheat your oven to 425°F (220°C).
- Egg Wash: In a small bowl, beat the large egg. Brush the tops of the biscuits lightly with the egg wash. This provides a beautiful golden sheen and helps create a crisp crust.
- Bake: Bake for 12-15 minutes, or until the biscuits are well-risen and the tops are golden brown. Baking time may vary depending on your oven.
- Cool: Transfer the baked chocolate biscuits to a wire rack to cool slightly before serving. Enjoying them warm is truly a delight!
Ensure that you master the technique of biscuit making by referring to our guide on Best Moist Chocolate Layer Cake. Understanding the nuances involved will help you achieve the perfect texture and flavor in your chocolate biscuits.
Pro Tips for Success
Achieving bakery-quality results at home requires attention to detail and a few expert techniques. Elevate your baking game with these professional insights, ensuring your best chocolate biscuits are consistently perfect. These tips bridge the gap between enthusiastic home cooking and precise pastry arts.
- Keep Ingredients Cold: This is perhaps the most crucial rule for flaky biscuits. Cold butter creates pockets of steam in the oven, leading to those coveted layers. Ensure your butter and buttermilk are well-chilled.
- Do Not Overwork the Dough: Excessive kneading develops gluten, resulting in tough biscuits. Mix just until the ingredients are combined and the dough comes together. A shaggy dough is a happy dough.
- Flour Your Surface Lightly: Too much flour on your work surface will dry out the dough, while too little will cause sticking. Find the right balance.
- Press Straight Down When Cutting: Twisting the biscuit cutter seals the edges, preventing the layers from rising. A clean, straight cut ensures maximum lift and flakiness, vital for the best chocolate biscuits.
- Bake at a High Temperature: The initial blast of high heat helps the biscuits rise quickly and creates a beautiful golden crust. Ensure your oven is fully preheated.
- Avoid Opening the Oven Door: Resist the urge to peek during the first 10 minutes of baking. Fluctuations in temperature can cause the biscuits to deflate.
- Use Quality Chocolate: Since chocolate is a star ingredient, invest in good quality chips or chunks. This makes a noticeable difference in the overall flavor of your chocolate biscuits.
Storage & Reheating Tips
Preserving the fresh taste and tender texture of your best chocolate biscuits ensures you can enjoy them beyond baking day. Proper storage is key to maintaining their deliciousness. When it comes to reheating, a few simple methods can bring them back to their initial glory, providing warm, comforting treats anytime.
- Room Temperature: Store freshly baked chocolate biscuits in an airtight container at room temperature for up to 2-3 days. Place a piece of parchment paper between layers to prevent sticking.
- Refrigeration: While not typically necessary for short-term storage, you can refrigerate them in an airtight container for up to 5 days. This is particularly useful if your kitchen is very warm.
- Freezing Baked Biscuits: For longer storage, wrap cooled biscuits individually in plastic wrap, then place them in a freezer-safe bag or container. They will keep well in the freezer for up to 2-3 months. Thaw at room temperature or reheat directly from frozen.
- Freezing Unbaked Dough: Cut the biscuits as instructed, then arrange them on a baking sheet and freeze until solid. Once frozen, transfer them to a freezer-safe bag. Bake from frozen, adding a few extra minutes to the baking time, for fresh-from-the-oven chocolate biscuits whenever you desire.
- Reheating: To reheat, place biscuits on a baking sheet and warm in a preheated oven at 350°F (175°C) for 5-7 minutes, or until heated through and crisp on the exterior. Alternatively, a toaster oven works wonderfully for a single biscuit.
To maintain the deliciousness of your baked goods, learn about optimal storage methods by checking out The Best Chocolate Cake Recipe Ever. Proper storage will help you enjoy your biscuits even beyond baking day.
What to Serve With This Recipe
While these are arguably the best chocolate biscuits on their own, pairing them thoughtfully can enhance the experience and create a truly memorable spread. Imagine them as part of a brunch, an afternoon tea, or a comforting dessert. To balance their rich sweetness, consider healthy, fresh accompaniments that offer contrasting flavors and textures.
- Fresh Fruit Medley: A vibrant bowl of mixed berries, sliced bananas, or mandarin segments offers a refreshing counterpoint to the deep chocolate.
- Greek Yogurt with Honey: A dollop of creamy, plain Greek yogurt drizzled with a touch of honey provides a tangy, protein-rich pairing.
- Lightly Sweetened Whipped Cream: For a classic indulgence, a cloud of homemade whipped cream adds an ethereal touch without being overly heavy.
- A Strong Cup of Coffee or Tea: The robust notes of a freshly brewed coffee or a comforting Earl Grey tea cut through the richness beautifully, making these best chocolate biscuits even more enjoyable.
- Glass of Cold Milk (or Plant-Based Alternative): A timeless combination, milk provides a simple, satisfying accompaniment.
- Berry Compote or Fruit Preserve: A homemade berry compote (low in sugar) or a good quality fruit preserve adds a lovely tartness and moistness.
- Roasted Almonds or Walnuts: A small side of lightly roasted nuts offers a delightful crunch and healthy fats.
Frequently Asked Questions (FAQ)
Can I make the dough ahead of time?
Absolutely! Preparing the dough in advance is an excellent time-saver. You can prepare the dough up to the point of cutting the biscuits, then wrap the entire slab of dough tightly in plastic wrap.
Refrigerate it for up to 24 hours. When ready to bake, unwrap, cut, and proceed with the egg wash and baking instructions. This flexibility helps streamline your baking process, ensuring fresh and delicious chocolate biscuits are always within reach.
What if I don’t have buttermilk?
No buttermilk? No problem! You can easily make a substitute at home.
For every 1 cup of buttermilk needed, simply add 1 tablespoon of fresh lemon juice or white vinegar to a liquid measuring cup, then fill the rest of the way with regular milk (dairy or plant-based, like almond or soy milk) until it reaches the 1-cup mark. Stir gently and let it sit for 5-10 minutes until it slightly curdles. This homemade version works wonderfully and ensures your best chocolate biscuits remain tender and flavorful.
Why are my chocolate biscuits not rising?
Several factors can contribute to biscuits not rising properly. First, ensure your leavening agents (baking powder and baking soda) are fresh and not expired. Old leaveners lose their potency.
Second, make sure your butter and buttermilk are very cold, as the steam from cold butter is crucial for lift. Third, avoid twisting the biscuit cutter; press straight down to prevent sealing the edges. Lastly, do not overwork the dough; excessive kneading develops gluten, which can result in tough, dense biscuits instead of light, fluffy ones. Following these tips helps achieve perfectly risen, light, and airy best chocolate biscuits every time.
Chocolate biscuits are a delightful treat enjoyed worldwide, often characterized by their rich cocoa flavor and satisfying crunch. For more insights on this beloved dessert, discover more about its history and variations on cookie traditions.
Final Thoughts
These best chocolate biscuits transcend mere dessert; they are a warm embrace, a moment of pure comfort. With careful technique and quality ingredients, you’ve mastered a recipe that will bring joy to every table. Share this elevated treat, and savor the rich, flaky delight you’ve created in your own kitchen. This recipe truly delivers the best chocolate biscuits.
Nutrition Information (per serving)
(Approximate values, based on 12 servings per recipe)
| Nutrient | Amount |
|---|---|
| Calories | 350 kcal |
| Total Fat | 20 g |
| Saturated Fat | 12 g |
| Cholesterol | 50 mg |
| Sodium | 300 mg |
| Total Carbohydrates | 40 g |
| Dietary Fiber | 3 g |
| Total Sugars | 20 g |
| Protein | 5 g |

best chocolate biscuits
Ingredients
Method
- In a large mixing bowl, whisk together the sifted all-purpose flour, cocoa powder, sugar, baking powder, baking soda, and salt.
- Add the chilled, cubed unsalted butter and use a pastry blender to cut it into the flour mixture until it resembles coarse crumbs.
- Create a well in the center and pour in the cold buttermilk, stirring gently until just combined.
- Fold in the chocolate chips or chunks until evenly distributed.
- Turn the dough out onto a floured surface and pat or roll it into a ¾-inch thick rectangle. Fold in thirds and roll out again, repeating 2-3 times.
- Use a biscuit cutter to cut out biscuits, pressing straight down without twisting.
- Arrange the biscuits on parchment-lined baking sheets and preheat the oven to 425°F (220°C).
- Brush the tops of the biscuits with the egg wash.
- Bake for 12-15 minutes until well-risen and golden brown.
- Transfer to a wire rack to cool slightly before serving.
Notes

Emma is the lead recipe developer and creative voice behind Empirefoodie. With a BSc in Pastry Arts from The Restaurant School at Walnut Hill College, she bridges the gap between professional culinary techniques and approachable home cooking. Based in sunny Florida, Emma combines her classical training with a passion for comfort food to create reliable, family-friendly recipes that anyone can master. When she isn't baking, she's exploring new flavors to bring to your table.