Crafting homemade digestive biscuits delivers a satisfying experience. These wholemeal biscuits offer subtle sweetness and a uniquely crumbly yet firm texture. Understanding the science behind their characteristics elevates this simple snack. This recipe guides you to create exceptional digestive biscuits, ensuring wholesome goodness in every bite.
Table of Contents
Why You’ll Love These Homemade Digestive Biscuits
Authentic Flavor: Superior taste in every homemade digestive biscuit.
Effortless Baking: Simple steps yield perfect results for your digestive biscuits.
Healthier Choice: Control ingredients for wholesome, fiber-rich digestive biscuits.
Ingredients You’ll Need

Success in baking these remarkable digestive biscuits hinges upon the quality and precise interaction of fundamental ingredients. Each component plays a critical role in achieving their characteristic texture and flavor.
Whole Wheat Flour (200g): The foundational ingredient, providing the signature nutty flavor and fiber content of digestive biscuits. Its higher protein and bran content interact differently with gluten development compared to all-purpose flour, necessitating specific handling to avoid toughness.
Unsalted Butter, cold and cubed (100g): Essential for creating the tender, crumbly texture. The cold butter, when cut into the flour, forms pockets of fat that inhibit extensive gluten formation, preventing a chewy biscuit and promoting flakiness. Its fat also carries flavor compounds effectively.
Light Brown Sugar (50g): Contributes a gentle caramel sweetness and aids in moisture retention, preventing the digestive biscuits from becoming too dry. The molasses content in brown sugar also assists in browning reactions, enhancing visual appeal.
Milk (approx. 3-4 tbsp): Acts as the binding agent, bringing the dough together to a workable consistency. The proteins and lactose in milk can also contribute to the final browning and a slight richness in the digestive biscuits.
Baking Soda (1 tsp): The primary chemical leavening agent. When combined with a liquid and heat, it releases carbon dioxide gas, creating small air pockets that contribute to the biscuit’s slightly open, tender crumb. This is crucial for the unique texture of digestive biscuits.
Salt (1/2 tsp): A critical flavor enhancer, balancing the sweetness and intensifying the overall taste profile. Beyond flavor, salt strengthens the gluten network, providing structure, and regulates yeast activity in fermented doughs (though less relevant here, it’s a general principle).
Substitutions & Variations
[ra_display_video url=”https://www.youtube.com/watch?v=zaF2b6EeLaM”]
For dietary adjustments, thoughtful substitutions can maintain the integrity and flavor of these homemade digestive biscuits. Understanding the scientific impact of each swap ensures successful results without compromising texture or taste, enhancing their wholesome appeal.
Gluten-Free Whole Wheat Flour: Replace the standard whole wheat flour with a high-quality gluten-free whole grain blend (e.g., oat flour, brown rice flour, sorghum flour, xanthan gum combination). The absence of gluten requires careful hydration and gentle handling to achieve a comparable texture without excessive crumbling in your digestive biscuits. Adjust liquid levels as gluten-free flours absorb differently.
Dairy-Free Butter: Opt for a plant-based, unsalted butter substitute (e.g., coconut oil, vegan butter sticks). Ensure it is cold and firm for proper incorporation into the flour, mirroring butter’s role in inhibiting gluten and creating flakiness. The melting point and fat composition will slightly alter texture, but generally yield excellent dairy-free digestive biscuits.
Sugar Alternatives: For reduced sugar content, experiment with a granulated erythritol-based sweetener or maple syrup. If using liquid sweeteners, reduce the added milk slightly to maintain dough consistency. Be aware that sugar alternatives may affect browning and overall texture due to differences in hygroscopy (moisture absorption) and caramelization.
Nutritional Boost: Incorporate a tablespoon of oat bran or flaxseed meal into the dry ingredients for an additional fiber and omega-3 fatty acid boost in your digestive biscuits. These additions will slightly increase hydration requirements, so have extra milk on hand.
When considering dietary adjustments, it’s crucial to understand how different ingredients can affect the outcome. Learn more about creating delightful treats with our recipe for German Chocolate Cookies that utilize thoughtful ingredient swaps.
Equipment You’ll Need
Precision in baking often starts with the right tools. While these digestive biscuits are relatively simple, having the correct equipment streamlines the process and ensures consistent results.
Large Mixing Bowl: For combining dry and wet ingredients effectively.
Pastry Blender or Fingertips: Crucial for cutting cold butter into the flour mixture, creating the desired sandy, crumbly texture without overworking the dough for your digestive biscuits.
Rolling Pin: For uniformly rolling out the dough to an even thickness, which is vital for even baking.
Round Cookie Cutters (approx. 6-7 cm diameter): To achieve consistently sized and shaped digestive biscuits. A sharp edge ensures clean cuts.
Baking Sheets: Lined with parchment paper for non-stick baking and easy cleanup.
Oven: A preheated oven with accurate temperature control is non-negotiable for proper leavening and browning of these digestive biscuits.
Step-by-Step Instructions
Follow these precise steps to craft perfect digestive biscuits, understanding the ‘why’ behind each action ensures exceptional results every time.
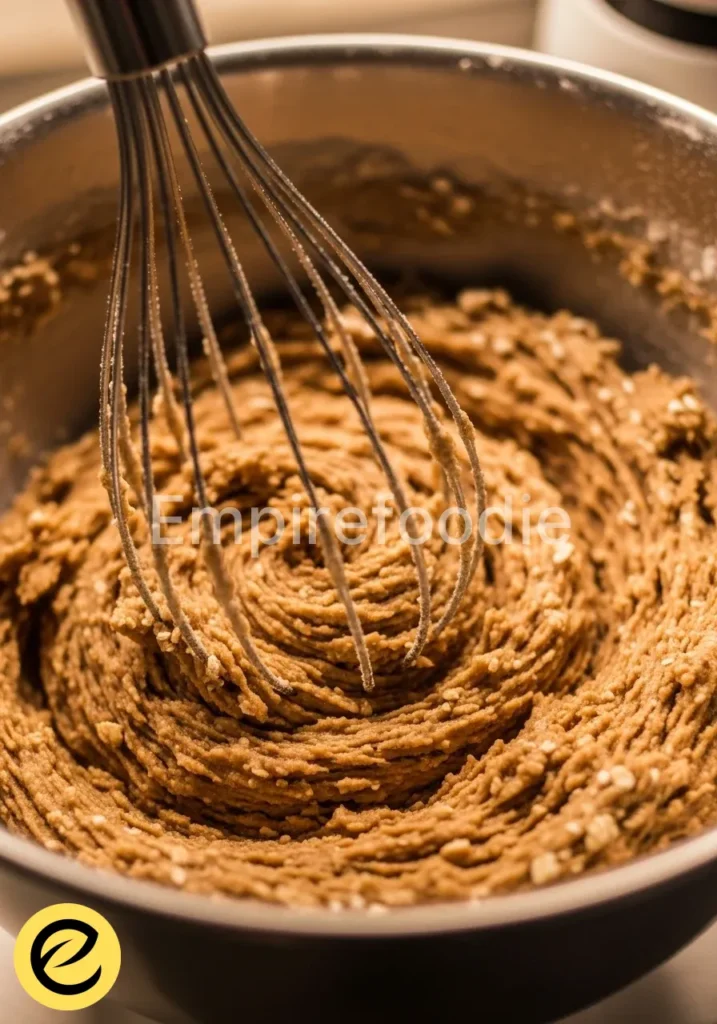
Combine Dry Ingredients: In your large mixing bowl, thoroughly whisk together the whole wheat flour, light brown sugar, baking soda, and salt. This aeration ensures even distribution of leavening and seasoning, preventing pockets of unmixed ingredients within your digestive biscuits.
Incorporate Cold Butter: Add the cold, cubed unsalted butter to the dry mixture. Using a pastry blender or your fingertips, quickly cut the butter into the flour until the mixture resembles coarse breadcrumbs with some pea-sized pieces remaining. The key here is to keep the butter cold, inhibiting excessive gluten development and creating steam pockets during baking for a tender crumb in your digestive biscuits.
Form the Dough: Gradually add the milk, one tablespoon at a time, mixing lightly with a spatula or your hands until a shaggy dough forms. Be precise; over-hydration leads to a sticky, unworkable dough, while under-hydration results in dry, crumbly digestive biscuits. The dough should just come together and hold its shape.
Chill the Dough: Flatten the dough into a disc, wrap it tightly in plastic film, and refrigerate for at least 30 minutes. Chilling allows the gluten to relax, making the dough easier to roll, and solidifies the butter, which prevents it from melting too quickly in the oven and maintains biscuit structure.
Preheat Oven & Prepare Sheets: Preheat your oven to 180°C (350°F). Line two baking sheets with parchment paper. Proper preheating is crucial for consistent heat transfer and immediate activation of leavening agents.
Roll and Cut: On a lightly floured surface, roll out the chilled dough to a uniform thickness of approximately 3-4 mm (about 1/8 inch). Thin, even rolling ensures crispy, evenly baked digestive biscuits. Use your round cookie cutter to cut out the biscuits. Gather and gently re-roll scraps once or twice, but avoid overworking the dough.
Dock the Biscuits: Use a fork to prick several holes (docking) into each biscuit. This prevents large air bubbles from forming and allows steam to escape, promoting a flat, crisp texture characteristic of authentic digestive biscuits.
Bake: Carefully transfer the cut biscuits to the prepared baking sheets. Bake for 12-15 minutes, or until the edges are golden brown and the centers feel firm. Baking time varies based on oven calibration and biscuit thickness; monitor closely to prevent over-browning. These homemade digestive biscuits should achieve a delicate crispness.
Cool: Remove the digestive biscuits from the oven and let them cool on the baking sheets for 5 minutes before transferring them to a wire rack to cool completely. Cooling on the rack allows air circulation, preventing moisture accumulation and ensuring maximum crispness.
Understanding the process of combining dry ingredients can enhance your baking experience. Be sure to check out our detailed guide on making a delicious No-Bake Chocolate Biscuits Cake for further inspiration.
Pro Tips for Success
Achieving perfectly crisp and tender digestive biscuits involves more than just following steps; it requires understanding the underlying culinary science.
Temperature Control is Paramount: Always use cold butter and milk. Cold fat slows gluten development and creates steam pockets during baking, resulting in a tender, flaky crumb. Warm ingredients lead to a tough, dense biscuit because butter melts prematurely and gluten strands develop excessively.
Do Not Overmix the Dough: Once liquid is added, mix just until the dough comes together. Overmixing develops gluten, leading to a tough and chewy texture, which is undesirable for digestive biscuits. The goal is a delicate, crumbly snap.
Consistent Dough Thickness: Roll the dough to an even thickness. Inconsistent thickness causes some digestive biscuits to burn while others remain undercooked. Aim for 3-4 mm for uniform baking and optimal crispness.
Docking for Evenness: Pricking the biscuits with a fork (docking) prevents them from puffing up excessively and ensures a flat, even surface. This allows steam to escape, contributing to the signature crispness of these digestive biscuits.
Monitor Oven Temperature: Ovens can vary. Use an oven thermometer to ensure accuracy. Baking at the correct temperature is crucial for the baking soda to react properly and for the Maillard reaction (browning) to occur without overcooking.
Cool Completely for Crispness: Resist the urge to eat warm digestive biscuits. They achieve their optimal crisp texture only after cooling completely, as moisture evaporates and the internal structure sets.
Storage & Reheating Tips
Proper storage is essential to maintain the crisp texture and fresh flavor of your homemade digestive biscuits. Their relatively low moisture content makes them quite stable when stored correctly.
Airtight Container: Once completely cooled, store digestive biscuits in an airtight container at room temperature. Exposure to air causes them to absorb moisture and become soft. They will remain fresh and crisp for up to 1-2 weeks.
Avoid Refrigeration: Refrigerating biscuits can introduce excess moisture, making them soft. It is generally not recommended for maintaining crispness. Your delicious digestive biscuits thrive in a cool, dry pantry.
Freezing (Optional): For longer storage, you can freeze baked digestive biscuits. Place cooled biscuits in a single layer on a baking sheet to freeze solid, then transfer to a freezer-safe bag or container. They will last for up to 3 months.Thaw at room temperature. A brief re-crisp in a low oven (120°C/250°F for 5-7 minutes) can revive texture after thawing.
Re-Crisping Stale Biscuits: If your digestive biscuits lose their crispness, a quick refresh in a preheated oven (150°C/300°F) for 5-10 minutes can often restore their crunch. Ensure they cool completely afterward.
To keep your homemade digestive biscuits fresh and crispy, proper storage techniques are essential. For more sweet delights, explore our simple Easy Chocolate Cake Recipe that’s perfect for all occasions.
What to Serve With This Recipe

These homemade digestive biscuits offer a versatile base for a range of healthful and enjoyable pairings, elevating your snack time or light meal.
Fresh Fruit Compote: A warm, subtly sweetened berry or apple compote provides a vibrant contrast to the wholemeal richness. The natural acids and moisture complement the biscuit’s dry crispness.
Greek Yogurt and Honey: The creamy tang of Greek yogurt, drizzled with a touch of honey, offers a protein-rich accompaniment. Crushing a digestive biscuit into this mixture adds texture and fiber.
Nut Butter Spreads: A thin layer of almond butter or peanut butter provides healthy fats and protein, transforming the digestive biscuit into a more substantial and satisfying snack. The nutty flavors naturally harmonize.
Aromatic Teas or Coffee: Classic pairings for good reason. A robust English breakfast tea or a freshly brewed coffee provides a comforting beverage that balances the biscuit’s subtle sweetness and aids in palate cleansing.
Cheese and Fruit: For a savory twist, pair digestive biscuits with a mild cheddar or a creamy goat cheese alongside fresh grapes or apple slices. The interplay of sweet, savory, and tart creates a sophisticated snack.
Frequently Asked Questions (FAQ)
Why are they called “digestive” biscuits?
The term “digestive” originates from the historical belief that the high baking soda content aided digestion. While modern science offers a more nuanced understanding, the whole wheat flour contributes significant dietary fiber, which is indeed beneficial for digestive health. Historically, they were marketed as a health food, and the name for these classic digestive biscuits simply stuck.
Can I make these homemade digestive biscuits gluten-free?
Yes, you absolutely can make gluten-free digestive biscuits. Substitute the whole wheat flour with a commercial gluten-free all-purpose flour blend containing xanthan gum, or create your own blend of brown rice, oat, and sorghum flours with a touch of xanthan gum. Gluten-free flours absorb liquid differently, so you may need to slightly adjust the amount of milk to achieve the correct dough consistency. Expect a slightly different texture, often a bit more crumbly, but still delicious.
How do I achieve the perfect crisp texture in my digestive biscuits?
Achieving the perfect crisp texture in your digestive biscuits relies on several scientific principles. First, ensure your dough is rolled to an even, thin thickness (3-4 mm). Second, dock the biscuits thoroughly with a fork to allow steam to escape during baking, preventing puffiness.
Third, bake at the correct temperature until golden brown, ensuring sufficient moisture evaporation. Finally, and crucially, cool the digestive biscuits completely on a wire rack. This allows residual moisture to dissipate fully, hardening the biscuit structure and locking in that satisfying crispness.
Digestive biscuits are a type of semi-sweet biscuit that originated in Scotland in the 19th century. They were designed to aid digestion, featuring wholemeal flour and baking soda, making them a popular choice for a wholesome snack with rich historical significance, as detailed in this informative article.
Final Thoughts
Mastering homemade digestive biscuits transforms a simple snack into a rewarding culinary achievement. Understanding the foundational science of ingredients and techniques elevates your kitchen skills. This recipe empowers you to create superior digestive biscuits, offering wholesome delight and a tangible connection to baking precision. Enjoy your perfectly crafted treats, a testament to culinary dedication.
Nutrition Information (per serving)
(Estimated per biscuit, based on 20 servings)
| Nutrient | Amount |
|---|---|
| Calories | 85-95 kcal |
| Total Fat | 4-5g |
| Saturated Fat | 2.5-3g |
| Carbohydrates | 10-12g |
| Dietary Fiber | 1-1.5g |
| Sugars | 3-4g |
| Protein | 1.5-2g |

digestive biscuits
Ingredients
- 200g whole wheat flour
- 100g unsalted butter, cold and cubed
- 50g light brown sugar
- approx. 3-4 tbsp milk
- 1 tsp baking soda
- 1/2 tsp salt
Instructions
- In a large mixing bowl, whisk together the whole wheat flour, light brown sugar, baking soda, and salt.
- Add the cold, cubed unsalted butter to the dry mixture and cut in until it resembles coarse breadcrumbs.
- Gradually add milk, one tablespoon at a time, mixing until a shaggy dough forms.
- Flatten the dough into a disc, wrap in plastic film, and refrigerate for at least 30 minutes.
- Preheat the oven to 180°C (350°F) and line baking sheets with parchment paper.
- Roll out the chilled dough to a thickness of approximately 3-4 mm and cut out biscuits.
- Dock each biscuit with a fork to prevent puffing during baking.
- Bake for 12-15 minutes until golden brown, then cool on a wire rack.
Notes

Adam is the lead recipe developer and culinary scientist behind Empirefoodie. Holding a Bachelor of Applied Science in Culinary and Food Science from Cincinnati State, Adam brings technical precision to home cooking. Based in Missouri, he specializes in breaking down the "why" behind cooking techniques to help you get consistent, delicious results every time. At 30, Adam is dedicated to turning kitchen experiments into family-favorite meals.


Comments are closed.