Author

Emma Williams Ava

Browsing

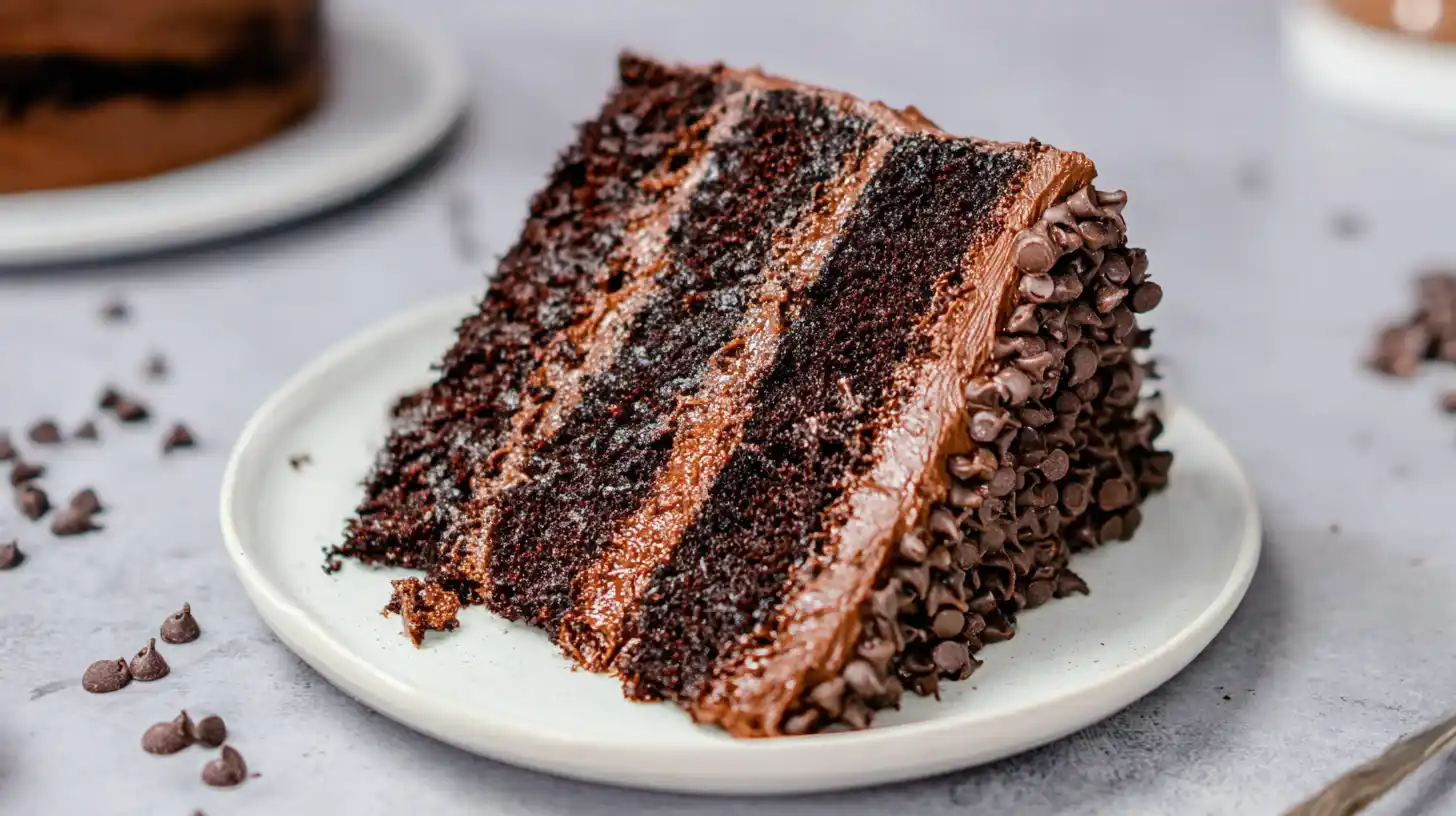
Welcome to a world of rich, intense chocolate. This fudgy flourless chocolate cake is a culinary delight, offering a luxurious experience in every bite. Naturally gluten-free, it relies on the finest chocolate and cocoa for its incredible depth of flavor. Topped with a silky, decadent chocolate ganache, this dessert promises an elegant finish that will impress anyone. Prepare to create something truly special.

Table of Contents

Why You’ll Love This Flourless Chocolate Cake

You’ll adore this flourless chocolate cake for its deep, complex chocolate flavor.

  • It offers a satisfyingly dense and fudgy texture that melts in your mouth.
  • This recipe is surprisingly easy to prepare, making it accessible for all skill levels.
  • Its elegant presentation makes it perfect for special occasions or holidays.
  • Being naturally gluten-free and Passover-friendly, it accommodates dietary needs. Understanding the dietary requirements for conditions like celiac disease is crucial, and a gluten-free diet is the only effective treatment, as highlighted by the Mayo Clinic.
  • The impressive chocolate ganache finish adds an extra layer of indulgence.

Ingredients

Crafting an exceptional flourless chocolate cake begins with quality ingredients. Each component plays a vital role in achieving its signature rich flavor and decadent texture.

For the Flourless Chocolate Cake

  • 1 cup (170g) semisweet chocolate chips or bittersweet chocolate chips
  • 8 tablespoons (113g) unsalted butter, at room temperature
  • 3/4 cup (149g) granulated sugar
  • 1/4 teaspoon table salt
  • 1 to 2 teaspoons espresso powder, optional
  • 1 teaspoon vanilla extract, optional
  • 3 large eggs
  • 1/2 cup (42g) Dutch-process cocoa

For the Chocolate Ganache Glaze

  • 1 cup (170g) semisweet chocolate chips or bittersweet chocolate chips
  • 1/2 cup (113g) heavy cream

Notes & Substitutions

Understanding your ingredients is key to a perfect flourless chocolate cake. Use high-quality chocolate chips; bittersweet offers deeper notes, while semisweet lends a sweeter profile. For dairy-free options, choose a plant-based butter alternative and dairy-free chocolate chips. Espresso powder enhances chocolate flavor without making the cake taste like coffee; omit it if you prefer. Dutch-process cocoa creates a darker color and milder chocolate flavor compared to natural cocoa.

Equipment

The right tools make preparing this flourless chocolate cake effortless. Gather these items before you begin.

How To Make Flourless Chocolate Cake

Creating this decadent dessert is a straightforward process when you follow these clear steps. Each stage is designed to ensure a perfect flourless chocolate cake every time, crowned with a luscious ganache glaze.

Prep the Pan

Preheat your oven to 375°F (190°C). Lightly grease an 8-inch metal cake pan. Cut a circle of parchment paper to fit the bottom of the pan, grease it lightly, and then place it inside. This helps with easy release.

Make the Cake Batter

Combine the chocolate chips and butter in a microwave-safe bowl. Heat them in 30-second intervals until the butter melts and the chips soften, then stir until smooth. Briefly reheat if any chocolate bits remain.

Transfer the melted chocolate mixture to a larger mixing bowl. Stir in the granulated sugar, salt, espresso powder (if using), and vanilla extract (if using). Espresso powder beautifully enhances the chocolate’s depth. Add the eggs, beating briefly until the mixture is smooth and well combined.

Finally, gently mix in the Dutch-process cocoa powder until just combined. Overmixing can lead to a tougher cake. Pour the smooth batter into your prepared pan.

Bake the Cake

Bake the flourless chocolate cake for 25 to 27 minutes. The top will form a thin, delicate crust. For precision, an instant-read thermometer inserted into the center should register at least 200°F (93°C). Do not overbake, as this can dry out the cake. Remove it from the oven and let it cool in the pan for 5 minutes.

Gently loosen the edges of the cake from the pan with a table knife or a nylon spreader. Invert the cake onto a serving plate; the bottom will now be the top, which is perfectly fine. The edges may crumble slightly, which is also normal for this style of cake. Allow the cake to cool completely before applying the ganache glaze. A fully cooled cake ensures the ganache sets beautifully.

Prepare the Ganache Glaze

Place the chocolate chips for the ganache in a heatproof bowl. In a small saucepan, heat the heavy cream until it reaches a gentle simmer, with small bubbles forming around the edges. Do not let it boil vigorously. Pour the hot cream directly over the chocolate chips. Let the mixture sit undisturbed for 5 minutes; this allows the heat from the cream to melt the chocolate evenly.

After 5 minutes, begin stirring slowly, then gradually increase your speed and vigor until the chocolate is completely melted and the ganache is smooth and glossy. If any small bits of chocolate persist, briefly reheat the bowl in the microwave or over a very low burner, then continue stirring until completely smooth.

Glaze and Serve

Once your cake is completely cool, spoon the warm, smooth ganache over the center. Use an offset spatula or the back of a spoon to gently spread the glaze towards the edges, allowing it to drip naturally over the sides. This creates a beautifully rustic yet elegant finish.

Allow the ganache glaze to set for several hours at room temperature before serving. This setting time ensures a firm, shiny glaze that slices cleanly. To achieve neat slices, dip a sharp knife in hot water and wipe it clean between each cut.

Pro Tips & Troubleshooting

For the best flourless chocolate cake, always use high-quality chocolate and cocoa powder. This significantly impacts the depth of flavor. Avoid overbaking; a slight wobble in the center is desirable for that signature fudgy texture. Cool the cake completely before glazing to prevent the ganache from melting or sliding off.

A hot, wiped knife ensures neat, clean slices every time. For an extra touch, garnish with toasted sliced almonds. If your cake crumbles, it might be slightly overbaked or still warm. For lumpy ganache, gently reheat it over a double boiler or in short microwave bursts, stirring until smooth.

Serving, Storage, and Variations

This versatile dessert offers many possibilities for enjoyment and personalization.

Serving Suggestions

Enhance your flourless chocolate cake with a scattering of fresh raspberries or sliced strawberries. A dollop of freshly whipped cream adds a delightful contrast. You could also pair it with a vibrant raspberry coulis for a tart counterpoint. For a simple yet elegant finish, dust the cooled cake with a light layer of cocoa powder or powdered sugar before serving.

Storage Instructions

Store any leftover flourless chocolate cake covered at room temperature for up to 1-2 days. For longer freshness, refrigerate it in an airtight container for up to 5 days. You can also freeze individual slices, wrapped tightly in plastic wrap, for up to 1 month. Thaw frozen slices in the refrigerator overnight or at room temperature for a few hours before serving.

Flavor Variations

Experiment with variations to personalize your flourless chocolate cake. Add the zest of one orange to the cake batter for a bright, citrusy note. Infuse the heavy cream with a sprig of fresh mint or a pinch of chili powder for unique flavor profiles before making the ganache. Consider topping the cake with a caramel drizzle or a white chocolate ganache for a different look and taste. For added texture, fold 1/2 cup of finely chopped pecans or walnuts into the batter.

Nutrition Information

This rich dessert provides substantial energy and flavor in each serving. Here’s a breakdown of the nutritional content for one piece of flourless chocolate cake with ganache.

NutrientAmount
Serving Size1 piece (76g)
Calories300 kcal
Carbohydrate33g
Cholesterol80mg
Fiber4g
Protein4g
Sodium75mg
Sugar27g
Fat20g
Saturated Fat13g
Trans Fat0g

Frequently Asked Questions (FAQ)

Is flourless chocolate cake truly gluten-free?

Yes, because it contains no wheat flour. This makes it a great option for those with gluten sensitivities or celiac disease.

Can I use a different size cake pan?

Using an 8-inch round pan is ideal for the specified baking time and texture. If you use a different size, adjust baking time and monitor doneness carefully.

How can I prevent my cake from cracking?

Overbaking is a common cause of cracks. Ensure you don’t bake it longer than necessary, and cool it gradually.

Can this cake be made ahead of time?

Absolutely. This flourless chocolate cake can be baked and glazed a day or two in advance. Store it properly for optimal freshness.

What is the ideal texture for this cake?

The ideal texture is dense, rich, and fudgy, almost like a brownie but more elegant. It should melt in your mouth, not be dry or crumbly.

Final Thoughts

This elegant flourless chocolate cake recipe with its decadent ganache promises a show-stopping dessert for any occasion. Its intense chocolate flavor and incredibly fudgy texture make it an unforgettable treat. Naturally gluten-free and surprisingly simple to prepare, it truly bridges professional culinary techniques with approachable home cooking.

Embrace the joy of baking and confidently create this masterpiece. Share this luxurious experience with loved ones, celebrating the simple pleasure of an exceptional homemade dessert.

The Ultimate Flourless Chocolate Cake

Prep Time 25 minutes
Cook Time 25 minutes
Total Time 55 minutes
Servings 8 slices
Calories 450
A rich and decadent flourless chocolate cake featuring a fudgy texture, enhanced by optional espresso and vanilla, topped with a smooth, glossy chocolate ganache. This elegant dessert is perfect for special occasions and chocolate lovers.

Equipment

  • 8-inch round cake pan
  • parchment paper
  • Microwave-safe bowl or Saucepan
  • Mixing bowl
  • Instant-read thermometer
  • Table knife or nylon spreader
  • Serving plate
  • Heatproof bowl

Ingredients

Cake Ingredients

  • 1 cup semisweet chocolate chips or bittersweet chocolate chips ((170g))
  • 8 tablespoons unsalted butter ((113g), at room temperature)
  • 3/4 cup granulated sugar ((149g))
  • 1/4 teaspoon table salt
  • 1 to 2 teaspoons espresso powder (optional)
  • 1 teaspoon King Arthur Pure Vanilla Extract (optional)
  • 3 large eggs
  • 1/2 cup Dutch-process cocoa ((42g))

Ganache

  • 1 cup semisweet chocolate chips or bittersweet chocolate chips ((170g))
  • 1/2 cup heavy cream ((113g))

Instructions 

To make the cake

  • Preheat the oven to 375°F. Lightly grease an 8-inch round cake pan, then cut, grease, and lay a piece of parchment paper in the bottom.
  • Combine chocolate and butter in a microwave-safe bowl; heat until butter melts and chips soften, then stir until smooth.
  • Transfer the mixture to a mixing bowl, then stir in the sugar, salt, espresso powder, and vanilla.
  • Add the eggs, beating briefly until smooth, then mix in the cocoa powder just until combined.
  • Spoon the prepared batter into the cake pan.
  • Bake the cake for 25 minutes; it should form a thin crust and register at least 200°F with an instant-read thermometer.
  • Cool the cake in the pan for 5 minutes, then loosen the edges and turn it out onto a serving plate to cool completely.
  • Ensure the cake is completely cool before proceeding with glazing.

To make the glaze

  • Place the chocolate in a heatproof bowl and heat the heavy cream until fine bubbles appear around the edge, just before simmering.
  • Pour the hot cream over the chocolate, stir very briefly, and let the mixture rest for 5 minutes.
  • Stir again, starting slowly and then more vigorously, until the chocolate is fully melted and the glaze is smooth, reheating briefly if necessary.
  • Spoon the glaze over the cooled cake, spreading it to drip over the sides, and allow it to set for several hours before serving.

Notes

Espresso powder can enhance chocolate flavor; use 1 teaspoon for general enhancement or 2 teaspoons for a subtle mocha hint. It is normal for the cake to invert and for edges to crumble slightly. Ensure the cake is completely cool before applying the ganache, and allow the ganache to set for several hours for best results.
Author: Emma Williams Ava
Calories: 450kcal
Course: Dessert
Cuisine: American, Classic
Keyword: Flourless Chocolate Cake, Ganache, Gluten-Free

Welcome to the ultimate guide for crafting the perfect chocolate chip cookies right in your own kitchen! This recipe delivers that coveted balance: crispy edges, delightfully soft and chewy centers, and pockets of gooey, melted chocolate.

We’ve perfected a method that requires absolutely no chilling, meaning warm, fresh cookies are just minutes away. Prepare to master a truly irresistible classic that promises consistently delicious results every time.

Table of Contents

Why You’ll Love These Chocolate Chip Cookies

These aren’t just any ordinary cookies; they are an elevated comfort classic designed for success.

  • You’ll achieve the perfect texture with crispy golden edges and wonderfully gooey, soft centers.
  • Each bite bursts with rich, buttery flavor complemented by melty chocolate.
  • The recipe uses simple, pantry-stape ingredients and a straightforward process.
  • No dough chilling is needed, so you can enjoy fresh-baked cookies faster.
  • They consistently bake up beautifully, making you a baking hero.
  • These homemade cookies are a guaranteed crowd-pleaser for any occasion.
  • The dough and baked cookies freeze well, perfect for future cravings.

Ingredients

Gathering high-quality ingredients is the first step to truly exceptional chocolate chip cookies.

  • 1 cup (2 sticks) salted butter, softened
  • 1 cup granulated sugar
  • 1 cup light brown sugar, packed
  • 2 teaspoons pure vanilla extract
  • 2 large eggs
  • 3 cups all-purpose flour
  • 1 teaspoon baking soda
  • ½ teaspoon baking powder
  • 1 teaspoon sea salt
  • 2 cups (12 oz) chocolate chips (milk, semi-sweet, or dark)

Notes & Substitutions

Butter: Salted butter is recommended for a balanced flavor, but unsalted butter works too; just add an extra pinch of salt to the dry ingredients. Ensure it’s truly softened, not melted.

Eggs: Large eggs bind the dough and add moisture. For a quick egg substitute, you can use a flax egg (1 tablespoon ground flaxseed mixed with 3 tablespoons water per egg), although it may alter the texture slightly.

Sugars: The combination of light brown sugar and granulated sugar is crucial. Brown sugar contributes to the desired chewiness and moisture, while granulated sugar promotes spread and crisp edges.

Flour: All-purpose flour is the standard here. For a gluten-free alternative, a 1:1 gluten-free baking blend can often be used successfully, but results may vary depending on the brand.

Salt: Fine sea salt is preferred for its pure taste. If using table salt, reduce the amount slightly as it is finer and more potent.

Chocolate Chips: The choice is yours! Milk chocolate for sweetness, semi-sweet for a classic balance, or dark for a richer flavor. Feel free to use a mix of varieties or chop up your favorite chocolate bar for a more artisan feel.

Equipment

Having the right tools makes the baking process smooth and enjoyable.

How To Make Chocolate Chip Cookies

Creating the best homemade chocolate chip cookies is a rewarding experience. Follow these steps for perfect results every time.

  1. Prep Oven & Pans: Preheat your oven to 375°F (190°C). Line three large baking sheets with parchment paper or silicone mats. This prevents sticking and ensures even baking.
  2. Combine Dry Ingredients: In a medium bowl, whisk together the all-purpose flour, baking soda, baking powder, and sea salt. Whisking ensures these leavening agents and salt are evenly distributed throughout the dough. Set this bowl aside.
  3. Cream Wet Ingredients: In a large mixing bowl, using an electric mixer, cream together the softened salted butter, granulated sugar, and packed light brown sugar. Beat on medium speed for about 2-3 minutes until the mixture is light, fluffy, and pale in color. This step incorporates air, contributing to the cookies’ tender texture. For more information on why this step is so crucial, you can explore the science behind creaming butter and sugar.
  4. Add Eggs & Vanilla: Beat in the large eggs, one at a time, allowing each egg to fully incorporate before adding the next. This creates a stable emulsion. Follow with the pure vanilla extract, mixing until just combined. Scrape down the sides of the bowl as needed to ensure everything is well-mixed.
  5. Incorporate Dry: Gradually add the reserved dry ingredient mixture to the wet ingredients. Mix on low speed until just combined. Be careful not to overmix; stop as soon as no streaks of flour remain, as overmixing can lead to tough cookies.
  6. Fold in Chocolate Chips: With a rubber spatula, gently fold in the chocolate chips until they are evenly distributed throughout the cookie dough. Avoid overworking the dough during this step.
  7. Scoop Dough: Drop 2-3 tablespoon portions of the dough onto the prepared baking sheets. Leave enough space between each dough ball (about 2 inches) to allow for spreading. Using a cookie scoop helps create uniform-sized homemade cookies that bake evenly.
  8. Bake: Place the baking sheets in the preheated oven. Bake for approximately 8-10 minutes. The cookies are ready when their edges are lightly golden brown, but their centers still look slightly soft and underdone. This ensures a wonderfully chewy and gooey interior.
  9. Cool: Allow the freshly baked chocolate chip cookies to cool on the baking sheets for 5 minutes before carefully transferring them to a wire rack to cool completely. This resting period helps them set and prevents them from breaking.

Pro Tips for Perfect Chocolate Chip Cookies

Mastering these tips will elevate your chocolate chip cookies from good to absolutely phenomenal.

  • Softened Butter is Key: Ensure your butter is truly softened, not melted or cold. It should yield slightly to a gentle press. This state is crucial for properly creaming with sugars and creating a tender crumb.
  • Measure Flour Accurately: Use the scoop and level method. Fluff the flour in its container, then gently scoop it into a measuring cup and level it off with a straight edge. Too much flour will result in dry, crumbly cookies.
  • Do Not Overmix Dough: Once the dry ingredients are added, mix only until just combined. Overmixing develops gluten, which can lead to tough, dense homemade cookies.
  • Don’t Overbake: For that signature gooey center, pull your cookies from the oven when the edges are set and golden, but the centers still look slightly soft or even underdone. They will continue to set as they cool.
  • Use an Oven Thermometer: Oven temperatures can vary widely. An inexpensive oven thermometer ensures your oven is heating accurately, preventing common baking issues.
  • Troubleshooting Flat Cookies: Flat cookies often result from using expired leavening agents, over-creaming butter and sugar, ingredients being too warm, or an oven temperature that is too low.
  • Troubleshooting Cookies Not Spreading: If your cookies don’t spread, the dough might be too cold, you might have used too much flour, or the butter and sugars weren’t creamed enough to incorporate sufficient air.

Storage, Freezing & Variations

Extend the enjoyment of your delicious homemade chocolate chip cookies with proper storage and creative variations.

Storage: Store baked cookies in an airtight container at room temperature for up to 5 days. For optimal freshness, place a slice of bread in the container to help them stay soft.

Freezing Baked Cookies: Once completely cooled, arrange baked cookies in a single layer on a baking sheet and flash-freeze for 30 minutes. Then, transfer them to an airtight freezer-safe container or bag. They will keep for up to 2 months. Thaw at room temperature.

Freezing Dough: Scoop raw dough balls onto a parchment-lined baking sheet and flash-freeze until firm (about 1 hour). Transfer the frozen dough balls to a freezer-safe bag. Store for up to 2 months.

Baking from Frozen:

  • Thaw first: You can thaw frozen dough balls on a baking sheet in the refrigerator overnight, then bake as directed in the recipe.
  • Bake directly: For a quicker option, bake frozen dough balls at a slightly lower temperature (e.g., 350°F / 175°C) for a longer duration (typically 12-15 minutes), adding a few extra minutes until the edges are golden.

Halving the Recipe: This recipe is easily halved to make a smaller batch. Simply divide all ingredient quantities by two. A half batch typically yields about 18 perfectly sized cookies.

Add-in Variations: Get creative with your batch of cookies! Incorporate ½ cup of chopped walnuts or pecans for a nutty crunch. Add sprinkles for a festive look, or experiment with white chocolate chips, butterscotch chips, or even a mix of different chocolate types.

Nutrition Information

Understanding the nutritional breakdown of your favorite treats can be helpful for meal planning.

Below is an estimated nutritional breakdown per cookie based on the ingredients and serving size provided.

NutrientAmount
Serving Size1 cookie
Calories183 kcal
Carbohydrates26 g
Protein2 g
Fat8 g
Saturated Fat5 g
Cholesterol27 mg
Sodium153 mg
Potassium31 mg
Fiber1 g
Sugar18 g
Vitamin A197 IU
Vitamin C1 mg
Calcium24 mg
Iron1 mg

Disclaimer: This nutrition information is an estimation based on the listed ingredients and preparation. Actual values may vary depending on specific brands, ingredient variations, and portion sizes.

Frequently Asked Questions (FAQ)

Get quick answers to common questions about making perfect chocolate chip cookies.

How do I make my cookies extra gooey?

The key is not to over-bake them. Remove the cookies from the oven when the edges are set and light golden, but the centers still look soft and slightly underdone. They will continue to bake and set as they cool on the hot baking sheet.

Why do my cookies flatten out too much?

Cookies can flatten if your leavening agents are expired, if you overmix the dough, if your butter was too warm or melted, or if your oven temperature is too low. Ensure ingredients are at the right temperature and your baking powder and soda are fresh.

Why don’t my cookies spread enough?

This often happens if the dough is too cold, you used too much flour, or you didn’t cream the butter and sugars sufficiently. Ensure your butter is softened and flour is measured accurately.

Can I halve this recipe easily?

Yes, this recipe for classic chocolate chip cookies can be easily halved. Simply divide all ingredient quantities by two, and you will yield approximately 18 delicious cookies.

Can I add nuts or other mix-ins to the dough?

Absolutely! Feel free to incorporate up to ½ cup of your favorite nuts like walnuts or pecans, or other mix-ins like sprinkles. If adding nuts, you might slightly reduce the chocolate chip quantity to maintain balance.

Final Thoughts

These homemade chocolate chip cookies are more than just a dessert; they are a delightful testament to the joy of baking. With crispy edges, gooey centers, and rich flavor, this recipe consistently delivers perfection without the need for chilling.

Embrace the simplicity and expertise within these steps to create truly unforgettable cookies. We encourage you to try this recipe, share your delicious creations, and bring smiles to those around you.

The Best Homemade Chocolate Chip Cookies

Prep Time 25 minutes
Cook Time 9 minutes
Total Time 39 minutes
Servings 30 cookies
Calories 180
A classic recipe for delicious homemade chocolate chip cookies, featuring a perfect balance of sweet and salty flavors with a chewy texture and plenty of chocolate.

Equipment

  • Oven
  • Baking sheets
  • parchment paper
  • Medium bowl
  • Electric Mixer
  • Cooling Rack

Ingredients

Dough

  • 1 cup salted butter (softened)
  • 1 cup granulated sugar
  • 1 cup light brown sugar (packed)
  • 2 teaspoons pure vanilla extract
  • 2 large eggs
  • 3 cups all-purpose flour
  • 1 teaspoon baking soda
  • ½ teaspoon baking powder
  • 1 teaspoon sea salt
  • 2 cups chocolate chips (12 oz)

Instructions 

Instructions

  • Preheat your oven to 375 degrees Fahrenheit (190 degrees Celsius) and line three baking sheets with parchment paper.
  • In a medium bowl, whisk together the flour, baking soda, baking powder, and salt, then set aside.
  • Cream together the softened butter and both sugars in a large bowl until the mixture is light and fluffy.
  • Beat in the eggs one at a time, then add the pure vanilla extract and mix until just combined.
  • Gradually mix the dry ingredients into the wet ingredients until just combined and no flour streaks remain.
  • Fold in the chocolate chips until they are evenly distributed throughout the cookie dough.
  • Roll 2-3 Tablespoons of dough into balls and place them evenly spaced on the prepared baking sheets.
  • Bake for approximately 8-10 minutes in the preheated oven, removing them when they are just barely starting to turn brown.
  • Allow the cookies to cool on the baking pan for 5 minutes before transferring them to a cooling rack to cool completely.

Notes

Do not overbake the cookies; they should be just barely starting to turn brown for a soft, chewy texture. Allowing them to cool on the baking sheet for 5 minutes helps them set before transferring to a cooling rack.
Author: Emma Williams Ava
Calories: 180kcal
Course: Dessert, Snack
Cuisine: American
Keyword: Chocolate Chip, Chocolate Chip Cookies, Chocolate Cookies, cookies

Welcome to the ultimate indulgence for every chocolate lover! Prepare yourself for a dessert experience like no other. This Death by Chocolate Cake recipe delivers layers of unbelievably rich, moist cake generously slathered with a luxurious dark chocolate buttercream. It truly is a chocolate lover’s dream, promising an unforgettable journey into pure cocoa decadence. Get ready to bake a masterpiece!

Table of Contents

Why You’ll Love This Death by Chocolate Cake

You will adore this Death by Chocolate Cake for its irresistible qualities, blending sophisticated flavors with approachable baking techniques. This recipe consistently delivers stunning results that impress everyone. It’s perfect for any occasion where you want to serve something truly spectacular and deeply satisfying.

  • Decadently rich chocolate flavor: Each bite explodes with intense cocoa goodness.
  • Moist, tender cake layers: The secret simple syrup keeps every crumb perfectly soft.
  • Silky smooth dark chocolate buttercream: Our frosting is light, fluffy, and intensely chocolatey.
  • Simple assembly and decoration: Achieve professional-looking results with ease.
  • Perfect for any celebration: This showstopper is ideal for birthdays, holidays, or just because.

Ingredients

Crafting this magnificent Death by Chocolate Cake begins with selecting quality ingredients. Each component plays a vital role in creating its incredible texture and deep flavor. Measure everything precisely for the best outcome.

Chocolate Simple Syrup

  • 1/2 cup water (120g)
  • 1/2 cup granulated sugar (100g)
  • 1 Tbsp dark or Dutch-processed cocoa powder (6g)

Dark Chocolate Cake Layers

  • 2 cups all-purpose flour (260g)
  • 2 cups granulated sugar (400g)
  • 3/4 cup dark or Dutch-processed cocoa powder (75g)
  • 2 tsp baking powder (8g)
  • 1 1/2 tsp baking soda (9g)
  • 1 tsp fine salt (6g)
  • 1 cup warm water (240g)
  • 1 cup full-fat sour cream, room temperature (255g)
  • 1/2 cup vegetable or canola oil (110g)
  • 2 large eggs, room temperature (112g)
  • 2 tsp vanilla extract or vanilla bean paste (8g)
  • 1 tsp instant espresso or coffee – optional (1g)

Chocolate Buttercream Frosting

  • 2 cups (4 sticks) unsalted butter, room temperature (452g)
  • 1 cup dark baking cocoa, sifted (100g)
  • 1 tsp vanilla extract or vanilla bean paste (4g)
  • 1/2 tsp fine salt (3g)
  • 5 cups powdered sugar (625g)
  • 3/4 cup heavy whipping cream, room temperature (180g)
  • 1 1/3 cups dark chocolate chips, melted and cooled (230g)

Optional Decoration

  • 2 cups mini chocolate chips (360g)

Notes & Substitutions

  • All-Purpose Flour: Use a 1:1 gluten-free blend; stir for an extra minute to hydrate gums.
  • Granulated Sugar: Do not reduce the sugar quantity; it impacts moisture and structure.
  • Dark Cocoa Powder: Black cocoa or Dutch-processed cocoa powder deepens the flavor and color.
  • Sour Cream: Substitute with full-fat plain yogurt, buttermilk, or whole milk.
  • Vegetable Oil: Canola or sunflower oil work well; avoid strong-flavored oils like olive.
  • Eggs: Try vegan egg replacers or flaxseed eggs for a dairy-free option.
  • Unsalted Butter: Use salted butter and omit the additional salt in the buttercream.
  • Heavy Cream: Whole milk or a dairy-free milk alternative can be used, but cream yields the best texture.
  • Dark Chocolate: Milk or semi-sweet chocolate can be used, but adjust sweetness.

Equipment

Gathering your tools before starting ensures a smooth baking process. You will need:

How To Make Death by Chocolate Cake

Follow these detailed steps to create your showstopping Death by Chocolate Cake. Precision and patience will lead to a truly spectacular dessert. Take your time with each stage for the best results.

Prepare Chocolate Simple Syrup

Pour 1/2 cup water and 1/2 cup granulated sugar into a small saucepan. Cook over medium heat, whisking continuously until the mixture starts to boil. Remove from heat and whisk in 1 tablespoon of dark cocoa powder.

Pour into a medium-sized bowl to cool completely at room temperature, then cover and set aside. You will brush this onto the cake layers right before assembly. Store any advance-made syrup in an airtight container in the fridge for up to three weeks.

Bake Cake Layers

Preheat your oven to 350°F (175°C). Grease and line four 7-inch or three 8-inch cake pans with parchment paper rounds. Set these aside. Sift or whisk together 2 cups all-purpose flour, 2 cups granulated sugar, 3/4 cup dark cocoa powder, 2 teaspoons baking powder, 1 1/2 teaspoons baking soda, and 1 teaspoon fine salt into a large bowl.

Then add 1 cup warm water, 1 cup full-fat sour cream, 1/2 cup vegetable oil, 2 large eggs, 2 teaspoons vanilla extract, and 1 teaspoon instant espresso (if using) into the dry ingredients. Whisk everything together until just incorporated, ensuring no dry streaks remain.

Divide the batter evenly between the prepared cake pans; a kitchen scale helps achieve even layers. Bake for 22-25 minutes, or until a toothpick inserted into the center comes out with just a few moist crumbs. Remove the cake layers from the oven and let them cool in the pans for about 15 minutes.

Gently run an offset spatula around the rim of the cake pans to loosen them, then flip them onto wire racks to finish cooling completely. For extra moisture, you can pop the cake layers (pans and all) into the freezer for 30 minutes to trap steam. Once fully cooled, use a serrated knife to level the top of each cake layer. Wrap and freeze layers at this point if making in advance.

Make Chocolate Buttercream

To achieve the best results in your baking, it’s widely recommended to use room temperature ingredients as they emulsify better and create a smoother batter.

Beat 2 cups (4 sticks) of room temperature unsalted butter on medium speed for 30 seconds with a paddle attachment until smooth and creamy. Add 1 cup sifted dark baking cocoa, 1 teaspoon vanilla extract, and 1/2 teaspoon fine salt. Mix on low speed until all ingredients are fully incorporated. Scrape the sides and bottom of the bowl as needed with a rubber spatula.

Gradually mix in 5 cups of powdered sugar and 3/4 cup of room temperature heavy cream on a low speed until combined. Then, mix in 1 1/3 cups of melted and cooled dark chocolate at a low speed. The chocolate should be fluid but not hot to the touch; let it sit for about 10 minutes after melting before adding.

Continue mixing until the buttercream is smooth and consistent, ensuring all melted chocolate is fully incorporated to prevent lumps. Scrape the bowl well. Cover the buttercream with plastic wrap to prevent crusting and set aside.

Assemble and Frost the Cake

Stack and frost your Death by Chocolate Cake layers on a greaseproof cake board or flat plate. Use a dab of chocolate buttercream to help stick the first cake layer to the board. Before placing each subsequent cake layer, use a silicone brush to generously soak the top of the existing cake layer with the cooled chocolate simple syrup.

Spread an even layer of chocolate buttercream on top of each cake layer as you stack them using a large offset spatula. If desired, sprinkle 2-3 tablespoons of mini chocolate chips on top of each layer of frosting for added texture and crunch.

Repeat the stacking and frosting process with the remaining cake layers. Once all layers are stacked and filled, freeze the assembled cake for about 10 minutes. This chilling step helps the buttercream between the layers firm up, reduces crumbs, and makes the cake significantly easier to frost. Then, cover the entire cake with a thick, even layer of chocolate buttercream and smooth it using a large offset spatula.

Don’t worry if the frosting isn’t perfectly smooth at this stage. Carefully press mini chocolate chips into the frosting around the sides and top of the cake until it is completely covered for a truly “death by chocolate” appearance.

Decorate Your Cake

Decorate your finished Death by Chocolate Cake as desired! We recommend using the leftover buttercream to pipe beautiful swirls on top of the cake. Fit a small piping bag with an open star tip, such as a Wilton 1M, and create elegant rosettes or borders. Once decorated, cut yourself a generous slice and savor every decadent moment!

Pro Tips for Success

Achieving a truly professional-looking and tasting Death by Chocolate Cake requires attention to a few key details. These tips will elevate your baking game.

  • Use room temperature ingredients: This ensures proper emulsification and a smooth batter.
  • Measure flour accurately: Spoon flour into your measuring cup, then level it off with a straight edge.
  • Weigh dry ingredients with a kitchen scale: This is the most accurate way to measure and prevents dense cakes.
  • Mix batter minimally: Overmixing develops gluten, leading to a tough cake. Mix until just combined.
  • Weigh batter in pans: Divide batter evenly among pans for consistent baking and level layers.
  • Chill cake layers: Chilled layers are firmer and much easier to handle, stack, and frost.
  • Freeze layers (in pans): This technique locks in moisture, resulting in an exceptionally tender cake.
  • Cover cut cake sections: Prevent your cake from drying out by covering any exposed slices.

Serving, Storage, and Variations

This incredible Death by Chocolate Cake is sure to be a hit, no matter how you serve it. Knowing how to store it and explore variations ensures you can enjoy it in many ways.

Serving Suggestions

  • Serve this rich cake at room temperature for the best flavor and texture.
  • Pair a slice with a scoop of vanilla bean ice cream or a dollop of fresh whipped cream.
  • Fresh raspberries or strawberries add a lovely contrast to the intense chocolate.
  • Present it on a decorative platter for an impressive display at any gathering.

Storing Leftovers

  • Room temperature: Store leftover cake at room temperature, covered tightly, for up to 2 days.
  • Refrigerator: Keep the cake in an airtight container in the refrigerator for up to 1 week; cover cut sections with plastic wrap.
  • Freezer: Freeze individual slices or the whole cake, well-wrapped, for up to 1 month. Thaw overnight in the fridge.

Cake Size Variations

  • Use two 9-inch cake layers, adjusting baking time slightly.
  • Bake four 6-inch cake layers for a taller, more elegant presentation.
  • Convert the recipe into one 9×13-inch sheet cake for easy serving.
  • For tiered cakes, adjust batter batches and baking times accordingly.
  • This specific recipe is for layers; use a dedicated cupcake recipe if making cupcakes.

Flavor Variations

  • Add different extracts like peppermint, almond, or orange to the cake batter or buttercream.
  • Include chopped nuts (walnuts, pecans) in the cake layers for texture.
  • Garnish with chocolate shavings, chocolate curls, or fresh fruit for visual appeal and contrasting flavors.

Nutrition

Enjoying a slice of this magnificent Death by Chocolate Cake is a treat. Here’s a general nutritional overview.

NutrientAmount
Serving Size1 slice (g)
Calories480 kcal
Carbohydrates75 g
Protein4 g
Fat20 g
Saturated Fat8 g
Polyunsaturated Fat10 g
Cholesterol39 mg
Sodium314 mg
Fiber2 g
Sugar61 g

Note: Nutritional values are estimates and can vary based on specific ingredients and portion sizes. This Death by Chocolate Cake is best enjoyed as an occasional treat.

Frequently Asked Questions (FAQ)

Got questions about creating the perfect Death by Chocolate Cake? We have answers to help you succeed.

What makes this cake so moist?

The combination of sour cream, oil, and our special chocolate simple syrup ensures an incredibly moist and tender crumb.

Can I make Death by Chocolate Cake in advance?

Absolutely! You can bake the cake layers and freeze them for up to a month, and the simple syrup can be made weeks ahead.

Is the chocolate simple syrup necessary?

While optional, the simple syrup adds an extra layer of moisture and deep chocolate flavor, highly recommended for this decadent cake.

What kind of cocoa powder should I use?

We recommend dark or Dutch-processed cocoa powder for a richer color and intense chocolate flavor.

How do I prevent my buttercream from being lumpy?

Ensure your melted chocolate is cooled (not hot) before adding it, and scrape the bowl thoroughly to incorporate all ingredients.

Final Thoughts

This Death by Chocolate Cake is more than just a dessert; it’s an experience. Its irresistible richness, moist layers, and luxurious buttercream create a truly unforgettable indulgence. Perfect for any celebration or simply to brighten an ordinary day, this recipe brings joy with every single bite. We encourage you to try this ultimate Death by Chocolate Cake recipe and share your magnificent creations with us! Enjoy the pure bliss of chocolate!

Death by Chocolate Cake

Prep Time 1 hour 40 minutes
Cook Time 30 minutes
Total Time 3 hours
Servings 12 slices
Calories 650
This ultimate decadent Death by Chocolate Cake features moist dark chocolate cake layers, a rich chocolate simple syrup, and a silky smooth chocolate buttercream frosting, all adorned with mini chocolate chips. Perfect for serious chocolate lovers, this impressive dessert is ideal for special occasions.

Equipment

  • Small saucepan
  • Whisk
  • Medium-sized bowl
  • Cake pans (7-inch or 8-inch)
  • parchment paper
  • Large bowl
  • Offset spatula
  • Wire racks
  • Serrated knife
  • Stand mixer (with paddle attachment)
  • Rubber spatula
  • Plastic wrap
  • Greaseproof cake board or flat plate
  • Silicone brush
  • Open star tip (e.g., Wilton 1M)

Ingredients

Chocolate Simple Syrup

  • 1/2 cup water ((120g))
  • 1/2 cup granulated sugar ((100g))
  • 1 Tbsp dark or Dutch-processed cocoa powder ((6g))

Dark Chocolate Cake Layers

  • 2 cups all-purpose flour ((260g))
  • 2 cups granulated sugar ((400g))
  • 3/4 cup dark or Dutch-processed cocoa powder ((75g))
  • 2 tsp baking powder ((8g))
  • 1 1/2 tsp baking soda ((9g))
  • 1 tsp fine salt ((6g))
  • 1 cup water (warm (240g))
  • 1 cup full-fat sour cream (room temperature (255g))
  • 1/2 cup vegetable or canola oil ((110g))
  • 2 large eggs (room temperature (112g))
  • 2 tsp vanilla extract or vanilla bean paste ((8g))
  • 1 tsp instant espresso or coffee (optional (1g))

Chocolate Buttercream Frosting

  • 2 cups unsalted butter ((4 sticks) (452g), room temperature)
  • 1 cup dark baking cocoa (sifted (100g))
  • 1 tsp vanilla extract or vanilla bean paste ((4g))
  • 1/2 tsp fine salt ((3g))
  • 5 cups powdered sugar ((625g))
  • 3/4 cup heavy whipping cream (room temperature (180g))
  • 1 1/3 cups dark chocolate chips (melted and cooled (230g))
  • 2 cups mini chocolate chips ((360g))

Instructions 

Chocolate Simple Syrup

  • Combine water and sugar in a saucepan, whisking over medium heat until boiling.
  • Remove from heat, whisk in cocoa powder, then cool to room temperature in a bowl.

Dark Chocolate Cake Layers

  • Preheat the oven to 350°F/175°C, then grease and line four 7-inch or three 8-inch cake pans.
  • Sift or whisk together flour, sugar, cocoa powder, baking powder, baking soda, and salt in a large bowl.
  • Add warm water, sour cream, oil, eggs, vanilla, and espresso to the dry ingredients, then whisk until just combined.
  • Divide batter into prepared pans and bake for 22-25 minutes, or until a toothpick inserted comes out with a few moist crumbs.
  • Cool cakes in pans for 15 minutes, then transfer to wire racks to finish cooling, or freeze for 30 minutes to retain moisture.
  • Once fully cooled, level the tops of the cake layers with a serrated knife; layers can be wrapped and frozen if made in advance.

Chocolate Buttercream Frosting

  • Beat butter in a stand mixer on medium speed for 30 seconds until smooth.
  • Add cocoa powder, vanilla extract, and salt, mixing on low until fully incorporated, scraping the bowl as needed.
  • Gradually mix in powdered sugar and heavy cream on low speed until combined.
  • Finally, mix in cooled, melted dark chocolate on low speed until fully incorporated and desired consistency is reached, ensuring no lumps of hardened chocolate remain.

Assembling this Death by Chocolate Cake

  • Stack and frost cake layers on a cake board, using a dab of buttercream to secure the first layer.
  • Brush each cake layer with chocolate simple syrup before stacking.
  • Spread an even layer of chocolate buttercream on top of each stacked cake layer, optionally sprinkling with mini chocolate chips for texture.
  • Repeat stacking and frosting, then freeze the cake for about 10 minutes to firm up the buttercream and ease frosting.
  • Cover the cake with a thick, even layer of chocolate buttercream, smoothing with an offset spatula.
  • Press mini chocolate chips around the sides of the cake until fully covered.
  • Decorate as desired, perhaps piping swirls with leftover buttercream, then slice and enjoy.

Notes

For the chocolate simple syrup, it can be stored in an airtight container in the fridge for up to 3 weeks if made in advance. Freezing cake layers (pans and all) for 30 minutes traps steam, making them extra moist; fully cooled and leveled layers can be wrapped and frozen for later use. When making the buttercream, ensure melted chocolate is cool but still fluid and thoroughly mixed to avoid lumps. Freezing the assembled cake for 10 minutes firms up the buttercream, reducing crumbing and making final frosting easier. Don’t worry if the final frosting isn’t perfectly smooth! The finished cake can be stored at room temperature for up to 2 days or in the fridge for up to a week.
Author: Emma Williams Ava
Calories: 650kcal
Course: Cake, Dessert
Cuisine: American, Baking
Keyword: Buttercream, Chocolate Cake, Chocolate Layer Cake, Death by Chocolate Cake

Discover the joy of baking perfect classic chocolate cookies with this incredibly simple recipe. These treats are designed for home bakers of all skill levels, promising a delightful experience from start to finish. You can easily customize this recipe with your favorite additions, making each batch uniquely yours. Prepare to enjoy the ultimate chocolate cookie, boasting a rich flavor and a wonderfully soft texture that everyone will adore.

Table of Contents

Why You’ll Love These Classic Chocolate Cookies

  • You will quickly fall in love with these decadent cookies for several compelling reasons. First, their preparation is wonderfully easy and fast, perfect for satisfying sudden cravings.
  • Next, they offer a truly rich and deep chocolate flavor, a hallmark of well-crafted treats. Expect a delightful medium-soft texture that melts in your mouth with every bite.
  • The possibilities for customization are truly endless, allowing you to tailor each batch to your preference. Finally, these versatile cookies are perfect for any occasion, from casual snacks to elegant dessert spreads.

Ingredients

Gather these high-quality ingredients to create your unforgettable classic chocolate cookies:

  • 8 tablespoons (113g) unsalted butter, room temperature
  • 1/2 cup (99g) granulated sugar
  • 1/3 cup (71g) light brown sugar or dark brown sugar, packed
  • 1/3 cup (28g) Dutch-process cocoa or King Arthur Triple Cocoa Blend
  • 1/2 teaspoon table salt
  • 1/4 teaspoon baking soda
  • 1/2 teaspoon baking powder
  • 1 teaspoon King Arthur Pure Vanilla Extract
  • 1 large egg
  • 2 tablespoons (28g) milk, (optional, if you add chips/nuts/fruit)
  • 1 cup plus 2 tablespoons (134g) King Arthur Unbleached All-Purpose Flour
  • 1 teaspoon espresso powder, optional; for depth of flavor
  • 2 cups (227g to 340g) chips, nuts, and/or dried fruit, optional but good

Notes & Substitutions

Selecting the right cocoa makes a big difference in these cocoa cookies. Dutch-process cocoa, or King Arthur Triple Cocoa Blend, provides a darker color and a smoother, less bitter flavor compared to natural cocoa.

Understanding the unique properties of Dutch-process cocoa, such as its neutral pH, is crucial for achieving the desired taste and appearance in baked goods. If using natural cocoa, you might adjust the baking soda slightly as they react differently.

The optional milk hydrates the dough when you add extra ingredients like chips or nuts, ensuring a consistent texture. For deep flavor, the espresso powder is fantastic but completely optional; omit it if you prefer. Ensure your butter is at room temperature for smooth creaming; cold butter will not incorporate well.

Both light and dark brown sugars work beautifully; dark brown sugar offers a richer, molasses-like note.

Equipment

You need only a few essential tools for these delicious homemade chocolate rounds.

How To Make Classic Chocolate Cookies

Follow these simple steps to bake your perfect batch of classic chocolate cookies:

Step 1: Preheat Oven & Prepare Sheets
Preheat your oven to 375°F (190°C). Lightly grease two baking sheets or line them with parchment paper or silicone baking mats. This prevents sticking and ensures even baking.

Step 2: Cream Wet & Dry Bases
In a large bowl, or the bowl of your stand mixer, combine the room temperature butter, granulated sugar, and brown sugar. Beat them together on medium speed until they become light and fluffy, about 2–3 minutes. Next, add the Dutch-process cocoa powder, table salt, baking soda, baking powder, and vanilla extract to the creamed mixture.

Continue beating until all ingredients are well blended and the mixture is uniform in color and texture. Scrape down the sides of the bowl to ensure everything incorporates fully. This step builds the foundation for the rich chocolate flavor.

Step 3: Incorporate Egg & Milk (if using add-ins)
Add the large egg to the mixture. Beat on medium speed until the egg is fully incorporated and the mixture is smooth, about 1 minute. Scrape the sides of the bowl once more, then beat briefly again to ensure complete smoothness.

If you plan to include chips, nuts, or dried fruit in your cookies, now is the time to beat in the 2 tablespoons of milk. The milk adds extra moisture to balance the dry additions, maintaining the perfect dough consistency. If you’re baking plain cookies without add-ins, omit the milk entirely.

Step 4: Mix in Flour & Espresso Powder
Add the King Arthur Unbleached All-Purpose Flour and the optional espresso powder to the wet ingredients. Mix on low speed, or by hand with a spatula, until just combined. Be careful not to overmix the dough, as this can lead to tough cookies.

Mix only until no streaks of dry flour remain. The espresso powder, though optional, greatly enhances the chocolate flavor without making the cookies taste like coffee.

Step 5: Stir in Optional Add-ins
If you are using chips, nuts, or dried fruit, gently fold them into the dough now. Use a rubber spatula to evenly distribute your chosen add-ins throughout the dough. Avoid overworking the dough during this step.

Step 6: Scoop Dough onto Sheets
Using a tablespoon-sized cookie scoop, or two measuring teaspoons, drop the cookie dough onto the prepared baking sheets. Space the dough balls about 2 inches apart to allow for proper spreading during baking. This spacing ensures even air circulation around each cookie.

Step 7: Bake & Cool
Bake the classic chocolate cookies for 12 to 14 minutes. They are ready when they have lost their shiny appearance and the edges look set, though the centers may still seem slightly soft. Do not overbake. Remove the baking sheets from the oven.

You can either cool the cookies directly on the pans for a chewier texture or carefully transfer them to a wire rack to cool completely. Cooling on the pan for a few minutes before transferring helps them firm up.

Step 8: Serve & Store
Serve your delicious homemade chocolate rounds slightly warm for the best experience, or at room temperature. The warm, gooey chocolate is truly irresistible. For storage, place cooled cookies in an airtight container at room temperature for several days. For longer preservation, freeze them.

Pro Tips & Troubleshooting

Achieve the perfect cookie texture by not overbaking; the centers should look just set, not hard. To prevent cookies from spreading too much, ensure your butter is at room temperature, not melted.

Chilling the dough for 30 minutes can also help. For even baking, rotate your baking sheets halfway through the bake time. If you desire smaller cookies, reduce the baking time by a couple of minutes.

To ensure deep chocolate flavor, use high-quality Dutch-process cocoa and consider adding the optional espresso powder. As highlighted by the Institute of Culinary Education, understanding the science of cookie baking is key to consistently achieving desired results, from texture to flavor. Remember, never overmix the dough after adding flour; mix only until combined to keep your rich chocolate biscuits tender.

Serving, Storage & Variations

Serve your freshly baked classic chocolate delights warm with a tall glass of cold milk, a hot cup of coffee, or alongside a scoop of vanilla bean ice cream for an indulgent dessert. Store cooled cookies in an airtight container at room temperature for up to 3-4 days.

For longer storage, freeze baked cookies for up to 2 months; flash freeze them on a baking sheet first, then transfer to a freezer bag. You can also freeze portions of raw cookie dough for future baking.

Experiment with different types of chocolate chips like semi-sweet, dark, milk, or even white chocolate. Mix in chopped nuts such as walnuts, pecans, or almonds for added crunch and flavor.

Dried fruits like cherries, cranberries, or finely diced apricots also make wonderful additions. Boost the flavor with a dash of almond extract, a pinch of cinnamon, or orange zest for a vibrant twist.

Nutrition Information

Enjoy these homemade treats responsibly. Each serving provides a balance of energy and delightful taste.

NutrientAmount
Serving Size1 cookie (28g)
Calories120 calories
Carbohydrate Content16g
Cholesterol Content25mg
Fiber Content0g
Protein Content2g
Sodium Content105mg
Sugar Content10g
Fat Content6g
Saturated Fat Content3.5g
Trans Fat Content0g

Nutrition information is an estimate based on ingredients and preparation.

Frequently Asked Questions (FAQ)

Why are my classic chocolate cookies flat?

Flat cookies often result from over-softened butter, not enough flour, or overmixing the dough. Ensure your butter is at room temperature, not melted, and measure your flour accurately. Chilling the dough for 30 minutes can also help.

Can I use natural cocoa powder?

Yes, you can use natural cocoa powder, but the flavor will be slightly lighter, and the color less dark. You might also want to slightly adjust the baking soda, as natural cocoa is acidic and reacts differently with leaveners.

How long do classic chocolate cookies last?

These cookies stay fresh for 3-4 days when stored in an airtight container at room temperature. For longer preservation, you can freeze them for up to two months.

Can I freeze cookie dough?

Absolutely! Scoop the dough onto a parchment-lined baking sheet and freeze until firm, then transfer to a freezer-safe bag. Bake from frozen, adding a few minutes to the baking time.

What makes these cookies “medium-soft”?

The combination of brown sugar, butter, and precise baking time contributes to their delightful medium-soft texture. Avoid overbaking to maintain their chewiness rather than becoming crunchy.

Best way to measure flour?

Spoon flour into your measuring cup and then level it off with a straight edge. Do not scoop directly from the bag, as this compacts the flour and can result in too much flour.

Final Thoughts

This recipe makes it incredibly simple to create a batch of unbelievably delicious classic chocolate cookies. With their rich flavor, perfect medium-soft texture, and endless customization options, these treats are sure to become a family favorite.

We encourage you to try this recipe today and experience the joy of baking perfect cookies. Don’t forget to share your wonderful creations with us! These gooey chocolate goodness treats are a true culinary delight.

Classic Chocolate Cookies Recipe

Prep Time 20 minutes
Cook Time 14 minutes
Total Time 34 minutes
Servings 24 cookies
Calories 180
Indulge in these irresistible classic chocolate cookies, featuring a rich cocoa flavor, a perfect balance of sweetness, and optional delicious add-ins like chips, nuts, or dried fruit. They are easy to make and perfect for any occasion.

Equipment

  • Baking sheets
  • parchment paper
  • Mixing bowl
  • Spatula
  • Tablespoon cookie scoop
  • Cooling Rack

Ingredients

Main Ingredients

  • 8 tablespoons (113g) unsalted butter (room temperature)
  • 1/2 cup (99g) granulated sugar
  • 1/3 cup (71g) brown sugar (packed)
  • 1/3 cup (28g) Dutch-process cocoa
  • 1/2 teaspoon table salt
  • 1/4 teaspoon baking soda
  • 1/2 teaspoon baking powder
  • 1 teaspoon vanilla extract
  • 1 large egg
  • 2 tablespoons (28g) milk (optional, if you add chips/nuts/fruit)
  • 1 cup plus 2 tablespoons (134g) all-purpose flour
  • 1 teaspoon espresso powder (optional; for depth of flavor)
  • 2 cups (227g to 340g) chips, nuts, and/or dried fruit (optional but good)

Instructions 

Preparation

  • Preheat the oven to 375°F and prepare two baking sheets by lightly greasing them or lining with parchment paper.
  • In a bowl, beat together the butter, sugars, cocoa powder, salt, baking soda, baking powder, and vanilla until well blended.
  • Add the egg, beating until smooth; scrape the sides of the bowl and beat again. If adding chips, nuts, or dried fruit, beat in the 2 tablespoons of milk, otherwise omit it.
  • Add the flour and optional espresso powder, mixing to combine.
  • Stir in the chips, nuts, etc., if you are using them.
  • Drop tablespoonfuls of dough onto the prepared baking sheets, spacing them about 2 inches apart; a tablespoon cookie scoop works well here.
  • Bake the cookies for 12 to 14 minutes until they have lost their shiny appearance and look set, then cool them on the pans or transfer to a rack.
  • Serve the chocolate cookies slightly warm or at room temperature; store in an airtight container for several days or freeze for longer storage.

Notes

The milk is optional and should only be added if you’re including chips, nuts, or dried fruit. A tablespoon cookie scoop is recommended for consistent cookie size. Store cookies in an airtight container at room temperature for several days, or freeze for longer storage.
Author: Emma Williams Ava
Calories: 180kcal
Course: Dessert, Snack, Treat
Cuisine: American
Keyword: Chocolate Cookies, Cocoa Cookies, Easy Cookies, Soft Cookies

Welcome to the ultimate cozy indulgence! Imagine your favorite warm mug of cocoa transformed into a delightful cookie. These hot chocolate cookies are perfectly soft, wonderfully chewy, and packed with pockets of melty marshmallows. They are incredibly easy to make, delivering that classic comforting flavor in every bite. Whether you’re planning for holidays, a cookie exchange, or simply craving a sweet treat, these hot chocolate cookies are sure to become a cherished recipe.

Table of Contents

Why You’ll Love These Hot Chocolate Cookies

Prepare to fall in love with these delightful hot chocolate cookies. They combine beloved flavors with an irresistible texture, making them a must-bake for any cookie enthusiast.

  • Authentic Hot Chocolate Flavor: Enjoy a rich, deep cocoa taste that truly captures the essence of a warm drink.
  • Perfect Texture: Each cookie offers a soft, chewy bite, complemented by pockets of delightful, melty marshmallows.
  • Simple & Straightforward: This recipe is as easy to follow as your favorite classic chocolate chip cookies, perfect for all skill levels.
  • Holiday Hit: These treats are ideal for gifting, adding to festive cookie platters, or serving at seasonal gatherings.
  • Family Favorite: Guaranteed to please every member of your family, from the youngest to the oldest.
  • Versatile: Easily adapt the recipe by experimenting with different types of chocolate chips to suit your preference.

Ingredients

Crafting these delightful hot chocolate cookies begins with a selection of pantry staples and a couple of special additions. Each ingredient plays a crucial role in achieving their signature flavor and texture.

  • 1 cup (2 sticks) butter, softened
  • 1 cup granulated sugar
  • 2/3 cup brown sugar, packed
  • 2 large eggs
  • 1 teaspoon vanilla extract
  • 3 1/4 cups all-purpose flour
  • 4 packages hot cocoa mix or 3/4 cups hot cocoa mix – NOT SUGAR FREE VERSIONS
  • 1 teaspoon salt
  • 1 teaspoon baking soda
  • 1 teaspoon baking powder
  • 1 cup chocolate chips (semi-sweet or milk chocolate)
  • 1 cup Mallow Bits (dehydrated marshmallows)

Notes & Substitutions

Careful attention to ingredients ensures the best outcome for your hot chocolate cookies.

  • Hot Cocoa Mix: Use a regular, high-quality hot cocoa mix for the best flavor. Avoid sugar-free varieties, as they can alter the texture and taste significantly. Simple mixes like Swiss Miss work wonderfully.
  • Mallow Bits: These are crucial for the desired texture. Mallow Bits are dehydrated marshmallows that hold their shape better during baking, melting into delightful pockets. Regular mini marshmallows will melt completely and create a sticky mess, so they are not recommended.
  • Flour: To measure flour accurately, always spoon it lightly into your measuring cup, then level it off with a straight edge. This prevents over-measuring, which can lead to dry, dense cookies.
  • Butter: Ensure your butter is truly softened, not melted. Softened butter creams properly with sugar, creating the necessary air pockets for a light and tender cookie.
  • Chocolate Chips: Feel free to customize with your favorite chocolate chips. Dark chocolate, milk chocolate, or even white chocolate chips all work beautifully in these cookies.

Equipment

Having the right tools ready makes the baking process smooth and enjoyable. You likely have most of these essential items already in your kitchen.

How To Make Hot Chocolate Cookies

Follow these simple steps to create a batch of perfect hot chocolate cookies. Precision and patience are key to achieving their irresistible texture and flavor.

  1. Prepare Wet Ingredients: In a large mixing bowl, use your stand mixer or hand mixer to beat the softened butter, granulated sugar, and brown sugar until the mixture is light and fluffy. This typically takes about 2-3 minutes.
  2. Add Eggs & Vanilla: Crack in the two large eggs one at a time, mixing well after each addition until fully incorporated. Stir in the vanilla extract, ensuring it is thoroughly combined with the butter and sugar mixture.
  3. Combine Dry Ingredients: In a separate medium-sized bowl, whisk together the all-purpose flour, hot cocoa mix, salt, baking soda, and baking powder. Whisk for about 30 seconds to ensure all ingredients are evenly distributed.
  4. Mix Dough: Gradually add the dry ingredient mixture to the wet mixture, beating on low speed until just blended. Be careful not to overmix, as this can lead to tough cookies. Stop mixing as soon as no streaks of flour remain.
  5. Fold In Mix-ins: Gently stir in the chocolate chips and Mallow Bits using a rubber spatula or a wooden spoon. Fold them in until they are evenly distributed throughout the cookie dough.
  6. Preheat Oven: When you are ready to bake, preheat your oven to 350°F (175°C). Line your baking sheets with parchment paper or silicone baking mats to prevent sticking and promote even baking.
  7. Scoop & Place: Using a 2-tablespoon cookie scoop, drop rounded balls of dough onto the prepared baking sheets. Place them about 2 inches apart to allow for spreading during baking.
  8. Bake Cookies: Bake the hot chocolate cookies for 9 to 11 minutes. Look for edges that are lightly browned and centers that appear set but still look soft. Do not overbake.
  9. Cool Cookies: Remove the baking sheets from the oven and let the cookies cool on the sheets for 5 minutes. This allows them to set up further. Afterward, carefully transfer them to wire racks to cool completely.

Pro Tips & Troubleshooting

Achieving perfect hot chocolate cookies is simple with a few expert insights. Here are some tips to guide you and common issues to avoid.

  • Dough Consistency: Expect the dough to be quite thick and slightly dry. Resist the urge to add extra liquid, as this can throw off the texture. The thick dough helps create a chewy cookie.
  • Preventing Marshmallow Melt: Mallow Bits are designed to hold up well, but if you’re concerned about them melting too much, you can press a few extra Mallow Bits onto the top of each scooped dough ball right before baking.
  • Achieving Perfect Texture: Chilling the dough is a non-negotiable step. Chilling for at least 30 minutes allows the flavors to meld and prevents the cookies from spreading too much, resulting in a thicker, chewier cookie.
  • Accurate Flour Measurement: Always spoon flour into your measuring cup, then level it off with a straight edge. Scooping directly from the bag compacts the flour, leading to an excess amount and dry cookies.
  • Darker Color Cookies: For a richer, darker chocolate appearance in your hot chocolate cookies, stir in an extra tablespoon of unsweetened cocoa powder when combining the dry ingredients. This enhances both color and depth of flavor.
  • Don’t Overbake: Overbaking is the enemy of soft, chewy cookies. Remove them from the oven when the edges are lightly browned but the centers still look slightly soft. They will continue to set as they cool on the baking sheet.

Common Mistakes

  • Using sugar-free hot cocoa mix, which can drastically alter the cookie’s texture and flavor profile.
  • Adding regular mini marshmallows instead of Mallow Bits; these will completely melt and create a sticky, hard-to-handle mess.
  • Skipping the dough chilling step, which often leads to flat, overly spread-out cookies.
  • Scooping flour directly from the bag, resulting in too much flour and dry, crumbly cookies.

Serving, Storage & Variations

These hot chocolate cookies are incredibly versatile, offering delightful ways to enjoy and customize them.

  • Serving Suggestions: These cookies are a match made in heaven with a warm mug of, you guessed it, hot cocoa! For an extra festive touch, pair them with peppermint hot chocolate.
  • Storage: Store your baked cookies in an airtight container at room temperature. They will stay fresh and delicious for up to 5 days, though they rarely last that long!
  • Freezing Baked Cookies: To enjoy later, place fully cooled cookies in a single layer on a baking sheet to flash freeze for about an hour. Then, transfer them to a freezer-safe bag or container, separating layers with parchment paper. They can be frozen for up to 3 months. Thaw them at room temperature when ready to enjoy.
  • Freezing Dough: Scoop the raw dough into individual balls and place them on a parchment-lined baking sheet. Freeze until solid, then transfer the frozen dough balls to a freezer-safe bag. You can bake them directly from frozen, adding 1-2 minutes to the bake time.
  • Flavor Variations: Get creative! Use different types of chocolate chips like dark chocolate, white chocolate, or even butterscotch chips. Experiment with flavored hot cocoa mixes such as peppermint or cinnamon for seasonal twists on your hot chocolate cookies.
  • Topping Ideas: Before serving, dust cooled cookies with a sprinkle of powdered sugar for a “snowy” effect. Drizzle with melted chocolate or sprinkle with crushed candy canes for extra festive flair.

Nutrition Information

Understanding the nutritional content can be helpful for meal planning. Below are estimated values for these delicious hot chocolate cookies.

NutrientAmount
Calories157.26 kcal
Carbohydrates22.93 g
Protein1.8 g
Fat6.65 g
Saturated Fat4.07 g
Cholesterol23.4 mg
Sodium150.58 mg
Potassium44.82 mg
Fiber0.44 g
Sugar13.55 g
Vitamin A181.98 IU
Vitamin C0.03 mg
Calcium23.38 mg
Iron0.67 mg

Disclaimer: These values are estimated per cookie (1 serving) and can vary based on specific ingredients and brands used. Please verify with a personal nutritional calculator if precise values are needed for dietary planning.

Frequently Asked Questions

Get quick answers to common questions about making perfect hot chocolate cookies.

Why are my hot chocolate cookies flat?

Flat cookies are often due to insufficient dough chilling, which allows the butter to melt too quickly, or inaccurate flour measurement resulting in too little flour.

Can I use regular mini marshmallows instead of Mallow Bits?

It is not recommended to use regular mini marshmallows as they melt completely and create a sticky, messy cookie. Stick to Mallow Bits for the best results.

Can I freeze hot chocolate cookie dough?

Yes, you can freeze scooped dough balls. Place them on a baking sheet until firm, then transfer to a freezer-safe bag and bake from frozen with a few extra minutes added to the baking time.

What kind of hot cocoa mix works best for these cookies?

Simple, non-sugar-free hot cocoa mixes, like classic Swiss Miss, are ideal. Avoid specialty or sugar-free mixes for optimal texture and flavor.

How do I get a richer, darker chocolate color in my cookies?

To achieve a deeper chocolate color, add an extra tablespoon of unsweetened cocoa powder to your dry ingredients alongside the hot cocoa mix.

Final Thoughts

These hot chocolate cookies truly embody the spirit of cozy comfort, bringing the beloved taste of a warm cocoa mug into a perfect cookie form. Their irresistibly soft, chewy texture, combined with delightful pockets of marshmallow, makes them a standout treat for any occasion.

We encourage you to try this recipe and experience the joy and simplicity of creating these wonderful cookies in your own kitchen. We can’t wait to hear how these delicious hot chocolate cookies brighten your day!

The origins of hot chocolate can be traced back to the ancient Mayan civilization, as detailed by the Institute of Culinary Education, where it was consumed in a bitter, frothy form. Learn more about the history of hot chocolate.

Hot Chocolate Cookies

Prep Time 45 minutes
Cook Time 10 minutes
Total Time 55 minutes
Servings 24 cookies
Calories 300
These hot chocolate cookies are a delightful cozy treat, combining rich chocolate flavor with melty marshmallow bits. Perfect for a chilly day, they offer a comforting twist on classic cookies.

Equipment

  • standing mixer
  • Large bowl
  • bowl
  • Baking sheets
  • silicone baking mats or parchment paper
  • Wire racks

Ingredients

Cookie Dough

  • 1 cup butter (softened)
  • 1 cup sugar
  • 2/3 cup brown sugar
  • 2 large eggs
  • 1 teaspoon vanilla
  • 3 1/4 cups all purpose flour
  • 4 packages hot cocoa mix (or 3/4 cups hot cocoa mix – NOT SUGAR FREE VERSIONS)
  • 1 teaspoon salt
  • 1 teaspoon baking soda
  • 2 teaspoon baking powder
  • 1 cup chocolate chips
  • 1 cup Mallow Bits (mini marshmallows do not work the same and can be a bit of a sticky mess)

Instructions 

Instructions

  • In a large bowl, beat softened butter and sugars until light and fluffy, then mix in eggs and vanilla until well combined.
  • Combine dry ingredients in a separate bowl, then gradually beat them into the butter mixture until blended. Stir in chocolate chips and Mallow Bits, then cover and chill the dough for at least 30 minutes.
  • Preheat oven to 350 degrees F. Drop 2 tablespoon portions of dough onto lined baking sheets and bake for 9-11 minutes until edges are lightly browned. Cool cookies on baking sheets for 5 minutes before transferring to wire racks to cool completely.

Notes

Make sure to use Mallow Bits, as mini marshmallows can become sticky. Do not use sugar-free hot cocoa mix for best results.
Author: Emma Williams Ava
Calories: 300kcal
Course: Dessert, Snack, Treat
Cuisine: American
Keyword: Holiday Cookies, Hot Chocolate Cookies, Marshmallow Cookies

Welcome to a world of rich, chocolatey bliss! These aren’t just any cookies; they are intensely flavored, boasting a texture that beautifully bridges the gap between a fudgy brownie and a perfectly chewy cookie. Every bite delivers a satisfying depth of cocoa. Our recipe for these incredible double chocolate cookies draws inspiration from classic techniques, ensuring a truly unforgettable experience. Prepare to indulge in a treat that’s both comforting and elevated.

Table of Contents

Why You’ll Love These Double Chocolate Cookies

  • Irresistibly Fudgy Texture: Enjoy a thick, chewy interior that melts in your mouth with every bite.
  • Crinkly, Cracker Exterior: These cookies feature a beautiful, satisfyingly crisp outer shell.
  • Balanced Sweet and Salty Notes: A touch of flaky sea salt perfectly complements the sweetness of the chocolate.
  • Deep Chocolate Flavor: Two forms of chocolate ensure an intense, complex cocoa experience.
  • Perfect for Any Occasion: Share them with loved ones or keep them all to yourself for a luxurious personal indulgence.

Ingredients for Double Chocolate Cookies

Crafting the perfect batch of double chocolate cookies begins with high-quality ingredients. Each component plays a crucial role in achieving their signature rich flavor and delightful texture.

1 cup all-purpose flour
1/3 cup unsweetened cocoa powder
1/2 tsp. baking soda
5 TBS unsalted butter, at room temperature
1 cup granulated sugar
1 tsp. Maldon flaky sea salt* + more for sprinkling (optional)
1 large egg, at room temperature
1 TBS. vanilla extract
3.5 oz good quality dark chocolate (70% cocoa), roughly chopped

Notes & Substitutions

High-quality dark chocolate (70% cocoa) provides a robust, complex flavor without being overly sweet. You can substitute with another quality dark chocolate if preferred.

While Maldon flaky sea salt offers a delicate crunch and burst of flavor, you can use kosher salt or even a pinch of fine table salt as alternatives. Ensure all your cold ingredients, especially butter and egg, reach room temperature. This allows them to cream together properly, creating a smooth, emulsified batter.

For the cocoa powder, natural unsweetened cocoa yields a lighter color and sharper chocolate taste, while Dutch-processed cocoa gives a darker, milder flavor. As King Arthur Baking explains, natural cocoa powder is lighter and more acidic than Dutch-processed cocoa. Either works well in this rich cookie recipe.

Equipment You’ll Need

Gathering your tools before you begin ensures a smooth baking process. You will not need anything specialized for these double chocolate cookies.

How to Make Double Chocolate Cookies (Step-by-Step Instructions)

Follow these detailed steps to create your own batch of truly decadent double chocolate cookies. Precision and patience will yield the best results for these rich, chewy treats.

  1. Step 1: Combine Dry Ingredients. Measure the flour, unsweetened cocoa powder, and baking soda into a medium-sized bowl. Use a fork or a whisk to stir them together thoroughly. This ensures the leavening agent and cocoa are evenly distributed, preventing pockets of unmixed ingredients in your finished cookies. Set this mixture aside.
  2. Step 2: Cream Butter and Sugar. In a large mixing bowl, either by hand with a rubber spatula or using a stand mixer fitted with the paddle attachment, cream together the softened unsalted butter and granulated sugar. Mix on medium speed for about 5-6 minutes. Continue mixing until the mixture lightens in color and the sugar is completely incorporated into the butter. The texture will be more sandy than fluffy due to the specific butter-to-sugar ratio, which is ideal for these fudgy cookies.
  3. Step 3: Add Wet Ingredients. In a separate small bowl, whisk the large egg and vanilla extract until they are well blended. Gradually add this egg mixture to the creamed butter and sugar. Mix on low speed until everything is fully incorporated. Remember to scrape down the sides of the bowl with your rubber spatula as needed. This ensures all ingredients are evenly combined, contributing to a consistent cookie dough.
  4. Step 4: Mix in Dry and Chocolate. Add the prepared flour mixture to the wet ingredients. Mix on low speed, or gently fold by hand, until just combined. Be careful not to overmix, as this can lead to tough cookies. Finally, add the roughly chopped dark chocolate chunks to the dough. Mix briefly, just enough to evenly distribute the chocolate throughout the rich dough. This ensures every bite of your double chocolate cookies features those delightful melty morsels.
  5. Step 5: Chill the Dough. Cover the bowl containing the cookie dough tightly with plastic wrap. Transfer the covered bowl to the refrigerator and chill for at least 3 hours. For even better flavor development and texture, you can chill the dough for as long as 5 days. Chilling the dough helps prevent the cookies from spreading too much during baking and intensifies the chocolate flavor.
  6. Step 6: Prepare for Baking. Once the dough is sufficiently chilled, preheat your oven to 350ºF (175ºC). Line two large baking sheets with parchment paper. Parchment paper prevents sticking and ensures even baking, making cleanup a breeze.
  7. Step 7: Shape Cookies. Divide the chilled dough into 9 equal portions. Each portion should be approximately 1/4 cup in size. Roll each portion into a smooth ball between your palms. Place the dough balls evenly spaced over the prepared baking sheets. Remember to leave plenty of room between them, as these double chocolate cookies will spread considerably while baking. Gently press each ball down with the palm of your hand or the bottom of a glass to form thick, even disks. This flattening encourages the characteristic crinkled top.
  8. Step 8: Bake Cookies. Place one baking sheet in the preheated oven. Bake for 6 minutes. After 6 minutes, carefully rotate the baking sheet 180 degrees to ensure even baking. Continue baking for another 5-6 minutes, or until the edges are set and the centers still look slightly soft. Do not overbake these rich chocolate treats.
  9. Step 9: Cool and Finish. Remove the cookies from the oven. If desired, immediately sprinkle them with a very light dusting of flaky sea salt. The cookies are already well-seasoned from the dough, but the extra salt adds a beautiful aesthetic and a delightful flavor contrast. Allow the cookies to cool for at least 10 minutes directly on the baking sheet. This allows them to finish setting up and prevents them from breaking when you transfer them. After 10 minutes, move them to a wire rack to cool completely.

Pro Tips for Perfect Double Chocolate Cookies

Achieving bakery-quality double chocolate cookies is easy with a few expert insights. These tips will elevate your baking experience and ensure fantastic results every time.

  • Room Temperature is Key: Ensure butter and egg are at room temperature for a smooth, emulsified dough that bakes evenly.
  • Do Not Overmix: Mix the dry ingredients and chocolate chips only until just combined to keep the cookies tender.
  • Chill Dough Thoroughly: Chilling for at least 3 hours prevents excessive spreading and deepens the chocolate flavor.
  • Flatten Dough Balls: Gently press down each dough ball before baking to achieve that signature crinkly top and chewy texture.
  • Avoid Overbaking: Remove the cookies from the oven when the edges are set but the centers are still slightly soft; they will continue to cook as they cool.
  • Flaky Sea Salt: A sprinkle of flaky sea salt after baking enhances the rich chocolate notes and adds a delightful textural contrast to your double chocolate cookies.

Serving, Storing, and Variations

These double chocolate cookies are versatile and delicious in many ways. You can serve them warm, store them for later, or adapt the recipe to create new flavor combinations.

Serving Suggestions

Enjoy these delectable cookies with a tall glass of cold milk, alongside a hot cup of coffee, or as an elegant dessert paired with a scoop of vanilla bean ice cream. They are equally wonderful on their own.

Storage

Store baked double chocolate cookies in an airtight container at room temperature for up to 3-5 days. For optimal freshness, place a slice of bread in the container to help keep them soft.

Freezing

You can freeze baked cookies for up to 3 months. Let them cool completely, then place them in an airtight freezer-safe bag or container. You can also freeze cookie dough balls: scoop and shape, then freeze on a parchment-lined tray until solid. Transfer to a freezer bag and bake from frozen, adding a few extra minutes to the baking time.

Variations

  • Extra Chocolate Chips: Stir in white chocolate chips, milk chocolate chips, or even peanut butter chips for diverse flavors.
  • Nutty Crunch: Fold in chopped pecans, walnuts, or almonds for added texture and a rich, toasted note.
  • Spiced Delights: Incorporate a pinch of cinnamon, espresso powder, or even a touch of cayenne for a subtle kick that enhances the chocolate.
  • Flavor Extracts: Experiment with peppermint extract for a holiday twist, or almond extract for a nuanced, nutty aroma.

Double Chocolate Cookies Nutrition

Understanding the nutritional aspects of your homemade treats can be helpful. Please note that the following is an approximate nutritional guide for these double chocolate cookies.

NutrientAmount Per Cookie (approx.)
Calories220-250 kcal
Total Fat12-15g
Saturated Fat7-9g
Cholesterol25-30mg
Sodium120-150mg
Total Carbohydrates28-32g
Dietary Fiber2-3g
Total Sugars20-24g
Protein3-4g

This information is an estimate based on typical ingredient values. For precise nutritional data tailored to your specific ingredients, consider using an online nutrition calculator.

Double Chocolate Cookies FAQ

Here are answers to common questions about making these delicious double chocolate cookies. These insights will help you achieve perfect results every time.

Why are my cookies flat?

Flat cookies often result from dough that is too warm, butter that is too soft, or a lack of chilling time. Ensure your dough is properly chilled for at least three hours.

Can I freeze cookie dough?

Yes, you absolutely can! Scoop and roll the dough into balls, then freeze them on a baking sheet before transferring to an airtight freezer bag for several weeks.

What’s the best cocoa for this recipe?

Both natural unsweetened cocoa and Dutch-processed cocoa work well, offering slightly different flavor profiles. Choose based on your preference for a sharper or milder chocolate taste.

Can I omit the sea salt?

You can omit the extra sprinkling of flaky sea salt, but it truly enhances the deep chocolate flavor and adds a fantastic textural element. The dough itself is already well-seasoned.

How long do these cookies last?

When stored in an airtight container at room temperature, these double chocolate cookies maintain their freshness and deliciousness for 3 to 5 days.

Final Thoughts

These decadent double chocolate cookies offer an irresistible blend of rich cocoa flavor and a wonderfully chewy, fudgy texture. They prove that professional culinary techniques can be easily mastered in any home kitchen, yielding truly exceptional results.

We encourage you to try this recipe and experience the pure joy of baking these fantastic chocolate treats. Share them with friends and family, or savor them yourself. Happy baking!

Decadent Double Chocolate Cookies Recipe

Prep Time 30 minutes
Cook Time 12 minutes
Total Time 3 hours 42 minutes
Servings 9 cookies
Calories 320
This recipe yields decadent double chocolate cookies with a rich, sandy texture, packed with dark chocolate chunks and a hint of sea salt, requiring a minimum of 3 hours chilling time.

Equipment

  • Medium-sized bowl
  • fork
  • Stand mixer (optional)
  • Rubber spatula
  • refrigerator
  • Oven
  • Baking sheets
  • parchment paper

Ingredients

Cookie Dough

  • 1 cup all-purpose flour
  • 1/3 cup unsweetened cocoa powder
  • 1/2 tsp. baking soda
  • 5 TBS unsalted butter (at room temperature)
  • 1 cup sugar
  • 1 tsp. Maldon flaky sea salt (+ more for sprinkling (optional))
  • 1 egg (at room temperature)
  • 1 TBS. vanilla extract
  • 3.5 oz dark chocolate (70% cocoa) (good quality, roughly chopped)

Instructions 

Preparation

  • Measure and combine flour, cocoa, and baking soda in a medium bowl using a fork.
  • Cream softened butter and sugar together for 5-6 minutes until the mixture lightens and sugar is fully incorporated.
  • In a separate bowl, whisk the egg and vanilla, then add to the butter-sugar mixture and mix on low speed until fully incorporated, scraping the bowl as needed.
  • Add the flour mixture and mix until just combined, then fold in the chocolate chunks to distribute them evenly throughout the dough; cover and chill the dough in the refrigerator for at least 3 hours or up to 5 days.

Baking

  • Preheat the oven to 350ºF and line two baking sheets with parchment paper.
  • Divide the chilled dough into 9 equal 1/4 cup portions, roll into balls, and arrange them with ample space on the prepared baking sheets, then gently flatten into thick, even disks.
  • Bake for 6 minutes, rotate the pans, and continue baking for another 5-6 minutes; remove, optionally sprinkle with flaky salt, and cool on the baking sheet for 10 minutes.

Notes

The dough requires a minimum of 3 hours chilling time, and can be stored for up to 5 days. These cookies spread significantly, so ensure ample space on baking sheets. Optional flaky sea salt can be added for aesthetic appeal, but the cookies are already well-seasoned.
Author: Emma Williams Ava
Calories: 320kcal
Course: Cookie, Dessert, Snack
Cuisine: American
Keyword: Chewy Cookies, Cocoa Powder, Double Chocolate Cookies, Fudgy Cookies

Embrace the irresistible allure of cranberry white chocolate cookies, a timeless pairing that truly delights. These cookies offer a perfect balance of soft, chewy texture with bursts of tart cranberries and sweet white chocolate. This straightforward recipe makes it incredibly easy to whip up a batch of these popular treats. They are perfect for holiday gatherings or simply to enjoy as a comforting snack any time of year.

Table of Contents

Why You’ll Love These Cranberry White Chocolate Cookies

  • Soft-Baked Perfection: Enjoy a wonderfully soft and chewy cookie texture with every bite.
  • Irresistible Flavor Combination: The vibrant tartness of cranberries perfectly complements the creamy sweetness of white chocolate.
  • Rich, Buttery Base: A delicious foundation of rich butter and brown sugar creates an addictive depth of flavor.
  • Effortless Baking: Follow easy, straightforward recipe instructions to achieve bakery-quality results at home.
  • Freezer-Friendly Dough: Prepare the dough ahead of time and freeze it, making fresh cranberry white chocolate cookies whenever a craving strikes.

Ingredients for Cranberry White Chocolate Cookies

Here are the ingredients you’ll need to create these amazing cranberry white chocolate cookies:

  • ¾ cup (12 Tbsp; 170g) unsalted butter, softened to room temperature
  • ¾ cup (150g) packed light or dark brown sugar (I use dark)
  • ¼ cup (50g) granulated sugar
  • 1 large egg, at room temperature
  • 2 teaspoons pure vanilla extract
  • 2 cups (250g) all-purpose flour (spooned & leveled)
  • 2 teaspoons cornstarch (cornflour)
  • 1 teaspoon baking soda
  • ½ teaspoon salt
  • ¾ cup (135g) white chocolate chips, plus a few extra for garnish
  • 1 cup (140g) dried cranberries, plus a few extra for garnish

Notes & Substitutions

Achieve the best results for your cranberry white chocolate cookie recipe by understanding these key ingredient tips:

  • Room Temperature Butter: Softened butter creams easily with sugar, creating a light, airy base crucial for cookie texture.
  • Sugar Balance: Brown sugar adds chewiness and moisture, while granulated sugar contributes to crisp edges and spread.
  • Pure Vanilla Extract: Use high-quality pure vanilla for the richest, most authentic flavor profile.
  • Cornstarch for Softness: Cornstarch is a secret ingredient that helps create incredibly soft, tender cookies and prevents excessive spread.
  • White Chocolate Chips: Opt for good quality white chocolate chips or chopped white chocolate bars; avoid confectionery coating for better flavor.
  • For optimal flavor and melting, look for white chocolate with a cocoa butter percentage of 33% or more. More information on quality white chocolate for baking
  • Dried Cranberries: Dried cranberries provide the best texture and concentrated tartness for this recipe, superior to fresh ones.

Equipment You’ll Need

Gathering the right tools makes baking these festive cranberry white chocolate cookies a breeze.

How to Make Cranberry White Chocolate Cookies

Creating these delectable cranberry white chocolate cookies is a rewarding process. Follow these steps for perfect results.

  • In a large bowl, using a handheld mixer or stand mixer with a paddle attachment, beat the softened butter, brown sugar, and granulated sugar together on medium speed. Continue mixing until the mixture is light, fluffy, and creamy, which usually takes about 3 minutes. Beat in the large egg and pure vanilla extract until just combined. Scrape down the sides and bottom of the bowl with a spatula, then beat again briefly to ensure everything is fully incorporated.
  • In a separate medium bowl, whisk together the all-purpose flour, cornstarch, baking soda, and salt until thoroughly combined. Gradually add this dry mixture to the wet ingredients on low speed. Mix until no streaks of flour remain, but do not overmix. The cookie dough will be noticeably soft and thick. Fold in the white chocolate chips and dried cranberries by hand or on low speed until they are evenly distributed throughout the dough. Cover the dough tightly with plastic wrap and chill it in the refrigerator for at least 1 hour, or up to 3–4 days. Chilling is essential to prevent the cookies from spreading too much during baking.
  • After chilling, remove the cookie dough from the refrigerator. If the dough chilled for longer than 3–4 hours, let it sit at room temperature for about 30 minutes. This makes the firm dough easier to scoop and roll.
  • Preheat your oven to 350°F (177°C). Line large baking sheets with parchment paper or silicone baking mats to prevent sticking. Set them aside.
  • As the oven preheats, use a medium cookie scoop (about 1.5 tablespoons of dough) to portion the dough. Roll each portion into a smooth ball between your palms. The dough may feel slightly crumbly at first, but it will come together as you work it. Arrange the dough balls about 3 inches apart on your prepared baking sheets, allowing room for spreading.
  • Bake the cookies for 11–12 minutes, or until the edges are lightly golden brown. The centers of the cookies will still look soft and slightly underbaked. If your cookies do not spread much, gently bang the baking sheets on the counter a couple of times while the cookies are still warm from the oven. This action encourages them to spread and deflate, creating a chewy texture.
  • Allow the baked cookies to cool on the baking sheet for 5 minutes. During this crucial time, you can optionally press a few extra white chocolate chips and dried cranberries into the warm tops of the cookies. This step is purely for visual appeal, making your cranberry white chocolate cookies look even more enticing. After 5 minutes, carefully transfer the cookies to a wire rack to cool completely.
  • Store your delicious cookies in an airtight container at room temperature for up to 1 week.

Pro Tips for Perfect Cranberry White Chocolate Cookies

Elevate your baking with these expert tips, ensuring your cranberry white chocolate cookies turn out perfectly every time.

  • Proper Room Temperature Butter: Ensure your butter is truly soft, but not melted, for ideal creaming and cookie structure.
  • Don’t Skip Chilling: Chilling the dough solidifies the butter, preventing excessive spreading and enhancing flavor development.
  • Measure Flour Correctly: Spoon flour into your measuring cup and level it with a straight edge to avoid dense, dry cookies.
  • Use a Cookie Scoop: A cookie scoop ensures uniform size, leading to even baking and professional-looking results.
  • Slightly Underbake: Remove cookies from the oven when the edges are set and lightly golden, but the centers still look soft for ultimate chewiness.
  • Bang Baking Sheet: If cookies seem puffy or haven’t spread enough, a gentle tap on the counter can help them flatten and crinkle.
  • Extra Toppings for Looks: Press a few extra white chocolate chips and dried cranberries onto warm cookies for a beautiful finish.

Serving, Storage, & Variations

These delightful cranberry white chocolate cookies are versatile for serving, easy to store, and simple to adapt.

Storage

  • Baked Cookies: Store cooled baked cookies in an airtight container at room temperature. They will remain fresh and delicious for up to one week.

Freezing Instructions

  • Unbaked Cookie Dough: Scoop dough balls and place them on a parchment-lined tray. Freeze until solid, then transfer to a freezer-safe bag or container for up to 3 months. Bake from frozen, adding 2–3 minutes to the baking time.
  • Baked Cookies: Once completely cooled, place baked cookies in a single layer in a freezer-safe container, separated by parchment paper, or in a freezer bag. Freeze for up to 3 months. Thaw at room temperature or warm briefly in the oven.

Recipe Variations

  • Different Chocolate Chips: Substitute milk chocolate or dark chocolate chips for white chocolate.
  • Add Chopped Nuts: Incorporate ½ cup of chopped pistachios, pecans, or walnuts for added crunch and flavor.
  • Citrus Zest: For a brighter flavor, mix in 1–2 teaspoons of fresh orange or lemon zest with the wet ingredients.
  • Warm Spices: A pinch of cinnamon or nutmeg (¼ teaspoon) can add a lovely warmth, especially during the holidays.

Nutrition Information

Please note that the following nutrition facts are estimated per serving and can vary based on specific ingredients and preparation methods. This is provided as a general guide.

Estimated Nutrition Per Cookie (Yields 24 cookies)

NutrientAmount
Calories180 kcal
Total Fat9g
Saturated Fat5g
Cholesterol25mg
Sodium90mg
Total Carbs24g
Dietary Fiber1g
Total Sugars16g
Protein2g

Frequently Asked Questions (FAQ)

Why do I need to chill the dough?

Chilling the dough allows the butter to firm up, which prevents the cranberry white chocolate cookies from spreading too much in the oven. It also deepens their flavor.

Can I use fresh cranberries?

While dried cranberries work best for texture and sweetness, you can use fresh cranberries. If using fresh, chop them finely and be aware the cookies might be slightly more tart.

What kind of white chocolate works best?

Use good quality white chocolate chips or a chopped white chocolate bar (at least 20% cocoa butter). Avoid “white confectionery coating” for the best flavor and texture in your cranberry white chocolate cookies.

How long do these cookies last?

These cookies stay fresh for up to one week when stored in an airtight container at room temperature. For longer storage, you can freeze them.

Can I make the dough ahead of time?

Absolutely! You can chill the dough for up to 3–4 days in the refrigerator, or freeze scooped dough balls for up to 3 months, ready to bake whenever you like.

Final Thoughts

These cranberry white chocolate cookies offer an unparalleled combination of soft chewiness, rich buttery flavor, and a delightful contrast of tart and sweet. This recipe bridges professional techniques with approachable home cooking, ensuring a reliable and delicious outcome every time. We encourage you to try baking a batch of these truly delightful treats soon. Share your creations and connect with us in the comments below!

Cranberry White Chocolate Cookies

Prep Time 15 minutes
Cook Time 12 minutes
Total Time 1 hour 30 minutes
Servings 24 cookies
Calories 200
These delightful cookies feature a rich, buttery dough studded with sweet white chocolate chips and tart dried cranberries. Chilling the dough ensures perfectly soft and chewy results.

Equipment

  • Large bowl
  • handheld mixer or stand mixer
  • Paddle attachment
  • separate bowl
  • Baking sheets
  • parchment paper or silicone baking mats
  • Wire rack

Ingredients

Main Ingredients

  • 3/4 cup unsalted butter (softened to room temperature)
  • 3/4 cup packed brown sugar (light or dark (I use dark))
  • 1/4 cup granulated sugar
  • 1 large egg (at room temperature)
  • 2 teaspoons pure vanilla extract
  • 2 cups all-purpose flour (spooned & leveled)
  • 2 teaspoons cornstarch (cornflour)
  • 1 teaspoon baking soda
  • 1/2 teaspoon salt
  • 3/4 cup white chocolate chips (plus a few extra for garnish)
  • 1 cup dried cranberries (plus a few extra for garnish)

Instructions 

Instructions

  • Cream butter, brown sugar, and granulated sugar together until combined and creamy, then beat in the egg and vanilla extract.
  • In a separate bowl, whisk together the flour, cornstarch, baking soda, and salt, then slowly mix into the wet ingredients. Fold in the white chocolate chips and dried cranberries, then chill the dough for at least 1 hour to prevent over-spreading.
  • Remove the dough from the refrigerator; if chilled longer than 3-4 hours, let it sit at room temperature for about 30 minutes to soften.
  • Preheat your oven to 350°F (177°C) and line large baking sheets with parchment paper or silicone baking mats.
  • Scoop and roll approximately 1.5 Tablespoons of dough for each cookie into balls, arranging them 3 inches apart on the prepared baking sheets.
  • Bake for 11-12 minutes until the edges are lightly browned but the centers still look soft; lightly bang the baking sheets on the counter if cookies didn’t spread enough.
  • Allow cookies to cool on the baking sheet for 5 minutes, pressing extra white chocolate chips and dried cranberries into the warm tops for garnish, then transfer to a wire rack to cool completely.
  • Store cooled cookies in a covered container at room temperature for up to one week to maintain freshness.

Notes

Chilling the dough for at least 1 hour is crucial to prevent the cookies from over-spreading. For best results, allow firm dough to sit at room temperature for about 30 minutes before scooping.
Author: Emma Williams Ava
Calories: 200kcal
Course: Baked Goods, Dessert, Snack
Cuisine: American
Keyword: Chewy Cookies, Chocolate Cookies, Cranberry White Chocolate Cookies, Holiday Cookies, White Chocolate Cookies

Discover the sheer joy of crafting your own homemade chocolate bars right in your kitchen. This guide empowers you to transform simple ingredients into gourmet treats. You can easily customize flavors, textures, and designs, making each bar uniquely yours. Whether for impressive gifts or an indulgent personal snack, learning to make your own chocolate bars opens a world of delicious possibilities. Dive into the delightful process and create something truly special.

Table of Contents

Why You’ll Love This Homemade Chocolate Bar Recipe

Crafting homemade chocolate bars brings immense satisfaction and several benefits:

  • Infinitely Customizable: Tailor every aspect to your exact preferences, from chocolate type to delightful mix-ins.
  • More Affordable: Create delicious, high-quality chocolate bars at a fraction of the cost of store-bought gourmet options.
  • Impressive Gifts: Your custom-made chocolate bars make thoughtful, personal gifts for holidays, birthdays, or any special occasion.
  • Fun Activity: Enjoy a creative and engaging kitchen project perfect for solo crafting or involving the whole family.
  • Control Ingredients: You know exactly what goes into each bar, allowing for dietary considerations and ingredient quality.

Ingredients for Homemade Chocolate Bars

Making delicious homemade chocolate bars begins with quality ingredients. For the base, you will need 2–8 ounces of melted chocolate. For exciting additions, gather your favorite mix-ins and toppings.

Choosing Your Chocolate: Pure vs. Compound

The type of chocolate you select impacts both flavor and the crafting process.

  • Pure Chocolate: This includes high-quality dark, milk, or white chocolate made with cocoa butter. It offers a rich, complex flavor but requires tempering for a smooth, shiny finish and proper snap. Brands like Ghirardelli, Callebaut, or Valrhona provide excellent pure chocolate options.
  • Compound Chocolate: Also known as candy melts, melting wafers, confectionery coating, or almond bark, this uses vegetable oils instead of cocoa butter. It’s incredibly easy to melt and requires no tempering, making it ideal for beginners or quick projects. It’s designed to harden quickly and maintain shape without special treatment.

Mix-In Ideas for Custom Chocolate Bars

Unleash your creativity with a wide array of mix-ins. These additions elevate your custom chocolate bars from simple to spectacular.

  • Nuts: Toasted almonds, pecans, walnuts, or salted peanuts provide a satisfying crunch and nutty flavor.
  • Dried Fruits: Chewy cranberries, cherries, raisins, or apricots add a burst of fruity sweetness.
  • Crunchy Additions: Crushed cookies, pretzels, potato chips, toffee bits, or puffed rice cereal offer delightful textures.
  • Chewy Items: Miniature marshmallows, caramel bits, gummy candies, or chewy nougat pieces create an interesting contrast.
  • Sweet Toppings: Sprinkles, crushed candy canes, mini chocolate chips, or sea salt flakes add visual appeal and extra flavor.

Experiment with combinations like dark chocolate with dried cherries and almonds, or milk chocolate with pretzels and caramel bits.

Essential Equipment

Gathering the right tools makes crafting your custom homemade chocolate bars smooth and enjoyable. You likely have many of these items already.

Step-by-Step Instructions to Make Homemade Chocolate Bars

Follow these clear instructions to create your perfect homemade chocolate bars. Whether you choose pure chocolate or compound chocolate, this guide will lead you through each crucial step. Pay close attention to the details for the best results.

Preparing Your Chocolate (Tempering Pure Chocolate)

Tempering pure chocolate ensures it hardens properly with a glossy finish and a satisfying snap. This process stabilizes the cocoa butter crystals.

  1. Finely chop your pure chocolate. Smaller pieces melt more evenly. Reserve about one-quarter of the chopped chocolate.
  2. Microwave Tempering: Place three-quarters of the chocolate in a microwave-safe bowl. Heat on 50% power in 30-second intervals, stirring thoroughly after each, until mostly melted. The temperature should reach about 115°F (46°C) for dark chocolate, 110°F (43°C) for milk, and 105°F (40°C) for white.
  3. Seeding Method: Remove from the microwave. Stir in the reserved chopped chocolate. Continue stirring until all pieces melt and the chocolate cools to its working temperature: 88-91°F (31-33°C) for dark, 86-88°F (30-31°C) for milk, and 82-84°F (28-29°C) for white. This “seeding” introduces stable crystals, setting the temper.
  4. Double Boiler Setup: Alternatively, melt the chocolate in a heatproof bowl set over a saucepan of simmering water, ensuring the bowl does not touch the water. Stir frequently until melted, then proceed with the seeding method.

Melting Compound Chocolate (No Tempering Needed)

Compound chocolate is much simpler to prepare as it doesn’t require tempering.

  1. Microwave Melting: Place compound chocolate pieces in a microwave-safe bowl. Heat on 50% power in 30-second bursts, stirring well after each interval. Continue until the chocolate is smooth and fully melted. Avoid overheating, which can cause it to seize.
  2. Double Boiler Melting: Gently melt compound chocolate in a heatproof bowl set over a saucepan of barely simmering water. Stir constantly until smooth and fluid. This method provides more controlled, even heating.

Molding Your Chocolate Bars

Once your chocolate is perfectly melted, it’s time to create your custom shapes.

  1. Pour Chocolate: Carefully pour the melted and tempered pure chocolate, or melted compound chocolate, into your candy bar molds. You can also use a non-stick loaf pan or a rectangle plastic container for a slab that you will break later.
  2. Add Mix-ins: If desired, stir your favorite candy bar toppings directly into the melted chocolate before pouring. Alternatively, pour the chocolate first, then sprinkle your chosen ingredients evenly on top of the wet chocolate.
  3. Tap Molds: Gently tap the molds several times on your countertop. This crucial step helps release any trapped air bubbles, preventing voids in your finished homemade chocolate bars.
  4. Pop Bubbles: Use a toothpick or the tip of a knife to pop any visible air bubbles that rise to the surface. Tap the mold a few more times to ensure a smooth, professional-looking top.
  5. Chill Until Firm: Place pure chocolate bars in the refrigerator to chill for about 10-15 minutes until firm. For compound chocolate, use the freezer for approximately 10 minutes. Do not over-chill.
  6. Unmold Carefully: Once completely hardened, gently flex the molds to release the candy bars. Handle them carefully to prevent breakage.

Pro Tips & Troubleshooting

Achieve perfect homemade chocolate bars every time with these expert tips and solutions for common issues.

  • Pro Tip: Ensure absolutely no water contacts your chocolate during melting. Even a single drop can cause it to seize and become grainy. Research confirms that water can cause chocolate to seize by creating an imbalance of dry to wet ingredients.
  • Pro Tip: Do not over-chill your chocolate bars. Pure chocolate can develop condensation, while compound chocolate can become brittle.
  • Pro Tip: Test pure chocolate temper by dipping a knife or spatula. If it sets within 3-5 minutes at room temperature, it’s tempered correctly.
  • Troubleshooting: If chocolate gets stuck in molds, it’s likely untempered pure chocolate or due to over-chilling. Ensure proper temper and chilling times.
  • Troubleshooting: Prevent white streaks (bloom) on chocolate by ensuring proper tempering (for pure chocolate) and by storing bars at a consistent, cool room temperature.

Serving, Storage, and Creative Variations

These homemade chocolate bars are incredibly versatile, perfect for enjoying as is or incorporating into other culinary creations.

Serving Suggestions

Enjoy your delicious creations in many ways. You can simply savor them plain alongside a warm cup of coffee or tea. Chop the hardened bars into chunks and use them as an exciting mix-in for cookies, brownies, or even homemade ice cream. They also make fantastic edible garnishes for cakes and cupcakes.

Proper Storage for Freshness

To maintain optimal freshness and prevent bloom, store your chocolate bars properly. Keep them at cool room temperature, ideally between 60-70°F (15-21°C), away from direct sunlight, heat, and strong odors. Wrap them tightly in plastic wrap or foil, then place them in an airtight container.

For extended storage, especially with perishable mix-ins, you can freeze them. Wrap them very tightly, then thaw slowly in the refrigerator before bringing to room temperature. Shelf life varies from 2 weeks to 2 months depending on mix-ins.

Endless Flavor Combinations and Designs

Unleash your imagination with endless variations for your homemade chocolate bars.

  • Cookies & Cream: Swirl crushed sandwich cookies into white or milk chocolate.
  • Swirled Designs: Drizzle contrasting melted chocolate colors (e.g., dark and white) into the mold and gently swirl with a toothpick.
  • Multi-colored Bars: Create layers with different types of chocolate, chilling each layer before adding the next.
  • Holiday Themes: Use seasonal candy molds or sprinkles to create festive bars for any holiday.
  • Salty-Sweet: Incorporate pretzels, sea salt, or potato chips for an irresistible contrast.

Nutrition Information

Making your own chocolate bars gives you control over the ingredients. Below is estimated nutrition for a plain chocolate bar serving.

NutrientAmount
Calories170 kcal
Serving Size1 serving (30g)

Disclaimer: This nutrition information is an estimate for a standard serving of plain chocolate. Adding mix-ins like nuts, dried fruits, or caramel bits will significantly alter the nutritional values and calorie count of your homemade chocolate bars.

Frequently Asked Questions (FAQ)

Why is my homemade chocolate chalky or streaky?

This often indicates improper tempering for pure chocolate, or moisture exposure. Ensure your pure chocolate is correctly tempered and keep water away from it during melting.

Can I use regular chocolate chips for homemade chocolate bars?

Regular chocolate chips contain stabilizers that prevent them from melting and setting smoothly like couverture or compound chocolate. While they can work, the texture might be softer and less stable without proper tempering.

How long do homemade chocolate bars last?

When stored correctly, plain homemade chocolate bars last for several weeks at room temperature. With perishable mix-ins, consume them within 1-2 weeks or store them in the freezer for longer freshness.

Are special molds necessary for making chocolate bars?

While special candy bar molds provide a professional finish, they are not strictly necessary. You can use a parchment-lined loaf pan or a shallow container to create a chocolate slab, then break it into pieces.

Can children participate in making these chocolate bars?

Absolutely! Making homemade chocolate bars is a wonderful activity for children. They can help with stirring compound chocolate, choosing fun mix-ins, and decorating, making it a truly engaging experience.

Final Thoughts

Crafting your own homemade chocolate bars is a rewarding culinary adventure that combines simplicity with endless creative possibilities. You’ve learned the essential techniques, from selecting the right chocolate to perfecting your custom designs.

Embrace the freedom to experiment with flavors, textures, and decorations, making each batch uniquely yours. We encourage you to try this delightful process and share your delicious, custom-made treats with friends and family. Happy chocolate making!

Homemade Chocolate Bars

Prep Time 5 minutes
Total Time 15 minutes
Servings 4 bars
Calories 250
Craft your own custom chocolate bars at home with this simple guide. Melt your favorite chocolate, add delicious mix-ins, and chill to create personalized treats in minutes.

Equipment

  • Candy bar mold
  • Non-stick loaf pan
  • Rectangle plastic container
  • Toothpick
  • Knife

Ingredients

Main Ingredients

  • 2-8 ounces chocolate, melted ((and tempered if needed))

Optional Mix-ins

  • mix-ins or toppings (like toffee bits, cookie pieces, nuts, dried fruits, caramel bits, and more)

Instructions 

Instructions

  • Pour melted chocolate into your chosen mold or container.
  • Stir in optional toppings before pouring, or add them on top of the wet chocolate.
  • Tap the mold several times to release any trapped air bubbles.
  • Pop any visible air bubbles with a toothpick or knife.
  • Tap the mold again to ensure a smooth top surface.
  • Chill pure chocolate bars in the refrigerator or compound chocolate in the freezer for about 10 minutes, until hardened.
  • Carefully remove the hardened candy bars from the mold.

Notes

This recipe offers endless customization options! Experiment with various chocolate types and a wide array of mix-ins to create your perfect candy bar. Tempering pure chocolate ensures a smooth, glossy finish and stable texture.
Author: Emma Williams Ava
Calories: 250kcal
Course: Confectionery, Dessert, Snack
Cuisine: American, British, Global
Keyword: Candy, Chocolate Bars, Chocolate Biscuits, Homemade Chocolate Bars

Welcome to the ultimate recipe for white chocolate cookies! This guide helps you create truly irresistible treats with ease. Expect incredibly soft, chewy centers perfectly complemented by crispy, golden edges. Our straightforward method requires no chilling, making delicious homemade cookies accessible whenever the craving strikes. Get ready to bake a perfect sweet treat for any occasion.

Table of Contents

Why You’ll Love These White Chocolate Cookies

You will adore these white chocolate cookies for many fantastic reasons, bringing professional techniques into your home kitchen.

  • Incredibly soft and chewy texture. Each bite offers a satisfyingly tender mouthfeel.
  • Crispy, golden-brown edges. These provide a delightful contrast to the soft interior.
  • Rich, buttery, vanilla-infused flavor. High-quality ingredients create a truly luxurious taste experience.
  • Packed with melty white chocolate chips. Every cookie is generously studded with sweet, creamy pockets.
  • Simple ingredients, straightforward process. You will not need any complex techniques to achieve perfection.
  • No dough chilling time needed. Bake these delicious cookies right away, saving you precious time.
  • A guaranteed crowd-pleaser. Everyone, from family to friends, will request this cookie recipe.

Ingredients for Perfect White Chocolate Cookies

Crafting the perfect batch of white chocolate cookies begins with high-quality ingredients. Each component plays a vital role in achieving that ideal texture and flavor profile. Here’s what you need to gather:

  • 2 1/4 cups all-purpose flour (270g): To ensure accurate measurement and prevent dry cookies, it’s recommended to use the spoon and level method for flour.
  • 1/2 tsp baking soda (3g): This leavening agent ensures a soft, tender crumb.
  • 3/4 tsp salt (4g): Balances the sweetness and enhances all the flavors.
  • 1 cup unsalted butter, room temperature (230g): Softened butter is key for proper creaming.
  • 1/2 cup granulated sugar (100g): Contributes to spread and crispy edges.
  • 1 cup packed light-brown sugar (200g): Adds moisture, chewiness, and a subtle caramel note.
  • 2 large eggs, room temperature: Essential for binding and structure.
  • 2 tsp pure vanilla extract (10ml): A must-have for classic, warm cookie flavor.
  • 2 cups white chocolate chips (300g): Divided for mixing into the dough and optional topping.

Notes & Substitutions

  • Butter: Always use unsalted butter for better control over the salt content. Ensuring your butter and eggs are at the correct room temperature is crucial for baking success, as it creates a smooth, emulsified dough that bakes evenly. Ensure it is truly at room temperature, soft but not melted, for optimal creaming. If using salted butter, reduce the added salt to 1/2 teaspoon.
  • Sugars: The combination of granulated sugar and light brown sugar is crucial. Granulated sugar promotes spread and crispness, while brown sugar provides chewiness and depth of flavor. Do not alter the ratio without expecting a different texture.
  • Vanilla: Opt for pure vanilla extract for the best, most authentic flavor. Imitation vanilla cannot compare.
  • White Chocolate Chips: The quality of your white chocolate chips profoundly impacts the final taste. We recommend high-quality chips or even a finely chopped white chocolate bar for superior melt and flavor in these delightful cookies.
  • Add-ins: Feel free to customize your batch. Consider adding 1/2 cup of toasted macadamia nuts, dried cranberries, or even a handful of chopped walnuts for extra texture and flavor.

Equipment You’ll Need

Having the right tools makes baking these white chocolate cookies a breeze. You likely have most of these items in your kitchen already.

How to Make White Chocolate Cookies

Follow these detailed steps to bake perfect, chewy white chocolate cookies every time. Precision at each stage ensures a fantastic outcome.

  1. Prep Oven & Dry Ingredients: Preheat your oven to 360°F (180°C). Line two large baking sheets with parchment paper or silicone mats. In a medium bowl, whisk together the all-purpose flour, baking soda, and salt. Set this dry mixture aside.
  2. Cream Butter & Sugars: In the bowl of a stand mixer fitted with the paddle attachment, or using a large bowl and an electric hand mixer, combine the softened unsalted butter and granulated sugar. Beat on medium-high speed until the mixture becomes light, fluffy, and pale in color, about 2-3 minutes. Add the light brown sugar and continue mixing until it is fully incorporated and the mixture is smooth, about 1-2 more minutes.
  3. Add Wet Ingredients: Pour in the pure vanilla extract and mix until just combined. Next, add the large eggs, one at a time, beating well after each addition until fully incorporated. After adding both eggs, use your rubber spatula to scrape down the sides and bottom of the bowl, ensuring all ingredients are well-mixed.
  4. Combine Wet & Dry: With the mixer on its lowest speed, gradually add the reserved flour mixture to the wet ingredients. Mix only until the flour is almost fully combined and a few streaks of flour remain. Avoid overmixing, as this can develop gluten and result in tough cookies.
  5. Fold in Chocolate Chips: Remove the bowl from the mixer. Gently fold in 1 1/2 cups of the white chocolate chips using your rubber spatula. If you plan to add extra chips to the tops of the cookies after baking, reserve the remaining 1/2 cup for that step.
  6. Scoop & Bake: Use a 2-tablespoon cookie scoop to portion out the dough. Place the scooped dough balls onto your prepared baking sheets, ensuring they are about 3 inches apart to allow for proper spreading. Bake in the preheated oven for 8-10 minutes.
  7. Optional Topping: For extra-pretty cookies, remove the baking sheets from the oven after 8 minutes. Quickly press a few of the reserved white chocolate chips onto the tops of each cookie. Return the cookies to the oven and continue baking for another 2-3 minutes, or until the edges are golden brown and the centers still look slightly soft.
  8. Cool Cookies: Once baked, remove the baking sheets from the oven. Let the cookies cool on the baking sheets for about 5 minutes. This crucial step allows them to set up and prevents breakage. Carefully transfer the slightly cooled white chocolate cookies to a wire cooling rack to cool completely before serving or storing.

Pro Tips for the Best White Chocolate Cookies

Achieving bakery-quality white chocolate cookies is easy with these expert tips. They help ensure perfect results every time.

  • Use room temperature butter and eggs. This creates a smooth, emulsified dough that bakes evenly.
  • Measure flour accurately (spoon and level). Scooping directly can pack too much flour, leading to dry cookies.
  • Avoid overmixing dough. Overmixing develops gluten, resulting in tougher cookies. Mix until just combined.
  • Don’t skip the salt. It balances the sweetness of the white chocolate and enhances all the flavors.
  • Bake until edges are golden, centers slightly soft. This ensures a chewy interior and crisp edges.
  • Use a cookie scoop for even baking. Consistent size means all cookies bake at the same rate.

Even experienced bakers encounter issues. Here are solutions for common cookie problems you might face with your white chocolate cookies.

  • Spreading too much: Ensure your butter is at room temperature, not melted. Accurately measure flour; too little can cause excessive spreading.
  • Dry/crumbly: Overbaking is the main culprit. Check your oven temperature with a thermometer and remove cookies when edges are set.
  • Hard centers: This also indicates overbaking. Take the cookies out of the oven while the centers still look slightly underdone; they will continue to set as they cool.

Serving Suggestions, Storage & Variations

These homemade white chocolate cookies are incredibly versatile, perfect for many occasions.

Serving Suggestions

  • Enjoy them warm straight from the oven with a tall glass of cold milk.
  • Pair them with your favorite coffee or a mug of rich hot chocolate for a cozy treat.
  • For an indulgent dessert, serve a warm cookie with a scoop of vanilla bean ice cream.
  • They make a perfect addition to lunchboxes, dessert platters, or any casual gathering.

Storage Instructions

  • Room Temperature: Store baked white chocolate cookies in an airtight container at room temperature for up to 1 week.
  • Freezing Baked Cookies: Once completely cool, place cookies in a single layer in an airtight freezer-safe container or bag. They will keep for up to 3 months. Thaw at room temperature before serving.
  • Freezing Dough: Scoop the dough into individual balls and place them on a baking sheet. Freeze until solid, then transfer the frozen dough balls to a freezer bag. Bake from frozen, adding an extra 2-4 minutes to the bake time.

Flavor Variations

  • White Chocolate Macadamia: Fold in 1/2 cup of toasted macadamia nuts for a classic combination.
  • Cranberry White Chocolate: Add 1/2 cup of dried cranberries for a tart, chewy contrast.
  • Dark & White Chocolate: Use a mix of white chocolate chips and dark chocolate chips for a balanced flavor.
  • Spiced: Incorporate a pinch of cinnamon or nutmeg into the dry ingredients for a warm twist.
  • Citrus Zest: Include 1 teaspoon of lemon or orange zest for a bright, refreshing flavor note.

White Chocolate Cookies Nutrition Information

Please note that these nutritional values are estimates based on standard ingredient calculations and may vary depending on specific brands and exact portion sizes. This information is provided for general guidance only.

NutrientPer Serving (1 cookie)
Calories248 kcal
Carbohydrates31 g
Protein3 g
Fat13 g
Saturated Fat8 g
Cholesterol37 mg
Sodium142 mg
Potassium75 mg
Fiber1 g
Sugar22 g
Vitamin A261 IU
Vitamin C1 mg
Calcium44 mg
Iron1 mg

Frequently Asked Questions (FAQ)

Here are answers to common questions about making these delicious white chocolate cookies.

What makes white chocolate cookies chewy and crispy?

The precise combination of both brown and granulated sugars, along with careful baking time, creates this perfect texture balance.

Can I use milk or dark chocolate instead of white?

Absolutely! You can easily swap out the white chocolate chips for your preferred type of chocolate to customize the flavor.

How do I prevent my cookies from spreading too flat?

Ensure your butter is at the correct room temperature (soft, not melted) and measure your flour accurately. If needed, a brief chill of the dough can help, although it’s not strictly necessary for this recipe.

Can I make the cookie dough ahead of time?

Yes, you can. Store the prepared dough in an airtight container in the refrigerator for up to 3 days, or freeze it for longer storage.

What’s the best way to store leftover white chocolate cookies?

Keep your cooled cookies in an airtight container at room temperature. This method maintains their freshness and chewiness for several days.

Final Thoughts

You now have everything needed to bake the most incredible homemade white chocolate cookies. With their irresistible chewy centers, crispy edges, and rich vanilla flavor, these cookies will undoubtedly become a staple in your recipe collection. Embrace the joy of baking and create delicious memories with every batch. We encourage you to share your beautiful creations with us and your loved ones!

The Best Chewy White Chocolate Cookies

Prep Time 20 minutes
Cook Time 11 minutes
Total Time 31 minutes
Servings 24 cookies
Calories 250
These irresistible white chocolate cookies are perfectly chewy with golden edges and a soft center. They are easy to make and ideal for any cookie lover.

Equipment

  • Stand mixer
  • Paddle attachment
  • Baking sheets
  • Silicone mats or parchment paper
  • Bowls
  • Whisk
  • Measuring cups and spoons
  • Spatula

Ingredients

Main Ingredients

  • 2 1/4 cups all-purpose flour ((270g))
  • 1/2 tsp baking soda ((3g))
  • 1 cup unsalted butter (room temperature (230g))
  • 1/2 cup granulated sugar ((100g))
  • 1 cup packed light-brown sugar ((200g))
  • 3/4 tsp salt ((4g))
  • 2 tsp pure vanilla extract ((10ml))
  • 2 large eggs
  • 2 cups white chocolate chips ((300g) divided)

Instructions 

Instructions

  • Preheat oven to 360F and line baking sheets with silicone mats or parchment paper. Whisk together flour, salt, and baking soda, then set aside.
  • In a stand mixer or large bowl with an electric hand mixer, beat butter and granulated sugar on high until light and fluffy. Add brown sugar and mix until well-combined.
  • Stir in the vanilla extract, then mix in the eggs one at a time, scraping down the bowl after each addition.
  • Add the flour mixture to the wet ingredients and mix on low until almost combined. Fold in the white chocolate chips, reserving a handful if you plan to add them on top later.
  • Scoop two-tablespoon portions of dough onto the lined cookie sheets, spacing them 3 inches apart. Bake for about 10 minutes at 360F, or until the edges are golden. If adding reserved chips, bake for 8 minutes, add chips, then continue baking for 2-3 minutes.

Notes

To ensure the best chewy texture, avoid overmixing the dough once the flour is added. For an extra touch, press a few reserved white chocolate chips onto the warm cookies immediately after baking.
Author: Emma Williams Ava
Calories: 250kcal
Course: Dessert, Snack
Cuisine: American
Keyword: Chewy Cookies, Easy Cookies, No-Chill Cookies, White Chocolate Cookies

Discover the timeless allure of a classic chocolate biscuits cake, a delightful no-bake treat cherished for its simplicity and rich flavor. This iconic dessert, famously a favorite of Queen Elizabeth II, offers a touch of royal elegance without any baking required. Get ready to create a truly delicious and effortlessly impressive dessert that will captivate everyone.

According to royal chefs and various culinary sources, the chocolate biscuit cake was indeed a beloved dessert of Queen Elizabeth II. Learn more about the Queen’s favorite cake.

Table of Contents

Why You’ll Love This Chocolate Biscuits Cake

This easy chocolate biscuits cake quickly becomes a household favorite. Here are the key benefits:

  • Quick & Simple: Requires no oven, making it ideal for busy schedules or warm weather.
  • Rich & Decadent: Layers of crunchy biscuits and luxurious chocolate create an indulgent texture and flavor.
  • Versatile for Occasions: Perfect for afternoon tea, birthdays, or a comforting everyday treat.
  • Kid-Friendly: Children love helping to break the biscuits and enjoy the delightful taste.
  • Royal Endorsement: Enjoy a dessert fit for royalty, celebrated for its unique charm.

Ingredients

Crafting this delectable chocolate biscuits cake requires just a few quality ingredients for both the base and the smooth ganache.

For the Chocolate Biscuit Base:

  • 225g Rich Tea biscuits
  • 115g softened unsalted butter
  • 115g golden caster sugar
  • 115g dark chocolate, 53% minimum cocoa solids, chopped
  • 2 tablespoons warm water

For the Chocolate Ganache Topping:

  • 125g dark chocolate, 53% minimum cocoa solids, chopped
  • 125g whipping cream

Notes & Substitutions

For the biscuit base, Rich Tea biscuits are traditionally perfect due to their neutral flavor and crisp texture, absorbing the chocolate mixture beautifully.

You can also use other plain, firm biscuits like Marie or Petit Beurre. For more information on suitable alternatives, consider exploring Rich Tea biscuit substitutes. Avoid using digestive biscuits or Graham crackers, as their texture can become too soft or crumbly.

If you need a dairy-free option, substitute unsalted butter with a high-quality vegan butter block. For the dark chocolate, aim for 50-60% cocoa solids for a balanced richness; higher percentages might be too bitter for some. Golden caster sugar provides a fine texture and subtle caramel note, but regular caster sugar works equally well.

Equipment

Gathering your tools before you begin ensures a smooth cooking process. You will need a 15cm (6-inch) loose-bottom cake tin, essential for easy unmolding. Prepare a large mixing bowl for the biscuit mixture and a smaller bowl for the ganache.

A sturdy spatula or wooden spoon is perfect for mixing. Use a saucepan or microwave-safe bowl to melt the chocolate. Finally, a wire rack is crucial for the cake to set evenly after applying the ganache.

How To Make Chocolate Biscuits Cake

Follow these clear steps to create your perfect no-bake chocolate biscuits cake.

  1. Prepare the Tin: Lightly butter and line the base and sides of a 15cm (6-inch) loose-bottom cake tin with parchment paper. Set it aside.
  2. Break Biscuits: Break the Rich Tea biscuits into small, irregular pieces, roughly 1 to 2 cm in size. Avoid crushing them into crumbs; you want distinct pieces for texture in the chocolate biscuits cake.
  3. Cream Butter & Sugar: In a large mixing bowl, cream the softened unsalted butter and golden caster sugar together until the mixture is light and fluffy. This creates a smooth base for your cake.
  4. Melt Chocolate: Gently melt 115g of chopped dark chocolate. You can do this in a microwave in 30-second intervals, stirring each time, or in a heatproof bowl set over a pan of simmering water (bain-marie). Do not let water touch the chocolate.
  5. Combine Chocolate & Butter: Pour the melted chocolate over the creamed butter and sugar mixture. Mix thoroughly with your spatula until fully combined and smooth.
  6. Add Water & Biscuits: Stir the 2 tablespoons of warm water into the chocolate mixture. Then, add all the broken biscuit pieces. Mix well, ensuring every biscuit piece is completely coated in the rich chocolate mixture for an even chocolate biscuits cake.
  7. Press into Tin: Spoon the entire biscuit mixture into the prepared cake tin. Use the back of your spoon or your hands to press the mixture down gently but firmly, creating an even surface and compacting it well. This step is vital for a firm cake.
  8. Chill Cake: Place the cake tin into the refrigerator and let it chill for a minimum of 30 minutes. This allows the mixture to firm up slightly before the ganache is applied.
  9. Prepare Ganache: While the cake chills, make the ganache. Place the remaining 125g of chopped dark chocolate into a heatproof bowl.
  10. Heat Cream: Pour the whipping cream into a small saucepan and bring it to a gentle simmer over medium heat. Do not let it boil vigorously.
  11. Combine Ganache: Immediately pour the warm cream over the chopped chocolate in the bowl. Let it sit undisturbed for 1-2 minutes to allow the chocolate to melt.
  12. Stir Ganache: Stir the chocolate and cream mixture continuously with a spatula, starting from the center and working outwards, until it is completely smooth, glossy, and emulsified.
  13. Unmold Cake: Remove the chilled cake from the fridge. Carefully unclip the sides of the loose-bottom tin and gently remove the cake. Place it onto a wire rack set over a tray or parchment paper to catch any drips.
  14. Pour Ganache: Pour the warm, smooth ganache evenly over the top of the cake, allowing it to drip down the sides. Use a spatula to gently spread it if needed, ensuring the entire surface and sides are coated.
  15. Set Ganache: Allow the ganache to set at room temperature for about 1-2 hours, or place it back in the fridge for 30 minutes for a quicker set.
  16. Slice & Serve: Once the ganache is firm, carefully transfer the cake to a serving platter. Slice and serve your magnificent chocolate biscuits cake.

Pro Tips for the Best Chocolate Biscuits Cake

Achieving a perfect chocolate biscuits cake is simple with a few expert tips. Do not over-crush your biscuits; chunky pieces provide essential texture and structure. Ensure the cake chills for at least 30 minutes, or even longer, for a firm base that won’t crumble.

When coating with ganache, pour it slowly and evenly, rotating the cake for a pristine finish. Always use high-quality dark chocolate for both the base and ganache; it truly elevates the flavor.

If your cake falls apart when slicing, it likely wasn’t pressed firmly enough into the tin during preparation. For a decorative touch, sprinkle chocolate curls, cacao nibs, or a dusting of cocoa powder before the ganache sets.

Serving, Storage, and Variations

Elevate your chocolate biscuits cake experience with these suggestions.

Serving Suggestions

Serve this royal treat at cool room temperature for the best texture and flavor. The chocolate will be perfectly soft but not runny. It pairs wonderfully with a hot cup of tea or a rich coffee, making it ideal for afternoon gatherings. Slice into modest portions, as this rich chocolate biscuits cake is wonderfully indulgent.

Storage Instructions

Store any leftover cake in an airtight container in the refrigerator for up to 5-7 days. Cover it properly to prevent it from drying out or absorbing other food odors. Allow it to come to room temperature for about 15-20 minutes before serving for optimal enjoyment.

Flavor Variations

Experiment with your chocolate biscuits cake by adding dried cherries or chopped toasted hazelnuts for extra texture and taste. A hint of orange zest or a splash of espresso in the chocolate base can add depth. For an adult twist, a tablespoon of rum or Kahlúa works beautifully. You can also try using different types of plain biscuits, such as ginger snaps, for a unique flavor profile.

Nutrition Information

This estimated nutrition information helps you understand the components of your homemade treat. Each serving of chocolate biscuits cake provides a balanced mix of energy and macronutrients, making it a satisfying dessert option.

Please remember that these values are estimates and can vary based on specific ingredients and portion sizes. Enjoy the transparency of knowing exactly what goes into your delicious creation.

Serving SizeCaloriesTotal FatSaturated FatTrans FatUnsaturated FatCholesterolSodiumCarbohydratesFiberSugarProtein
1338 cal21g12g0g7g34mg97mg37g2g24g3g

Frequently Asked Questions (FAQ)

What kind of biscuits are best for this chocolate biscuits cake?

Rich Tea biscuits are ideal, but you can also use other plain, firm varieties like Marie or Petit Beurre for a similar result. Avoid soft or highly flavored biscuits.

Can I make this chocolate biscuits cake vegan?

Yes, easily! Swap the unsalted butter for a high-quality vegan butter block and ensure your dark chocolate is dairy-free.

How long does this cake need to chill?

It needs at least 30 minutes in the fridge before ganache, and then another 30-60 minutes after ganache application to fully set. Overnight chilling is even better for firmness.

Is this really Queen Elizabeth’s favorite cake?

Indeed it is! It was a well-known favorite of Queen Elizabeth II and was even served at royal weddings.

Why is my chocolate biscuits cake dry?

Your cake shouldn’t be dry; it should be rich and dense. Ensure you adequately coat all biscuit pieces with the chocolate mixture to prevent dryness.

Final Thoughts

This no-bake chocolate biscuits cake is more than just a dessert; it’s a delightful journey into accessible culinary excellence. Its simplicity, combined with a rich, decadent flavor, makes it a truly special treat perfect for any occasion.

We encourage you to try this royal recipe and experience the joy of creating something so delicious with such ease. Share your creations or leave a comment below; we love hearing from you!

The Queen’s Favorite No-Bake Chocolate Biscuits Cake

Prep Time 40 minutes
Total Time 2 hours
Servings 8 slices
Calories 550
This decadent no-bake chocolate biscuit cake, a favorite of the Queen, combines crushed Rich Tea biscuits with a rich chocolate butter mixture, topped with a glossy chocolate ganache for an indulgent treat.

Equipment

  • 15cm (6-inch) loose bottom cake tin
  • Mixing bowl
  • Saucepan
  • Wire rack
  • Tray
  • Spatula/Spoon

Ingredients

Main Ingredients

  • 225 g Rich Tea biscuits
  • 115 g unsalted butter (softened)
  • 115 g golden caster sugar
  • 115 g dark chocolate (53% minimum cocoa solids, chopped)
  • 2 tablespoon warm water
  • 125 g dark chocolate (53% minimum cocoa solids, chopped)
  • 125 g whipping cream

Instructions 

Chocolate Biscuit Cake

  • Line a 15cm (6-inch) loose bottom cake tin with butter and set aside.
  • Break Rich Tea biscuits into small pieces, approximately 1-2 cm in size, ensuring they are not crumbs.
  • Cream the softened butter and golden caster sugar together until the mixture becomes light and fluffy.
  • Melt 115g of chopped dark chocolate either in the microwave or over a pan of boiling water.
  • Pour the melted chocolate over the creamed butter and sugar mixture, then mix thoroughly until well combined.
  • Add the warm water and broken biscuits to the chocolate mixture; mix well until all biscuit pieces are evenly coated.
  • Spoon the mixture into the prepared cake tin, gently pressing it down to create an even surface, then chill in the fridge for 30 minutes.
  • While the cake chills, prepare the ganache by placing 125g of chopped dark chocolate in a bowl and bringing the whipping cream to a simmer in a separate pan.
  • Pour the warm cream over the chocolate and stir continuously until the chocolate has completely melted and a glossy ganache forms.
  • Remove the chilled cake from the fridge, turn it out, and place it on a wire rack with a tray underneath.
  • Spoon the ganache over the entire cake, ensuring the top and sides are fully coated; allow it to set and cool before transferring to a serving platter.
  • Serve the cake by cutting it into individual slices.

Notes

This cake is best served chilled. For a firmer ganache, allow extra setting time in the fridge. Ensure biscuits are broken into small, distinct pieces, not crumbs, for optimal texture.
Author: Emma Williams Ava
Calories: 550kcal
Course: Afternoon Tea, Dessert
Cuisine: British
Keyword: Biscuits Cake, Chocolate Biscuits Cake, No-Bake, Queen Elizabeth, Rich Tea, Royal Dessert