Author

Emma Williams Ava

Browsing

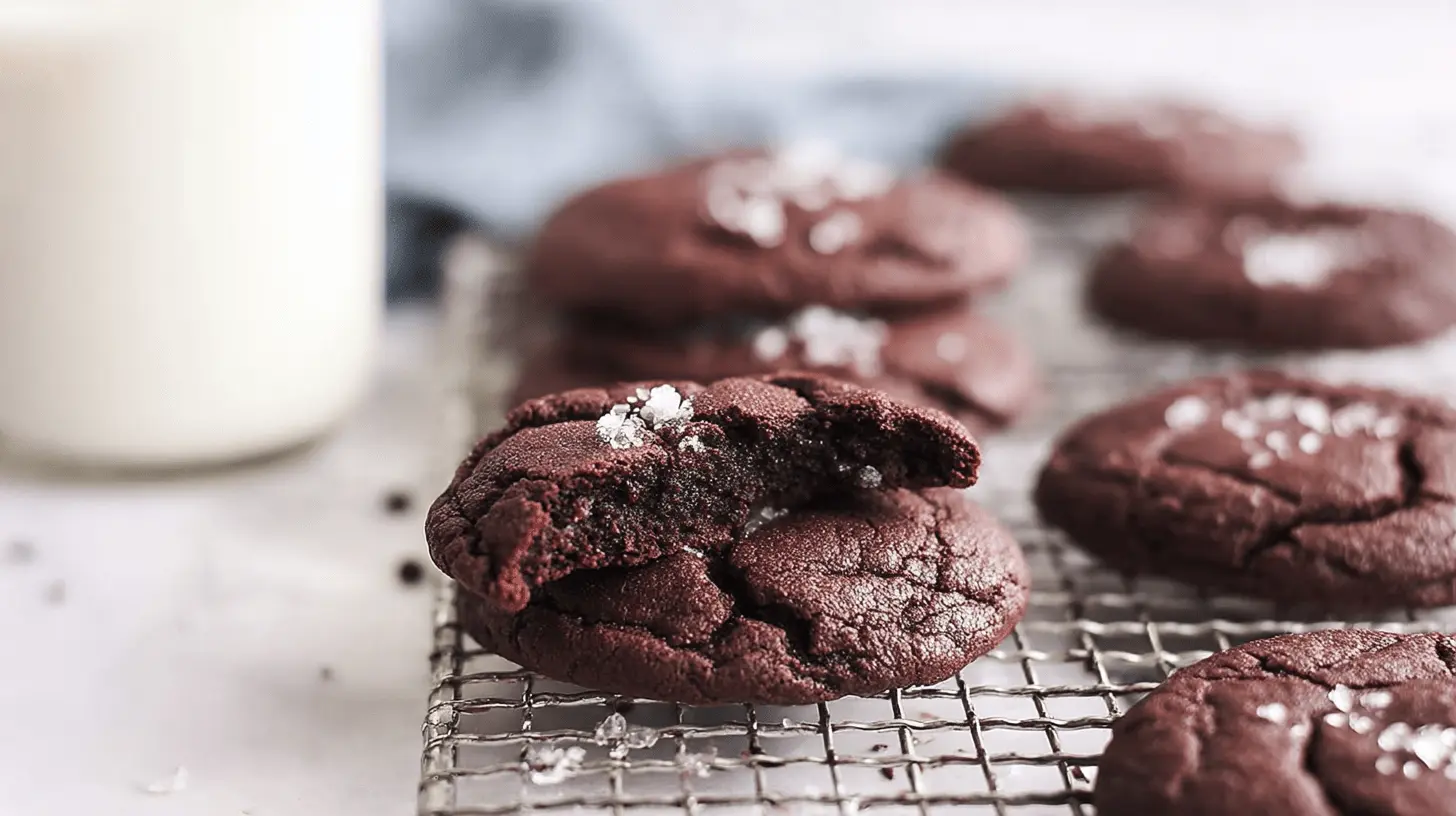
Get ready to discover the ultimate homemade chocolate biscuits that will revolutionize your baking! This recipe delivers a perfect balance of sweet and wonderfully chocolatey flavors, creating a truly irresistible treat. You’ll achieve remarkably flaky, tender layers that melt in your mouth with every bite. These rich chocolate biscuits are incredibly versatile, perfect for an elevated breakfast or a decadent dessert.

Table of Contents

Why You’ll Love These Chocolate Biscuits

These incredible chocolate biscuits combine professional techniques with home cooking ease, making them a kitchen favorite.

  • Effortlessly Easy: Prepare these delicious biscuits quickly, even on a busy morning.
  • Irresistible Chocolate Flavor: Enjoy a deep, satisfying cocoa taste in every bite.
  • Perfect Flaky Layers: Master the secret to achieving consistently light and airy textures.
  • Versatile for Any Occasion: Serve them for breakfast, brunch, or a delightful dessert.
  • Simple Ingredients, Impressive Results: Create bakery-quality treats with basic pantry staples.

Ingredients

Gather these simple ingredients to create your own batch of delectable Chocolate Biscuits. Precision in measurement ensures the best results for that signature flaky texture and rich flavor.

  • 2 cups all-purpose flour
  • 1 tablespoon baking powder
  • 2 teaspoons white granulated sugar
  • 2-3 tablespoons cocoa powder (start with 2 and add more to taste)
  • 1/2 teaspoon cream of tartar
  • 1/2 teaspoon sea salt
  • 1/2 cup chilled butter, salted
  • 2/3 cup milk

Notes & Substitutions

Cold Butter is Key: Always use very cold butter straight from the refrigerator. Cut it into small pieces or grate it for easier incorporation. Understanding the science behind baking, the use of very cold butter is crucial for creating flaky layers in biscuits. This ensures steam is released during baking, creating those coveted flaky layers.

Cocoa Powder Choices: Opt for unsweetened natural cocoa powder for a classic flavor. For a darker, richer color and mellower chocolate taste, use Dutch-processed cocoa. Adjust the amount to your preference for deeper flavor.

Cream of Tartar: This ingredient helps activate the baking powder and stabilizes the dough, contributing to a tender crumb and perfect rise. If you don’t have cream of tartar, you can omit it; the biscuits will still be delicious but might have a slightly less pronounced rise.

Milk Options: Whole milk provides the richest flavor and best texture due to its fat content. You can use 2% milk, but avoid skim milk for optimal results. For a dairy-free alternative, chilled full-fat oat milk or almond milk can work.

Add-ins: Feel free to fold in 1/2 cup of mini chocolate chips or chopped chocolate chunks with the dry ingredients for an extra burst of chocolatey goodness.

Equipment

Having the right tools makes preparing these delightful biscuits even easier. You likely have most of these items already in your kitchen.

  • Mixing Bowls: You’ll need at least one medium-sized bowl for combining ingredients.
  • Pastry Blender: This is ideal for cutting in cold butter, but two knives, a fork, or even your fingertips work well.
  • Baking Sheet: A standard baking sheet will hold your biscuits perfectly.
  • Parchment Paper: Line your baking sheet to prevent sticking and for easy cleanup.
  • Biscuit Cutter: A 3-inch round cutter creates uniform biscuits, but a sharp knife can also be used to cut squares.

How To Make Chocolate Biscuits

Follow these clear, step-by-step instructions to create beautiful, flaky Chocolate Biscuits. Attention to detail, especially with temperature and handling, ensures a perfect batch every time.

  1. First, preheat your oven to 415 degrees Fahrenheit. Line a baking sheet with parchment paper, preparing it for your delicious biscuits. Set this aside.
  2. In a medium mixing bowl, meticulously sift together the all-purpose flour, cocoa powder, baking powder, sugar, cream of tartar, and sea salt. Sifting ensures all dry ingredients are evenly distributed, leading to a consistent crumb.
  3. Next, using a pastry blender, two knives, or even your hands, cut in the chilled butter. Work quickly to prevent the butter from warming too much. Continue until the mixture resembles coarse crumbs, with some pea-sized butter pieces remaining. This is crucial for flaky layers.
  4. Gradually add the milk to the dry ingredients. Stir gently with a fork until the mixture just begins to come together. Avoid overmixing; the dough will look shaggy and slightly sticky.
  5. Turn the dough out onto a lightly floured surface. Gently knead and fold the dough 5-6 times. This light handling helps create layers without developing too much gluten, which can make biscuits tough. Dust your surface with cocoa powder instead of flour for a darker finish and to enhance flavor.
  6. Roll out the dough evenly until it is about 1/2 inch thick. Using a 3-inch biscuit cutter, press straight down without twisting. Twisting seals the edges, preventing a good rise. Alternatively, cut the dough into squares with a sharp knife. Re-form any leftover dough gently, roll it out, and cut more biscuits until all the dough is used.
  7. Arrange your cut biscuit dough on the prepared baking sheet. Ensure they are spaced about an inch apart for even baking.
  8. Bake for 10-12 minutes, or until the chocolate biscuits are beautifully risen and lightly golden at the edges. The aroma will fill your kitchen, signaling they are ready.
  9. Serve your delicious chocolate biscuits immediately while they are still warm. The warm, flaky texture is truly unmatched.

Pro Tips for Perfect Chocolate Biscuits

Achieving perfectly flaky and tender chocolate biscuits requires a few key techniques. These expert tips will help you master the recipe and avoid common pitfalls.

  • Keep Everything Cold: Ensure your butter, milk, and even your mixing bowl are very cold. Cold ingredients prevent the butter from melting before baking, essential for flaky layers. You can even chill your flour for 15 minutes.
  • Avoid Overworking Dough: Mix the dough only until it barely comes together. Over-kneading develops gluten, resulting in tough, dense biscuits instead of light, tender ones. A light touch is always best.
  • Gentle Handling: When folding and rolling the dough, handle it as little as possible. This preserves the delicate butter layers. Work quickly and confidently.
  • Proper Cutting Technique: Press your biscuit cutter straight down through the dough without twisting. Twisting seals the edges, which prevents the biscuits from rising fully and achieving their maximum height and flakiness.
  • Troubleshooting Tough Biscuits: If your biscuits turn out tough, it’s usually due to too much kneading or using ingredients that were too warm. Remember, less handling is more.
  • Maximize Your Rise: For the best rise, ensure your oven is fully preheated and hot. Place biscuits close together on the baking sheet but not touching. The proximity helps them steam each other, encouraging a higher rise.

Serving, Storage & Variations

These versatile chocolatey biscuits are delightful on their own or dressed up. Discover various ways to enjoy, store, and customize your batch.

Serving Suggestions

  • Enjoy plain with a smear of softened butter for a classic treat.
  • Pair with a dollop of honey or your favorite fruit jam for a sweet breakfast.
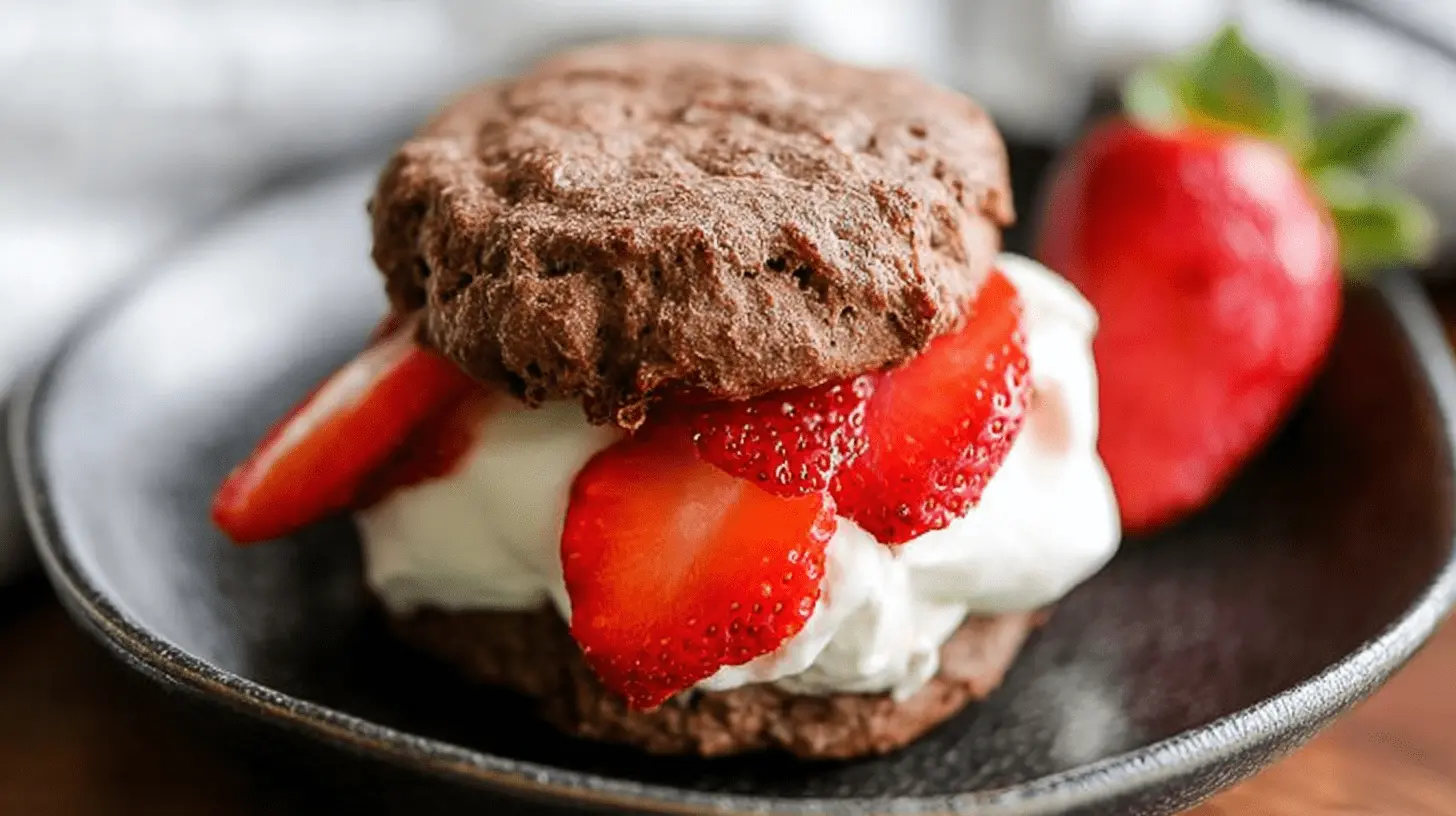
  • Create an exquisite chocolate strawberry shortcake by splitting them and adding berries and whipped cream.
  • Serve with Greek yogurt and a drizzle of fruit sauce for a balanced snack.
  • Integrate them into a unique savory brunch alongside eggs and bacon.
  • Offer them as a surprising side dish to crispy fried chicken for a sweet and savory contrast.
  • Enjoy with a freshly brewed cup of coffee or a comforting tea.
  • Use them as a base for gourmet breakfast sandwiches, perhaps with a touch of fruit and cheese.

Storage Instructions

  • Store cooled chocolate biscuits in an airtight container at room temperature for up to 2-3 days.
  • Freeze unbaked biscuit dough by cutting out biscuits and placing them on a baking sheet to freeze solid. Transfer to a freezer bag for up to 1 month. Bake from frozen, adding a few minutes to the baking time.
  • Freeze baked biscuits in a freezer-safe bag or container for up to 2 months. Thaw at room temperature.
  • Reheat baked biscuits in a toaster oven or conventional oven at 300°F (150°C) for 5-7 minutes until warmed through.

Variations

  • Chocolate Types: Fold in white chocolate chips, dark chocolate chunks, or even a mix of both for elevated chocolate biscuits.
  • Flavor Boosts: Add a pinch of cinnamon, a dash of espresso powder, or a hint of orange zest to the dry ingredients for aromatic notes.
  • Glazes & Drizzles: Drizzle a simple powdered sugar glaze, a chocolate ganache, or a salted caramel sauce over the warm biscuits.
  • Size Matters: Use a smaller cutter for mini biscuits perfect for snacking, or a larger cutter for jumbo-sized treats.

Nutrition Information

Enjoying these homemade chocolate biscuits can be part of a balanced diet. Here is a general breakdown of the nutritional content per serving. These values are approximate and may vary based on specific ingredients and precise measurements.

NutrientAmount Per Serving
Calories232 kcal
Carbohydrates27 g
Protein4 g
Fat12 g
Saturated Fat7 g
Cholesterol31 mg
Sodium257 mg
Fiber1 g
Sugar2 g

Serving Size: 1 biscuit

Frequently Asked Questions (FAQ)

What makes these biscuits so flaky?

The key is very cold butter cut into small pieces and minimal handling of the dough. This creates pockets of butter that release steam during baking, forming distinct layers.

Can I prepare the dough ahead of time?

Yes, you can cut out the biscuits and freeze them unbaked. Bake them directly from frozen, adding a few extra minutes to the baking time.

What if I don’t have a biscuit cutter?

No problem! A sharp knife works perfectly for cutting the dough into squares or even wedges.

Why did my biscuits turn out tough?

Tough biscuits usually result from overworking the dough. Too much kneading develops gluten, which makes the texture chewy rather than tender.

Can I add extra chocolate to my chocolate biscuits recipe?

Absolutely! Fold in up to 1/2 cup of chocolate chips or chopped chocolate with the dry ingredients for an extra chocolate boost.

How long do chocolate biscuits last?

Store baked biscuits in an airtight container at room temperature for up to 2-3 days. For longer storage, freeze them for up to two months.

Final Thoughts

You’ve now learned how to create the ultimate flaky Chocolate Biscuits – a true delight for any occasion. With their rich flavor, tender crumb, and beautiful layers, these are sure to become a cherished recipe in your home. We’ve simplified professional techniques so anyone can achieve impressive results. Try this recipe today and experience the joy of baking these amazing Chocolate Biscuits yourself. Share your creations and connect with us online!

Chocolate Biscuits Recipe

Prep Time 20 minutes
Cook Time 12 minutes
Total Time 32 minutes
Servings 8 biscuits
Calories 250
These ultimate flaky chocolate biscuits are easy to make and perfect for a sweet treat. Enjoy them warm from the oven for a delightful experience.

Equipment

  • baking sheet
  • parchment paper
  • medium mixing bowl
  • pastry blender
  • biscuit cutter

Ingredients

Main Ingredients

  • 2 cups all-purpose flour
  • 1 tablespoon baking powder
  • 2 teaspoons white granulated sugar
  • 2-3 tablespoons cocoa powder (start with 2 and add more to taste)
  • 1/2 teaspoon cream of tartar
  • 1/2 teaspoon sea salt
  • 1/2 cup butter (chilled, salted)
  • 2/3 cup milk

Instructions 

Main Instructions

  • Preheat your oven to 415 degrees Fahrenheit and line a baking sheet with parchment paper.
  • In a medium mixing bowl, sift together the flour, cocoa powder, baking powder, sugar, cream of tartar, and sea salt.
  • Cut the chilled butter into the dry ingredients using a pastry blender, your hands, or a knife and fork until the mixture resembles coarse crumbs.
  • Add the milk and stir with a fork until the mixture comes together; then, turn the dough out onto a lightly floured surface and knead until smooth.
  • Dust your countertop with cocoa powder, roll out the dough to 1/2 inch thick, and cut out biscuits using a 3-inch cutter or into squares; re-roll any scraps to make more biscuits.
  • Arrange the cut biscuit dough on the prepared baking sheet and bake for 10-12 minutes, or until they are risen.
  • Serve the chocolate biscuits immediately while warm, or set them aside until ready to serve.

Notes

Ensure butter is well chilled for the flakiest biscuits. Do not overmix the dough to keep it tender.
Author: Emma Williams Ava
Calories: 250kcal
Course: Breakfast, Dessert
Cuisine: American
Keyword: Chocolate Biscuits, Easy Dessert, Flaky Pastry, Homemade Baking

Welcome to Emma Williams Ava’s kitchen, where we transform simple ingredients into irresistible indulgences. Prepare to discover the ultimate recipe for Chocolate Dessert Bars – a treat that promises rich, fudgy perfection in every bite. This straightforward method ensures satisfying results, making it an ideal choice for both novice and experienced bakers. Perfect for chocolate lovers, these decadent bars will become a go-to for any occasion, from casual gatherings to special celebrations. Achieve that sought-after fudgy texture every time with our expert guidance, embracing the joy of baking.

Table of Contents

Why You’ll Love These Chocolate Dessert Bars

You will adore these Chocolate Dessert Bars for many compelling reasons, embodying our brand’s commitment to culinary excellence and accessibility. They perfectly bridge professional techniques with home cooking convenience, making baking a pleasure.

  • Incredibly Rich and Wonderfully Fudgy: Each bar boasts a deep chocolate flavor and a melt-in-your-mouth fudgy texture that is truly irresistible.
  • Simple, Straightforward Baking Process: Our recipe streamlines the steps, ensuring a smooth and enjoyable baking experience even for beginners.
  • Uses Readily Available Ingredients: You likely have most of these pantry staples on hand, making these decadent chocolate bars accessible anytime.
  • A Guaranteed Crowd-Pleaser Dessert: These universally loved treats disappear quickly, making them perfect for potlucks, parties, or family desserts.
  • Versatile for Customization: Easily adapt this base recipe with your favorite mix-ins or toppings, allowing for endless creative variations.

Ingredients

Gather your high-quality ingredients to create truly exceptional Chocolate Dessert Bars. Using good-quality cocoa and chocolate makes a noticeable difference in flavor and overall richness.

  • 1½ cups (180g) all-purpose flour
  • ¾ cup (65g) unsweetened cocoa powder, sifted
  • 1½ cups (300g) granulated sugar
  • ½ cup (100g) light brown sugar, packed
  • 1 cup (226g) unsalted butter, melted
  • 3 large eggs, at room temperature
  • 2 teaspoons pure vanilla extract
  • 1 teaspoon fine sea salt
  • 1 cup (170g) semi-sweet chocolate chips, plus more for topping
  • ½ teaspoon baking powder

Notes & Substitutions

Thoughtful substitutions and notes help adapt this recipe to various needs and preferences, maintaining the integrity of these delightful chocolate dessert bars. These tips ensure reliability and excellent results.

  • Flour: For a gluten-free option, use a 1:1 gluten-free all-purpose baking blend. Measure carefully for best consistency.
  • Cocoa Powder: Opt for Dutch-processed cocoa powder to achieve a darker color and a mellower, less bitter chocolate flavor in your fudgy squares. For more on how Dutch-processed cocoa powder differs from natural cocoa in baking, this article explores the science behind cocoa processing.
  • Butter: If unsalted butter is unavailable, use salted butter and reduce the added fine sea salt to ¼ teaspoon. You can also substitute with an equal amount of vegetable oil for moisture.
  • Eggs: Room temperature eggs emulsify better with melted butter and sugar, resulting in a smoother, more cohesive batter for the ultimate chocolate dessert bars. Learn more about why room temperature eggs are beneficial in baking.
  • Chocolate: Experiment with dark, milk, or white chocolate chips, or a combination, to vary the sweetness and complexity of the flavor profile. Consider chocolate chunks too.
  • Salt: A sprinkle of flaky sea salt on top before baking enhances the chocolate’s depth and adds a delightful textural contrast. It’s a professional touch.

Equipment

Having the right tools simplifies the baking process and contributes to consistent results for your delicious Chocolate Dessert Bars. These essential items ensure ease and efficiency in the kitchen, fostering culinary excellence.

  • A 9×13 inch baking pan is perfect for achieving the ideal thickness and quantity of your rich treats.
  • Parchment paper makes for easy removal and cleanup, preventing sticking and preserving the bars’ delicate structure.
  • You will need two large mixing bowls for combining wet and dry ingredients separately, promoting organized preparation.
  • A whisk effectively blends dry ingredients and incorporates air into the wet mixture, ensuring a smooth batter for these impressive chocolate bars.
  • A rubber spatula is essential for gently folding and scraping down the sides of the bowl, preventing overmixing.
  • Accurate measuring cups and spoons ensure precise ingredient ratios for perfect, reliable chocolate dessert bars.
  • A wire cooling rack allows optimal air circulation, ensuring even cooling and preventing any sogginess.

How To Make Chocolate Dessert Bars

Follow these detailed steps to create truly exceptional Chocolate Dessert Bars, bringing professional techniques into your home kitchen. Precision and care are key for that perfect fudgy texture.

  1. Step 1: Preheat Oven and Prepare Pan. Position an oven rack in the middle of your oven. Preheat your oven to 350°F (175°C). Line a 9×13 inch baking pan with parchment paper, ensuring an overhang on the sides for easy lifting later. Lightly grease any exposed parts of the pan. This careful preparation prevents sticking and ensures clean removal of your chocolate bars.
  2. Step 2: Melt Butter and Combine Sugars. In a large microwave-safe bowl, melt the unsalted butter. Add the granulated sugar and light brown sugar to the melted butter immediately. Whisk vigorously for about one minute until thoroughly combined and smooth. This initial step begins to dissolve the sugar, creating a moist and flavorful base for your fudgy treats.
  3. Step 3: Whisk in Eggs and Vanilla. Add the large eggs, one at a time, to the sugar-butter mixture, whisking well after each addition until fully incorporated. Stir in the pure vanilla extract. Continue whisking for another minute until the mixture appears light in color and slightly thickened. This aeration helps create a tender crumb and contributes to the fudgy texture of the chocolate dessert bars.
  4. Step 4: Sift Together Dry Ingredients. In a separate medium bowl, whisk together the all-purpose flour, sifted unsweetened cocoa powder, fine sea salt, and baking powder. Sifting the cocoa powder prevents lumps, ensuring a smooth, uniform batter. This precise combination of dry ingredients forms the structural base of these delightful chocolate bars.
  5. Step 5: Gently Fold Dry into Wet. Gradually add the dry ingredient mixture to the wet mixture, using a rubber spatula. Fold gently until just combined. Be careful not to overmix the batter; overmixing can develop the gluten too much, leading to cakey rather than perfectly fudgy chocolate dessert bars. Stop as soon as no dry streaks remain.
  6. Step 6: Stir in Chocolate Chips. Fold in 1 cup of semi-sweet chocolate chips until they are evenly distributed throughout the batter. This ensures delightful pockets of melted chocolate in every bite, adding to the richness and decadence of these incredible chocolate dessert bars.
  7. Step 7: Spread Batter Evenly in Pan. Pour the thick batter into the prepared 9×13 inch baking pan. Use your rubber spatula to spread the batter evenly to all corners, creating a uniform layer. Sprinkle additional chocolate chips or a touch of flaky sea salt over the top for an appealing finish, if desired.
  8. Step 8: Bake Until Edges Are Set. Bake for 25-30 minutes. The edges should appear set and slightly firm, but the center should still look slightly soft and gooey when gently jiggled. A toothpick inserted into the center should come out with moist crumbs, not wet batter. This is crucial for achieving truly fudgy chocolate bars.
  9. Step 9: Cool Completely on Rack. Remove the pan from the oven and immediately place it on a wire cooling rack. Allow the chocolate dessert bars to cool completely in the pan before cutting. This crucial step can take at least 2-3 hours, or even longer, as cooling helps the bars set properly and develop their dense, fudgy texture.
  10. Step 10: Cut into Squares and Serve. Once thoroughly cooled, use the parchment paper overhang to carefully lift the entire slab of chocolate bars out of the pan. Place it on a clean cutting board. Use a sharp, clean knife to cut the bars into 24 even squares. Serve and enjoy your homemade fudgy chocolate dessert bars!

Pro Tips for Perfect Chocolate Dessert Bars

Mastering these techniques elevates your baking, ensuring consistently perfect Chocolate Dessert Bars every time. These expert tips come from years of culinary experience, bridging professional insights with home baking.

  • Do Not Overmix the Batter: Overmixing develops gluten, which can lead to a cakey texture instead of the desired fudgy richness. Mix until just combined.
  • Use Good Quality Chocolate: The flavor of your chocolate dessert bars heavily relies on the quality of chocolate chips and cocoa powder. Invest in premium brands.
  • Avoid Overbaking for Fudginess: Pull the bars from the oven when the edges are set but the center still jiggles slightly. This ensures a moist, fudgy interior.
  • For Clean Cuts, Chill Thoroughly: For perfectly neat squares, chill the cooled slab of chocolate bars in the refrigerator for at least 30 minutes before cutting.
  • Sprinkle with Flaky Sea Salt: A touch of flaky sea salt on top before or after baking beautifully contrasts the sweetness and enhances the deep chocolate flavor.
  • Line Pan with Parchment: Always line your pan with parchment paper, allowing an overhang. This prevents sticking and makes lifting the entire batch easy.

Serving, Storage, and Variations

Maximize your enjoyment of these delectable Chocolate Dessert Bars with creative serving suggestions, proper storage, and exciting flavor variations. These ideas empower you to personalize your treats.

Serving Suggestions

Elevate your fudgy chocolate dessert bars experience with these delightful pairings, perfect for any occasion.

  • Serve warm with a scoop of premium vanilla bean ice cream for a classic, comforting treat that melts in your mouth.
  • Dust with a delicate layer of powdered sugar for an elegant presentation that adds visual appeal.
  • Enjoy with fresh raspberries or sliced strawberries to add a touch of fruity brightness and cut through the richness.
  • Pair with a cold glass of milk, or a robust cup of coffee, for a satisfying snack or indulgent dessert.

Storage Instructions

Keep your chocolate dessert bars fresh and delicious for longer with these storage tips, ensuring their reliability.

  • Store the cooled bars in an airtight container at room temperature for up to 3-4 days, maintaining their perfect texture.
  • For longer preservation, freeze individual chocolate bars tightly wrapped in plastic wrap to prevent freezer burn.
  • Frozen bars will keep well in the freezer for up to 3 months, perfect for future cravings or unexpected guests.
  • Thaw frozen bars at room temperature for about an hour before serving for optimal texture and flavor.

Flavor Variations

Unleash your creativity and customize your chocolate dessert bars with these delicious additions, making them uniquely yours.

  • Add ½ cup of chopped nuts like walnuts, pecans, or almonds for extra crunch and a delightful nutty flavor.
  • Swirl in spoonfuls of caramel sauce, peanut butter, or hazelnut spread into the batter before baking for a rich twist.
  • Incorporate 1-2 teaspoons of espresso powder into the dry ingredients to subtly deepen the chocolate flavor without tasting like coffee.
  • Top cooled chocolate bars with a rich cream cheese frosting or a simple chocolate ganache for an extra layer of decadence and elegance.

Nutrition Information

Enjoy these homemade Chocolate Dessert Bars knowing the general nutritional breakdown. This information helps you make informed choices while indulging in a delicious treat, reflecting our brand’s transparency.

ComponentAmount (per 1 brownie)
Calories277
Fat13g
Saturated Fat8g
Cholesterol68mg
Sodium248mg
Carbohydrate39g
Sugars29g
Fiber1g
Protein3g

Note: These values are estimates and may vary slightly based on specific ingredient brands and preparation methods. Our recipe for these chocolate dessert bars emphasizes homemade goodness you can trust, providing a more wholesome option than store-bought.

Frequently Asked Questions (FAQ)

Find quick answers to common questions about baking and enjoying these delightful Chocolate Dessert Bars. We aim to empower your baking journey with reliable information.

Why are my chocolate bars cakey instead of fudgy?

Overmixing the batter or overbaking are common culprits. Mix until just combined and remove them from the oven when the center is still slightly soft.

Can I use a different size pan for these chocolate dessert bars?

A different pan size will alter baking time and thickness. For best results, use a 9×13 inch pan as specified in the recipe.

How do I know when they’re done baking?

The edges should be set, but a toothpick inserted into the center should come out with moist crumbs, not wet batter. This indicates perfect fudginess.

Can I add nuts or candy to these bars?

Absolutely! Fold in ½-1 cup of chopped nuts, candy pieces, or dried fruit with the chocolate chips for added flavor and texture variation.

How long do these bars keep fresh?

Stored in an airtight container at room temperature, these chocolate dessert bars remain fresh and delicious for 3-4 days, perfect for enjoying throughout the week.

Are these suitable for freezing?

Yes, these bars freeze beautifully. Wrap individual bars tightly and store them for up to three months; thaw at room temperature before serving for optimal enjoyment.

Final Thoughts

We hope you thoroughly enjoy creating and indulging in these rich, decadent Chocolate Dessert Bars. This simple yet refined recipe yields impressively satisfying results, bridging the gap between professional quality and approachable home baking for everyone.

Whether you’re sharing them with loved ones or savoring a moment of personal indulgence, these fudgy treats are sure to bring joy and connection. Bake a batch today and experience the delight of perfect homemade chocolate dessert bars, a true testament to the joy and reliability of baking with Emma Williams Ava.

Ultimate Fudgy Chocolate Dessert Bars

Prep Time 15 minutes
Cook Time 25 minutes
Total Time 40 minutes
Servings 12 bars
Calories 400
Indulge in these rich and decadent chocolate dessert bars, perfect for any occasion. Their fudgy texture and intense chocolate flavor make them an irresistible treat.

Equipment

  • Baking pan
  • Mixing bowls
  • Whisk
  • Saucepan (or microwave-safe bowl)

Ingredients

Main Ingredients

  • 1 cup Chocolate
  • 1/2 cup Butter
  • 1 cup Sugar
  • 1/2 cup All-purpose flour
  • 2 large Eggs

Instructions 

Preparation

  • Preheat your oven to 350°F (175°C) and grease and flour a 9×13 inch baking pan.
  • In a heatproof bowl, melt the chocolate and butter together over a double boiler or in the microwave. Stir until smooth.
  • Whisk in the sugar and then the eggs one at a time until fully incorporated into the chocolate mixture.
  • Gently fold in the all-purpose flour until just combined, being careful not to overmix the batter.
  • Pour the batter into the prepared baking pan and bake for 25-30 minutes, or until a toothpick inserted into the center comes out with moist crumbs. Let cool completely before cutting into bars.

Notes

For an extra touch, sprinkle with a pinch of sea salt before baking to enhance the chocolate flavor.
Author: Emma Williams Ava
Calories: 400kcal
Course: Dessert
Cuisine: American
Keyword: Chocolate Dessert Bars, Dessert Recipes, Fudgy Brownies

Prepare yourself for the ultimate indulgence: intensely rich and irresistibly soft and chewy chocolate cookies. This recipe delivers a deep, brownie-like flavor that will satisfy any cocoa craving. Best of all, they’re surprisingly quick and easy to make, requiring no chilling time. Get ready to bake a batch of these extraordinary chocolate cookies that are perfect for any occasion.

Table of Contents

Why You’ll Love These Chocolate Cookies

These aren’t just any ordinary cookies; they are truly special.

  • Intense Chocolate Flavor: Enjoy a deeply satisfying and rich cocoa taste that’s reminiscent of your favorite fudgy brownie.
  • Perfect Texture: Each bite offers a delightful contrast of a crisp edge with a soft, chewy, and slightly fudgy center.
  • Quick & Easy: From start to finish, you can have a warm batch of these chocolate cookies ready in under 30 minutes, with no tedious waiting.
  • Versatile: They are absolutely delicious on their own, or you can elevate them with various toppings and additions.
  • Simple Ingredients: This recipe relies on readily available pantry staples, making it accessible for any home baker.

Ingredients

To create these amazing chocolate cookies, gather these essential components. Precision in measurement is key for the best results, ensuring the perfect balance of flavor and texture in every bite. Many baking experts emphasize that for optimal texture and consistency, weighing ingredients is the most accurate method.

  • ¾ cup unsalted butter, at room temperature
  • 1 ½ cup granulated sugar
  • 2 large eggs
  • 2 teaspoons vanilla extract
  • 2 cups all-purpose flour, measured correctly (see Notes)
  • ⅔ cup unsweetened cocoa powder
  • 1 teaspoon baking soda
  • ½ teaspoon salt
  • Coarse sugar or flaky sea salt, for sprinkling (optional)

Notes & Substitutions

  • Butter: Using unsalted butter allows you to control the total salt content. Ensure it’s truly at room temperature for proper creaming.
  • Flour: Always measure flour by spooning it into your measuring cup and leveling it off. This prevents over-packing and results in a tender cookie.
  • Cocoa Powder: Natural unsweetened cocoa powder (like Hershey’s) gives a classic chocolate flavor. Dutch-process cocoa creates a darker, milder, and less acidic cookie.
  • Salt: A high-quality fine sea salt enhances the depth of the chocolate. The optional coarse salt sprinkle provides a pleasant crunch and flavor contrast.
  • Sugar: Granulated sugar is used exclusively here to achieve the desired chewy texture and slight crispness on the edges.

Equipment

Having the right tools makes baking these chocolate cookies a breeze.

Step-by-Step Instructions

Follow these steps carefully to bake the perfect batch of soft and chewy chocolate cookies. Precision ensures an outstanding result every time.

  1. Prep Oven & Pan: Preheat your oven to 350°F (175°C). Line a large baking sheet with parchment paper. This prevents sticking and ensures even baking.
  2. Cream Wet Ingredients: In the bowl of a stand mixer fitted with a paddle attachment, or using a hand mixer, beat the room temperature unsalted butter and granulated sugar on medium-high speed. Continue beating until the mixture is light, fluffy, and creamy, which typically takes about 4 minutes.
  3. Incorporate Eggs & Vanilla: Add the large eggs to the creamed mixture one at a time, mixing well after each addition until fully incorporated. Then, stir in the vanilla extract until just combined.
  4. Combine Dry Ingredients: In a separate medium bowl, sift together the all-purpose flour, unsweetened cocoa powder, baking soda, and salt. Sifting helps to eliminate lumps and ensures the dry ingredients are evenly distributed.
  5. Mix Dough: Gradually add the sifted dry ingredients to the wet ingredients in the mixer. Mix on low speed until the dough is just combined. Be careful not to overmix, as this can lead to tough cookies. Scrape down the sides and bottom of the bowl with a rubber spatula to ensure everything is evenly incorporated.
  6. Scoop Cookies: Using a medium #40 (1.5 Tbsp) cookie scoop, portion the dough into rounded tablespoons. Place the scooped dough balls onto the prepared baking sheet, leaving about 2 inches between each to allow for spreading.
  7. Bake: Transfer the baking sheet to the preheated oven. Bake for approximately 9 minutes, or until the edges appear set and the tops just barely look firm, no longer wet. The centers might still seem slightly soft; this is normal for a chewy cookie. Baking times can vary depending on your oven and the size of your cookies.
  8. Finish & Cool: Immediately upon removing from the oven, sprinkle the warm chocolate cookies with coarse sugar or flaky sea salt, if desired. If any cookies are misshapen, gently use a spatula to push them back into a perfect circle while they are still hot and pliable. Let the cookies cool on the baking sheet for a few minutes to set before carefully transferring them to a wire rack to cool completely.
  9. Repeat: Continue scooping and baking the remaining cookie dough in batches until all your delicious chocolate cookies are baked and cooled.

Pro Tips for Perfect Chocolate Cookies

Achieve consistently perfect results with these expert insights.

  • Butter Temperature: Ensure your butter is truly at room temperature, soft enough to indent but not melted. This prevents the cookies from spreading too much.
  • Flour Measurement: Weighing your flour (240 grams) is the most accurate method. If measuring by volume, spoon flour into the cup and level for a tender crumb.
  • Do Not Overmix: Once the flour is added, mix only until no dry streaks remain. Overmixing develops gluten, resulting in a tougher cookie. Understanding how gluten develops in dough is crucial for achieving the desired tenderness in baked goods.
  • Baking Time: Watch for visual cues. The edges of the chocolate cookies should be set, but the centers may still look a little soft. This leads to that perfect chewy texture.
  • The Spatula Trick: For perfectly round cookies, gently swirl a spatula or round cookie cutter around each hot cookie on the baking sheet immediately after baking.
  • Salt Sprinkle: A final sprinkle of flaky sea salt on the hot cookies intensifies the chocolate flavor and adds a delightful textural contrast.

Serving, Storage, and Variations

These rich chocolate cookies are delightful served warm or at room temperature. Enjoy them with a cold glass of milk, a hot cup of coffee, or transform them into incredible ice cream sandwiches.

Storage

Store cooled cookies in an airtight container at room temperature for up to 4-5 days. For longer storage, flash freeze baked cookies on a baking sheet, then transfer to a freezer-safe bag for up to 3 months. Thaw at room temperature.

Freezing Dough

You can freeze raw cookie dough balls for up to 3 months. Place scooped dough on a baking sheet and freeze until solid, then transfer to a freezer bag. Bake directly from frozen, adding 2-4 minutes to the baking time.

Variations

  • Add-ins: Stir in 1 cup of chocolate chips (dark, milk, or white), chopped nuts like walnuts or pecans, or even a mix of mini marshmallows for a rocky road vibe.
  • Flavor Boosts: Enhance the chocolate flavor with 1 teaspoon of instant espresso powder mixed into the dry ingredients. Try almond extract instead of vanilla for a unique twist.
  • Toppings: Drizzle with melted white chocolate, a simple glaze, or sprinkle with crushed peppermint candies during the holidays.

Nutrition Information

ComponentAmount
Calories192 kcal
Carbohydrates26 g
Protein3 g
Fat9 g
Saturated Fat6 g
Cholesterol29 mg
Sodium102 mg
Potassium97 mg
Fiber2 g
Sugar15 g
Vitamin A201 IU
Calcium13 mg
Iron1 mg
Serving Size1 serving

Disclaimer: Nutrition values are estimates and may vary based on specific ingredients and preparation methods.

Frequently Asked Questions (FAQ)

Why didn’t my chocolate cookies spread?

This often happens if your butter was too cold, you added too much flour, or your oven temperature was too low. Ensure butter is room temperature and flour is measured precisely.

Can I use a different type of cocoa powder?

Yes, you can! Natural cocoa powder creates a classic, slightly acidic chocolate flavor, while Dutch-process cocoa results in a darker, milder, and less bitter cookie.

How do I get a chewier cookie?

For ultimate chewiness, avoid overbaking. Pull the cookies from the oven when the edges are set but the centers still look slightly soft.

Can I make these ahead of time?

Absolutely! You can prepare the dough and refrigerate it for up to 3 days, or freeze scooped dough balls for up to 3 months for future baking.

What’s the best way to store them?

Keep your baked chocolate cookies in an airtight container at room temperature. This helps them stay fresh and chewy for several days.

Final Thoughts

You now have the perfect recipe for incredibly decadent and chewy chocolate cookies that truly deliver on flavor and texture. This straightforward approach allows anyone to create bakery-quality treats right at home, bridging professional techniques with accessible baking. We encourage you to try this recipe, share the joy with your loved ones, and experience the pure delight of homemade cookies. Let us know how your batch turns out in the comments below!

Decadent & Chewy Chocolate Cookies

Prep Time 20 minutes
Cook Time 25 minutes
Total Time 45 minutes
Servings 24 cookies
Calories 180
Indulge in these rich and delightful chocolate cookies, featuring a perfectly soft and chewy texture. This recipe provides a simple guide to baking a batch of truly decadent treats.

Equipment

  • Oven
  • Sheet pan
  • Stand mixer
  • Mixing bowls
  • Sifter
  • Cookie scoop
  • Spatula
  • Wire rack

Ingredients

Main Ingredients

  • ¾ cup unsalted butter (at room temperature)
  • 1 ½ cup granulated sugar
  • 2 large eggs
  • 2 teaspoons vanilla extract
  • 2 cups all-purpose flour (measured correctly)
  • cup unsweetened cocoa powder
  • 1 teaspoon baking soda
  • ½ teaspoon salt
  • Coarse sugar or salt (for sprinkling (optional))

Instructions 

Instructions

  • Preheat oven to 350°F and line a sheet pan with parchment paper.
  • In a stand mixer, beat butter and sugar until light and creamy, about 4 minutes. Gradually add eggs, mixing after each, then stir in vanilla extract.
  • Sift together flour, cocoa powder, baking soda, and salt in a separate bowl. Add this dry mixture to the wet ingredients and mix until just combined, scraping the bowl as needed.
  • Scoop rounded tablespoons of dough onto the prepared sheet pan.
  • Bake for about 9 minutes, or until the edges are crisp and the tops are set.
  • Immediately sprinkle hot cookies with coarse sugar or salt and reshape with a spatula if needed. Cool on the pan for a few minutes, then transfer to a wire rack to cool completely.
  • Repeat baking with the remaining dough and store cooled cookies in an airtight container at room temperature.

Notes

For best results, ensure flour is measured correctly. Baking times can vary based on your oven and cookie size; keep an eye on them. If cookies are misshapen after baking, gently reshape them with a spatula while still warm. Store cooled cookies in an airtight container at room temperature.
Author: Emma Williams Ava
Calories: 180kcal
Course: Dessert
Cuisine: American
Keyword: Chewy Dessert, Chocolate Cookies, Cocoa Powder, Fudgy Cookies

Indulge in the ultimate classic: a truly decadent chocolate cake that promises pure delight in every bite. This recipe makes crafting an incredibly moist, rich, and intensely flavored cake surprisingly simple. Perfect for any celebration or a sweet craving, this easy chocolate cake comes together effortlessly. Prepare to bake a show-stopping dessert that’s adaptable for various dietary needs, ensuring everyone can enjoy a slice of pure bliss.

Table of Contents

Why You’ll Love This Chocolate Cake

You will fall in love with this ultimate chocolate cake recipe for so many reasons. Its simple preparation method and impressive results make it a household favorite.

  • One-Bowl Ease: Minimize cleanup with a streamlined process that brings everything together in a single bowl.
  • Incredibly Moist and Rich: Experience a tender crumb and luxurious texture that melts in your mouth.
  • Deep, Intense Chocolate Flavor: High-quality cocoa and a secret ingredient amplify the robust chocolate taste.
  • Adaptable for All: Easily adjust for gluten-free or egg-free preferences without sacrificing flavor or texture.
  • Perfect for Any Occasion: This versatile dessert suits birthday parties, holidays, or a simple weeknight treat.

Ingredients

Gather these essential ingredients to create your luscious chocolate cake. These components ensure a perfectly balanced flavor and an irresistible texture.

  • 2 cups all-purpose flour
  • 2 cups sugar
  • 3/4 cup unsweetened cocoa powder
  • 2 teaspoons baking powder
  • 1 1/2 teaspoons baking soda
  • 1 teaspoon kosher salt
  • 1 teaspoon espresso powder, homemade or store-bought
  • 1 cup milk, or buttermilk, almond, or coconut milk
  • 1/2 cup vegetable oil, or canola oil, or melted coconut oil
  • 2 large eggs
  • 2 teaspoons vanilla extract
  • 1 cup boiling water
  • Chocolate Buttercream Frosting Recipe (for assembly)

Notes & Substitutions

Espresso powder deepens the chocolate flavor without making the cake taste like coffee, as noted by King Arthur Baking, which explains how espresso powder enhances chocolate. It’s a secret weapon for an intensely rich chocolate cake. For milk, buttermilk adds a slight tang and extra tenderness, while unsweetened almond, oat, or coconut milk works beautifully for dairy-free options.

Canola oil or melted coconut oil are great alternatives to vegetable oil. To make this chocolate cake gluten-free, substitute with a 1-to-1 gluten-free baking flour blend, such as Bob’s Red Mill. For an egg-free version, use 1/2 cup unsweetened applesauce or a commercial egg replacer like Bob’s Red Mill Egg Replacer.

Equipment

Having the right tools makes baking this classic dessert a breeze. You likely already own most of these kitchen essentials.

How To Make Chocolate Cake

Follow these clear steps to bake the perfect chocolate cake. Precision ensures a consistently moist and flavorful result every time. This recipe makes creating a decadent dessert simple and enjoyable.

  • Prepare Oven and Pans: Preheat your oven to 350º F (175°C). Prepare two 9-inch cake pans. You can spray them with baking spray, butter and lightly flour them, or brush them with homemade chocolate pan release for easy removal. Proper pan preparation is crucial for a smooth release of your delicious chocolate cake layers.
  • Combine Dry Ingredients: In a large mixing bowl or the bowl of a stand mixer, add the all-purpose flour, sugar, unsweetened cocoa powder, baking powder, baking soda, kosher salt, and espresso powder. Whisk these dry ingredients together thoroughly to combine them evenly. If using a stand mixer, use your paddle attachment and stir the flour mixture until well combined. This ensures all leavening agents and flavor enhancers are distributed throughout the batter.
  • Add Wet Ingredients: Next, add the milk (or your chosen substitute), vegetable oil (or alternative), large eggs, and vanilla extract to the dry ingredient mixture. Mix these together on medium speed until they are just well combined. Avoid overmixing at this stage to keep the cake tender.
  • Incorporate Boiling Water: Reduce the mixer speed to low. Carefully and slowly add the boiling water to the cake batter while mixing. Continue mixing until the batter is smooth and well combined. The batter for this chocolate cake will be quite thin; this is perfectly normal and contributes to the cake’s exceptional moisture.
  • Bake the Cake: Distribute the thin cake batter evenly between your two prepared 9-inch cake pans. Place the pans in the preheated oven. Bake for 30-35 minutes. To check for doneness, insert a toothpick or cake tester into the center of a cake. It should come out clean.
  • Cool Completely: Remove the cake pans from the oven and allow them to cool on a wire rack for about 10 minutes. This initial cooling helps the cakes firm up. After 10 minutes, carefully invert the cakes onto the wire rack to cool completely. Ensure they are fully cooled before proceeding to the next step; warm cakes will melt your frosting.
  • Frost and Serve: Once your cake layers are completely cool, frost them generously with your favorite Chocolate Buttercream Frosting. Stack the layers, apply frosting to the top and sides, then decorate as desired. Slice and enjoy your homemade chocolate cake!

Pro Tips for the Best Chocolate Cake

Achieve baking perfection with these expert tips for your delightful chocolate cake. These simple guidelines elevate your results from good to absolutely amazing.

  • Quality Cocoa: Use a good quality unsweetened cocoa powder for a deep, rich chocolate flavor.
  • Room Temperature Ingredients: Ensure milk and eggs are at room temperature for a smoother, more emulsified batter. As explained by Baking by Courtney, using room temperature ingredients is crucial for cake texture.
  • Do Not Overmix: Mix only until ingredients are just combined; overmixing develops gluten and can lead to a tough cake.
  • Proper Pan Prep: Always prepare your cake pans thoroughly to prevent sticking and ensure easy release.
  • Cool Completely: Allow cakes to cool fully on a wire rack before frosting to prevent the frosting from melting.

Serving Suggestions, Storage & Variations

Discover versatile ways to enjoy, store, and adapt this incredible chocolate cake. Whether for a crowd or a single craving, these ideas enhance your baking experience.

Serving Suggestions

  • Serve a slice of this rich chocolate cake with a scoop of vanilla bean ice cream or a dollop of fresh whipped cream.
  • Garnish with fresh raspberries or sliced strawberries for a burst of color and tartness, complementing the deep chocolate.
  • Drizzle with extra chocolate sauce or a sprinkle of flaky sea salt to enhance the flavors.
  • Pair it with a strong cup of coffee, a glass of cold milk, or even a robust red wine for a sophisticated dessert experience.

How to Store & Make Ahead

  • Storage: Store frosted chocolate cake covered loosely with plastic wrap or in an airtight cake dome at room temperature for up to 3-4 days. For longer storage, refrigerate it.
  • Make Ahead (Unfrosted Layers): Wrap unfrosted cake layers tightly in plastic wrap and then in aluminum foil. Freeze for up to 2 months. Thaw frozen layers in the refrigerator overnight before frosting.
  • Frosted Cake: A fully frosted cake can be frozen. Place it in the freezer uncovered for about 30 minutes until the frosting is firm, then wrap tightly in plastic wrap and foil. Thaw in the refrigerator.

Other Variations

  • Chocolate Cupcakes: Transform this recipe into delightful cupcakes. Fill cupcake liners two-thirds full and bake for 18-22 minutes, or until a toothpick comes out clean.
  • Sheet Cake: For a simpler presentation, bake the entire batter in a greased and floured 9×13-inch pan for 35-40 minutes. Alternatively, use a half-sheet pan (13×18 inches) for a thinner cake, adjusting baking time to 20-25 minutes.

Nutrition Information

Enjoying a slice of this homemade chocolate cake means indulging in rich flavors. Here is an approximate nutritional breakdown per serving.

NutrientAmount
Calories124 kcal
Carbohydrates27 g
Protein3 g
Fat1 g
Saturated Fat1 g
Cholesterol15 mg
Sodium178 mg
Fiber1 g
Sugar17 g
Serving Size1 serving

Disclaimer: All nutritional information is approximate and based on third-party calculations. Exact values may vary depending on ingredients used and portion sizes.

Frequently Asked Questions (FAQ)

Here are answers to common questions about baking this delightful chocolate cake. These insights help ensure your baking success.

Can I use 8-inch cake pans instead?

Yes, you can use 8-inch pans, but the layers will be thicker and require a longer baking time (around 35-45 minutes). You might also get slightly taller layers.

What type of cocoa powder is best for this recipe?

Both natural unsweetened cocoa powder and Dutch-processed cocoa powder work well. Dutch-processed gives a darker color and milder flavor, while natural cocoa offers a fruitier, more intense chocolate taste.

Can I skip the espresso powder?

You can, but espresso powder significantly enhances the chocolate flavor without making the cake taste like coffee. We highly recommend including it for the best taste.

How long does homemade chocolate cake last?

A frosted chocolate cake stored at room temperature, covered, will stay fresh and delicious for about 3-4 days. You can extend its life by refrigerating it.

Why is the batter so thin?

The thin consistency is intentional for this recipe. It’s what helps create an incredibly moist and tender crumb, so don’t be alarmed if your batter seems runny.

Final Thoughts

This truly is the best chocolate cake recipe ever, delivering an unparalleled combination of deep flavor, moist texture, and surprising ease. Bridging professional techniques with home cooking, this recipe ensures a reliable and delicious outcome every time. We encourage you to try this ultimate chocolate indulgence and experience the joy of baking a perfect classic. Share your photos and leave a review; we love hearing about your culinary adventures!

The Best Chocolate Cake Recipe Ever

Prep Time 25 minutes
Cook Time 35 minutes
Total Time 1 hour 30 minutes
Servings 12 slices
Calories 500
This is the best chocolate cake recipe ever, yielding a moist and rich cake perfect for any occasion, topped with a delicious chocolate buttercream frosting.

Equipment

  • Oven
  • 9-inch cake pans
  • Large bowl
  • Stand mixer
  • Whisk
  • Cake tester

Ingredients

Cake

  • 2 cups all-purpose flour
  • 2 cups sugar
  • 3/4 cup unsweetened cocoa powder
  • 2 teaspoons baking powder
  • 1 1/2 teaspoons baking soda
  • 1 teaspoon kosher salt
  • 1 teaspoon espresso powder (homemade or store-bought)
  • 1 cup milk (or buttermilk, almond, or coconut milk)
  • 1/2 cup vegetable oil (or canola oil, or melted coconut oil)
  • 2 large eggs
  • 2 teaspoons vanilla extract
  • 1 cup boiling water

Frosting

  • Chocolate Buttercream Frosting

Instructions 

Instructions

  • Preheat oven to 350º F. Prepare two 9-inch cake pans with baking spray, butter, and flour, or homemade chocolate pan release.
  • Combine flour, sugar, cocoa, baking powder, baking soda, salt, and espresso powder in a large bowl or stand mixer and whisk until well combined.
  • Add milk, vegetable oil, eggs, and vanilla to the flour mixture and mix well, then carefully add boiling water to the cake batter until well combined.
  • Divide batter evenly into the prepared pans and bake for 30-35 minutes, or until a toothpick inserted in the center comes out clean.
  • Remove the cakes from the oven and cool for about 10 minutes in the pans, then remove from the pans and cool completely.
  • Once completely cooled, frost the cake with Chocolate Buttercream Frosting.

Notes

Ensure all ingredients are at room temperature for a smoother batter. Do not overmix the batter to keep the cake tender.
Author: Emma Williams Ava
Calories: 500kcal
Course: Dessert
Cuisine: American
Keyword: Best Cake, Chocolate Cake, Easy Dessert