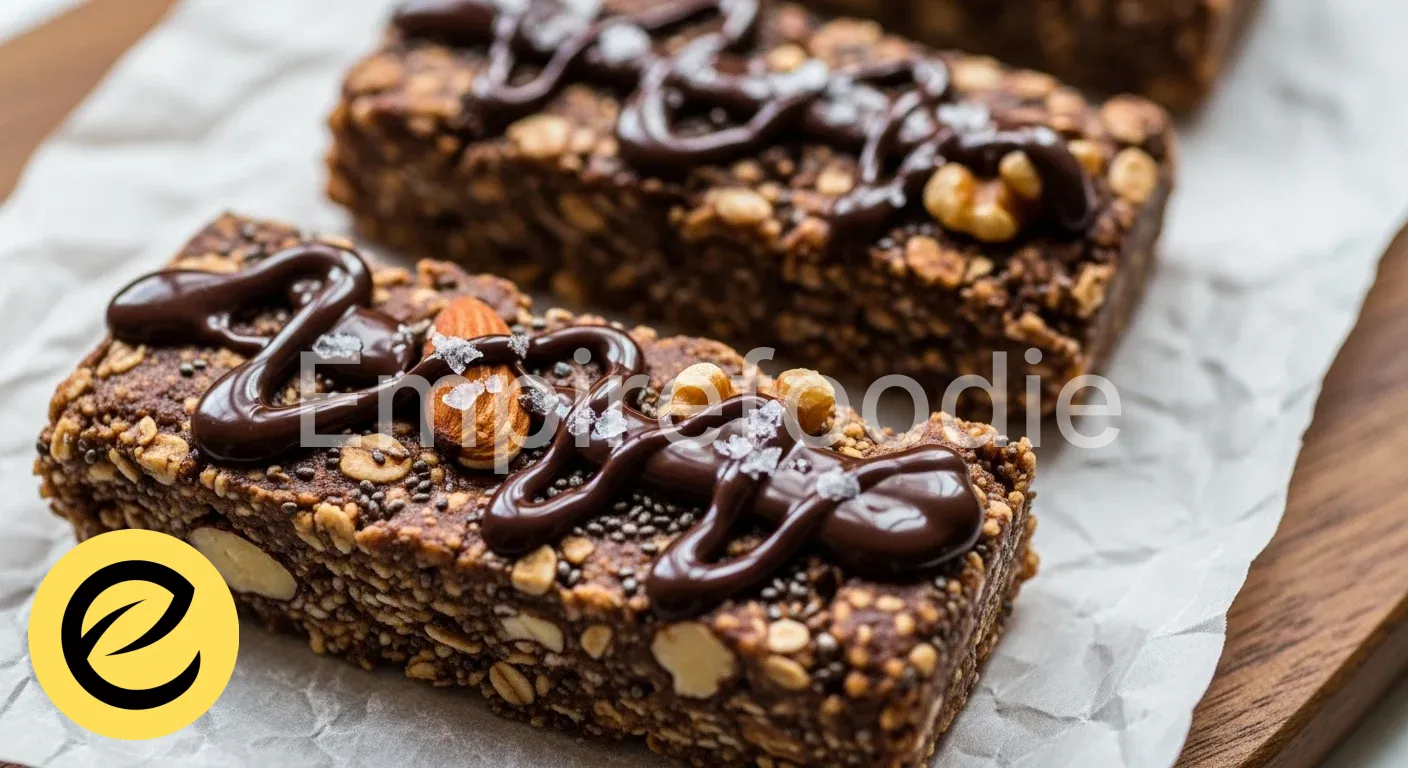
Indulge in these irresistible chocolate protein bars, a perfect blend of rich cocoa and satisfying texture. These gourmet treats offer a chewy bite with a decadent chocolate flavor, ideal for a wholesome snack or post-workout fuel. Crafted to bridge delicious pastry and healthy living, these homemade chocolate protein bars prove that nutritious can also be delightful.
Table of Contents
Why You’ll Love These Chocolate Protein Bars
- Rich Flavor: Decadent cocoa meets natural sweetness for a satisfying bite.
- Simple Prep: No-bake, minimal cleanup, ready in minutes.
- Nutrient-Rich: Packed with protein and fiber, perfect for energy.
- Adaptable: Easily customize for various dietary preferences.
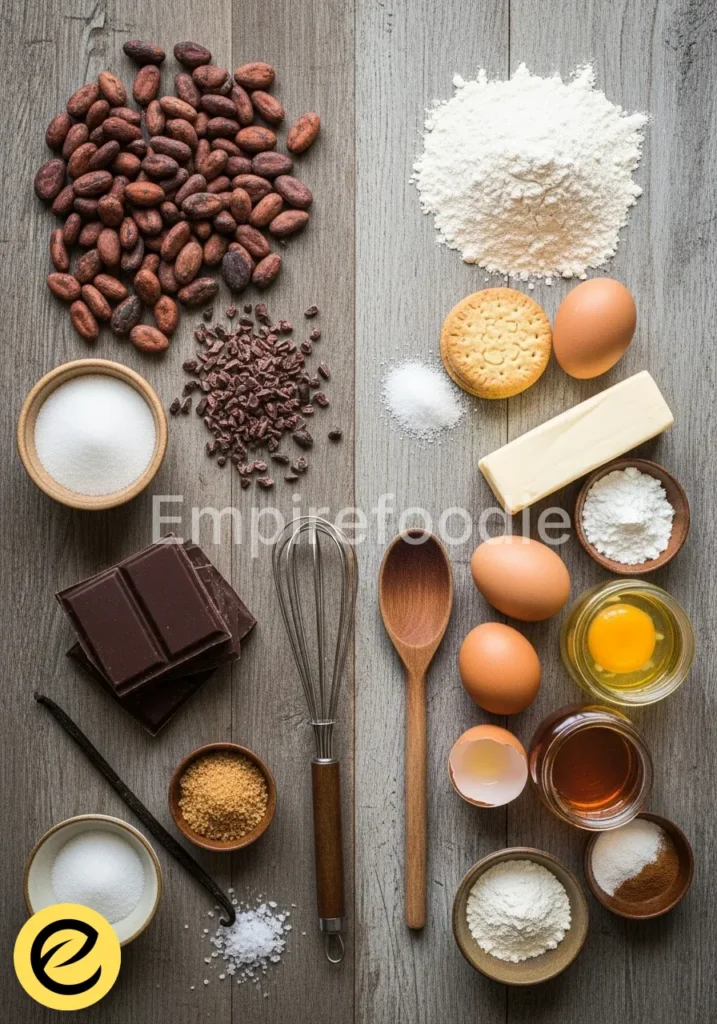
Ingredients You’ll Need
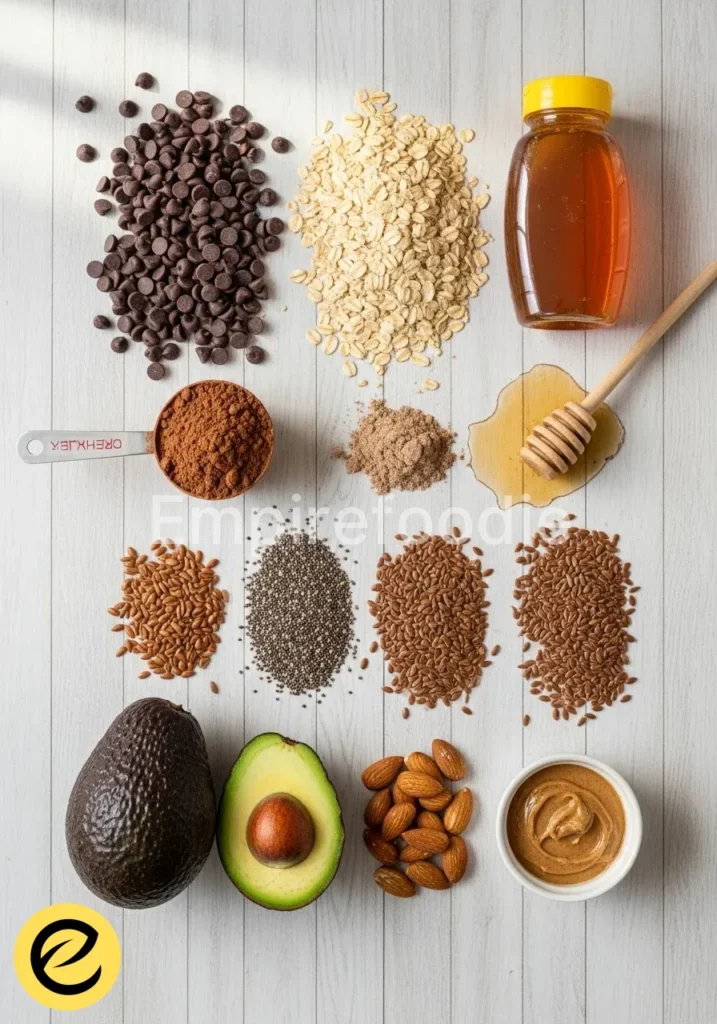
Creating truly exceptional chocolate protein bars starts with selecting high-quality ingredients. Each component plays a vital role in achieving that perfect balance of flavor, texture, and nutritional value. Embrace the finest natural products to elevate your homemade treats.
- Natural Peanut Butter: Opt for creamy, unsweetened peanut butter with no added oils or sugars. Its rich, nutty flavor forms the core binder and provides healthy fats, contributing to the satisfying chewiness of these protein bars. Almond butter or cashew butter also work beautifully.
- Protein Powder: A high-quality chocolate or unflavored whey protein isolate offers the best texture and nutritional profile for these bars. If you prefer a plant-based option, a blend of pea and rice protein works well, though you might need a tiny splash more liquid to achieve the right consistency. Ensure your chosen protein powder blends smoothly without grittiness.
- Unsweetened Cocoa Powder: Dutch-processed cocoa powder provides a darker color and a smoother, less bitter chocolate flavor. Look for a premium brand to truly enhance the chocolate depth in your protein bars. This is where the “chocolate” in chocolate protein bars truly shines.
- Honey or Maple Syrup: These natural sweeteners not only provide delicious flavor but also act as a crucial binder. Maple syrup offers a distinct earthy sweetness, while honey brings a floral note. Adjust the amount to your preferred level of sweetness. For vegan chocolate protein bars, strictly use maple syrup.
- Rolled Oats (Gluten-Free if desired): Old-fashioned rolled oats add essential fiber and a pleasant chewiness. They help absorb moisture and provide structure. Ensure they are certified gluten-free if you are catering to dietary restrictions. Do not use instant oats, as they will alter the texture too much.
- Vanilla Extract: Pure vanilla extract is a must for enhancing the overall flavor profile, complementing the chocolate and adding a touch of sophisticated warmth. A good quality extract makes all the difference.
- Pinch of Salt: A tiny bit of salt balances the sweetness and intensifies the chocolate flavor, making these homemade protein bars taste more gourmet.
- Optional Add-ins: Consider a handful of mini chocolate chips (dark chocolate recommended), chopped nuts (almonds, walnuts), or shredded unsweetened coconut for extra texture and flavor. These additions transform simple protein bars into luxurious treats.
Substitutions & Variations
[ra_display_video url=”https://www.youtube.com/watch?v=QZXx1u3kWQo”]
These chocolate protein bars are wonderfully adaptable. Experiment with wholesome swaps to suit your taste.
- Nut-free: Use sunflower seed butter.
- Vegan: Maple syrup replaces honey.
- Boosts: Add flaxseed, chia, or dried fruit.
- Flavor: Try different protein powder types.
For an extra rich chocolate experience, melt a tablespoon of coconut oil with unsweetened cocoa powder and drizzle over the finished chocolate protein bars before chilling. This creates a hard chocolate shell, reminiscent of your favorite confectionery, but packed with nutrition.
These chocolate protein bars are wonderfully adaptable, allowing you to experiment with different ingredients to suit your preferences. For delicious chocolate biscuits to complement your protein intake, check out this chocolate biscuits recipe.
Equipment You’ll Need
- 8×8 inch baking pan: Essential for shaping your chocolate protein bars.
- Parchment paper: Lines the pan for easy removal and cleanup.
- Large mixing bowl: For combining all the ingredients thoroughly.
- Sturdy spatula or spoon: To mix the dense batter effectively.
- Measuring cups and spoons: For precise ingredient measurements.
- Cutting board and sharp knife: For neat slicing of the finished bars.
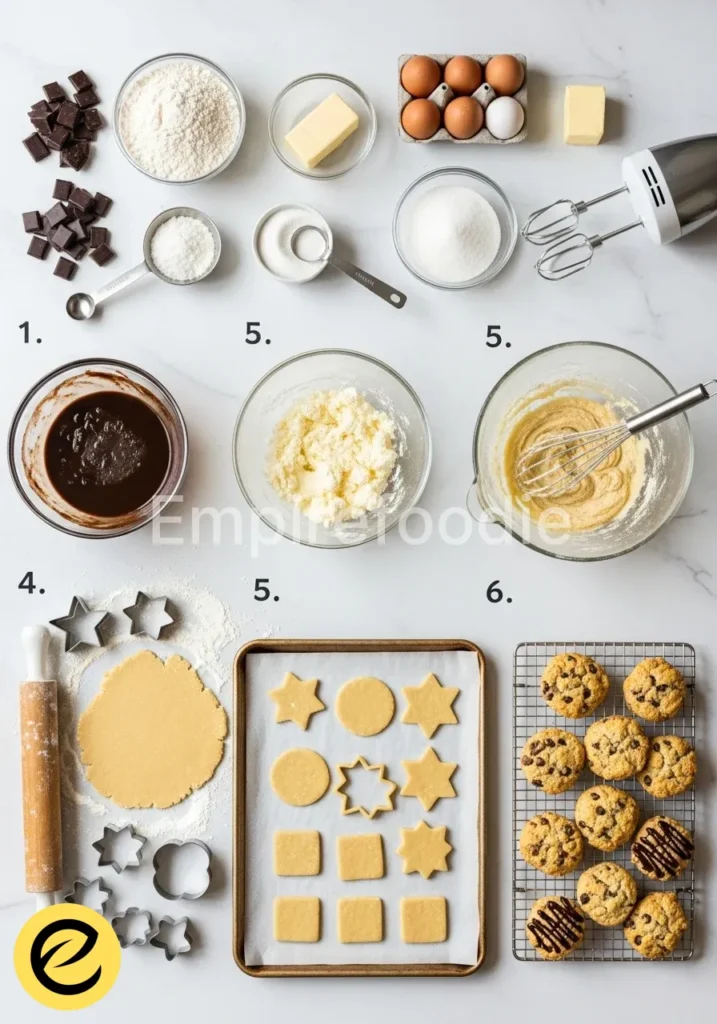
Step-by-Step Instructions
Crafting these delectable chocolate protein bars is a straightforward process, requiring no baking and minimal fuss. Follow these detailed steps to ensure perfectly formed, delicious, and nutritious homemade protein bars every time.
- Prepare Your Pan: First, line an 8×8 inch baking pan with parchment paper, leaving an overhang on all sides. This makes lifting the finished chocolate protein bars out of the pan incredibly easy. A light spray with cooking oil can help the parchment adhere.
- Combine Wet Ingredients: In a large mixing bowl, combine the natural peanut butter, honey (or maple syrup), and vanilla extract. Stir these ingredients vigorously until they are completely smooth and well-integrated. This forms the sticky, flavorful base for your homemade protein bars.
- Add Dry Ingredients: To the wet mixture, add the chocolate protein powder, unsweetened cocoa powder, rolled oats, and a pinch of salt. It is important to add these dry components gradually to prevent a dusty cloud and ensure even distribution.
- Mix Thoroughly: Using a sturdy spatula or your hands, mix all the ingredients until a thick, uniform dough forms. This will require some effort as the mixture is quite dense. Ensure no dry pockets of protein powder or oats remain. The consistency should be firm enough to press, but still pliable. This is key for well-structured homemade chocolate protein bars.
- Press into Pan: Transfer the mixture to the prepared baking pan. Using the back of your spatula or your clean hands, press the mixture down firmly and evenly into the pan. Make sure the surface is smooth and compact. The firmer you press, the less crumbly your finished chocolate protein bars will be.
- Chill: Place the pan in the refrigerator for at least 2 hours, or until the chocolate protein bars are completely firm. Chilling is crucial for setting the bars, allowing them to hold their shape perfectly when cut. For an even quicker set, you can place them in the freezer for about 30-45 minutes.
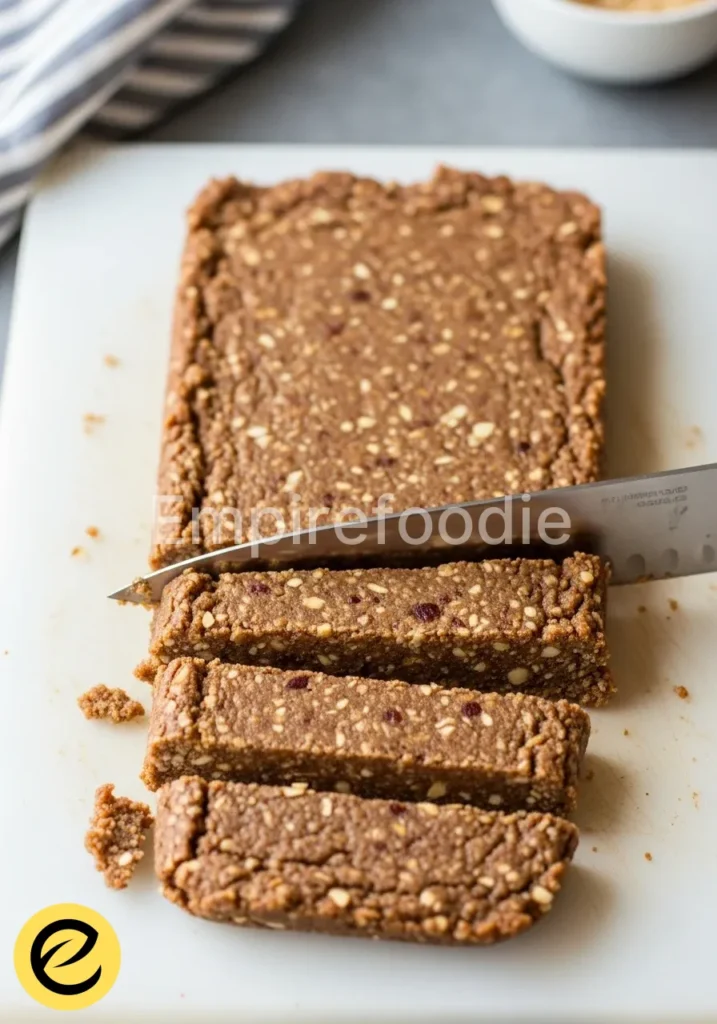
- Cut into Bars: Once firm, use the parchment paper overhang to lift the entire slab out of the pan. Place it on a cutting board. Using a sharp knife, cut the slab into 12 equal bars. For clean cuts, wipe your knife with a damp cloth between slices.
- Enjoy or Store: Your delicious chocolate protein bars are now ready to enjoy! For optimal freshness, store them as directed below.
Crafting these delectable chocolate protein bars is simple and requires minimal fuss, making it an ideal recipe for any home chef. To enhance your dessert repertoire, consider trying these lovely chocolate chip biscuits as well.
Pro Tips for Success
Achieving bakery-quality chocolate protein bars at home involves a few expert tricks. These tips, rooted in pastry arts, will ensure your no-bake chocolate protein bars are perfect every time.
- Ingredient Temperature: Ensure your peanut butter is at room temperature. This makes it much easier to mix with the other ingredients, creating a smoother, more cohesive base for your gourmet protein bars.
- Protein Powder Quality: Not all protein powders are created equal. Some absorb more liquid than others. If your mixture seems too dry, add a teaspoon of milk (dairy or non-dairy) at a time until it reaches a pressable consistency. If it’s too wet, add a tiny bit more oats or protein powder. This balance is crucial for perfect healthy protein bars.
- Pressing Technique: When pressing the mixture into the pan, really put some muscle into it. Use a flat-bottomed glass or a second piece of parchment paper to get a truly even, compact layer. This prevents crumbling and ensures each of your chocolate protein bars holds its shape.
- Clean Cuts: For professional-looking bars, use a large, sharp chef’s knife. Heat the knife under hot water and wipe it dry before each cut. This creates clean, precise edges, especially important for rich chocolate bars that contain sticky binders.
- Flavor Balancing: Taste your mixture before pressing it into the pan (if safe with raw oats/protein). Adjust sweetness or add another pinch of salt if needed. This allows you to customize the flavor of your delicious chocolate protein bars to your exact preference before they set.
Storage & Reheating Tips
Proper storage is essential to maintain the freshness and texture of your homemade chocolate protein bars. Since these are no-bake and contain natural ingredients, they require refrigeration.
- Refrigeration: Store your chocolate protein bars in an airtight container in the refrigerator for up to 1 week. This prevents them from drying out and keeps them firm.
- Freezing: For longer storage, wrap individual bars tightly in plastic wrap, then place them in a freezer-safe bag or container. They can be frozen for up to 2-3 months. Thaw individual bars in the refrigerator overnight or at room temperature for about 30 minutes before enjoying.
- Prevent Sticking: If stacking multiple bars, place a small piece of parchment paper between each one to prevent them from sticking together.
Proper storage is key to enjoying your homemade chocolate protein bars at their best. For a delightful treat that pairs beautifully with your protein bars, don’t miss out on these chocolate cookies with white chips.
What to Serve With This Recipe

These chocolate protein bars are substantial enough to be a standalone snack, but they also pair beautifully with light, healthy accompaniments that complement their rich flavor without overwhelming them. Think fresh and vibrant to contrast the decadent chocolate bars.
- Fresh Fruit Platter: A vibrant assortment of berries (strawberries, raspberries, blueberries), sliced apples, or a ripe banana provides natural sweetness and a refreshing counterpoint to the rich chocolate protein bars.
- Greek Yogurt: A dollop of plain Greek yogurt, perhaps with a drizzle of honey, offers an extra boost of protein and a creamy texture that contrasts nicely with the chewy bars.
- A Warm Beverage: Pair your protein bar with a soothing cup of herbal tea, a strong black coffee, or a glass of unsweetened almond milk. This combination makes for a comforting and satisfying break.
- Small Side Salad: For a truly balanced meal, consider a small, light side salad with mixed greens, a few cherry tomatoes, and a simple vinaigrette. It introduces freshness and an entirely different texture.
- Sparkling Water with Lemon: A glass of sparkling water infused with lemon or lime slices cleanses the palate and offers a crisp, refreshing accompaniment to these energy bars.
Frequently Asked Questions (FAQ)
Can I make these chocolate protein bars gluten-free?
Absolutely! The primary ingredient containing gluten would be the oats. Simply ensure you use certified gluten-free rolled oats, and your chocolate protein bars will be entirely gluten-free. Always double-check labels on other ingredients like protein powder to confirm they are also gluten-free if cross-contamination is a concern for severe allergies.
Are these healthy protein bars suitable for pre- or post-workout?
Yes, these healthy protein bars are excellent for both pre- and post-workout nutrition. They provide a good balance of protein for muscle repair and recovery, complex carbohydrates from the oats for sustained energy, and healthy fats for satiety. Their no-bake nature makes them a convenient, grab-and-go option for busy schedules. Enjoy one about an hour before your workout for sustained energy, or immediately after to kickstart recovery.
Why are my no-bake chocolate protein bars crumbly?
If your no-bake chocolate protein bars are crumbly, it’s likely due to an imbalance in the wet-to-dry ingredient ratio, or insufficient pressing. Ensure you measure accurately. If the mixture feels too dry after mixing, add a tiny bit more peanut butter or honey (half a teaspoon at a time) until it comes together.
Crucially, when pressing the mixture into the pan, press very, very firmly and evenly. This compaction is essential for the bars to hold together. Also, ensure they are thoroughly chilled before cutting, as this solidifies the binders.
Chocolate protein bars are a popular choice among fitness enthusiasts and health-conscious individuals looking for a convenient snack. These bars provide an excellent source of protein, essential for muscle repair and growth, making them a favored option for those engaged in physical activities; learn more about their benefits in this guide.
Final Thoughts
These homemade chocolate protein bars are more than just a snack; they are a testament to how simple, wholesome ingredients can create something truly extraordinary and satisfying. Embrace the joy of crafting elevated comfort food that nourishes your body and delights your palate, bridging the gap between sophisticated pastry art and accessible home cooking.
Nutrition Information (per serving)
Approximate values per chocolate protein bar (yields 12 servings):
| Nutrient | Amount |
|---|---|
| Calories | 220-250 kcal |
| Protein | 12-15 g |
| Fat | 12-15 g |
| Carbohydrates | 15-20 g |
| Fiber | 3-4 g |
| Sugars | 8-10 g |
chocolate protein bars
Ingredients
- Natural Peanut Butter
- Protein Powder
- Unsweetened Cocoa Powder
- Honey or Maple Syrup
- Rolled Oats
- Vanilla Extract
- Pinch of Salt
- Optional Add-ins (Chocolate Chips, Nuts, Coconut)
Instructions
- Prepare Your Pan: Line an 8×8 inch baking pan with parchment paper, leaving an overhang on all sides.
- Combine Wet Ingredients: In a large mixing bowl, combine peanut butter, honey (or maple syrup), and vanilla extract. Stir until smooth.
- Add Dry Ingredients: Gradually add chocolate protein powder, cocoa powder, rolled oats, and salt to the wet mixture.
- Mix Thoroughly: Mix until a thick, uniform dough forms.
- Press into Pan: Transfer the mixture to the prepared pan and press down firmly and evenly.
- Chill: Refrigerate for at least 2 hours until firm, or freeze for 30-45 minutes.
- Cut into Bars: Use the parchment paper to lift out the slab and cut into 12 equal bars.
- Enjoy or Store: Store in an airtight container in the refrigerator.