Indulge your cravings instantly with this ultimate chocolate mug cake recipe. Imagine sinking your spoon into a perfectly moist, intensely chocolatey cake, ready in mere minutes. This single-serving delight offers a sophisticated yet comforting experience, bridging the gap between a quick treat and a gourmet dessert. Emma Williams Ava brings you a perfectly balanced recipe for a luxurious, elevated chocolate mug cake that satisfies without the fuss of a full-sized baking project.
Table of Contents
Why You’ll Love This Elevated Chocolate Mug Cake
- Achieve gourmet flavor in under five minutes, perfect for spontaneous cravings.
- Enjoy a perfectly portioned dessert, curbing overindulgence with delightful ease.
- Utilize simple pantry staples, making this chocolate mug cake incredibly accessible.
- Customize endlessly with healthy toppings and variations to suit any preference.
- Experience the satisfaction of baking without extensive cleanup or kitchen mess.
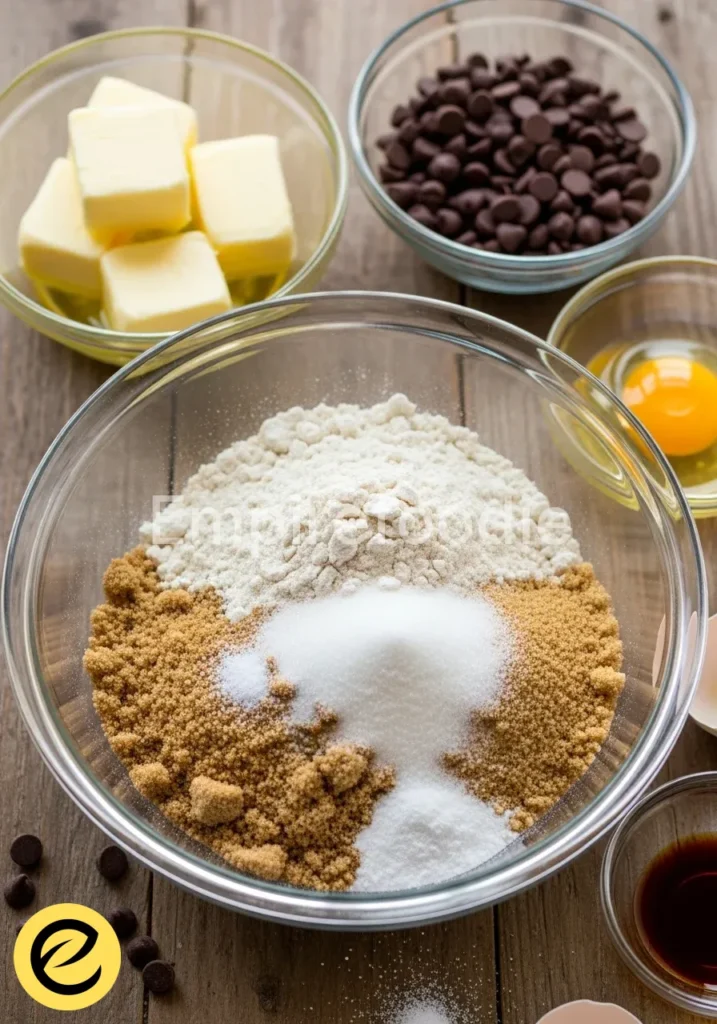
Ingredients You’ll Need
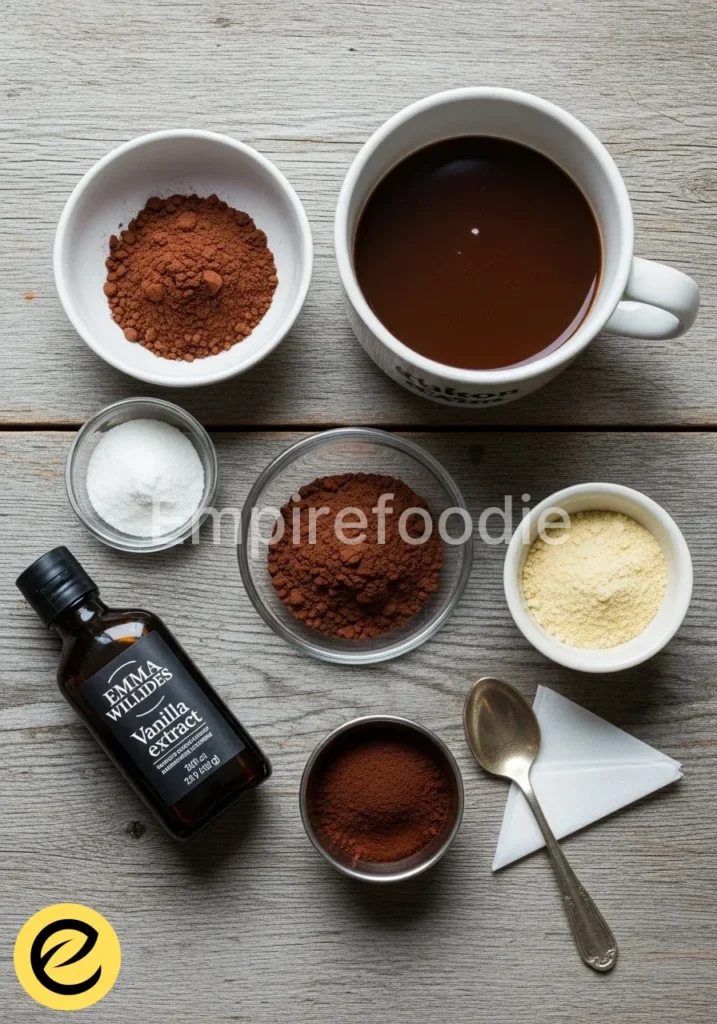
Crafting an exceptional chocolate mug cake begins with thoughtful ingredient selection. Prioritize quality for a truly decadent experience. Emma Williams Ava recommends using the best cocoa powder and vanilla extract you can find to elevate the flavor profile of this simple treat.
- All-Purpose Flour: 4 tablespoons (50g). Provides the cake’s structure.
- Granulated Sugar: 4 tablespoons (50g). Sweetens and contributes to moisture.
- Unsweetened Cocoa Powder: 2 tablespoons (15g), high-quality Dutch-processed for deep chocolate flavor.
- Baking Powder: ¼ teaspoon. The leavening agent for a light texture.
- Salt: ⅛ teaspoon. Enhances all the other flavors.
- Milk: 3 tablespoons (45ml), whole milk for richness or a plant-based alternative.
- Vegetable Oil: 1 tablespoon (15ml), or melted unsalted butter for added richness.
- Pure Vanilla Extract: ½ teaspoon. A non-negotiable for depth of flavor.
- Chocolate Chips: 1-2 tablespoons (15-30g), good quality semi-sweet or dark chocolate chips for pockets of melted chocolate.
Substitutions & Variations
[ra_display_video url=”https://www.youtube.com/watch?v=_7DAOnFrg-E”]
Flexibility in the kitchen allows for endless creativity and catering to dietary needs. This chocolate mug cake recipe welcomes thoughtful modifications. Consider these healthy swaps to adapt your dessert without sacrificing flavor. Substituting ingredients can often introduce new textures and nuances, making each chocolate mug cake experience unique and tailored to your preference.
- Flour Alternatives: For a gluten-friendly option, swap all-purpose flour with a 1:1 gluten-free baking blend. Almond flour or oat flour can also work, though they might alter the texture slightly, often requiring a touch more liquid.
- Sugar Swaps: Reduce the granulated sugar by 1 tablespoon if you prefer a less sweet treat. For a refined sugar-free version, try maple syrup or agave nectar (start with 2 tablespoons and adjust to taste, reducing other liquids by 1 tablespoon to compensate).
- Dairy-Free: Easily make this chocolate mug cake dairy-free by using your favorite plant-based milk (almond, soy, oat) and ensuring you use vegetable oil instead of butter. Use dairy-free chocolate chips.
- Boosted Nutrition: Incorporate a tablespoon of finely ground flaxseed meal for added fiber and omega-3s. You can also mix in a teaspoon of instant espresso powder to intensify the chocolate flavor without adding a coffee taste.
- Flavor Enhancements: Stir in a pinch of cayenne pepper for a subtle spicy kick, or a few drops of peppermint extract for a festive chocolate mint mug cake. A tablespoon of peanut butter swirled in before cooking creates a delightful peanut butter chocolate mug cake.
If you’re exploring ways to enhance your chocolate mug cake, consider checking out this delicious recipe for chocolate bundt cake that offers a different yet equally delightful chocolate experience.
Equipment You’ll Need
Making a chocolate mug cake requires minimal equipment, emphasizing its simplicity and convenience. You likely already possess everything necessary for this delightful treat. Emma Williams Ava champions efficiency, and this recipe embodies that principle, proving that gourmet results do not demand an extensive arsenal of tools.
- Standard Microwave-Safe Mug: A mug with at least a 12-ounce capacity prevents overflow as the cake rises. Choose a sturdy ceramic mug for even heating.
- Small Whisk or Fork: Essential for thoroughly mixing the dry and wet ingredients until just combined.
- Measuring Spoons and Cups: Accurate measurements ensure the correct balance of flavors and textures in your chocolate mug cake.
- Microwave Oven: The heart of this quick cooking method. Understanding your microwave’s wattage helps determine the precise cooking time.
Step-by-Step Instructions
Achieving a perfectly moist and fluffy chocolate mug cake is incredibly straightforward. Follow these precise steps to ensure success every time. Emma Williams Ava guides you through each stage, emphasizing technique for optimal results, ensuring your chocolate mug cake is never dry or tough. The key lies in careful mixing and mindful cooking.
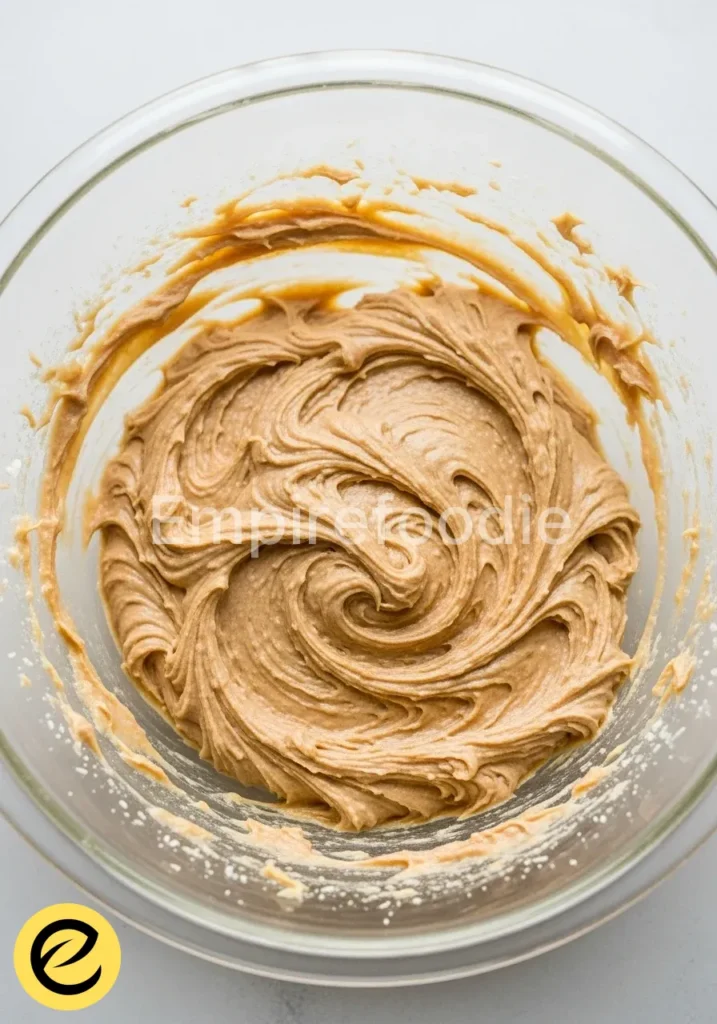
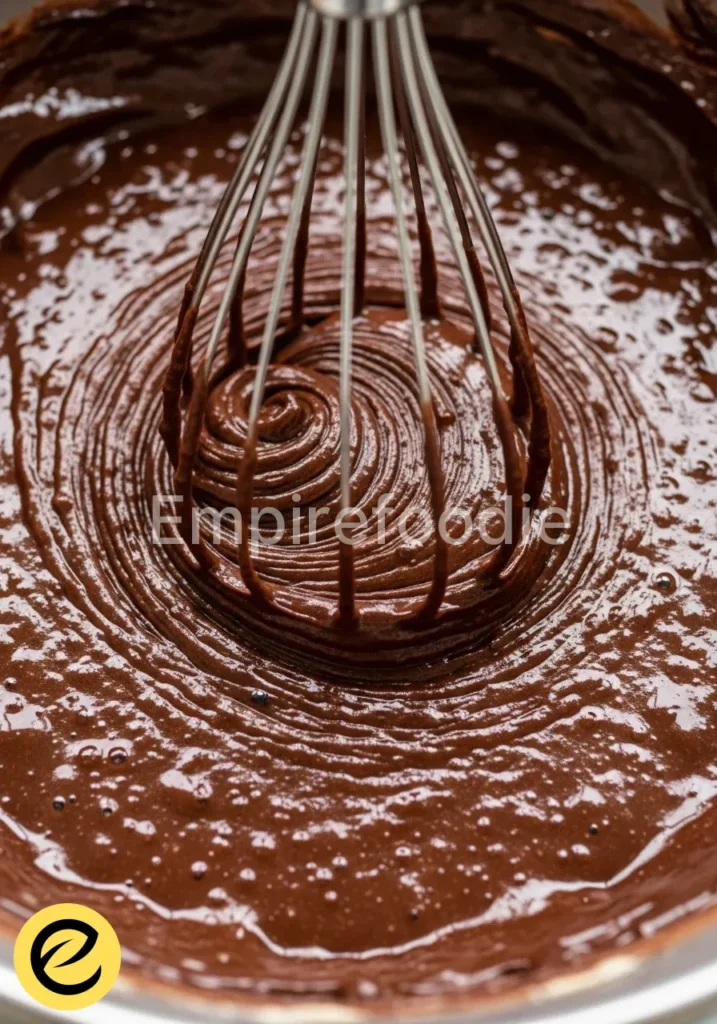
- Combine Dry Ingredients: In your chosen microwave-safe mug, whisk together the all-purpose flour, granulated sugar, unsweetened cocoa powder, baking powder, and salt. Use a small whisk or a fork to ensure there are no lumps and all ingredients are evenly distributed. This step prevents pockets of unmixed leavening agent.
- Add Wet Ingredients: Pour in the milk, vegetable oil (or melted butter), and pure vanilla extract. These liquid components will hydrate the dry mixture and form the cake batter.
- Mix Until Just Combined: Gently mix the ingredients with your whisk or fork until just combined. It is crucial not to overmix the batter. Overmixing develops the gluten in the flour, leading to a tough and rubbery chocolate mug cake. A few small lumps are perfectly acceptable; they will dissolve during cooking.
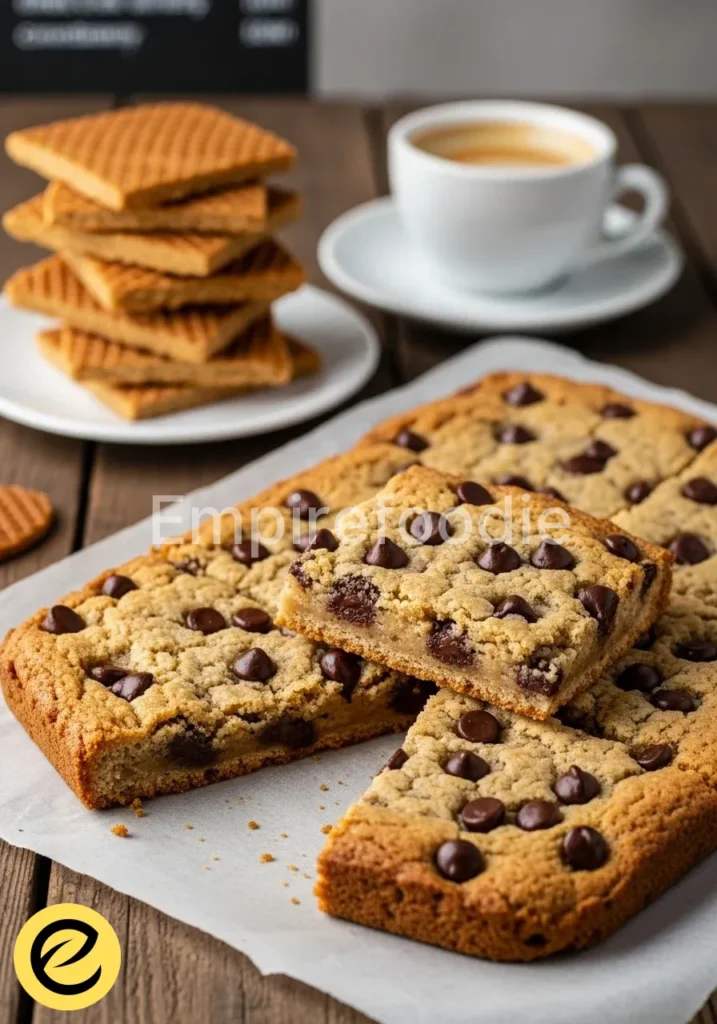
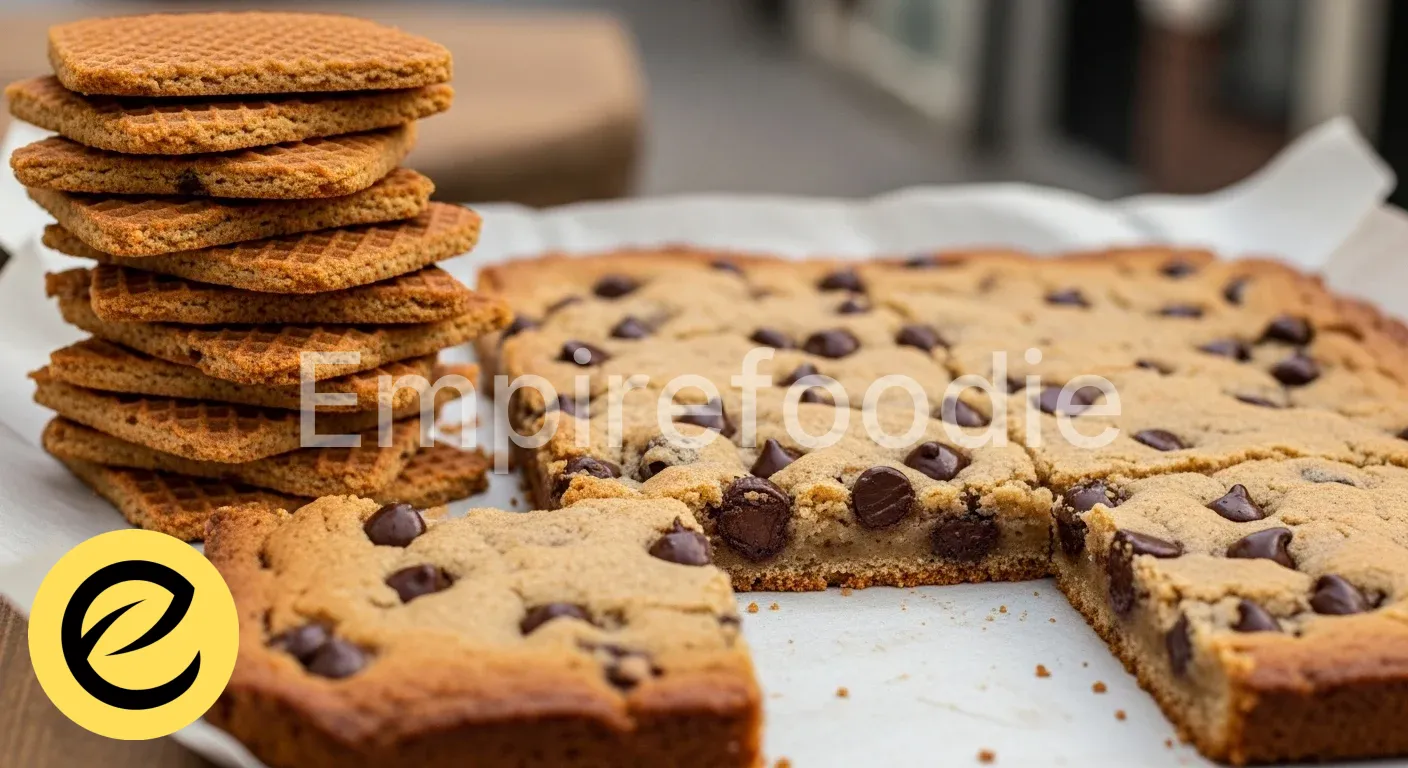
- Stir in Chocolate Chips: Fold in the chocolate chips, if using, distributing them evenly throughout the batter. These will melt into luscious pockets of chocolate during cooking, adding an extra layer of decadence to your chocolate mug cake.
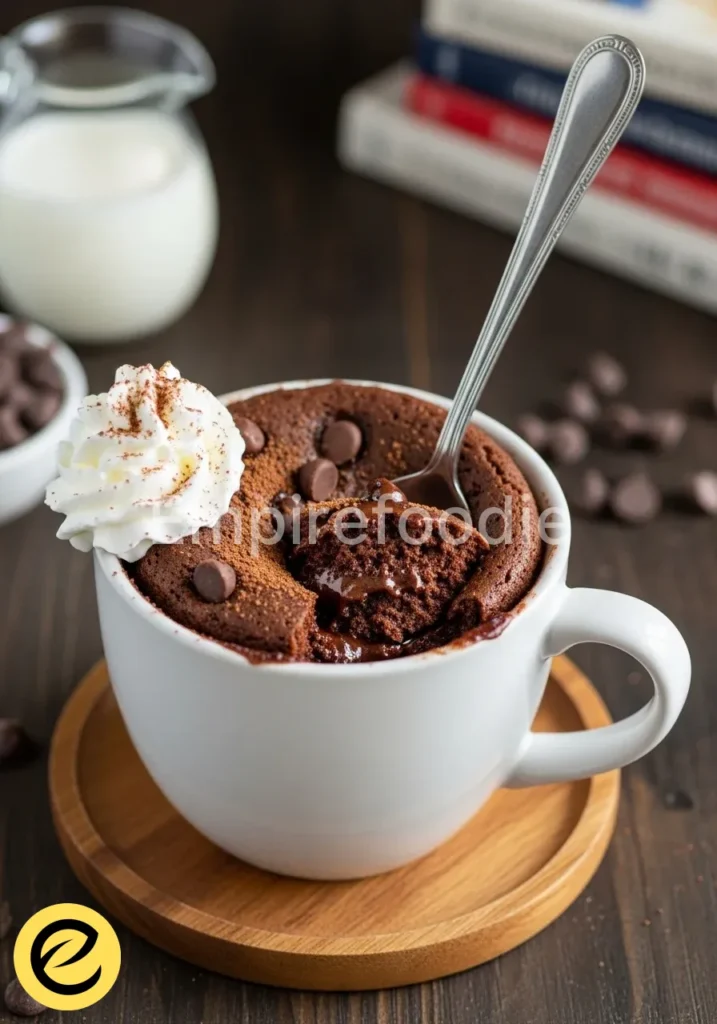
- Microwave: Place the mug in the microwave. Cook on high for 60 to 90 seconds. Microwave wattages vary significantly, so start with 60 seconds. Observe the cake: it should be visibly puffed up, and the center should appear set but still slightly moist. If it still looks very wet, continue microwaving in 10-second intervals. Be cautious not to overcook, as this will result in a dry chocolate mug cake.
- Rest and Serve: Carefully remove the hot mug from the microwave. Allow the chocolate mug cake to cool for 1-2 minutes before digging in. The residual heat will continue to cook the cake slightly, and this brief resting period improves texture.
For those who love chocolate, pairing your mug cake with chocolate oatmeal cookies can elevate your dessert experience to new levels of decadence and satisfaction.
Pro Tips for Success
Elevating your chocolate mug cake from good to exceptional involves a few insider tricks. Emma Williams Ava shares her pastry arts expertise to help you achieve consistent, professional-quality results right in your home kitchen. These tips focus on technique and understanding your ingredients to perfect every chocolate mug cake.
- Know Your Microwave: Microwave wattage varies widely. A 1000-watt microwave may cook your chocolate mug cake in 60-70 seconds, while an 800-watt microwave might take 80-90 seconds. Experiment with your specific appliance, starting with the lower end of the cooking time and adding 10-second increments until perfect. This prevents overcooking, the main culprit for dry mug cakes.
- Do Not Overmix: Once the wet ingredients are added, mix just until the dry ingredients are incorporated. A few small lumps are fine. Overmixing develops gluten, leading to a chewy, tough, and less desirable chocolate mug cake texture.
- Quality Ingredients Matter: While a simple recipe, the quality of your cocoa powder and vanilla extract profoundly impacts the final flavor of your chocolate mug cake. Invest in good Dutch-processed cocoa for a deep, rich chocolate taste and pure vanilla extract for aromatic complexity.
- Consider the Mug Size: Use a mug that is at least 12 ounces. This provides ample space for the cake to rise without overflowing, preventing a mess and ensuring even baking.
- A Pinch of Espresso Powder: For an intensely rich chocolate flavor without any coffee taste, add ¼ teaspoon of instant espresso powder to the dry ingredients. It truly deepens the chocolate notes in your chocolate mug cake.
- Resting Period: Allow your chocolate mug cake to rest for 1-2 minutes after microwaving. This resting period allows the cake to set further and makes it easier to handle and enjoy without burning yourself.
Storage & Reheating Tips
While a chocolate mug cake is best enjoyed immediately for peak freshness and warmth, circumstances sometimes require storing leftovers. Proper storage ensures your delightful treat remains enjoyable, even if not quite as perfect as fresh from the microwave. Emma Williams Ava recommends mindful handling to preserve its quality.
- Immediate Consumption is Key: This chocolate mug cake recipe is designed for single servings and is truly at its best when eaten within minutes of cooking. The texture is softest and most moist right after resting.
- If Storing: Should you have any leftover, cover the mug tightly with plastic wrap or transfer the chocolate mug cake to an airtight container. Refrigerate promptly. It will keep for up to 1 day. Be aware that the texture will become denser and less moist after refrigeration.
- Reheating: To gently reheat, place the refrigerated chocolate mug cake back in the microwave for 15-25 seconds on medium power. Be careful not to overheat, as this can dry out the cake even further. A brief reheating will warm it through, making it more palatable than eating it cold.
Although best enjoyed fresh, knowing how to store your chocolate mug cake properly is essential, and you might like to learn about chocolate sugar cookies which also require careful handling for optimal enjoyment.
What to Serve With This Recipe
While a chocolate mug cake is a complete indulgence on its own, thoughtful pairings can elevate the experience or balance its richness. Emma Williams Ava suggests additions that enhance the flavor profile while also offering a touch of freshness or complementary textures. Consider these healthy and delightful accompaniments to your rich chocolate mug cake.
- Fresh Berries: A handful of fresh raspberries, strawberries, or blueberries provides a bright, tart counterpoint to the sweetness and richness of the chocolate. Their natural sugars and vibrant colors also add visual appeal and a boost of antioxidants.
- Dollop of Greek Yogurt: A spoonful of plain or vanilla Greek yogurt offers a creamy, tangy element that cuts through the richness and adds a dose of protein. It’s a healthier alternative to whipped cream.
- Light Fruit Compote: A quick homemade compote of mixed berries or stewed apples (lightly sweetened) can add warmth, fruitiness, and an elegant touch.
- Nut Butter Drizzle: For extra protein and healthy fats, a thin drizzle of natural almond, cashew, or peanut butter complements the chocolate wonderfully, creating a more substantial and satisfying dessert.
- Sprinkle of Toasted Nuts: A small sprinkle of toasted pecans, walnuts, or almonds provides a delightful crunch and nutty flavor, enhancing the overall textural experience of your chocolate mug cake.
Frequently Asked Questions (FAQ)
Why is my chocolate mug cake dry?
Overcooking is the most common reason for a dry chocolate mug cake. Microwave wattages vary greatly, so always start with the minimum recommended time (around 60 seconds) and add 10-second intervals until the cake is just set. A slightly gooey center is better than an overcooked, dry result. Also, ensure you do not overmix the batter, as this develops gluten, leading to a tough texture.
Can I make this chocolate mug cake ahead of time?
This chocolate mug cake recipe is specifically designed for instant gratification and is best enjoyed immediately after cooking. While you can prepare the dry ingredients in advance and store them, the batter itself should be mixed and cooked right before serving to achieve the optimal moist and tender texture. Storing pre-mixed batter can affect the leavening agent’s effectiveness.
Can I double this recipe for a larger serving?
While tempting, it’s generally not recommended to simply double the recipe and cook it in a larger mug or bowl in the microwave. Microwave cooking is highly specific to surface area and volume. Doubling the recipe can lead to uneven cooking, where the edges cook too quickly and become dry while the center remains raw. For two servings, it is best to prepare two separate chocolate mug cakes in individual mugs.
Chocolate mug cakes are a quick and convenient dessert option that can be made in minutes using simple ingredients. This quick treat is perfect for those craving something sweet without the need for extensive baking or cleanup, offering an instant solution for dessert enthusiasts who seek both convenience and flavor.
Final Thoughts
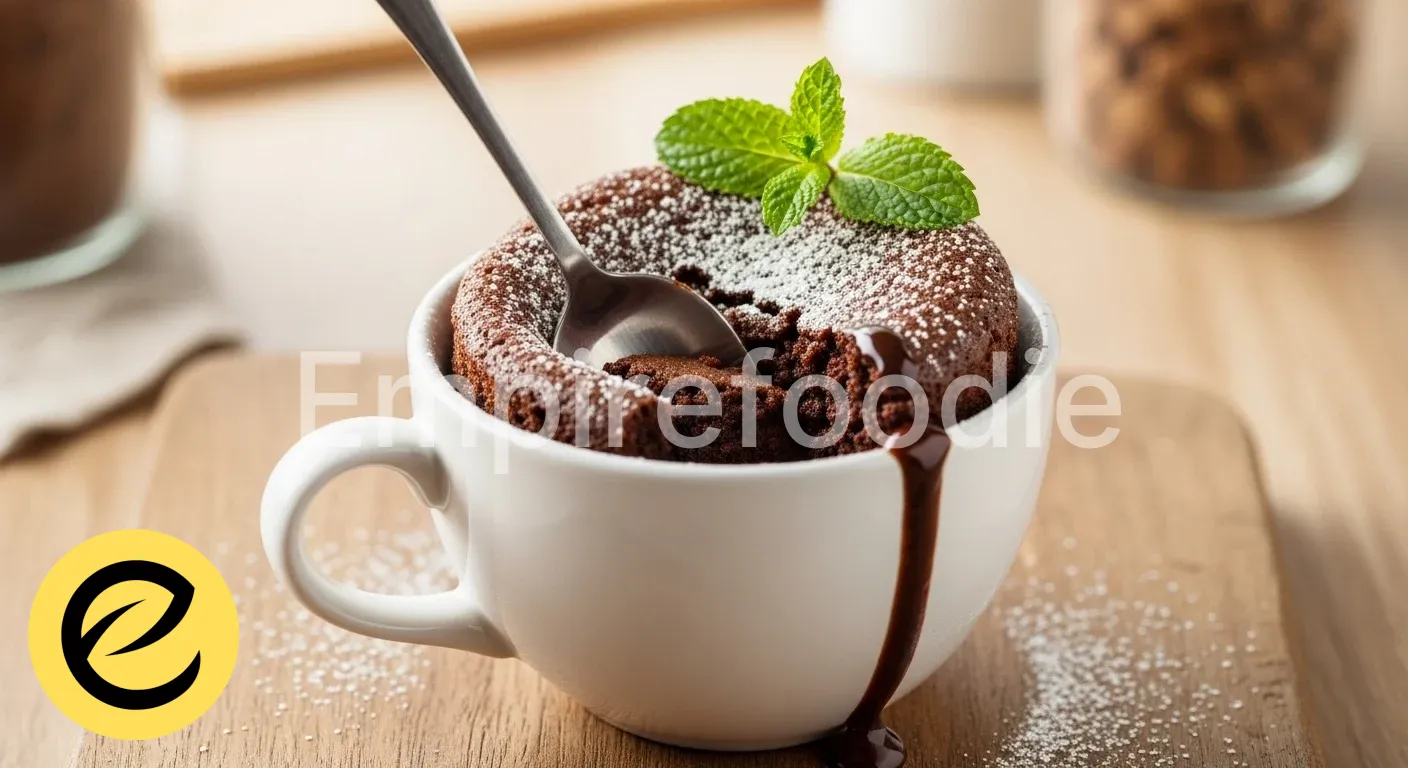
This chocolate mug cake offers more than just a quick treat; it’s a testament to accessible luxury. It delivers rich, comforting indulgence with minimal effort, perfectly balancing gourmet taste with everyday convenience. Savor this delightful moment of elevated comfort, a true triumph for home bakers and pastry enthusiasts alike.
Nutrition Information (per serving)
Approximate values based on recipe with whole milk and vegetable oil.
| Nutrient | Amount |
|---|---|
| Calories | 380-420 kcal |
| Total Fat | 18-22g |
| Saturated Fat | 3-5g |
| Cholesterol | <10mg |
| Sodium | 150-180mg |
| Total Carbohydrates | 50-55g |
| Dietary Fiber | 3-4g |
| Total Sugars | 30-35g |
| Protein | 5-7g |
chocolate mug cake
Ingredients
- 4 tablespoons all-purpose flour
- 4 tablespoons granulated sugar
- 2 tablespoons unsweetened cocoa powder
- 1/4 teaspoon baking powder
- 1/8 teaspoon salt
- 3 tablespoons milk
- 1 tablespoon vegetable oil
- 1/2 teaspoon pure vanilla extract
- 1-2 tablespoons chocolate chips
Instructions
- In a microwave-safe mug, whisk together the all-purpose flour, granulated sugar, cocoa powder, baking powder, and salt until well combined.
- Pour in the milk, vegetable oil, and vanilla extract. Mix until just combined; do not overmix.
- Fold in the chocolate chips, distributing them evenly throughout the batter.
- Microwave the mug for 60 to 90 seconds, watching closely to prevent overcooking.
- Remove the mug from the microwave and let it cool for 1-2 minutes before serving.