Author

Hana

Browsing

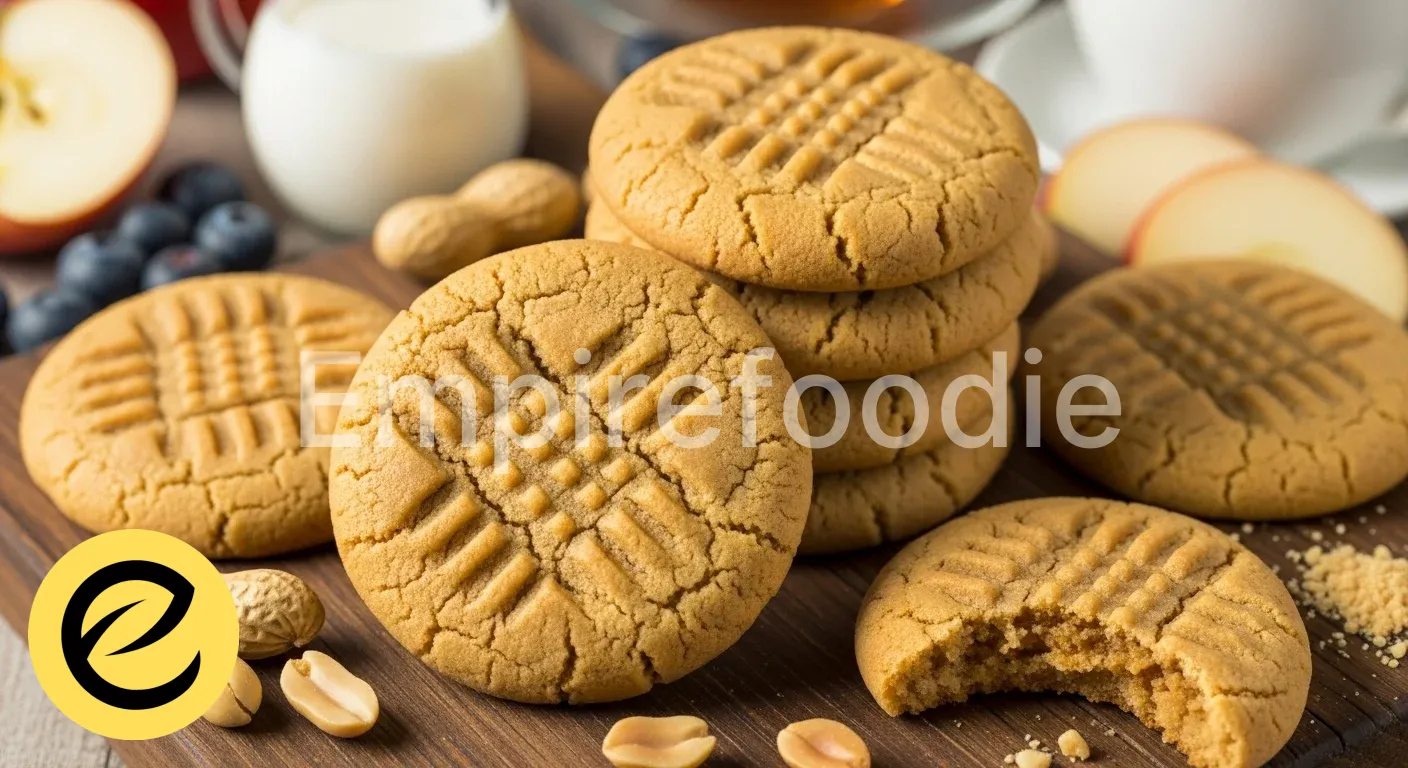
Indulge in the nostalgic comfort of homemade peanut butter cookies. This recipe delivers a perfect balance of chewy texture and rich, nutty flavor. Our classic peanut butter cookies are simple to prepare and truly irresistible.

Get ready to fill your home with their inviting aroma and create sweet memories. Let’s bake a batch of these delightful treats.

Table of Contents

Why You’ll Love These Peanut Butter Cookies

  • Pure Nostalgia: Classic, rich peanut butter taste.
  • Beginner-Friendly: Simple steps for perfect results.
  • Wholesome: Made with everyday ingredients.
  • Quick Treat: Delicious peanut butter cookies, fast!

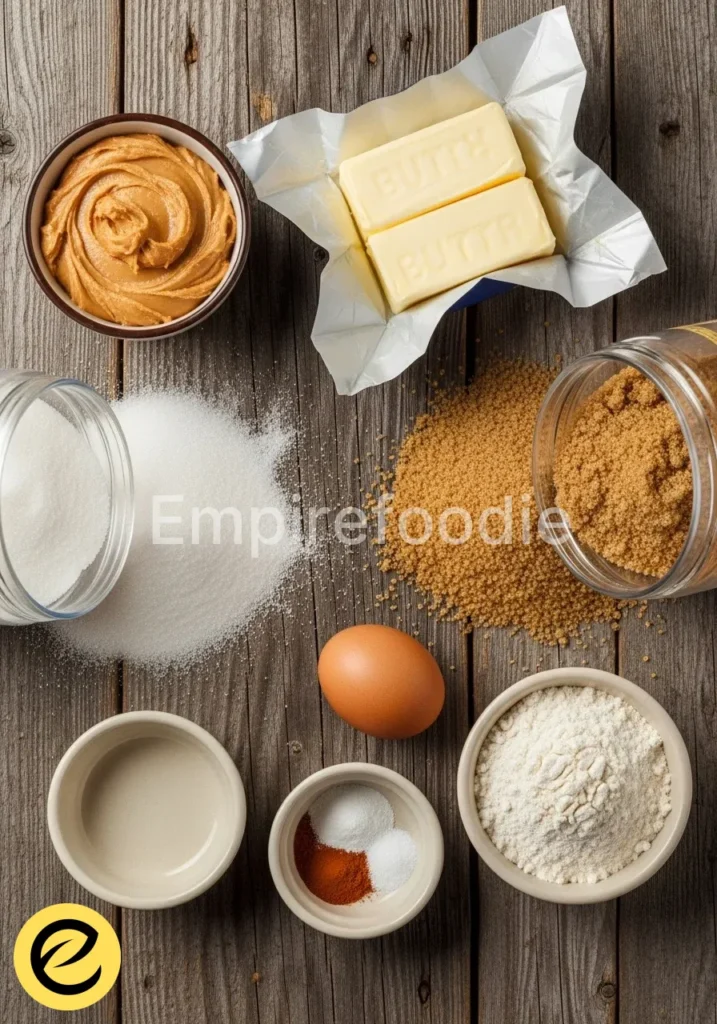
Ingredients You’ll Need
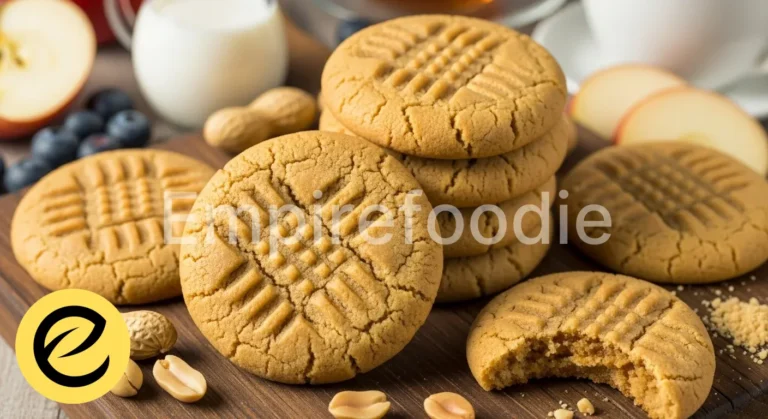
peanut butter cookies
  • Creamy Peanut Butter: Use a good quality, creamy peanut butter (not natural or oil-separated) for the best texture and flavor in your peanut butter cookies.
  • Unsalted Butter: Softened to room temperature. This provides richness and helps with the tender crumb.
  • Granulated Sugar: For sweetness and to create that classic crisp edge.
  • Brown Sugar: Packed light brown sugar adds moisture, chewiness, and a lovely molasses note to these peanut butter cookies.
  • Large Egg: Binds everything together and adds richness.
  • Vanilla Extract: Pure vanilla extract enhances all the flavors.
  • All-Purpose Flour: The structure for our delicious peanut butter cookies.
  • Baking Soda: Helps the cookies rise and spread slightly.
  • Salt: Balances the sweetness and brings out the peanut butter flavor.

Substitutions & Variations

[ra_display_video url=”https://www.youtube.com/watch?v=USPPrqOLy-U”]

  • Peanut Butter: Natural, unsweetened for healthier peanut butter cookies.
  • Sweetener: Reduce sugar by 1/4 cup.
  • Flour: Use 1:1 gluten-free baking blend.
  • Add-ins: Dark chocolate chips or shredded coconut.

If you’re interested in other cookie varieties, consider trying out some delicious digestive biscuits for a delightful twist on your baking adventures.

Equipment You’ll Need

  • Large Mixing Bowl
  • Electric Mixer (stand or hand-held)
  • Rubber Spatula
  • Measuring Cups and Spoons
  • Baking Sheets
  • Parchment Paper
  • Wire Cooling Rack
  • Cookie Scoop (optional, but highly recommended for uniform peanut butter cookies)

Step-by-Step Instructions
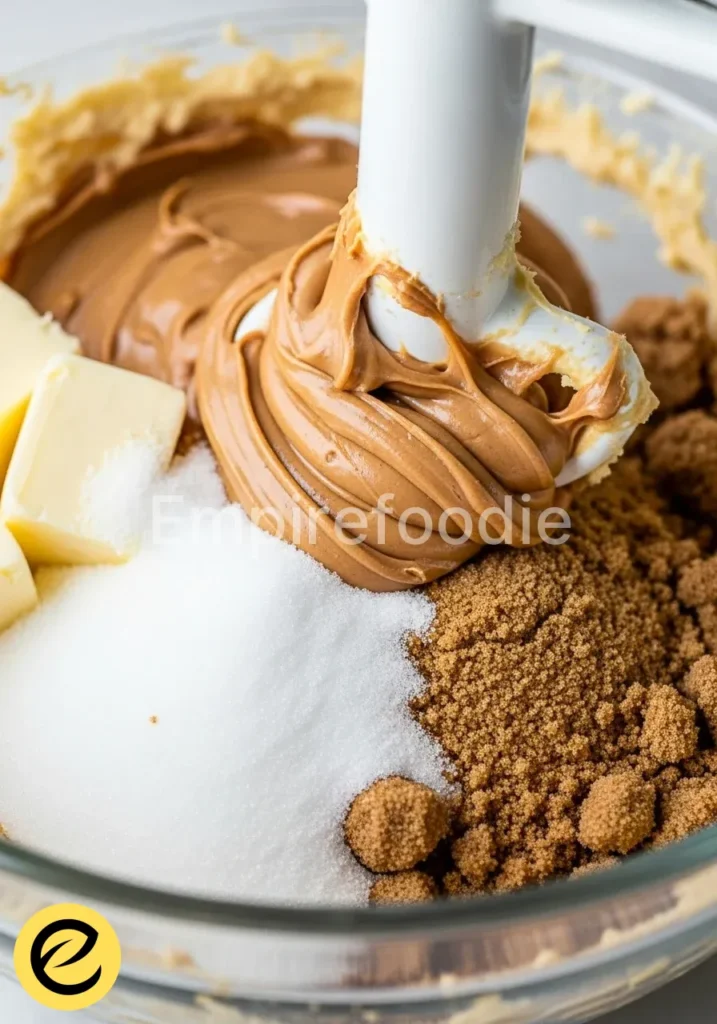
peanut butter cookies
  1. Prepare Your Oven: Preheat your oven to 375°F (190°C). Line two baking sheets with parchment paper. This simple step ensures easy cleanup and prevents sticking for your peanut butter cookies.
  2. Cream Fats and Sugars: In a large mixing bowl, using an electric mixer, cream together the softened unsalted butter, creamy peanut butter, granulated sugar, and packed light brown sugar until the mixture is light and fluffy. This typically takes about 2-3 minutes. Scrape down the sides of the bowl as needed to ensure everything combines evenly for the best peanut butter cookies.
  3. Add Wet Ingredients: Beat in the large egg and vanilla extract until just combined. Do not overmix at this stage.
  4. Combine Dry Ingredients: In a separate medium bowl, whisk together the all-purpose flour, baking soda, and salt. Ensure these are well combined.
  5. Gradually Add Dry to Wet: With the mixer on low speed, gradually add the dry ingredient mixture to the wet ingredients, mixing until just combined. Be careful not to overmix the dough; overmixing can lead to tough peanut butter cookies.
  6. Scoop and Shape: Use a 1.5-inch cookie scoop to portion the dough, then roll each portion into a smooth ball. Place the balls about 2 inches apart on your prepared baking sheets. These will become our beautiful peanut butter cookies.
  7. Create the Crisscross Pattern: Using the tines of a fork, gently press down on each cookie dough ball to create a crisscross pattern. This classic mark isn’t just for looks; it helps the peanut butter cookies bake evenly.
  8. Bake: Bake for 8-10 minutes, or until the edges are lightly golden and the centers are set but still look soft. Do not overbake; these peanut butter cookies continue to cook slightly as they cool.
  9. Cool: Remove the baking sheets from the oven and let the peanut butter cookies cool on the sheets for 5 minutes before transferring them to a wire cooling rack to cool completely. Enjoy the wonderful aroma!

While preparing your peanut butter cookies, you might also enjoy baking Decadent Double Chocolate Cookies that pack a rich, chocolatey punch for variety in your dessert lineup.

Pro Tips for Success

  • Room Temperature Ingredients: Ensure butter and egg are at room temperature. This allows them to cream together properly, resulting in a smoother dough and better textured peanut butter cookies.
  • Don’t Overmix: Overmixing the dough can develop the gluten too much, leading to tough, rather than tender, peanut butter cookies. Mix just until combined.
  • Proper Peanut Butter: Stick to creamy, processed peanut butter (like Jif or Skippy) for consistent results. Natural peanut butter can alter the texture and spread of these particular peanut butter cookies.
  • Chill the Dough (Optional): If your kitchen is warm or the dough seems too soft, chilling it for 15-30 minutes can make it easier to handle and reduce spreading.
  • Fork Marks: Dip your fork in sugar between pressing each cookie. This prevents sticking and gives your peanut butter cookies a nice, classic sparkle.
  • Even Baking: Rotate your baking sheets halfway through baking to ensure all your peanut butter cookies brown evenly.

Storage & Reheating Tips

  • Airtight Container: Store cooled peanut butter cookies in an airtight container at room temperature for up to 5-7 days.
  • Freezing Baked Cookies: For longer storage, freeze baked and cooled peanut butter cookies in a freezer-safe container or bag for up to 3 months. Thaw at room temperature before serving.
  • Freezing Dough: You can also freeze scooped, unbaked cookie dough balls. Place them on a baking sheet to freeze solid, then transfer to a freezer bag. Bake from frozen, adding 2-3 minutes to the baking time.
  • Refresh for Warmth: To enjoy a warm cookie again, pop a cooled peanut butter cookie into the microwave for 10-15 seconds, or warm gently in a preheated oven (275°F/135°C) for a few minutes.

After savoring your peanut butter cookies, consider making homemade chocolate bars for a perfect pairing of flavors and textures in your dessert collection.

What to Serve With This Recipe
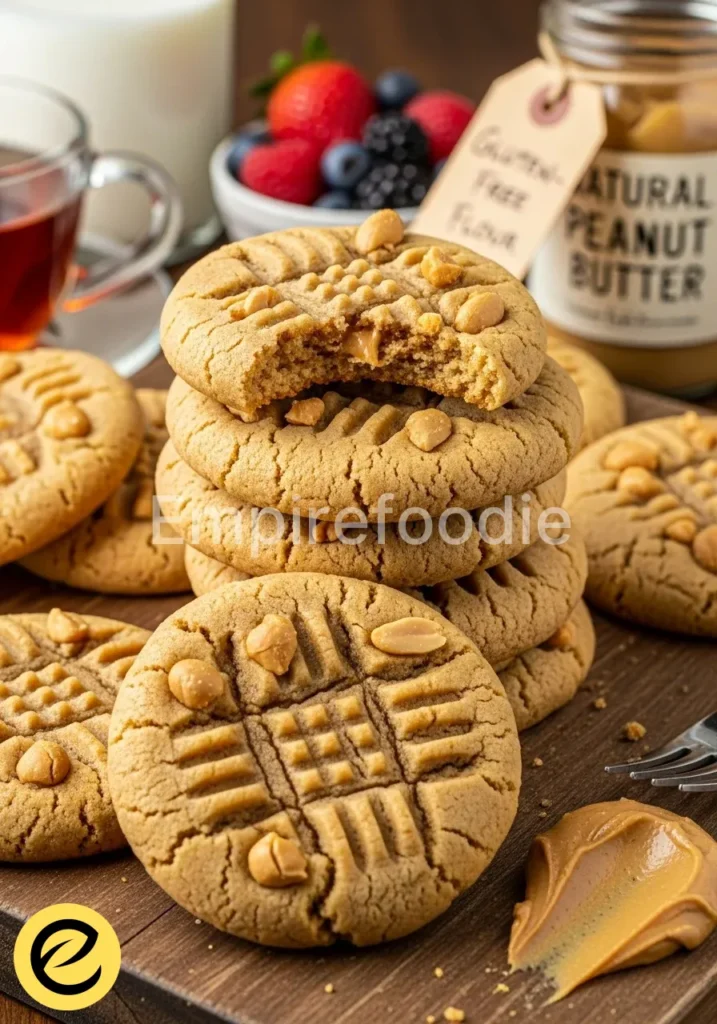
peanut butter cookies

“These delightful peanut butter cookies are wonderful on their own, but pairing them thoughtfully can elevate the experience. Think about balancing the sweetness with fresh, light options, just as we balanced flavors on the farmhouse table.”

  • Fresh Fruit Platter: A vibrant assortment of berries, sliced apples, or bananas provides a refreshing contrast.
  • Glass of Milk (or Plant-Based Alternative): The classic pairing, milk complements the rich flavor perfectly.
  • Herbal Tea: A warm, soothing cup of chamomile or peppermint tea makes for a cozy afternoon treat alongside your cookie.
  • Light Yogurt Parfait: Layers of Greek yogurt, granola, and fresh fruit offer a wholesome and delicious accompaniment.
  • Small Side Salad (with light vinaigrette): For an unexpected but delightful balance, a very small, fresh green salad can cut through the richness beautifully after a hearty meal.

Frequently Asked Questions (FAQ)

Can I use natural peanut butter for these cookies?

“While you technically can, I strongly recommend creamy, processed peanut butter for this specific recipe. Natural peanut butter tends to be oilier and less stable, which can lead to drier, more crumbly cookies or excessive spreading. If you must use it, be sure to stir it extremely well to recombine the oils, and you might need to add an extra tablespoon of flour if the dough seems too wet.”

Why do my peanut butter cookies flatten too much?

“Several factors can cause cookies to flatten. Your butter might have been too soft or melted, or you might have used too much baking soda. Ensure your oven temperature is accurate (a thermometer helps!), and chill your dough for 15-30 minutes if it feels very warm or soft before baking. Over-greasing baking sheets can also contribute to spreading.”

How do I achieve the perfect crisscross pattern?

“Achieving that iconic crisscross is simple! After rolling your dough into balls, gently press a fork onto the top of each ball, then rotate the fork 90 degrees and press again, creating the ‘X’ shape. For a cleaner impression and to prevent sticking, dip your fork tines in a small bowl of granulated sugar between each cookie press. This also adds a lovely sparkle!”

Peanut butter cookies are a beloved treat known for their rich flavor and chewy texture, often enjoyed as a quick snack or dessert. These cookies combine simple ingredients, making them a favorite for both novice and experienced bakers alike, creating a delightful experience that can remind many of childhood memories. Learn more about their history and variations at this link.

Final Thoughts

“These peanut butter cookies are more than a treat; they are a comforting hug, a slice of cherished history. Each bite evokes memories of grandma’s kitchen, warmth, and shared laughter. Baking connects us to generations past, carrying on traditions. Share, savor, and let them bring pure joy.”

Nutrition Information (per serving)

(Estimated per cookie, based on 3 dozen cookies from recipe)

Calories150 kcal
Total Fat9g
Saturated Fat3g
Cholesterol15mg
Sodium100mg
Total Carbohydrates15g
Dietary Fiber1g
Total Sugars10g
Protein4g

peanut butter cookies

Prep Time 20 minutes
Cook Time 10 minutes
Total Time 30 minutes
Servings 36 cookies servings
Calories 150
Indulge in the nostalgic comfort of homemade peanut butter cookies with a perfect balance of chewy texture and rich, nutty flavor. Our classic peanut butter cookies are simple to prepare and truly irresistible, filling your home with their inviting aroma and creating sweet memories.

Ingredients

  • 1 cup creamy peanut butter
  • 1/2 cup unsalted butter, softened
  • 1/2 cup granulated sugar
  • 1/2 cup packed light brown sugar
  • 1 large egg
  • 1 teaspoon vanilla extract
  • 1 1/2 cups all-purpose flour
  • 1 teaspoon baking soda
  • 1/2 teaspoon salt

Instructions 

  • Preheat your oven to 375°F (190°C). Line two baking sheets with parchment paper.
  • In a large mixing bowl, cream together the softened unsalted butter, creamy peanut butter, granulated sugar, and packed light brown sugar until light and fluffy.
  • Beat in the large egg and vanilla extract until just combined.
  • In a separate bowl, whisk together the all-purpose flour, baking soda, and salt.
  • Gradually add the dry ingredient mixture to the wet ingredients, mixing until just combined.
  • Use a cookie scoop to portion the dough and roll each portion into a ball. Place the balls 2 inches apart on prepared baking sheets.
  • Using a fork, press down to create a crisscross pattern on each cookie dough ball.
  • Bake for 8-10 minutes, until the edges are lightly golden and the centers are set.
  • Cool cookies on the baking sheets for 5 minutes before transferring to a wire rack to cool completely.
Notes

Ensure butter and egg are at room temperature. Avoid overmixing the dough. Use processed peanut butter for best results. Optionally chill the dough for easier handling.
Calories: 150kcal
Course: Dessert
Cuisine: American
Keyword: cookies, dessert, homemade, peanut butter

Step into my kitchen, dear friend, where the aroma of oats, honey, and a hint of cinnamon always brings a smile. Today, we’re making my cherished recipe for homemade granola bars – a truly delightful treat that’s both wonderfully chewy and perfectly crunchy. These wholesome granola bars offer a delicious blend of flavors and textures, making them an ideal snack for any time of day. They are simple to prepare and promise a nourishing, satisfying bite every single time.

Table of Contents

Why You’ll Love This Recipe

  • Effortlessly simple, transforming pantry staples into delicious granola bars.
  • Infinitely customizable, allowing you to tailor ingredients to your taste.
  • Packed with wholesome ingredients, offering sustained energy throughout your day.
  • A healthier, more economical alternative to store-bought granola bars.
  • Perfect for meal prep, providing grab-and-go goodness for busy schedules.

Ingredients You’ll Need

granola bars

Creating these delightful granola bars starts with choosing quality ingredients, much like my grandmother always insisted. Opt for organic oats and pure maple syrup for the best flavor and nutritional value.

  • 2 cups rolled oats: Not instant oats; the larger flakes give the best texture to your granola bars.
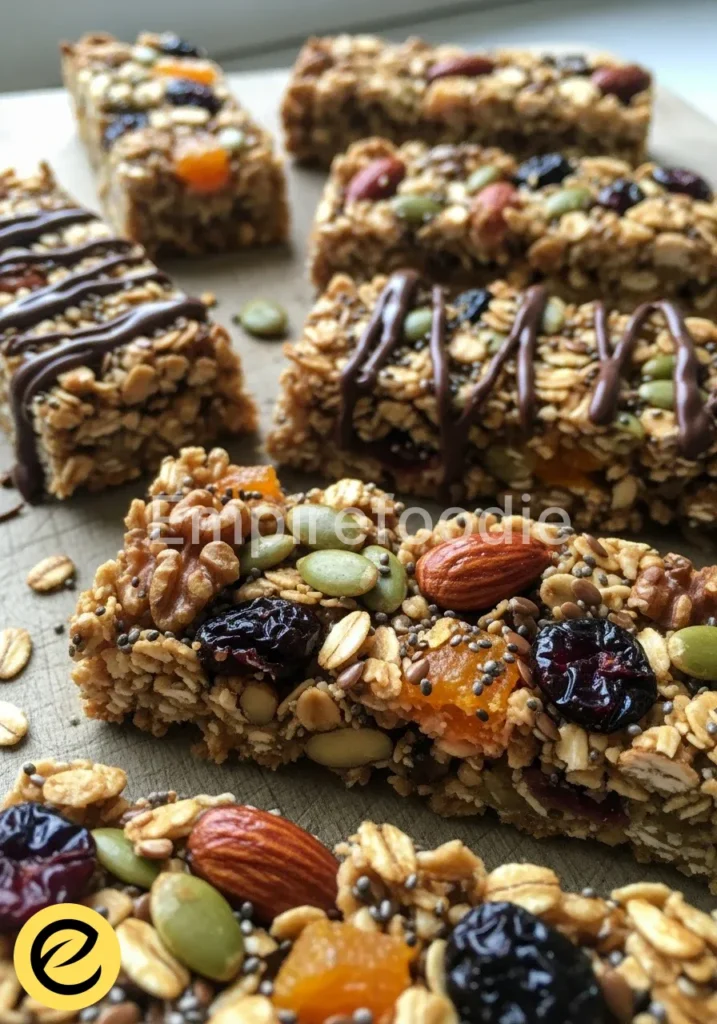
  • 1 cup mixed nuts: Almonds, walnuts, pecans – roughly chopped.
  • ½ cup shredded coconut: Unsweetened for a natural sweetness.
  • ¼ cup chia seeds: Or flax seeds for added Omega-3s and binding power.
  • ¼ teaspoon sea salt: Balances the sweetness beautifully.
  • ½ cup unsalted butter: Or coconut oil for a dairy-free option.
  • ½ cup pure maple syrup: Or honey for a richer flavor.
  • ¼ cup brown sugar: Packed, for depth of flavor and chewiness.
  • 1 teaspoon vanilla extract: Enhances all the other flavors.
  • ½ cup chocolate chips: Or dried fruit like cranberries or raisins, for an extra treat.

Substitutions & Variations

[ra_display_video url=”https://www.youtube.com/watch?v=63uSG5Qu1fc”]

One of the true joys of making homemade granola bars is the freedom to experiment. My grandmother always encouraged using what we had on hand. For a nut-free version, use sunflower or pumpkin seeds.

Swap out half the oats for quinoa flakes for an extra protein boost. Replace butter with coconut oil or a nut butter for a different flavor profile. Try adding a pinch of cinnamon or nutmeg for a warming spice note.

For a fruitier twist, mix in diced dried apricots or cherries. These variations keep your granola bars exciting and fresh.

For a delightful twist on texture and flavor, consider making some German chocolate cookies to serve alongside your granola bars. They complement the wholesome ingredients beautifully and add a sweet touch to your snack repertoire.

Equipment You’ll Need

You don’t need fancy gadgets to make these wholesome granola bars. Just a few basic kitchen tools will suffice, ensuring a smooth baking process.

  • 9×13 inch baking pan: Or an 8×8 inch pan for thicker bars.
  • Parchment paper: Essential for easy removal of your granola bars.
  • Large mixing bowl: To combine all the dry ingredients.
  • Small saucepan: For melting the wet ingredients together.
  • Spatula or wooden spoon: For mixing and pressing.
  • Measuring cups and spoons: For accurate ingredient proportions.
  • Sharp knife: For cutting your cooled granola bars into neat portions.

Step-by-Step Instructions

granola bars

Follow these simple steps, just as I learned from watching generations before me, to create perfect homemade granola bars. Precision here helps achieve that ideal texture.

  1. Preheat your oven to 325°F (160°C). Line your baking pan with parchment paper, leaving an overhang on the sides. This makes removing the finished granola bars much easier.
  2. In a large mixing bowl, combine the rolled oats, chopped nuts, shredded coconut, chia seeds, and sea salt. Stir them thoroughly to ensure an even distribution.
  3. In a small saucepan over medium heat, melt the unsalted butter (or coconut oil). Once melted, stir in the maple syrup, brown sugar, and vanilla extract. Bring the mixture to a gentle simmer, stirring constantly for about 1-2 minutes, until the sugar fully dissolves.
  4. Pour the hot wet mixture over the dry oat mixture in the large bowl. Stir vigorously with a spatula or wooden spoon until all the dry ingredients are uniformly coated. Make sure every oat flake is glistening.
  5. If using, fold in the chocolate chips or dried fruit now, ensuring they are evenly distributed throughout the mixture.
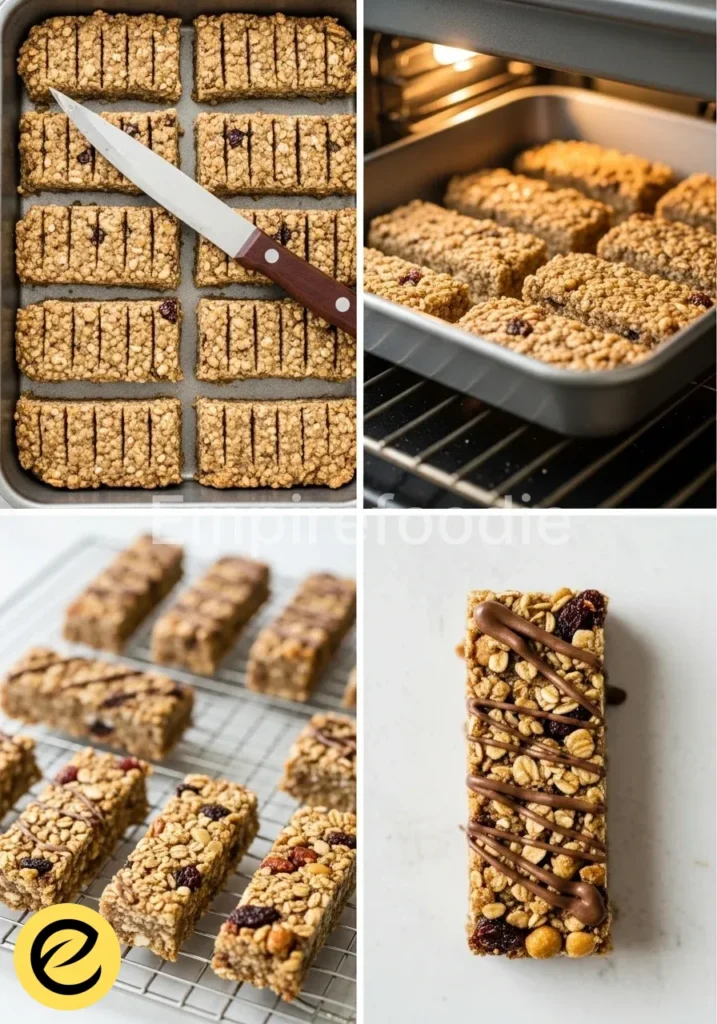
  6. Transfer the granola bar mixture to your prepared baking pan. Press it down very firmly and evenly into the pan. Use the back of a spoon, a spatula, or even another piece of parchment paper to really compact it. The firmer you press, the less likely your granola bars will crumble.
  7. Bake for 25-30 minutes, or until the edges are golden brown and the center feels set. The smell of these baking granola bars is simply divine.
  8. Remove the pan from the oven and let it cool completely on a wire rack before attempting to cut. This step is crucial for achieving sturdy granola bars.
  9. Once completely cool (this can take 2-3 hours or even longer), use the parchment paper overhang to lift the entire slab out of the pan. Place it on a cutting board and cut it into desired bar sizes using a sharp knife. Enjoy your delicious homemade granola bars!

As you master the art of granola bars, remember that achieving the right texture is crucial, much like creating the perfect chocolate biscuits. Both share a meticulous balance of ingredients that leads to a satisfying bite.

Pro Tips for Success

Achieving the perfect granola bar isn’t just about the ingredients; it’s also about a few smart techniques passed down through time. Always use rolled oats, not quick-cooking, for the best texture and chewiness in your granola bars. Press the mixture into the pan as firmly as possible; this is key to bars that hold together beautifully.

For extra flavor, toast your oats and nuts lightly before mixing. Allow the granola bars to cool completely before cutting; impatience leads to crumbly bars. If you prefer a chewier bar, bake for a shorter time; for a crispier bar, bake a little longer. A little extra drizzle of maple syrup or honey over the top before baking can also add a delightful glaze and help bind the granola bars even further.

Storage & Reheating Tips

Proper storage ensures your homemade granola bars stay fresh and delicious for days. Once cooled and cut, store your granola bars in an airtight container at room temperature for up to one week. You can also layer them with parchment paper to prevent sticking.

For longer storage, individual wrapping and freezing are excellent options. Frozen granola bars can last for up to 3 months. Simply thaw them at room temperature for an hour or two, or pop them in the microwave for a quick warm-up.

They are just as delightful frozen, sometimes even more so on a hot day. These versatile granola bars truly make healthy snacking effortless.

After enjoying your homemade granola bars, you might want to indulge in an easy chocolate cake recipe for a sweet treat. Proper storage of your bars ensures they last, but nothing beats the joy of baking a cake from scratch.

What to Serve With This Recipe

granola bars

These versatile granola bars are wonderful on their own, but they also pair beautifully with other wholesome foods. For a balanced breakfast, serve a granola bar alongside a bowl of fresh Greek yogurt topped with berries and a sprinkle of cinnamon. They make an excellent addition to a packed lunch with a vibrant garden salad or a hearty roasted vegetable wrap.

Consider them a post-workout snack with a protein smoothie. For a lighter evening treat, enjoy a granola bar with a cup of herbal tea. Their wholesome nature complements a wide range of healthy pairings, making them a fantastic addition to any meal plan.

Frequently Asked Questions (FAQ)

Can I make these granola bars gluten-free?

Absolutely! Simply ensure you use certified gluten-free rolled oats. All other ingredients are naturally gluten-free, making these granola bars a safe and delicious option for those with sensitivities.

Why are my granola bars crumbling?

The most common reasons for crumbling granola bars are not pressing the mixture firmly enough into the pan before baking, or cutting them before they have fully cooled. Ensure you really compact the mixture and exercise patience during the cooling process for perfectly sturdy granola bars.

How can I make these granola bars vegan?

To make these granola bars vegan, simply substitute the butter with an equal amount of coconut oil or a plant-based butter alternative. All other ingredients, such as maple syrup and oats, are typically vegan-friendly, ensuring you get delicious vegan granola bars.

Granola bars are a popular snack made from a mixture of oats, nuts, and sweeteners, typically baked until they are firm. They are often viewed as a healthier alternative to traditional snacks and can be customized with various ingredients like dried fruit or chocolate for added flavor and nutrition. Learn more about this snack and its origins in the Granola Bar article.

Final Thoughts

These homemade granola bars are more than just a snack; they carry the warmth of a farmhouse kitchen and the echoes of generations. Sharing them means sharing a piece of heart, a delicious tradition that nourishes body and soul. Each bite evokes memories of simpler times, making these granola bars a true taste of home.

Nutrition Information (per serving)

(Approximate values based on 12 servings)

NutrientAmount
Calories210 kcal
Total Fat12g
Saturated Fat5g
Cholesterol15mg
Sodium50mg
Total Carbohydrates25g
Dietary Fiber3g
Total Sugars15g
Protein4g

granola bars

Prep Time 15 minutes
Cook Time 30 minutes
Total Time 45 minutes
Servings 12 bars servings
Calories 210
Homemade granola bars that are wonderfully chewy and perfectly crunchy, made from wholesome ingredients.

Ingredients

  • 2 cups rolled oats
  • 1 cup mixed nuts, roughly chopped
  • ½ cup shredded coconut, unsweetened
  • ¼ cup chia seeds or flax seeds
  • ¼ teaspoon sea salt
  • ½ cup unsalted butter or coconut oil
  • ½ cup pure maple syrup or honey
  • ¼ cup brown sugar, packed
  • 1 teaspoon vanilla extract
  • ½ cup chocolate chips or dried fruit

Instructions 

  • Preheat your oven to 325°F (160°C). Line your baking pan with parchment paper, leaving an overhang.
  • In a large mixing bowl, combine rolled oats, chopped nuts, shredded coconut, chia seeds, and sea salt. Stir well.
  • In a small saucepan over medium heat, melt the unsalted butter (or coconut oil). Stir in maple syrup, brown sugar, and vanilla extract until the sugar dissolves.
  • Pour the wet mixture over the dry ingredients and stir until well coated.
  • Fold in chocolate chips or dried fruit if using.
  • Transfer mixture to the baking pan and press firmly into the pan.
  • Bake for 25-30 minutes until golden brown. Let cool completely before cutting into bars.

Notes

Use organic ingredients for the best flavor. Experiment with various mix-ins and storage methods for fresh granola bars.
Calories: 210kcal
Course: Snack
Cuisine: American
Keyword: granola bars, healthy, homemade, snack

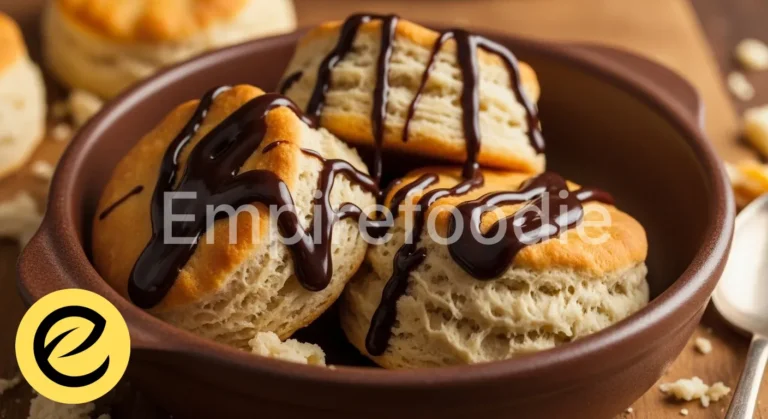
There’s nothing quite like the comforting aroma of freshly baked biscuits mingling with rich chocolate. This cherished Southern classic, chocolate gravy biscuits, brings a heartwarming sweetness to any morning or afternoon gathering. Imagine tender, flaky biscuits smothered in a velvety, indulgent chocolate sauce a truly unforgettable experience.

This recipe isn’t just food; it’s a hug from the past, a taste of home. Prepare yourself for a simple joy that satisfies both belly and soul. This delightful treat promises pure comfort.

Table of Contents

Why You’ll Love These Homemade Chocolate Gravy Biscuits

  • Experience unparalleled Southern comfort with every bite.
  • Surprisingly simple to prepare, even for novice bakers.
  • A delicious way to enjoy a classic treat with wholesome ingredients.
  • Perfect for creating cherished family memories around the breakfast table.

Ingredients You’ll Need

chocolate gravy biscuits

Creating truly memorable chocolate gravy biscuits begins with selecting high-quality ingredients. Just like Grandma always said, good food starts with good provisions. Here’s what you’ll gather for this delightful journey of crafting perfect chocolate gravy biscuits:

For the Fluffy Biscuits:

  • All-Purpose Flour: Unbleached, for that perfect tender crumb.
  • Baking Powder: Fresh, to ensure maximum lift and fluffiness.
  • Salt: A pinch enhances all the flavors.
  • Granulated Sugar: Just a touch for subtle sweetness.
  • Cold Unsalted Butter: Essential for flaky layers. Cut into small cubes.
  • Buttermilk: Cold, for a tangy depth and tender texture.

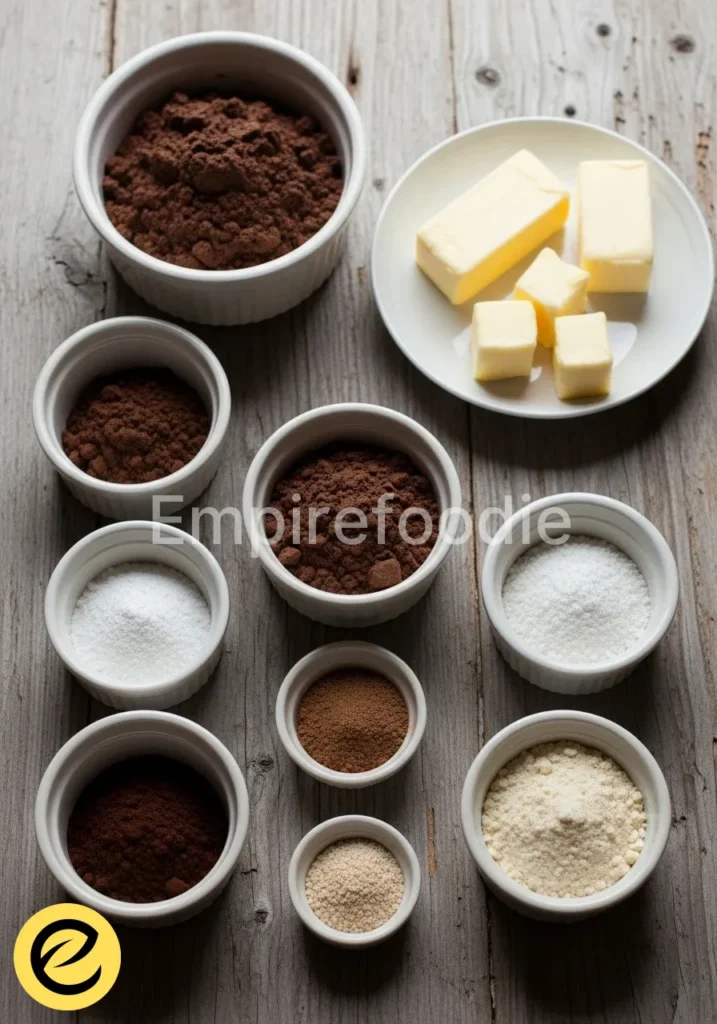
For the Velvety Chocolate Gravy:

  • Granulated Sugar: Provides the perfect sweetness to balance the cocoa.
  • Unsweetened Cocoa Powder: High quality is key for deep chocolate flavor.
  • All-Purpose Flour: Acts as a thickener, giving the gravy its luxurious texture.
  • Pinch of Salt: Balances and intensifies the chocolate notes.
  • Whole Milk: The creamy base for our rich gravy.
  • Unsalted Butter: Adds richness and a silky finish.
  • Vanilla Extract: Pure vanilla, for that comforting aromatic finish.

Substitutions & Variations

[ra_display_video url=”https://www.youtube.com/watch?v=8FHsrtqnV98″]

While the classic chocolate gravy biscuits are perfect as they are, sometimes we want to tweak things a bit for health or dietary needs. You can certainly make smart, wholesome substitutions without sacrificing that beloved taste and texture. Consider these ideas:

  • For the biscuits, try using whole wheat pastry flour for added fiber, or a gluten-free all-purpose blend.
  • Swap out whole milk for almond milk or oat milk in the gravy for a dairy-free option.
  • Reduce the sugar slightly or use a natural sweetener like a touch of maple syrup in the gravy.
  • Add a pinch of cinnamon or a dash of chili powder to the gravy for a warming, complex twist.

If you’re looking for a delightful way to incorporate chocolate into your baking, check out our easy chocolate cake recipe. It’s a great complement to the classic chocolate gravy biscuits, adding another layer of sweetness to your dessert repertoire.

Equipment You’ll Need

Gathering your tools before you start makes the baking process smooth and enjoyable. You won’t need anything fancy for these chocolate gravy biscuits; just common kitchen essentials will do the trick:

  • Large Mixing Bowls
  • Pastry Blender or Fork (for biscuits)
  • Rolling Pin
  • 2-inch Biscuit Cutter
  • Baking Sheet
  • Small Saucepan (for gravy)
  • Whisk
  • Measuring Cups and Spoons

Step-by-Step Instructions

chocolate gravy biscuits

Now, let’s bring these nostalgic chocolate gravy biscuits to life. Take your time, enjoy the process, and soon you’ll have a batch of pure comfort ready to savor. Remember, baking a batch of these classic chocolate gravy biscuits is a labor of love.

Part 1: Crafting the Fluffy Biscuits

  1. Preheat Your Oven: Set your oven to 425°F (220°C). Line a baking sheet with parchment paper or lightly grease it.
  2. Combine Dry Ingredients: In a large mixing bowl, whisk together the all-purpose flour, baking powder, salt, and granulated sugar. Make sure there are no lumps.
  3. Cut in the Butter: Add the cold, cubed unsalted butter to the dry ingredients. Use a pastry blender, two knives, or your fingertips to cut the butter into the flour mixture until it resembles coarse crumbs with some pea-sized pieces of butter remaining. This creates flaky layers.
  4. Add Buttermilk: Make a well in the center of the flour mixture and pour in the cold buttermilk. Stir gently with a fork until just combined. Be careful not to overmix; a slightly shaggy dough is perfect.
  5. Knead and Fold: Turn the dough out onto a lightly floured surface. Gently knead and fold the dough 4-5 times. Avoid overworking it, which can lead to tough biscuits.
  6. Shape the Biscuits: Pat the dough into a ¾-inch thick circle or rectangle. Dip your biscuit cutter in flour before each cut to prevent sticking. Cut out biscuits, pressing straight down without twisting for even rising. Gather scraps and gently re-pat to cut out any remaining biscuits.
  7. Bake: Arrange the biscuits on your prepared baking sheet, leaving a little space between them. Bake for 12-15 minutes, or until golden brown on top and cooked through.
  8. Cool Slightly: Once baked, remove the biscuits from the oven and let them cool on the baking sheet for a few minutes while you prepare the chocolate gravy.

Part 2: Preparing the Velvety Chocolate Gravy

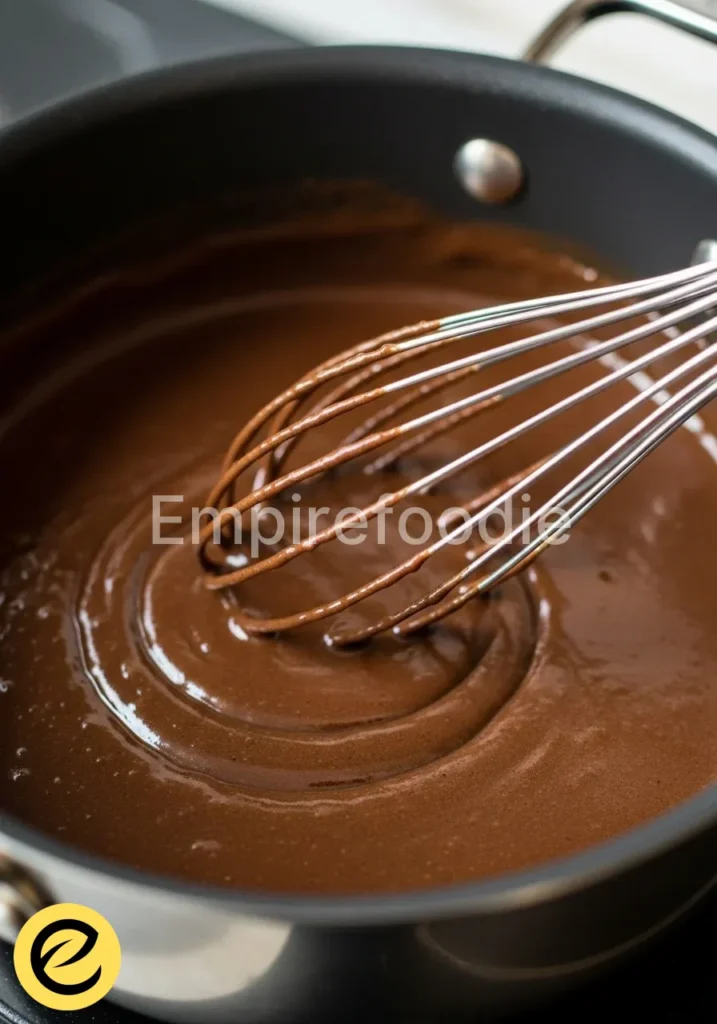
  1. Whisk Dry Ingredients: In a medium saucepan, whisk together the granulated sugar, unsweetened cocoa powder, all-purpose flour, and salt. Breaking up any cocoa lumps now ensures a smooth gravy.
  2. Add Milk: Gradually pour in the whole milk, whisking continuously until the mixture is smooth and completely combined.
  3. Cook the Gravy: Place the saucepan over medium heat. Bring the mixture to a gentle simmer, whisking constantly, especially at the bottom of the pan to prevent scorching. Continue to cook and whisk for 5-7 minutes, or until the gravy thickens to your desired consistency. It should be thick enough to coat the back of a spoon.
  4. Finish with Butter and Vanilla: Remove the saucepan from the heat. Stir in the unsalted butter and vanilla extract until the butter is fully melted and incorporated, creating a rich, glossy finish.
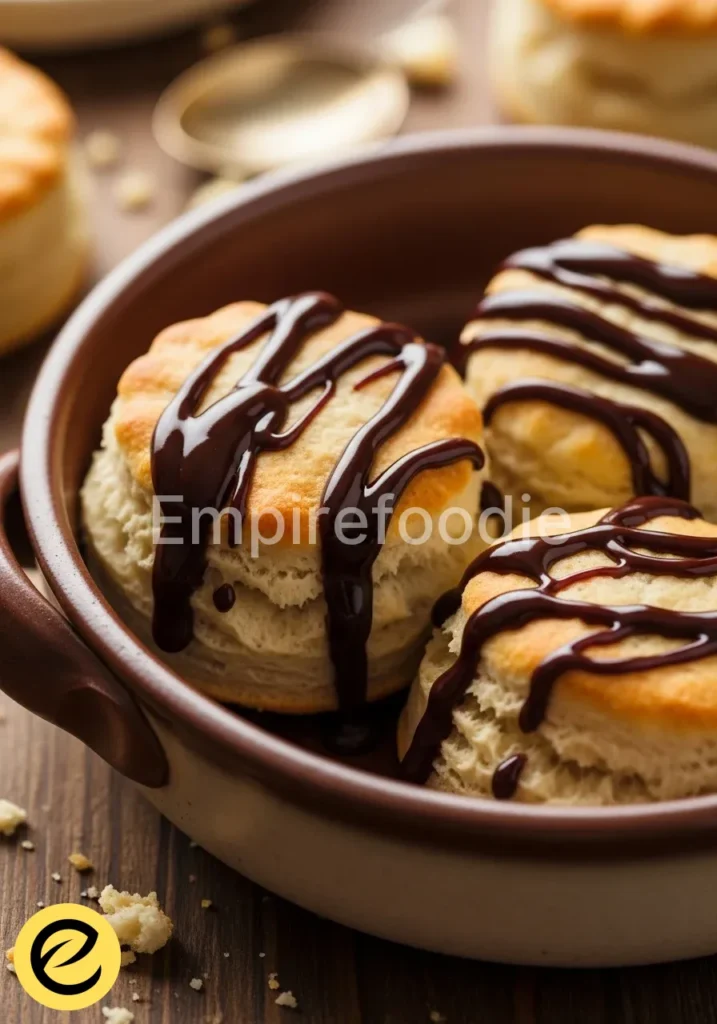
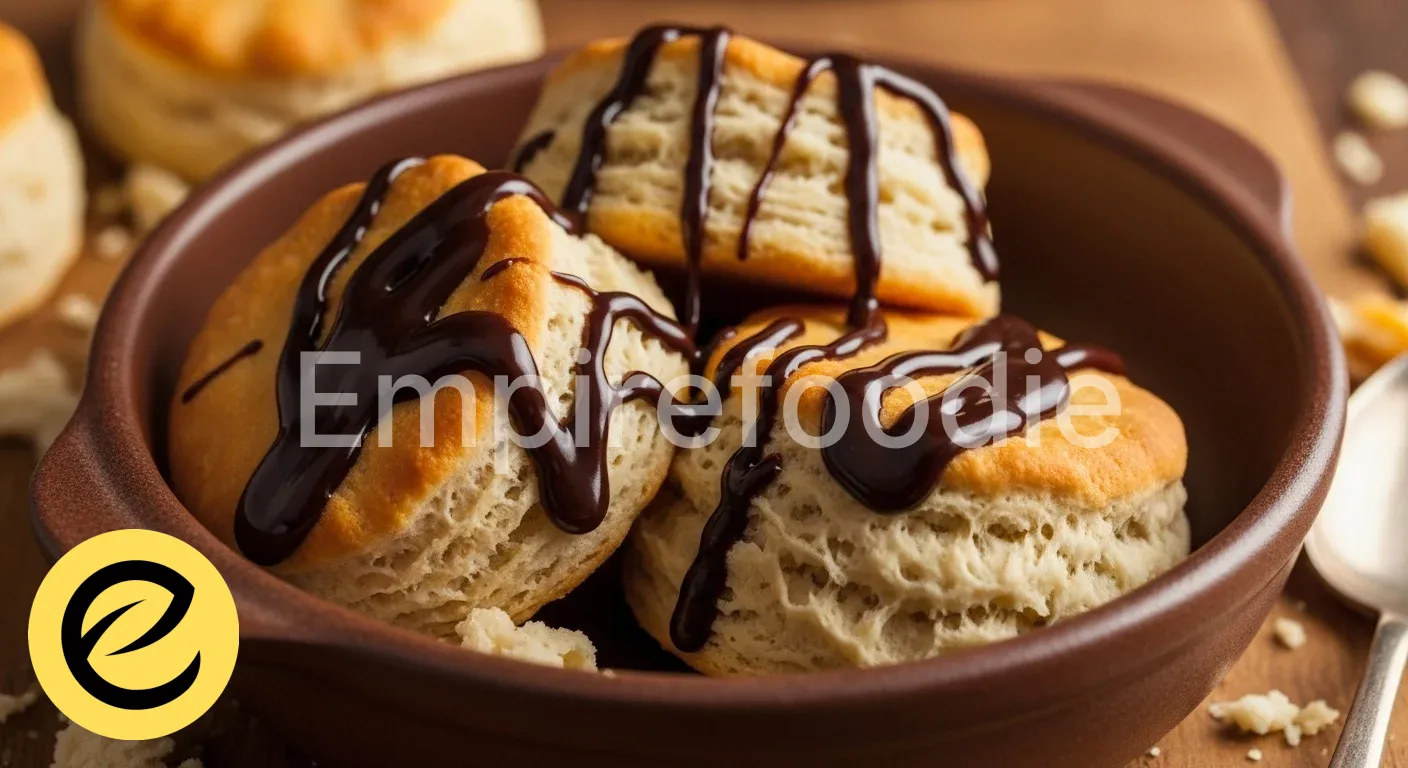
  5. Serve Immediately: Split your warm, fluffy biscuits in half. Ladle generous amounts of warm chocolate gravy over each half. Your delectable chocolate gravy biscuits are ready to enjoy!

As you savor your freshly baked chocolate gravy biscuits, consider also trying our German chocolate cookies. Their rich flavors will transport you to the heart of chocolate bliss, enhancing your baking experience.

Pro Tips for Success

To ensure your homemade chocolate gravy biscuits turn out perfectly every time, here are a few secrets from generations of Southern bakers:

  • Keep Ingredients Cold: For the flakiest biscuits, always use very cold butter and buttermilk. The cold butter creates steam pockets, which lead to those irresistible layers.
  • Do Not Overmix Biscuit Dough: Overworking the dough develops gluten, resulting in tough biscuits. Mix just until the ingredients are combined and the dough is shaggy.
  • Sift Cocoa Powder: Sifting your cocoa powder before mixing it into the gravy ensures a lump-free, silky smooth sauce. No one wants lumpy chocolate gravy!
  • Whisk Constantly for Gravy: When cooking the chocolate gravy, continuous whisking prevents sticking and ensures a smooth, evenly thickened sauce. Pay special attention to the bottom and corners of the pan for perfect chocolate gravy and biscuits.
  • Serve Warm: Chocolate gravy and biscuits are always best served warm. The gravy will thicken considerably as it cools.
  • Don’t Twist the Cutter: When cutting biscuits, press straight down and lift. Twisting the cutter seals the edges, preventing the biscuits from rising as high.

Storage & Reheating Tips

While the delightful combination of chocolate gravy biscuits is undoubtedly best fresh, you can store them to enjoy later. Proper storage ensures they retain their comforting qualities.

  • Biscuits: Store leftover biscuits in an airtight container at room temperature for up to 2-3 days. For longer storage, freeze them for up to 1 month.
  • Chocolate Gravy: Store any remaining chocolate gravy in an airtight container in the refrigerator for up to 3-4 days. It will thicken considerably as it chills.
  • Reheating Gravy: Gently reheat the gravy on the stovetop over low heat, whisking in a splash of milk or cream until it returns to your desired consistency.
  • Reheating Biscuits: Warm biscuits in a preheated oven at 350°F (175°C) for 5-7 minutes, or in a microwave for 15-30 seconds until heated through.

After enjoying your chocolate gravy biscuits, you may want to explore ways to vary your treats like our Mexican hot chocolate cookies. These cookies offer a unique twist, ensuring your chocolate cravings are always satisfied.

What to Serve With These Chocolate Gravy Biscuits

chocolate gravy biscuits

While chocolate gravy biscuits are a decadent treat on their own, pairing them with lighter, healthier options can create a balanced and delightful meal. Think about fresh flavors that complement the richness of these beloved chocolate gravy biscuits:

  • Fresh Berries: A bowl of mixed fresh berries (strawberries, blueberries, raspberries) adds a bright, tart counterpoint and a boost of antioxidants.
  • Sliced Bananas: Naturally sweet and creamy, sliced bananas are a classic pairing that many Southern families enjoy with their chocolate gravy.
  • Greek Yogurt: A dollop of plain Greek yogurt provides protein and a tangy contrast that cuts through the sweetness of the gravy, making your chocolate gravy biscuits feel a bit lighter.
  • Scrambled Eggs or Egg Whites: For a more substantial breakfast, simple scrambled eggs offer a savory balance.
  • Light Fruit Salad: A refreshing fruit salad can lighten the meal, making these chocolate gravy biscuits part of a more wholesome spread.

Frequently Asked Questions (FAQ)

Can I make the chocolate gravy ahead of time?

Yes, you can absolutely prepare the chocolate gravy a day or two in advance. Store it in an airtight container in the refrigerator. When you’re ready to serve, gently reheat it on the stovetop over low heat, adding a splash of milk or cream and whisking until it reaches your desired consistency and warmth. This makes preparing your chocolate gravy biscuits even easier on busy mornings, ensuring you can enjoy this beloved Southern treat.

How do I achieve extra flaky biscuits?

For truly exceptional flaky biscuits, the secret lies in cold butter and minimal handling. Ensure your butter is very cold and cut into small pieces before incorporating it into the flour. Avoid overmixing the dough; work it just enough to bring it together.

Also, when cutting the biscuits for your chocolate gravy biscuits, press straight down with your cutter don’t twist it! Twisting seals the edges and can inhibit rising, resulting in less flaky biscuits.

Can I make this recipe dairy-free or gluten-free?

You can certainly adapt this recipe for various dietary needs! For a dairy-free version of chocolate gravy biscuits, use a plant-based milk (like almond or oat milk) and a dairy-free butter alternative in both the biscuits and the gravy. For gluten-free biscuits, substitute the all-purpose flour with a high-quality gluten-free all-purpose baking blend. Be aware that texture might vary slightly, but the comforting taste of these delicious chocolate gravy biscuits remains.

Chocolate gravy biscuits are a beloved Southern dish, combining fluffy biscuits with a rich chocolate sauce for a comforting treat. These biscuits symbolize family gatherings and traditions, often cherished as a nostalgic breakfast option that evokes warm memories of home.

Final Thoughts

Making chocolate gravy biscuits isn’t just about following a recipe; it’s about connecting with tradition, creating warmth, and sharing love. As Hana, I believe these simple joys nourish our souls, bringing generations together one sweet, chocolatey bite at a time. This recipe is a timeless reminder of home and hearth.

Nutrition Information (per serving)

Please note that these values are approximate and can vary based on specific ingredients and serving sizes. This information is provided for general guidance.

NutrientAmount
Calories380 kcal
Total Fat18g
Saturated Fat10g
Cholesterol35mg
Sodium420mg
Total Carbohydrates48g
Dietary Fiber2g
Total Sugars28g
Protein7g

chocolate gravy biscuits

Prep Time 20 minutes
Cook Time 25 minutes
Total Time 45 minutes
Servings Serves 6 servings
Calories 380
There’s nothing quite like the comforting aroma of freshly baked biscuits mingling with rich chocolate. This cherished Southern classic, chocolate gravy biscuits, brings a heartwarming sweetness to any morning or afternoon gathering, featuring tender, flaky biscuits smothered in a velvety, indulgent chocolate sauce.

Ingredients

  • 2 cups unbleached all-purpose flour
  • 1 tablespoon baking powder
  • 1/2 teaspoon salt
  • 1 tablespoon granulated sugar
  • 1/2 cup cold unsalted butter, cut into cubes
  • 3/4 cup cold buttermilk
  • 1/2 cup granulated sugar (for gravy)
  • 1/3 cup unsweetened cocoa powder
  • 2 tablespoons all-purpose flour (for gravy)
  • 1/4 teaspoon salt (for gravy)
  • 2 cups whole milk
  • 2 tablespoons unsalted butter
  • 1 teaspoon vanilla extract

Instructions 

  • Preheat your oven to 425°F (220°C) and line a baking sheet with parchment paper.
  • In a large mixing bowl, combine the flour, baking powder, salt, and sugar. Whisk until well mixed.
  • Cut in the cold butter until the mixture resembles coarse crumbs.
  • Make a well in the center, add the buttermilk, and stir gently until just combined.
  • Turn the dough out onto a floured surface and gently knead it 4-5 times. Shape into a 3/4 inch thick circle.
  • Cut out biscuits and arrange them on the baking sheet. Bake for 12-15 minutes until golden.
  • While the biscuits are baking, prepare the chocolate gravy by whisking together sugar, cocoa, flour, and salt in a saucepan.
  • Gradually whisk in the milk until the mixture is smooth. Cook over medium heat, whisking constantly until the gravy thickens.
  • Remove from heat and stir in butter and vanilla until melted.
  • Serve the biscuits warm with generous amounts of chocolate gravy over them.

Notes

Store leftover biscuits in an airtight container at room temperature for up to 2-3 days. Store chocolate gravy in the refrigerator for up to 3-4 days.
Reheat gravy gently on the stovetop, adding a splash of milk to return to desired consistency.
Reheat biscuits in a preheated oven.
Calories: 380kcal
Course: Breakfast
Cuisine: American
Keyword: biscuits, breakfast, chocolate, Southern

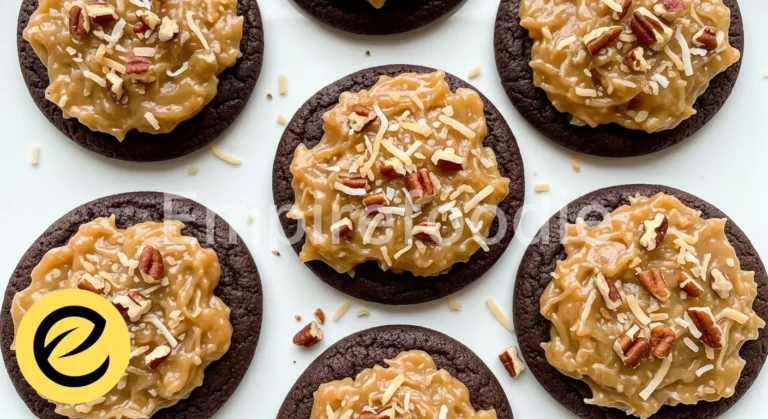
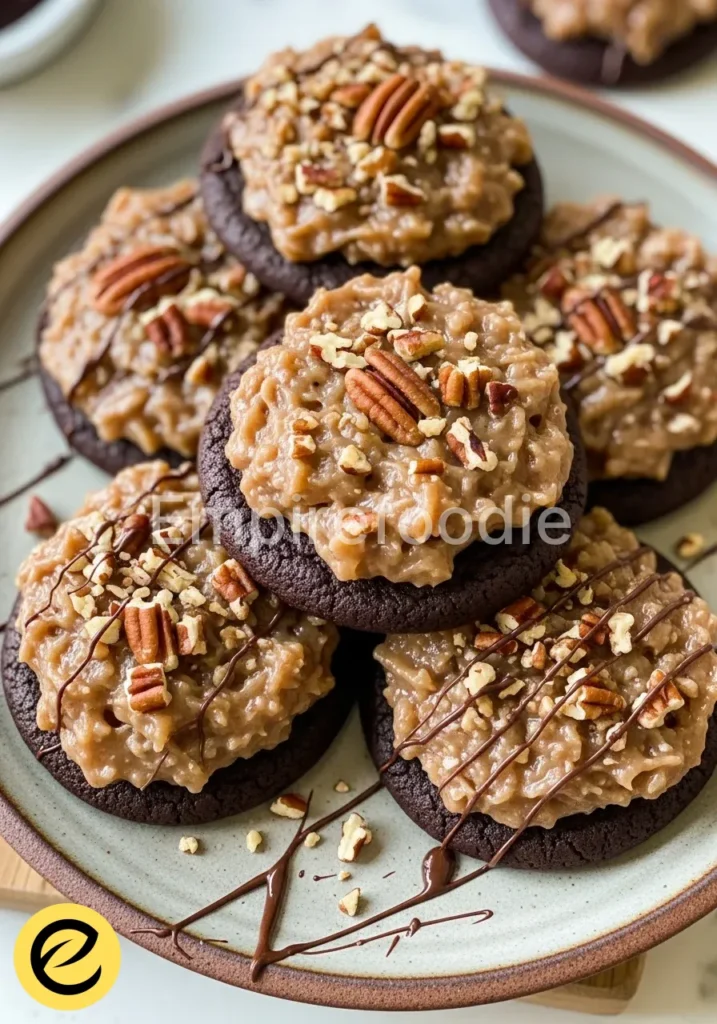
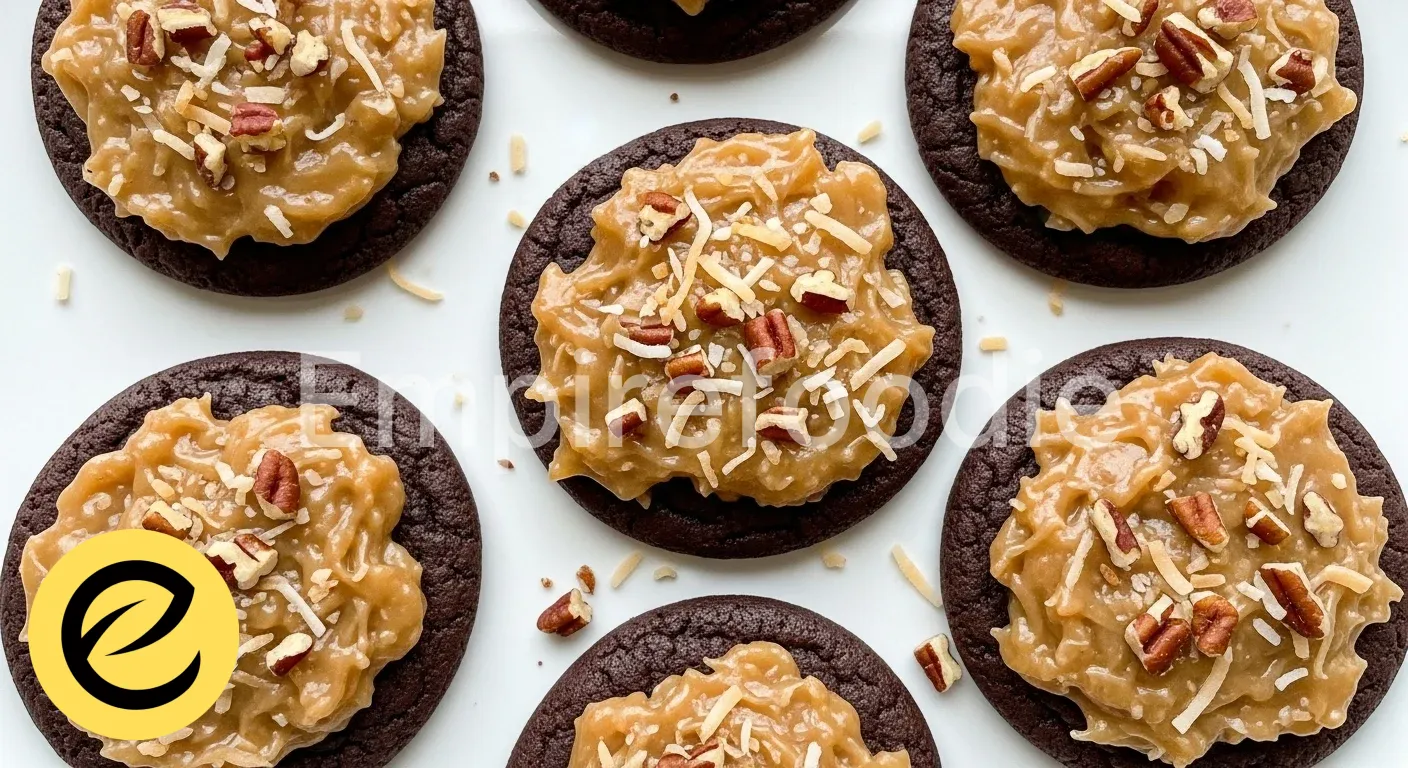
Welcome to my kitchen, dear friends, where the aroma of something truly special is about to fill your home. Today, we’re baking up a batch of the most decadent, chewy, and utterly irresistible German chocolate cookies you’ve ever imagined.

These delightful treats capture all the beloved flavors of the classic German chocolate cake – think rich chocolate, gooey coconut, and crunchy pecans – in a wonderfully portable cookie form. They’re a perfect blend of sweetness and texture, promising a little piece of comfort with every bite, making them an instant family favorite.

Table of Contents

Why You’ll Love These German Chocolate Cookies

  • Experience the nostalgic taste of classic German chocolate cake in a delightful, bite-sized cookie.
  • Effortlessly bake these impressive treats with simple steps, perfect for any home baker.
  • Enjoy a homemade dessert that brings joy and warmth, crafted with wholesome ingredients from your pantry.
  • Share these beautiful German chocolate cookies, creating cherished memories with every shared moment.
  • Satisfy your sweet tooth with a rich, chewy texture and an unforgettable flavor profile.

Ingredients You’ll Need

german chocolate cookies

In our farmhouse kitchen, we believe that the soul of any recipe lies in the quality of its ingredients. Just like my grandmother always said, “Good food starts with good things from the earth.” So, let’s gather our bounty for these amazing German chocolate cookies, focusing on fresh, wholesome choices that make all the difference.

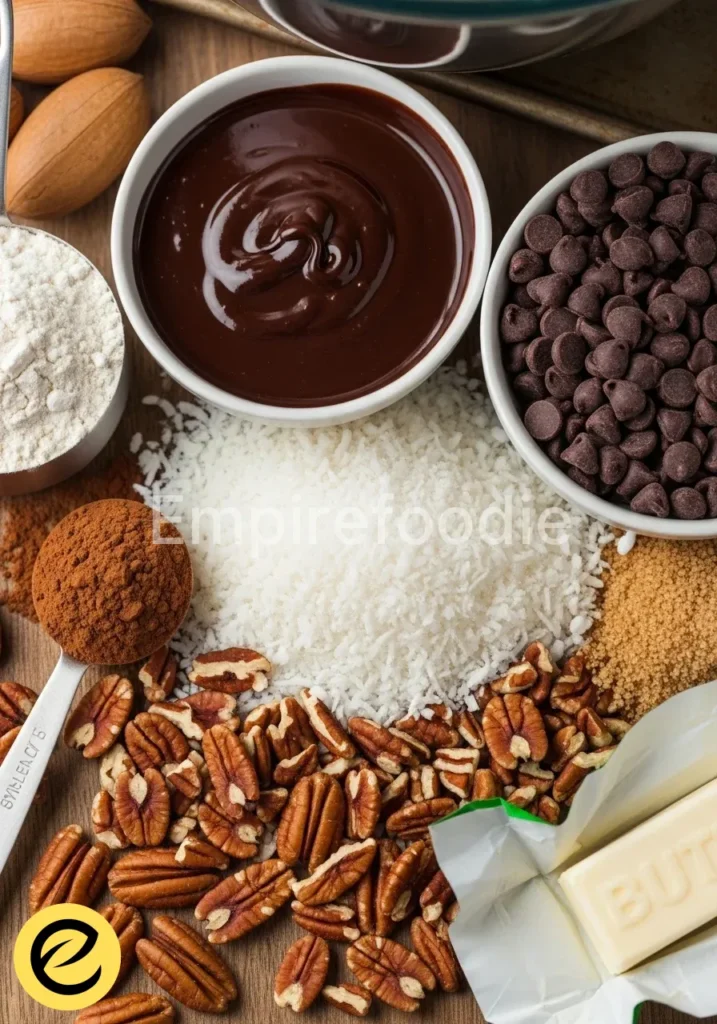
  • All-Purpose Flour: Opt for unbleached all-purpose flour for a lighter, tender crumb. About 2 ½ cups.
  • Unsweetened Cocoa Powder: A high-quality Dutch-processed cocoa powder will give your cookies a deep, rich chocolate flavor without bitterness. ½ cup.
  • Baking Soda: Essential for a soft, chewy texture. 1 teaspoon.
  • Salt: A pinch of fine sea salt balances the sweetness and enhances the chocolate notes. ½ teaspoon.
  • Unsalted Butter: Softened to room temperature, good quality butter makes these German chocolate cookies truly melt-in-your-mouth. 1 cup (2 sticks).
  • Granulated Sugar: For sweetness and structure. 1 ½ cups.
  • Light Brown Sugar: Packed, this adds moisture and a lovely caramel note. ½ cup.
  • Large Eggs: At room temperature, they bind everything beautifully. 2 large eggs.
  • Vanilla Extract: Pure vanilla extract is non-negotiable for its aromatic depth. 2 teaspoons.
  • Semi-Sweet Chocolate Chips: Good quality chips will melt perfectly into pockets of gooey goodness. 1 cup.
  • Sweetened Shredded Coconut: The heart of the German chocolate flavor. 1 ½ cups.
  • Pecans: Chopped finely or coarsely, depending on your preference for crunch. 1 cup.
  • Evaporated Milk: For the classic coconut-pecan frosting. ½ cup.
  • Egg Yolks: Also for the frosting, adding richness. 2 large.
  • Granulated Sugar (for frosting): ½ cup.
  • Unsalted Butter (for frosting): ¼ cup (½ stick).
  • Vanilla Extract (for frosting): 1 teaspoon.

Substitutions & Variations

[ra_display_video url=”https://www.youtube.com/watch?v=U1Y4NdtSu2k”]

While the classic recipe for German chocolate cookies is perfect as is, sometimes we need to adapt for dietary needs or simply to try something new. My grandma always taught me that baking is about nurturing, and that means making recipes work for everyone. Here are some healthy swaps and delightful variations to consider for your next batch.

For a gluten-free option, you can easily substitute the all-purpose flour with a 1:1 gluten-free baking blend that contains xanthan gum. This ensures your German chocolate cookies maintain their wonderful texture. If you’re looking to reduce sugar, consider swapping half of the granulated sugar with a natural sugar substitute like erythritol, adjusting to taste.

For those avoiding dairy, plant-based butter alternatives work beautifully, and you can use a dairy-free evaporated milk for the frosting. Nut-free? Replace pecans with toasted sunflower seeds or roasted pumpkin seeds for a similar crunch and earthy flavor. You can also mix in a handful of dried cherries or cranberries for a tart counterpoint to the rich chocolate, adding a lovely burst of color and flavor to your homemade German chocolate cookies.

While the classic recipe for German chocolate cookies is perfect as is, sometimes we need to adapt for dietary needs or simply to try something new. If you’re excited about exploring other delicious options like the timeless German chocolate cake, check out the recipe here.

Equipment You’ll Need

Having the right tools makes all the difference in the kitchen, just like a good hoe helps tend a garden. For these delightful German chocolate cookies, you don’t need anything fancy, just a few reliable pieces that will make your baking journey smooth and enjoyable.

  • Large Mixing Bowls: Two, one for dry and one for wet ingredients.
  • Electric Mixer: Stand mixer or hand mixer, essential for creaming butter and sugar.
  • Measuring Cups and Spoons: Accurate measurements are key.
  • Rubber Spatula: For scraping bowls and folding ingredients gently.
  • Baking Sheets: Sturdy, light-colored sheets prevent over-browning.
  • Parchment Paper or Silicone Baking Mats: For easy release and cleanup.
  • Wire Rack: For cooling your cookies evenly.
  • Small Saucepan: For preparing the coconut-pecan frosting.
  • Whisk: To blend the frosting ingredients smoothly.

Step-by-Step Instructions

german chocolate cookies

Now, let’s get our hands a little floury and bring these scrumptious German chocolate cookies to life! Follow these steps with a gentle hand and a happy heart, and you’ll soon be enjoying a true farmhouse treat.

  1. Prepare Your Workspace: Preheat your oven to 350°F (175°C). Line two large baking sheets with parchment paper or silicone mats.
  2. Combine Dry Ingredients: In a medium bowl, whisk together the all-purpose flour, unsweetened cocoa powder, baking soda, and salt. Set aside.
  3. Cream Wet Ingredients: In a large mixing bowl, using an electric mixer, cream together the softened unsalted butter, granulated sugar, and packed light brown sugar until light and fluffy, about 2-3 minutes.
  4. Add Eggs and Vanilla: Beat in the large eggs one at a time, ensuring each is fully incorporated before adding the next. Stir in the pure vanilla extract.
  5. Combine Wet and Dry: Gradually add the dry ingredients to the wet ingredients, mixing on low speed until just combined. Be careful not to overmix; a few streaks of flour are fine.
  6. Fold in Chips: Gently fold in the semi-sweet chocolate chips, sweetened shredded coconut, and chopped pecans until evenly distributed throughout the cookie dough.
  7. Scoop and Bake: Drop rounded tablespoons of cookie dough onto the prepared baking sheets, leaving about 2 inches between each cookie.
  8. Bake Cookies: Bake for 10-12 minutes, or until the edges are set and the centers still look slightly soft. The cookies will firm up as they cool.
  9. Cool Cookies: Let the German chocolate cookies cool on the baking sheets for 5 minutes before transferring them to a wire rack to cool completely.
  10. Prepare Frosting: While cookies cool, in a small saucepan, combine the evaporated milk, egg yolks, granulated sugar, and unsalted butter. Cook over medium-low heat, whisking constantly, until the mixture thickens to a pudding-like consistency, about 5-7 minutes. Remove from heat and stir in vanilla extract.
  11. Add Coconut and Pecans to Frosting: Stir in the remaining sweetened shredded coconut and chopped pecans into the cooked frosting.
  12. Frost Cookies: Once the cookies are completely cool, spread a dollop of the warm (not hot!) coconut-pecan frosting onto each cookie. Allow the frosting to set slightly before serving. These German chocolate cookies truly shine with their delicious topping.

Now, let’s get our hands a little floury and bring these scrumptious German chocolate cookies to life! To complement your baking journey, you can also try our chocolate cake recipe that will tantalize your taste buds here.

Pro Tips for Success

Baking is a science, but it’s also an art honed over generations. These little nuggets of wisdom, passed down through my family, will help you create the most perfect batch of German chocolate cookies every time.

  • Room Temperature Ingredients: Always use room temperature butter and eggs. This allows them to emulsify properly, creating a smoother, more uniform dough and a better texture in your final German chocolate cookies.
  • Don’t Overmix: After adding the flour mixture, mix just until combined. Overmixing develops the gluten, resulting in tough, dry cookies instead of chewy ones.
  • Use a Cookie Scoop: A cookie scoop ensures uniform size, which leads to even baking. Plus, it makes portioning much quicker and cleaner.
  • Chill the Dough (Optional but Recommended): If your dough feels too soft, chill it for 30 minutes to an hour. This helps prevent spreading and concentrates the flavors, resulting in thicker, chewier German chocolate cookies.
  • Test Your Oven: Ovens can vary. If your cookies are consistently baking too fast or too slow, consider using an oven thermometer to verify accuracy.
  • Don’t Overbake: The key to a chewy cookie is taking them out when the edges are set but the centers still look slightly underdone. They will continue to cook slightly on the hot baking sheet.
  • Proper Cooling: Allow cookies to cool on the baking sheet for a few minutes before transferring to a wire rack. This prevents them from breaking and helps them set. For the frosting, ensure the cookies are completely cool to prevent the frosting from melting and sliding off.
  • Toasting Nuts: Lightly toast your pecans before adding them to the dough and the frosting. This intensifies their flavor and adds an extra layer of deliciousness to your German chocolate cookies.

Storage & Reheating Tips

Once you’ve gone to the effort of baking these delightful German chocolate cookies, you’ll want to keep them fresh and delicious for as long as possible. Here’s how my grandmother would keep her treats tasting as good as the day they were baked.

Store your frosted German chocolate cookies in an airtight container at room temperature for up to 3-4 days. For optimal freshness, especially in warmer climates, you can store them in the refrigerator for up to a week. Just make sure the container is truly airtight to prevent them from drying out or absorbing other fridge odors.

If storing in layers, place a piece of parchment paper between each layer to prevent sticking and keep the frosting pristine. For longer storage, these cookies freeze beautifully. Place unfrosted cookies in a single layer on a baking sheet and freeze until firm, then transfer them to a freezer-safe bag or container for up to 2-3 months.

Thaw at room temperature and then frost. You can also freeze the coconut-pecan frosting separately in an airtight container for up to 1 month and thaw in the refrigerator before gently reheating over low heat to soften for frosting your fresh-baked German chocolate cookies.

Once you’ve gone to the effort of baking these delightful German chocolate cookies, you’ll want to keep them fresh and delicious for as long as possible. For another incredible dessert, discover how to prepare an ultimate flourless chocolate cake here that will surely impress.

What to Serve With This Recipe

german chocolate cookies

These rich and decadent German chocolate cookies are a treat in themselves, but pairing them with the right accompaniments can elevate the entire experience. In our farmhouse, we love balancing sweetness with fresh, vibrant flavors or a comforting beverage. Think of these pairings as ways to create a beautifully rounded moment of enjoyment.

  • A Warm Beverage: A classic pairing is a tall glass of cold milk, which beautifully cuts through the richness of the chocolate. For a more adult palate, serve these German chocolate cookies with a freshly brewed cup of dark roast coffee or a soothing mug of herbal tea. The bitterness of coffee complements the sweetness perfectly.
  • Fresh Fruit: Offer a side of fresh berries like raspberries or strawberries. Their natural tartness and juiciness provide a wonderful contrast to the dense, sweet cookies. A light fruit salad with melon, grapes, and citrus segments would also be a refreshing choice.
  • Light Dessert Options: If you’re serving these as part of a larger dessert spread, consider lighter options alongside, such as a simple sorbet or a bowl of vanilla bean ice cream (especially good with a warm German chocolate cookie!).
  • Herbal Infusions: A peppermint or chamomile tea offers a calming, digestive counterpoint after indulging in these rich German chocolate cookies.
  • Yogurt Parfait: For a lighter, healthier option, a small bowl of Greek yogurt with a drizzle of honey and a sprinkle of granola can be a lovely palate cleanser alongside the cookies.

Frequently Asked Questions (FAQ)

Absolutely! Preparing the cookie dough for these German chocolate cookies in advance is a wonderful time-saver. You can make the dough, wrap it tightly in plastic wrap, and store it in the refrigerator for up to 3 days.

When you’re ready to bake, simply let it come to room temperature for about 15-20 minutes to make it easier to scoop. You can also freeze the raw cookie dough balls for up to 3 months. Just scoop them onto a parchment-lined baking sheet, freeze until solid, then transfer to a freezer-safe bag. Bake from frozen, adding a few extra minutes to the baking time.

What if my coconut-pecan frosting doesn’t thicken?

Sometimes the frosting for these German chocolate cookies can be a bit finicky, but don’t worry! The most common reason for it not thickening is that it hasn’t cooked long enough or the heat wasn’t consistent. Ensure you are cooking the mixture over medium-low heat and whisking continuously to prevent scorching.

It needs to reach a simmer and cook until it coats the back of a spoon thickly, resembling a pudding. If it’s still too thin, you can try whisking in a very small amount of cornstarch mixed with cold water (a “slurry”) and cooking for another minute or two, but typically, patience and consistent whisking will get you there. Avoid using too high heat, as this can curdle the egg yolks.

Can I use a different type of nut in German chocolate cookies?

While pecans are traditional and provide that signature flavor in German chocolate cookies, you certainly can experiment with other nuts based on your preference or what you have on hand. Walnuts are an excellent substitute, offering a similar crunch and earthy flavor profile that pairs wonderfully with chocolate and coconut.

For a different twist, you could try using chopped almonds, which add a slightly sweeter, buttery note. Always remember to toast your nuts lightly before adding them to both the cookie dough and the frosting; this step significantly enhances their flavor and aroma, making your homemade German chocolate cookies even more delicious.

German chocolate cookies are an American treat inspired by the traditional German chocolate cake, known for its layers of rich chocolate, sweet coconut, and crunchy pecans. These cookies make a wonderful snack or dessert and embody the delightful flavors of this beloved cake—learn more about the dessert that began the trend here.

Final Thoughts

Baking these German chocolate cookies isn’t just about ingredients; it’s about weaving warmth and love into every bite. From my farmhouse kitchen to your home, I hope they bring you the same joy and comforting memories they’ve brought my family through generations.

Nutrition Information (per serving)

Please note that this is an estimated nutritional breakdown and can vary based on specific ingredient brands and portion sizes. Each serving considers one medium-sized cookie with frosting.

NutrientAmount
Calories280-320 kcal
Total Fat18-22 g
Saturated Fat10-12 g
Cholesterol50-60 mg
Sodium100-120 mg
Total Carbohydrates30-35 g
Dietary Fiber2-3 g
Total Sugars20-25 g
Protein3-4 g

german chocolate cookies

Prep Time 20 minutes
Cook Time 12 minutes
Total Time 32 minutes
Servings 24 cookies servings
Calories 300
These German chocolate cookies capture the rich flavors of the classic cake in a delightful, chewy cookie form, featuring chocolate, coconut, and pecans.

Ingredients

  • 2 ½ cups unbleached all-purpose flour
  • ½ cup unsweetened cocoa powder
  • 1 teaspoon baking soda
  • ½ teaspoon fine sea salt
  • 1 cup unsalted butter, softened
  • 1 ½ cups granulated sugar
  • ½ cup light brown sugar, packed
  • 2 large eggs, at room temperature
  • 2 teaspoons pure vanilla extract
  • 1 cup semi-sweet chocolate chips
  • 1 ½ cups sweetened shredded coconut
  • 1 cup chopped pecans
  • ½ cup evaporated milk
  • 2 large egg yolks
  • ½ cup granulated sugar (for frosting)
  • ¼ cup unsalted butter (for frosting)
  • 1 teaspoon vanilla extract (for frosting)

Instructions 

  • Preheat your oven to 350°F (175°C) and line baking sheets with parchment paper.
  • In a medium bowl, whisk together flour, cocoa powder, baking soda, and salt.
  • In a large mixing bowl, cream together butter, granulated sugar, and brown sugar until light and fluffy.
  • Beat in eggs one at a time and stir in vanilla extract.
  • Gradually add dry ingredients to the wet ingredients, mixing until just combined.
  • Fold in chocolate chips, shredded coconut, and chopped pecans.
  • Drop rounded tablespoons of dough onto baking sheets, leaving space between each cookie.
  • Bake for 10-12 minutes, until edges are set and centers are slightly soft.
  • Let cookies cool on sheets for 5 minutes, then transfer to a wire rack.
  • Prepare frosting by combining evaporated milk, egg yolks, sugar, and butter in a saucepan, cook until thickened.
  • Stir in coconut and pecans, then frost cookies once completely cooled.

Notes

Ensure all ingredients are at room temperature for best results. Store frosted cookies in an airtight container.
Calories: 300kcal
Course: Dessert
Cuisine: American
Keyword: chocolate, coconut, cookies, pecans

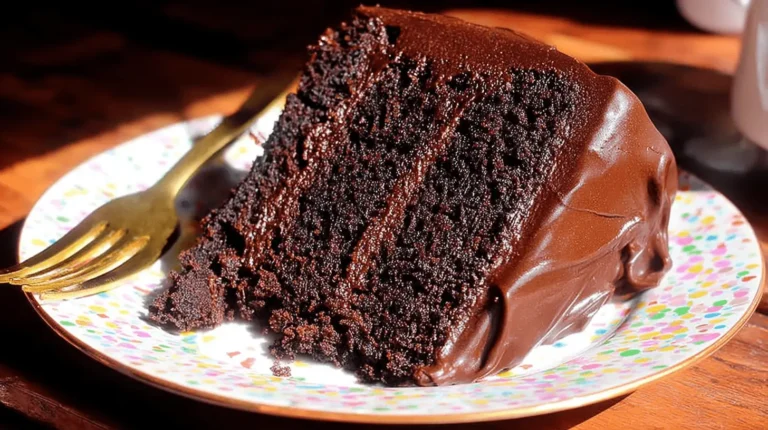
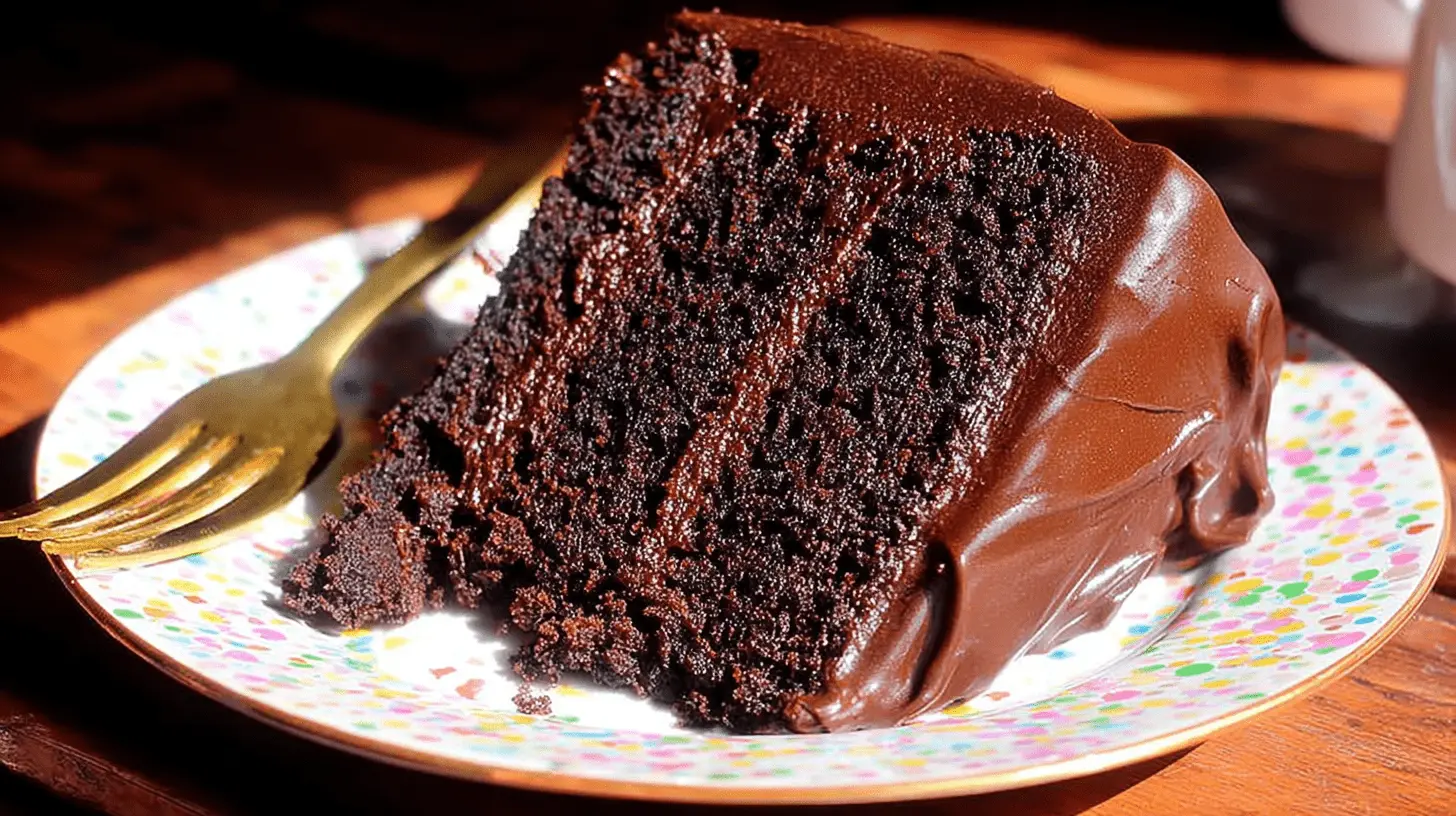
Unlock the secret to the most delectable homemade chocolate dessert with this Ultimate Moist Chocolate Layer Cake. This recipe delivers an exceptionally rich flavor and a tender, melt-in-your-mouth crumb every time. Enjoy the remarkable ease of a one-bowl method and no-mixer simplicity, making it perfect for bakers of all skill levels. Its exceptional moistness also ensures it stays fresh and delicious for days.

Table of Contents

Why You’ll Love This Moist Chocolate Layer Cake

  • Effortlessly Simple: This is a super easy, one-bowl recipe that requires no electric mixer, making cleanup a breeze.
  • Unrivaled Texture: You will achieve an incredibly moist and soft texture, thanks to carefully selected ingredients and precise ratios.
  • Deep Chocolate Flavor: Enjoy a truly rich and intense chocolate flavor that satisfies even the most discerning chocolate cravings.
  • Perfect Pairing: This Moist Chocolate Layer Cake pairs perfectly with a luscious, fudgy chocolate frosting for an indulgent treat.
  • No Buttermilk Needed: Achieve excellent results without the need for buttermilk, using readily available ingredients instead.

Ingredients

Here are the simple ingredients you will need for this fantastic cake:

  • Dry Ingredients: 1 ¾ cup (250g) all-purpose flour, ⅔ cup (56g) cocoa powder (Dutch-processed recommended), 1 teaspoon baking powder, 1 teaspoon baking soda, 1 cup (200g) granulated sugar, ½ cup (110g) packed light brown sugar, ¾ teaspoon salt.
  • Wet Ingredients: 2 large eggs, ½ cup (120ml) vegetable oil (sunflower oil preferred), ¾ cup (180ml) full-fat sour cream, 1 teaspoon (5ml) pure vanilla extract, 1 cup (240ml) hot coffee.

Notes & Substitutions

Always measure your flour accurately, preferably by weight using a kitchen scale, for the best texture. Dutch-processed cocoa powder creates a darker color and milder, less acidic chocolate flavor, while natural cocoa offers a fruitier, sharper profile.

For sour cream, you can use plain Greek yogurt or crème fraîche as a suitable substitute. Neutral oils like sunflower, canola, or grapeseed oil are recommended as they do not impart unwanted flavors.

The hot coffee or water helps bloom the cocoa and contributes to the cake’s moistness; use decaf coffee or instant coffee dissolved in hot water if preferred. Do not skip the vanilla extract; it significantly enhances the overall chocolate flavor.

Equipment

Gathering your tools before you begin ensures a smooth baking process. You will need two 8-inch round cake pans for even baking. A large mixing bowl and a whisk are essential, though an electric mixer can also be used if desired.

A fine mesh sieve helps ensure a smooth, lump-free batter. Parchment paper rounds are incredibly useful for preventing sticking and easy release. For consistent results, a kitchen scale is highly recommended for weighing ingredients. Finally, an offset spatula will be your best friend for spreading the frosting with ease.

How To Make Moist Chocolate Layer Cake

Creating this Moist Chocolate Layer Cake is a straightforward and rewarding process. Follow these steps for perfect results.

  • First, preheat your oven to 350°F (175°C). Lightly grease two 8-inch round cake pans, dust them lightly with flour, and then line the base of each pan with parchment paper rounds.
  • Next, prepare your hot coffee or water. If you are using instant coffee, simply add 1 tablespoon of instant coffee granules or 2 teaspoons of espresso powder to 1 cup of freshly boiled water and set it aside to stay hot while you prepare the batter.
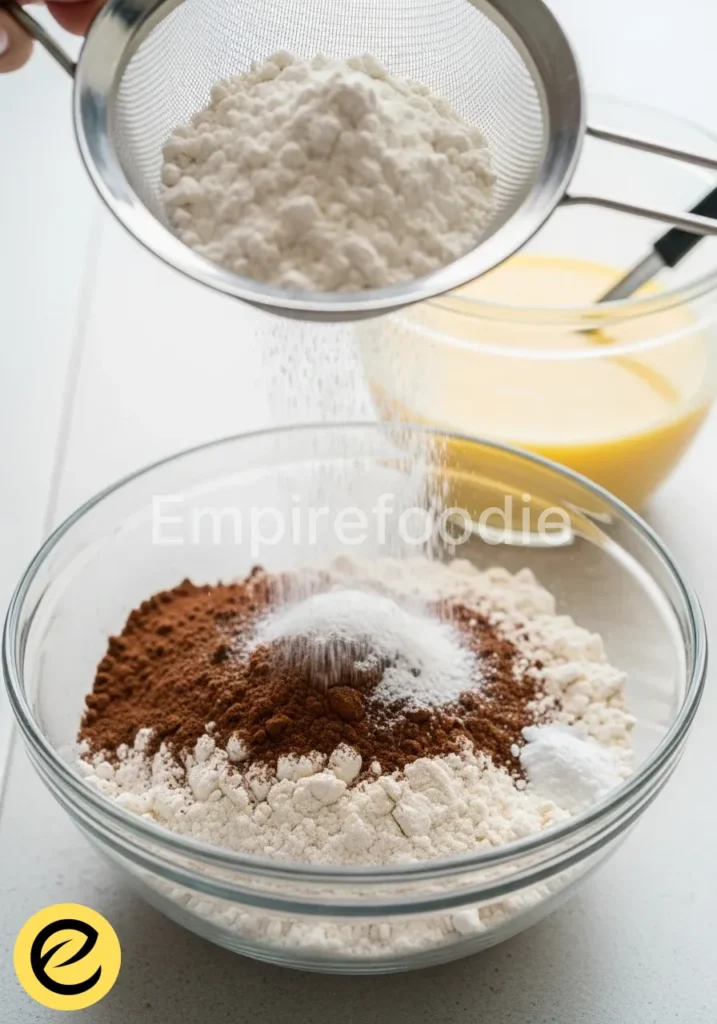
  • In a large bowl, combine your dry ingredients. Use a fine mesh sieve to sift the flour, cocoa powder, baking powder, and baking soda into the bowl. Add both granulated sugar and light brown sugar, along with the salt, and whisk everything together very well to ensure the ingredients are evenly combined. Press out any lumps of brown sugar.
  • In a separate medium bowl, whisk together the wet ingredients: eggs, oil, sour cream, and vanilla extract until well blended. Create a well in the center of the dry ingredients using a spatula, then pour in the whisked wet ingredients. Mix with an electric handheld mixer on medium-low speed or by hand with a wire whisk. Start in the center, gradually incorporating the dry ingredients from the sides until just blended. The batter will appear thick and somewhat dry at this stage.
  • Now, gradually add the hot coffee, pouring it in two stages to minimize any clumps forming. Continue mixing until the batter is evenly combined and smooth. Do not worry; the batter will be quite thin, which is normal for this incredibly moist chocolate layer cake.
  • Divide the thin batter evenly between your two prepared pans. Gently tap the pans on the countertop a few times to encourage any large air bubbles to surface and pop. Bake for 30-33 minutes, or until the cakes spring back when pressed gently in the center, and a skewer inserted into the center comes out clean.
  • Transfer the hot cake pans to a wire rack and let them cool for 15 minutes. After 15 minutes, run a knife or offset spatula around the sides of the pans before inverting the cakes onto the rack to cool completely. While the cakes are cooling, prepare your chosen Chocolate Fudge Frosting (you can find my best recipe here for the perfect complement).
  • Once the cake layers are completely cool, place one cake layer on your chosen serving plate. Use a large offset spatula to spread about ¾ cup of frosting evenly over the top, spreading it out to the edges. Carefully place the second cake layer on top, ensuring it aligns perfectly with the bottom layer.
  • Finally, cover the entire cake with the remaining frosting, using your offset spatula to smooth the sides and create beautiful swooshes and swirls on the top layer. Enjoy this phenomenal Moist Chocolate Layer Cake!

Pro Tips & Troubleshooting

Achieve the best results for your Moist Chocolate Layer Cake with these expert tips. Always sift your dry ingredients; this crucial step prevents lumps and ensures even leavening, leading to a perfectly consistent crumb.

Use a neutral-flavored oil, such as sunflower or canola, to allow the pure chocolate flavor to shine through without any interference. Do not be tempted to reduce the sugar in this recipe; sugar plays a vital role in retaining moisture, contributing to the cake’s signature soft texture. Bake the cakes until they are just done, overbaking is the quickest way to end up with a dry cake.

For professional-level consistency, weigh your ingredients with a kitchen scale; volume measurements can vary too much. Avoid over-mixing the batter after adding wet ingredients to dry, as this can develop gluten and result in a tough cake or tunneling. Lastly, ensure your baking powder and baking soda are fresh by testing them with water and vinegar, respectively, to guarantee proper lift.

Serving, Storage & Variations

Serving Suggestions

This Moist Chocolate Layer Cake is incredibly versatile. Serve it plain for a rich, satisfying dessert, or elevate it further with a scoop of vanilla bean ice cream. A handful of fresh raspberries or sliced strawberries adds a beautiful contrast in flavor and color.

Storage

Store any leftover cake covered tightly at room temperature for up to 3 days. To extend its freshness, refrigerate the covered cake for up to 1 week. Remember to bring it to room temperature for about 30 minutes before serving to ensure the best texture and flavor.

Freezing

For future enjoyment, you can freeze unfrosted cake layers. Wrap each cooled layer tightly in plastic wrap, then again in aluminum foil. They will keep well in the freezer for up to 3 months. Do not freeze the assembled or frosted cake, as the frosting and structure can be compromised upon thawing.

Variations

Easily adapt this recipe for different occasions. To make delightful chocolate cupcakes, simply divide the batter into lined muffin tins and adjust the baking time to approximately 20-25 minutes, checking for doneness.

Alternatively, bake it as a single loaf cake in a greased 9×5 inch loaf pan; you may need to adjust the batter quantity slightly and increase the baking time to 50-60 minutes, ensuring a clean skewer test.

Nutrition

Nutritional information for this Moist Chocolate Layer Cake is an estimate and can vary based on specific ingredients and serving sizes. Each serving typically accounts for one-twelfth of the entire cake. For precise details, consider using an online nutritional calculator with your exact ingredients.

NutrientPer Serving (estimated)
Calories450-500 kcal
Total Fat25-30g
Saturated Fat5-7g
Cholesterol40-50mg
Sodium300-350mg
Total Carbs55-60g
Dietary Fiber3-4g
Total Sugars40-45g
Protein5-6g

Frequently Asked Questions (FAQ)

What makes a cake moist?

High-fat ingredients like oil and sour cream, along with sufficient sugar and the addition of hot liquid, all contribute to an incredibly moist texture. This combination locks in moisture, resulting in a tender crumb for our Moist Chocolate Layer Cake. According to a study in Medium, fats like butter or oil are key to cake moistness by disrupting gluten formation.

Which cocoa powder should I use?

For this recipe, Dutch-processed cocoa powder is highly recommended for its darker color and milder, less acidic chocolate flavor. Natural cocoa powder can also be used, but it will yield a lighter color and a slightly more intense, fruitier chocolate taste.

Can I make this cake without coffee?

Yes, absolutely. If you prefer to bake without coffee, you can substitute the hot coffee with an equal amount of plain hot water. The hot liquid is primarily used to bloom the cocoa powder and thin the batter, not necessarily to impart a strong coffee flavor.

Can I use this recipe for cupcakes?

Yes, this recipe is easily adaptable for cupcakes. Simply divide the batter among 24 paper-lined muffin tins. Bake the cupcakes for approximately 20-25 minutes, or until a skewer inserted into the center comes out clean.

Final Thoughts

This Ultimate Moist Chocolate Layer Cake stands as a testament to the joy of simple, yet extraordinarily delicious home baking. With its rich, deep chocolate flavor, incredibly tender crumb, and amazing moistness that lasts for days, it is truly a dessert for any occasion.

Embrace the ease of this one-bowl, no-mixer recipe and impress everyone with a cake that tastes like it came from a professional bakery. Bake it, share it, and savor every magnificent bite of this ultimate chocolate delight.

Ultimate Moist Chocolate Layer Cake

Prep Time 25 minutes
Cook Time 32 minutes
Total Time 1 hour 22 minutes
Servings 12 slices
Calories 480
This recipe delivers an incredibly moist and rich chocolate layer cake, perfect for any special occasion. It features a tender crumb and is ideal for pairing with your favorite chocolate fudge frosting.

Equipment

  • Oven
  • 8-inch round cake pans (2)
  • parchment paper
  • Fine mesh sieve
  • Large bowl
  • Medium bowl
  • Whisk
  • Spatula
  • Electric handheld mixer
  • Wire rack
  • Knife
  • Offset spatula
  • Skewer

Ingredients

Dry Ingredients

  • 1 ¾ cup all-purpose flour ((250g))
  • cup cocoa powder ((56g))
  • 1 teaspoon baking powder
  • 1 teaspoon baking soda
  • 1 cup granulated sugar ((200g))
  • ½ cup packed light brown sugar ((110g))
  • ¾ teaspoon salt

Wet Ingredients

  • 2 large large eggs
  • ½ cup vegetable oil ((120ml))
  • ¾ cup full fat sour cream ((180ml))
  • 1 teaspoon pure vanilla extract ((5ml))
  • 1 cup hot coffee ((240ml))

Instructions 

Preparation

  • Preheat your oven to 350°F. Lightly grease two 8-inch round cake pans, dust them with flour, and line their bases with parchment paper rounds.
  • Prepare 1 cup of hot coffee using either instant coffee granules or espresso powder in just-boiled water, then set it aside.

Mixing the Batter

  • Sift the flour, cocoa powder, baking powder, and baking soda into a large bowl. Add both sugars and salt, then whisk thoroughly to combine and remove any brown sugar lumps.
  • In a separate medium bowl, whisk together the eggs, oil, sour cream, and vanilla. Pour this wet mixture into the dry ingredients, mixing with an electric mixer or whisk until just blended and thick, then gradually add the hot coffee in two stages, mixing until the thin batter is smooth.

Baking and Cooling

  • Divide the batter evenly between the prepared pans and tap them on the countertop to release air bubbles. Bake for 30-33 minutes until a skewer inserted into the center comes out clean.
  • Transfer pans to a wire rack to cool for 15 minutes, then run a knife or offset spatula around the sides and invert the cakes onto the rack to cool completely.
  • While the cakes are cooling, prepare your chosen chocolate fudge frosting.

Assembly

  • Once the cakes are fully cooled, place one layer on a serving plate and spread about ¾ cup of frosting over the top, extending to the edges. Carefully place the second cake layer on top, aligning it with the bottom layer.
  • Cover the entire cake with the remaining frosting, using an offset spatula to smooth the sides and create decorative swirls on the top layer, then enjoy!

Notes

Ensure all ingredients are at room temperature for best results. The hot coffee helps to bloom the cocoa powder, enhancing the chocolate flavor.
Author: Emma Williams Ava
Calories: 480kcal
Course: Cake, Dessert
Cuisine: American
Keyword: Chocolate Layer Cake, Layer Cake, Moist Chocolate Layer Cake, One-Bowl