Author

Hana

Browsing

This post contains affiliate links. As an Amazon Associate, I earn from qualifying purchases. This comes at no extra cost to you.

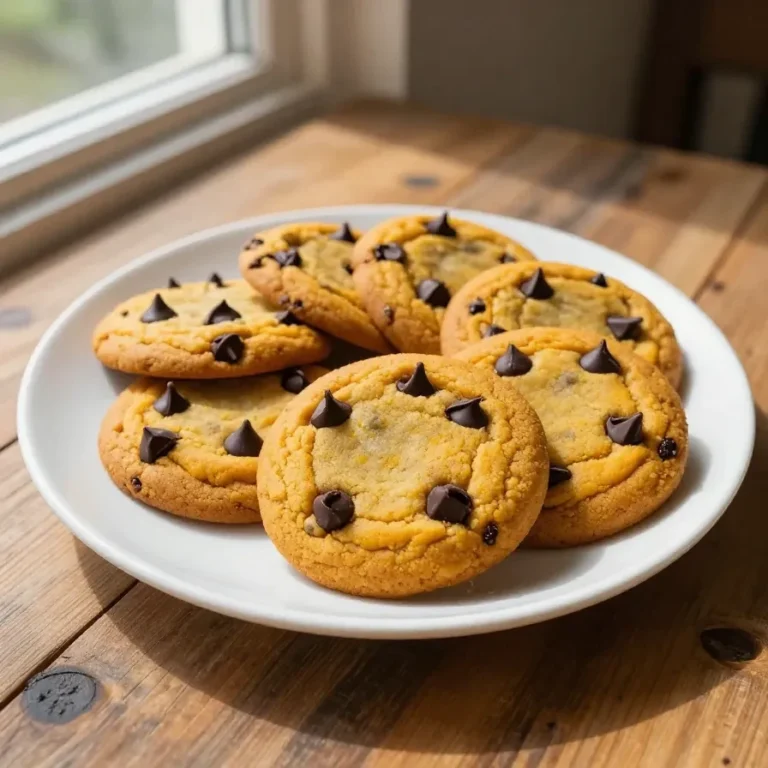
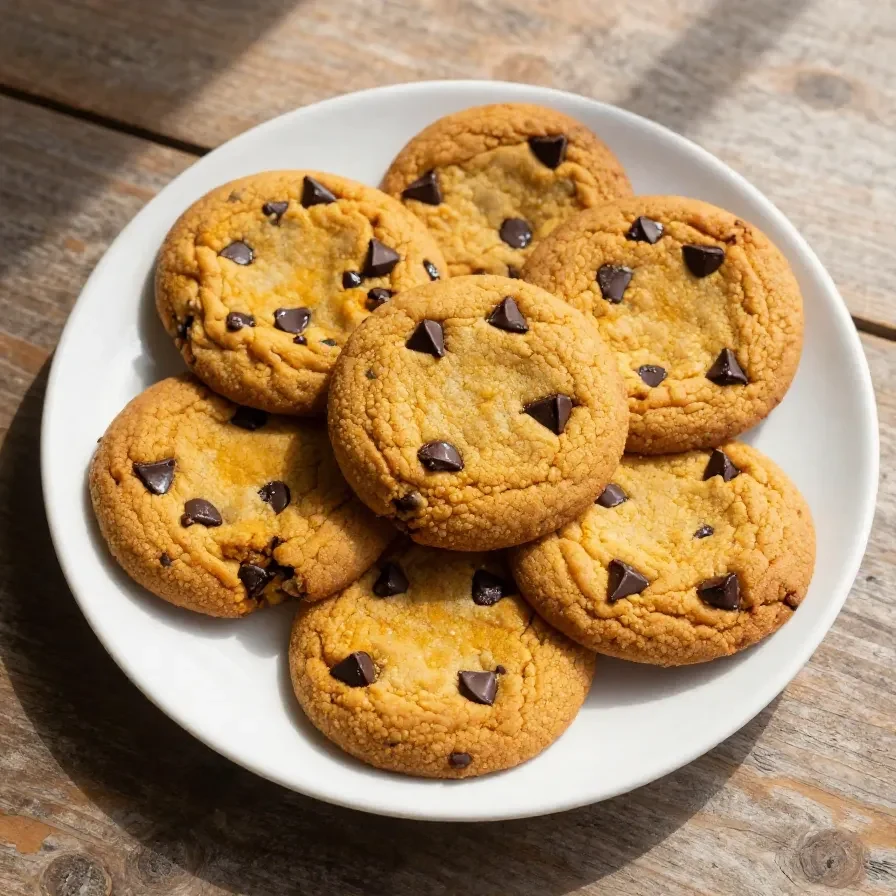
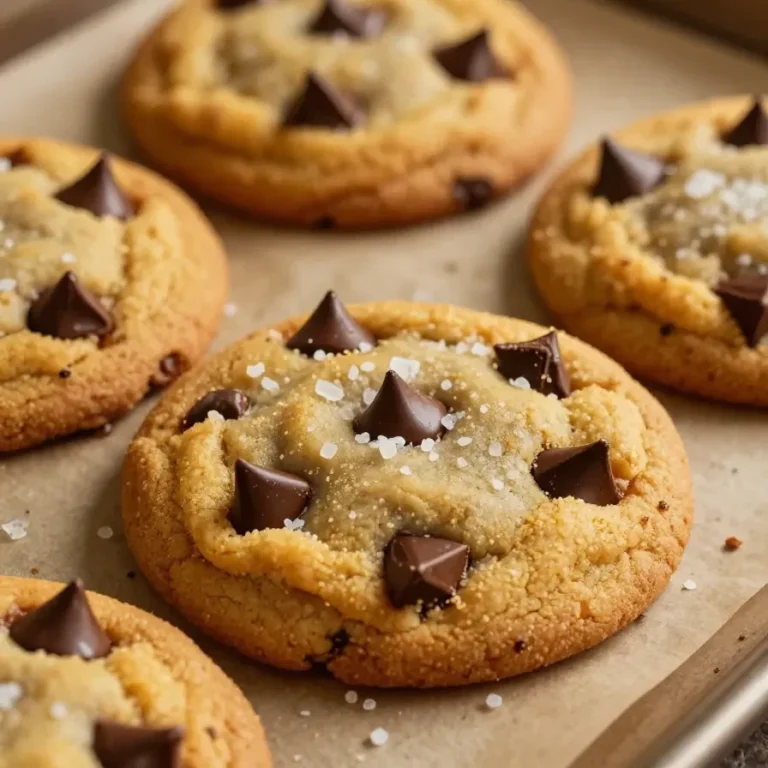
Brown Butter Pumpkin Chocolate Chip Cookies are a delightful blend of nutty, rich browned butter, warm pumpkin spices, and gooey chocolate chips. These cookies capture the essence of fall with their soft, chewy texture and cozy flavor profile. Perfectly spiced and indulgent, they’re ideal for holiday baking or relaxing weekends.

Table of Contents

Why Brown Butter Pumpkin Chocolate Chip Cookies Stand Out

  • Brown butter adds deep, nutty richness that elevates the cookie’s flavor. Its complexity pairs beautifully with the warm spices and pumpkin puree.
  • The combination of cinnamon, nutmeg, and cloves creates a perfectly spiced cookie reminiscent of autumn. These spices harmonize to complement the sweetness and pumpkin flavor.
  • Pumpkin puree ensures the cookies stay moist and tender. It’s a secret weapon for achieving that soft texture without being overly dense.
  • Chocolate chips add a decadent touch to balance the earthy spice notes. Every bite marries pumpkin warmth with bursts of sweet chocolate.

Everything You Need for Brown Butter Pumpkin Chocolate Chip Cookies

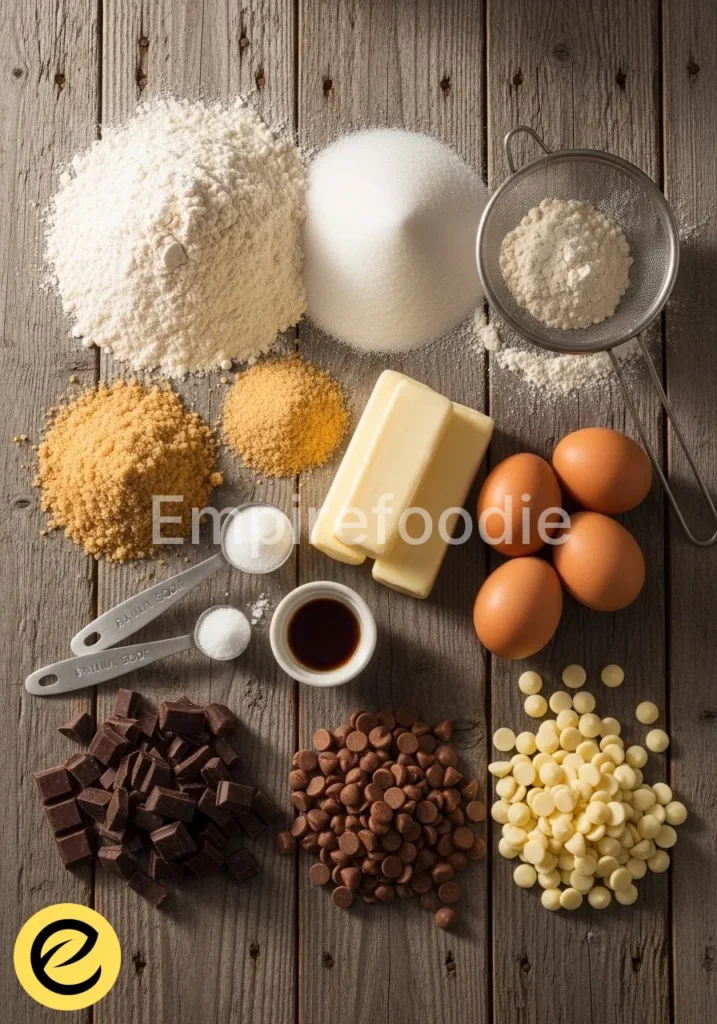
The browned butter is the star ingredient here, giving the cookies their signature nutty aroma and rich flavor. Pumpkin puree not only adds moisture but also enhances the earthy undertones of the spices.

How To Make Brown Butter Pumpkin Chocolate Chip Cookies Step by Step

  1. In a medium saucepan, melt the butter over medium heat, stirring frequently, until it turns golden brown and emits a nutty aroma. This should take about 5-7 minutes. Remove from heat and let cool slightly.
  2. In a large mixing bowl, whisk together the pumpkin puree, granulated sugar, and brown sugar until smooth.
  3. Add the browned butter, egg, and vanilla extract to the pumpkin mixture, and whisk until well combined.
  4. In a separate bowl, whisk together the flour, baking soda, baking powder, salt, cinnamon, nutmeg, and cloves.
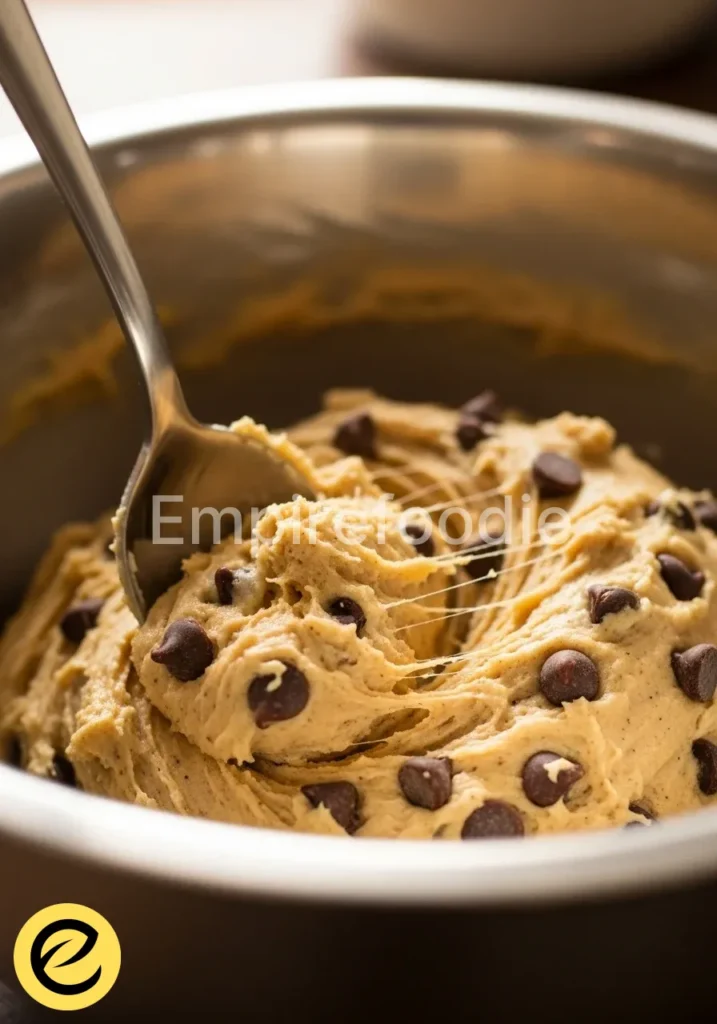
  5. Gradually add the dry ingredients to the wet mixture, stirring until just combined. Avoid overmixing to keep the cookies tender.
  6. Fold in the chocolate chips until evenly distributed throughout the dough.
  7. Cover the dough and refrigerate for at least 30 minutes to allow it to firm up.
  8. Preheat your oven to 350°F (175°C) and line baking sheets with parchment paper.
  9. Using a tablespoon or cookie scoop, drop rounded spoonfuls of dough onto the prepared baking sheets, spacing them about 2 inches apart.
  10. Bake the cookies in the preheated oven for 12-14 minutes, or until the edges are lightly golden and the centers are set.
  11. Remove the cookies from the oven and let them cool on the baking sheets for 5 minutes before transferring them to a wire rack to cool completely.
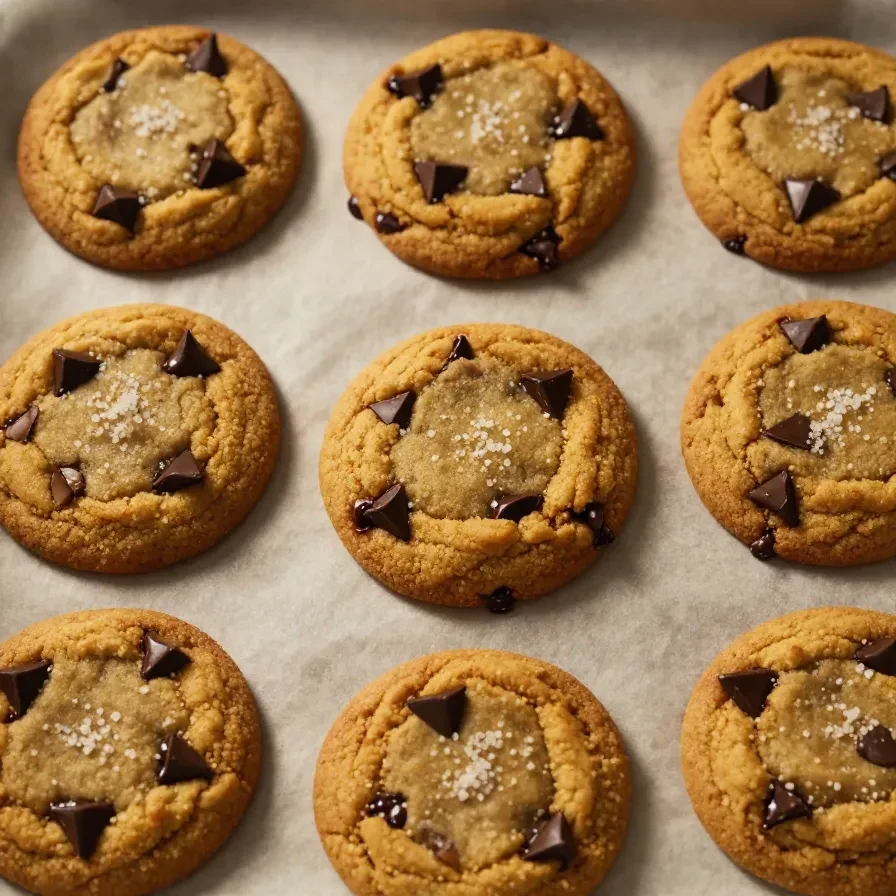
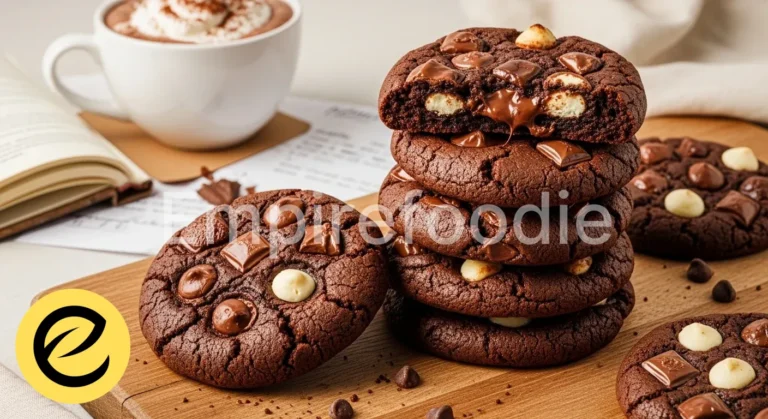
Freshly baked brown butter pumpkin chocolate chip cookies stacked on a plate.

Pumpkin has long been a staple in fall-inspired baking, originating from Native American traditions where pumpkins were used for pies and puddings. Spices like cinnamon, nutmeg, and cloves eventually became paired with pumpkin during colonial times, creating the aromatic profile we now associate with fall desserts.

KitchenAid Artisan Stand Mixer

Kitchen ApplianceKitchenAid Artisan Stand Mixer

Makes mixing dough and batters effortless — a kitchen game-changer

View on Amazon →

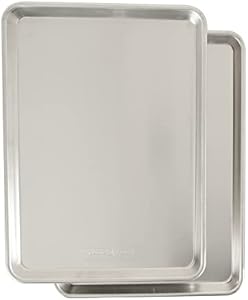
Nordic Ware Natural Aluminum Commercial Baker's Half Sheet

Essential CookwareNordic Ware Natural Aluminum Commercial Baker’s Half Sheet

Durable and reliable baking sheet for perfectly baked cookies

View on Amazon →

Modern pumpkin cookies evolved from this tradition, combining pumpkin’s natural moisture with decadent ingredients like butter and chocolate to create irresistible baked treats.

Easy Ingredient Swaps for This Recipe

  • For a gluten-free version, substitute all-purpose flour with a 1-to-1 gluten-free baking mix. The texture may be slightly lighter, but the flavor remains intact.
  • Use dairy-free butter and chocolate chips to make the recipe suitable for those avoiding dairy. Coconut oil can replace butter, adding a mild tropical hint to the cookies.
  • If you’re out of canned pumpkin puree, mashed sweet potato works as a similar substitute. It offers comparable moisture and sweetness.

Common Mistakes to Avoid

  • Skipping the refrigeration step can lead to cookies that spread too much. Chilling ensures the dough holds its shape during baking.
  • Overmixing the dough may result in tough cookies. Stir just until the dry ingredients are fully incorporated to maintain a soft texture.
  • Not browning the butter properly can diminish the recipe’s flavor profile. Take your time to achieve that golden color and nutty aroma.

Serving Suggestions

  • Pair these cookies with a hot cup of spiced tea or coffee for a cozy afternoon treat. The bold spices complement warm beverages beautifully.
  • Serve alongside vanilla ice cream for a decadent dessert combination. The cold creaminess contrasts perfectly with the warm, chewy cookies.
  • Enjoy them with a glass of milk to enhance their rich chocolate and spice flavors. This classic pairing never goes out of style.
  • Use these cookies as part of a fall-themed dessert platter alongside treats like our peanut butter chocolate cookies for variety.

Brown Butter Pumpkin Chocolate Chip Cookies

Prep Time 45 minutes
Cook Time 14 minutes
Total Time 59 minutes
Servings 24 cookies
Calories 150
Deliciously soft and chewy cookies made with browned butter, pumpkin puree, and warm spices, studded with chocolate chips.

Ingredients

Instructions 

  • In a medium saucepan, melt the butter over medium heat, stirring frequently, until it turns golden brown and emits a nutty aroma. This should take about 5-7 minutes. Remove from heat and let cool slightly.
  • In a large mixing bowl, whisk together the pumpkin puree, granulated sugar, and brown sugar until smooth.
  • Add the browned butter, egg, and vanilla extract to the pumpkin mixture, and whisk until well combined.
  • In a separate bowl, whisk together the flour, baking soda, baking powder, salt, cinnamon, nutmeg, and cloves.
  • Gradually add the dry ingredients to the wet mixture, stirring until just combined. Avoid overmixing.
  • Fold in the chocolate chips until evenly distributed throughout the dough.
  • Cover the dough and refrigerate for at least 30 minutes to allow it to firm up.
  • Preheat your oven to 350°F (175°C) and line baking sheets with parchment paper.
  • Using a tablespoon or cookie scoop, drop rounded spoonfuls of dough onto the prepared baking sheets, spacing them about 2 inches apart.
  • Bake the cookies in the preheated oven for 12-14 minutes, or until the edges are lightly golden and the centers are set.
  • Remove the cookies from the oven and let them cool on the baking sheets for 5 minutes before transferring them to a wire rack to cool completely.

Notes
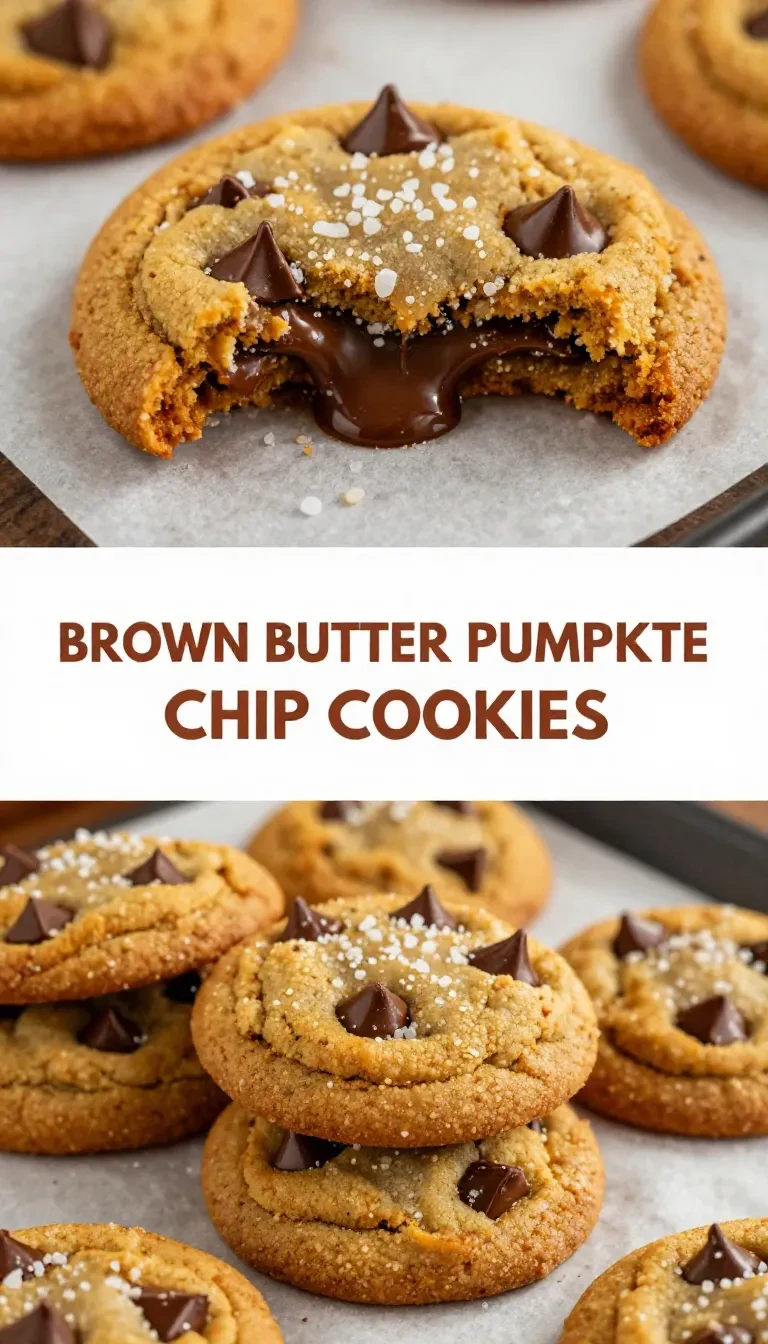
For extra flavor, you can add a pinch of ground ginger or use dark chocolate chips instead of semisweet.
Calories: 150kcal
Cost: $10
Course: Dessert
Cuisine: American
Keyword: Chocolate Chip Cookies, fall dessert, pumpkin cookies
Freshly baked brown butter pumpkin chocolate chip cookies stacked on a plate.

Loved this recipe? Save it to your favorite Pinterest board so you can easily find it later! ✨
This post contains affiliate links. As an Amazon Associate, I earn from qualifying purchases. This comes at no extra cost to you.

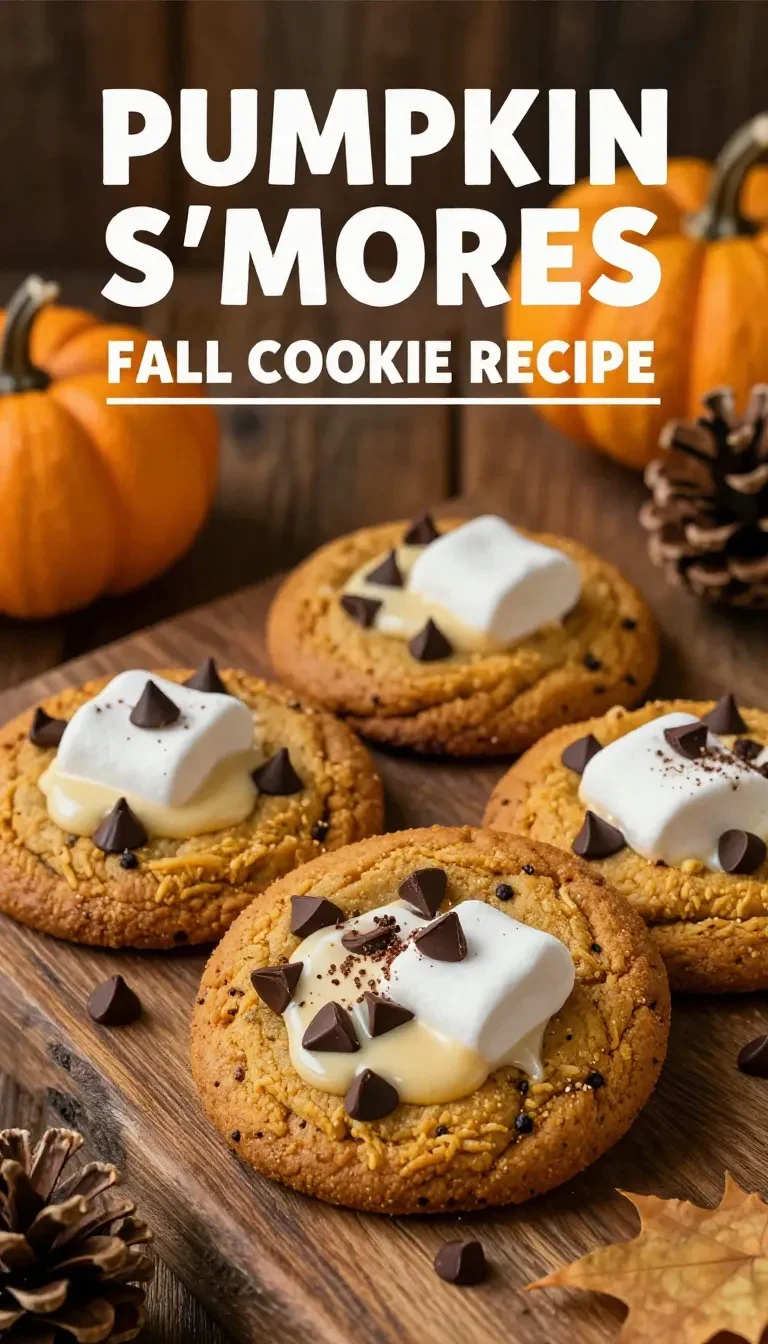
Pumpkin S’mores Cookies bring together the warm spices of fall and the nostalgic flavors of s’mores. Soft and chewy with hints of pumpkin spice, melted chocolate, gooey marshmallows, and crunchy graham crackers, these cookies are the perfect treat for seasonal gatherings or a sweet indulgence anytime. Their delightful combination of textures and flavors makes them a must-bake recipe for cookie lovers everywhere.

Table of Contents

Why Make These Cookies

  • Combines fall flavors with classic s’mores elements for a one-of-a-kind cookie. The pumpkin spice adds warmth, while the gooey marshmallows and chocolate create a comforting treat.
  • Quick and easy to prepare, making them perfect for busy schedules or last-minute gatherings. You’ll only need half an hour from start to finish.
  • Ideal for sharing with loved ones or serving at holiday parties. These cookies are both visually appealing and universally loved for their nostalgic charm.
  • Customizable with pantry-friendly swaps. You can tweak the spices or chocolate for unique versions of this crowd favorite.

Everything You Need for Pumpkin S’mores Cookies

The balance of pumpkin puree and spices like cinnamon, nutmeg, and ginger is key for achieving that cozy fall flavor. Mini marshmallows and chocolate chips ensure every bite has a gooey and sweet component.

How to Make Pumpkin S’mores Cookies Step by Step

  1. Preheat your oven to 350°F (175°C) and line baking sheets with parchment paper. This prevents sticking and ensures even baking.
  2. In a large bowl, cream together the softened butter, granulated sugar, and brown sugar until light and fluffy. Proper creaming helps create soft yet structured cookies.
  3. Mix in the pumpkin puree and vanilla extract until well combined. The pumpkin keeps the cookies moist and adds natural sweetness.
  4. In a separate bowl, whisk together the all-purpose flour, baking soda, baking powder, cinnamon, nutmeg, ginger, and salt.
  5. Gradually add the dry ingredients into the wet ingredients, mixing until a soft dough forms. Avoid overmixing to ensure a tender texture.
  6. Fold in the mini chocolate chips, mini marshmallows, and crushed graham crackers until evenly distributed.
  7. Scoop tablespoon-sized portions of dough and place them onto the prepared baking sheets, spacing them about 2 inches apart.
  8. Bake for 10-12 minutes, or until the edges are set and the marshmallows are golden and gooey.
  9. Allow the cookies to cool on the baking sheets for 5 minutes before transferring them to a wire rack to cool completely.
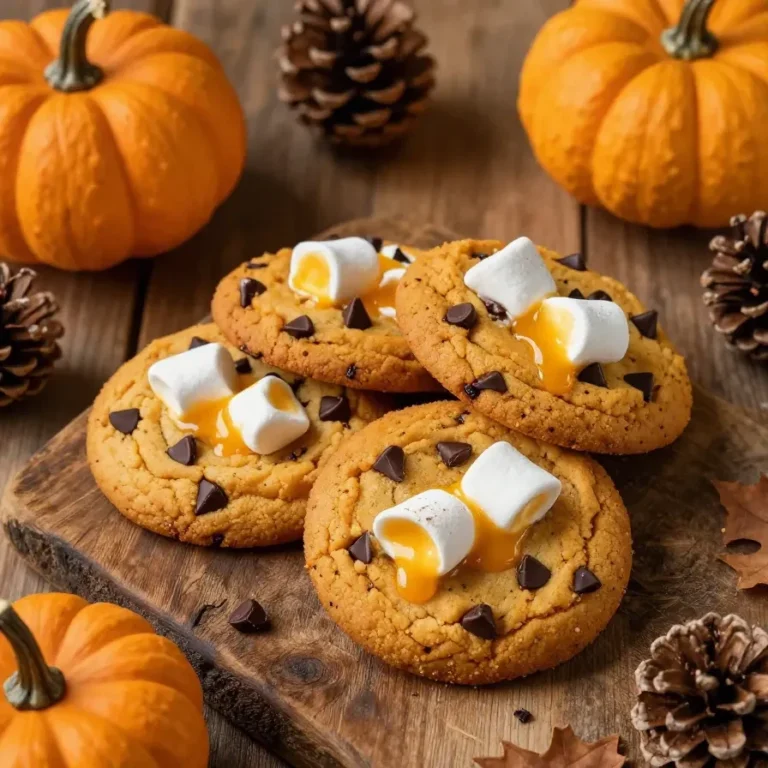
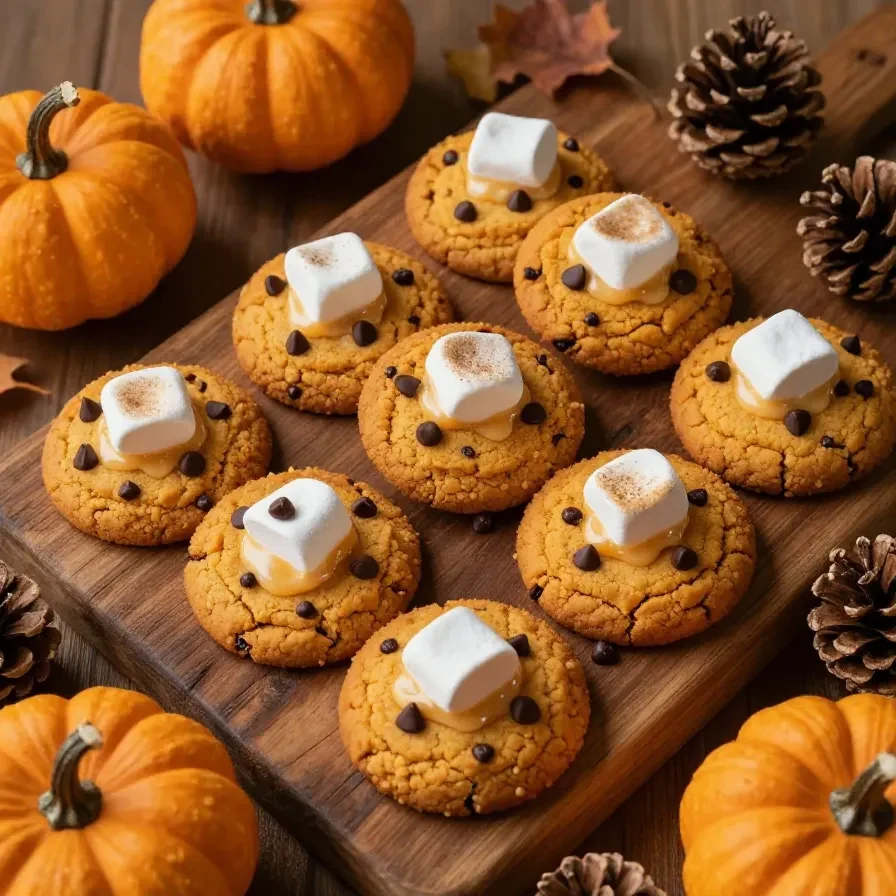
A close-up of freshly baked pumpkin s'mores cookies with melted chocolate and marshmallows on top.

KitchenAid Artisan Stand Mixer

Kitchen ApplianceKitchenAid Artisan Stand Mixer

Makes mixing dough and batters effortless — a kitchen game-changer.

View on Amazon →

Nordic Ware Natural Aluminum Baking Sheets

Essential CookwareNordic Ware Natural Aluminum Baking Sheets

Durable and reliable baking sheets for even cookie baking.

View on Amazon →

Simple Substitutions for Pantry Staples

  • If you don’t have graham crackers, substitute crushed digestive biscuits for a similar flavor and texture.
  • Swap mini chocolate chips with dark chocolate chunks for a richer taste. This pairs particularly well with the pumpkin and spices.
  • No mini marshmallows? Cut large marshmallows into smaller pieces or use marshmallow fluff, though the texture will vary slightly.

Expert Baking Tips to Perfect Your Cookies

  • Use room-temperature butter for creaming—it traps air for lighter cookies. Cold butter won’t blend as smoothly.
  • Rest the dough in the fridge for 15 minutes before baking to prevent spreading. This is especially helpful for the marshmallows to stay intact.
  • Line your baking sheet with parchment paper to ensure easy removal and cleanup.
  • Monitor baking closely—pull the cookies out once the marshmallows are golden for the perfect texture balance of gooey and chewy.

How to Store and Reheat Pumpkin S’mores Cookies

Store Pumpkin S’mores Cookies in an airtight container at room temperature for up to 3 days. For longer storage, refrigerate them for up to a week or freeze for up to 3 months.

To reheat, place cookies in a 300°F oven for 3-5 minutes to revive their gooey filling and crisp edges. Avoid microwaving as it can make the marshmallows too sticky.

Looking for something similar? Try our peanut butter chocolate cookies.

For more ideas, check out our raspberry white chocolate cookies.

You might also enjoy our chocolate cookies with white chips.

Avoid These Common Cookie Mistakes

  • Skipping the parchment paper can lead to marshmallows sticking to the pan. Always line your baking sheets to avoid this issue.
  • Overbaking will make the cookies dry rather than chewy. Watch closely and remove them from the oven as soon as the edges are golden.
  • Using cold butter instead of softened will cause uneven mixing. Leave butter out for 30 minutes before starting.

Pumpkin S'mores Cookies

Prep Time 15 minutes
Cook Time 12 minutes
Total Time 27 minutes
Servings 24 cookies
Calories 120
Delicious pumpkin cookies with gooey marshmallows, chocolate chips, and crushed graham crackers for a perfect fall treat.

Ingredients

Instructions 

  • Preheat your oven to 350°F (175°C) and line baking sheets with parchment paper.
  • In a large bowl, cream together the softened butter, granulated sugar, and brown sugar until light and fluffy.
  • Mix in the pumpkin puree and vanilla extract until well combined.
  • In a separate bowl, whisk together the all-purpose flour, baking soda, baking powder, cinnamon, nutmeg, ginger, and salt.
  • Gradually add the dry ingredients into the wet ingredients, mixing until a soft dough forms.
  • Fold in the mini chocolate chips, mini marshmallows, and crushed graham crackers until evenly distributed.
  • Scoop tablespoon-sized portions of dough and place them onto the prepared baking sheets, spacing them about 2 inches apart.
  • Bake for 10-12 minutes, or until the edges are set and the marshmallows are golden and gooey.
  • Allow the cookies to cool on the baking sheets for 5 minutes before transferring them to a wire rack to cool completely.

Notes

For extra flavor, sprinkle a pinch of sea salt on top of the cookies before baking.
Calories: 120kcal
Cost: $10
Course: Dessert
Cuisine: American
Keyword: cookies, pumpkin, s'mores
A close-up of freshly baked pumpkin s'mores cookies with melted chocolate and marshmallows on top.

Loved this recipe? Save it to your favorite Pinterest board so you can easily find it later! ✨
This post contains affiliate links. As an Amazon Associate, I earn from qualifying purchases. This comes at no extra cost to you.


Soft Batch Pumpkin Chocolate Chip Cookies

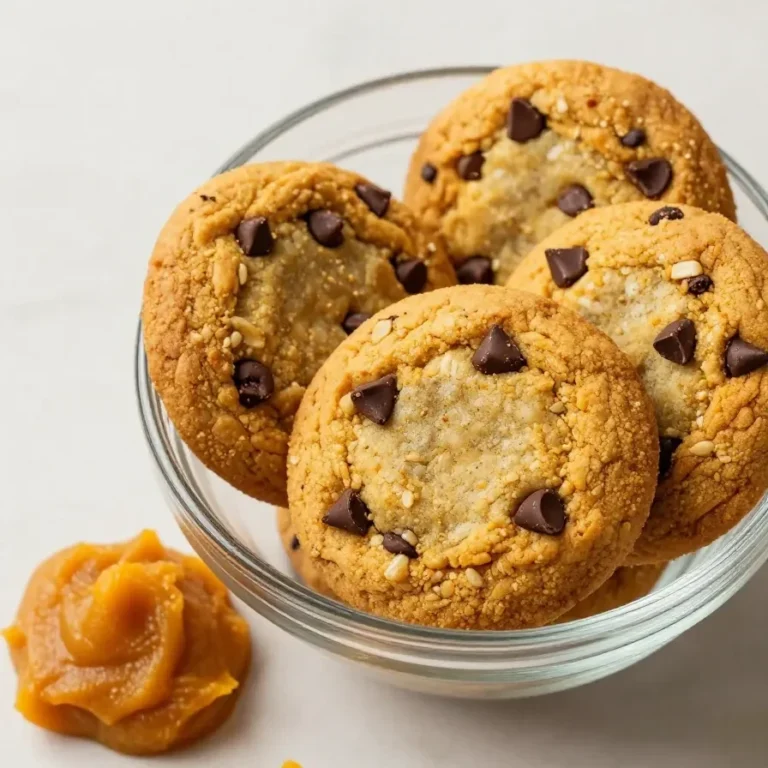
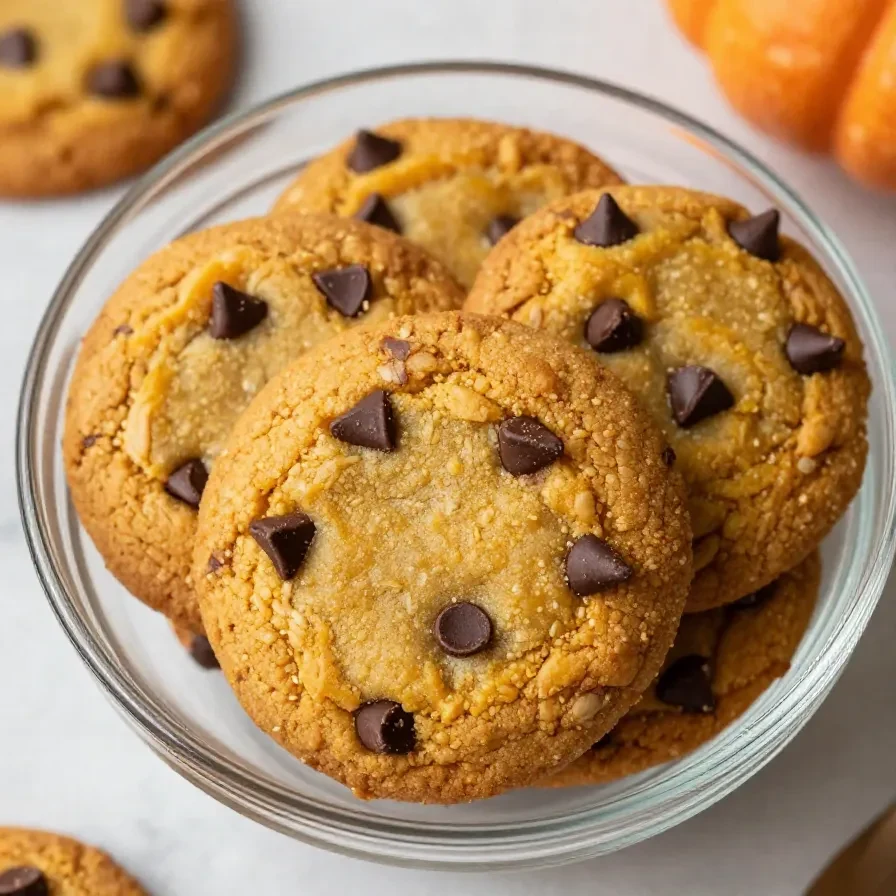
Soft Batch Pumpkin Chocolate Chip Cookies are a perfect treat for fall, featuring a moist and tender texture, warm autumn spices, and bursts of semi-sweet chocolate in each bite. The pumpkin puree makes these cookies soft and melt-in-your-mouth delicious, while hints of cinnamon, nutmeg, and cloves enhance their comforting flavors. They bake quickly, making them an irresistible option for busy holiday mornings or cozy evenings at home.

Table of Contents

Why These Cookies Are Perfect

  • The pumpkin puree creates a soft, moist texture that elevates these cookies beyond traditional chocolate chip cookies, making them ideal for anyone who loves tender baked goods.
  • Warm spices like cinnamon, nutmeg, and cloves bring a classic autumn flavor that pairs perfectly with the chocolate chips, making these cookies quintessential fall treats.
  • Quick preparation allows you to whip up a batch in under 30 minutes, perfect for busy schedules or last-minute gatherings.
  • They stay soft for days, making them excellent for meal prepping desserts or sharing during the holiday season.

Everything You Need for Soft Batch Pumpkin Chocolate Chip Cookies

The canned pumpkin puree is the cornerstone of this recipe, offering both moisture and flavor. Combining it with warm spices gives the cookies their signature autumn profile.

How To Make Soft Batch Pumpkin Chocolate Chip Cookies Step by Step

  1. Preheat your oven to 350°F (175°C) and line two baking sheets with parchment paper or silicone baking mats.
  2. In a large mixing bowl, cream together the softened butter, granulated sugar, and light brown sugar until light and fluffy, about 2-3 minutes using a hand mixer or stand mixer.
  3. Add the canned pumpkin puree, egg, and vanilla extract to the butter mixture, and beat until well combined.
  4. A close-up view of soft batch pumpkin chocolate chip cookies stacked on a plate.

    KitchenAid Artisan Stand Mixer

    Kitchen ApplianceKitchenAid Artisan Stand Mixer

    Makes mixing dough and batters effortless — a kitchen game-changer for cookie recipes.

    View on Amazon →

    Silicone Baking Mats Set of 2

    Essential CookwareSilicone Baking Mats Set of 2

    Reusable non-stick mats for even baking and easy cleanup — essential for cookie recipes.

    View on Amazon →

  5. In a separate bowl, whisk together the all-purpose flour, baking soda, baking powder, ground cinnamon, ground nutmeg, ground cloves, and salt.
  6. Gradually add the dry ingredients to the wet ingredients, mixing until just combined. Avoid overmixing to prevent tough cookies.
  7. Fold in the semi-sweet chocolate chips using a spatula or wooden spoon.
  8. Scoop the dough onto the prepared baking sheets using a tablespoon or cookie scoop, spacing them about 2 inches apart.
  9. Bake the cookies in the preheated oven for 10-12 minutes, or until the edges are set and the centers look slightly soft. Do not overbake to keep them tender.
  10. Allow the cookies to cool on the baking sheets for 5 minutes, then transfer them to a wire rack to cool completely.

Serving Ideas for Soft Batch Pumpkin Chocolate Chip Cookies

  • Pair with a cozy mug of hot chocolate for the ultimate fall indulgence.
  • Serve alongside whipped cream-topped pumpkin spice lattes for a seasonal dessert-and-drink combo that’s always in demand.
  • Enjoy them as a sweet side dish to a hearty soup or chili to balance out a savory meal.
  • Package them in decorative tins or gift bags for a thoughtful homemade holiday gift.

Common Mistakes to Avoid

  • Overmixing the dough can lead to dense cookies — mix only until the ingredients are just combined.
  • Skipping the parchment paper or silicone mats may cause sticking or uneven baking; always line your sheets.
  • Overbaking is a common mistake that dries out the texture. Remove the cookies when the edges are set but the centers are still slightly soft.

The Origin of Pumpkin Cookies

Pumpkin cookies trace their roots back to classic American autumn baking traditions, where seasonal ingredients like pumpkin and warm spices were showcased. Popularized during the 20th century alongside the rise of canned pumpkin, these cookies became a symbol of fall gatherings and holiday feasts.

Meal Prep, Storage, and Reheating

To store these cookies, place them in an airtight container at room temperature for up to 5 days. For longer storage, freeze them in a single layer on a tray before transferring to freezer-safe bags for up to 3 months.

You might also enjoy our chocolate chip cookies.

Reheat frozen cookies by letting them thaw at room temperature, then warming in the oven at 300°F (150°C) for 3 minutes to restore their soft texture. They’re just as tender and flavorful as freshly baked!

Looking for something similar? Try our chocolate chip protein mug cake.

For more ideas, check out our chocolate chip mug cake.


Soft Batch Pumpkin Chocolate Chip Cookies

Prep Time 15 minutes
Cook Time 12 minutes
Total Time 27 minutes
Servings 24 cookies
Calories 120
Soft and moist pumpkin cookies loaded with chocolate chips, perfect for fall baking.

Ingredients

Instructions 

  • Preheat your oven to 350°F (175°C) and line two baking sheets with parchment paper or silicone baking mats.
  • In a large mixing bowl, cream together the softened butter, granulated sugar, and light brown sugar until light and fluffy, about 2-3 minutes using a hand mixer or stand mixer.
  • Add the canned pumpkin puree, egg, and vanilla extract to the butter mixture, and beat until well combined.
  • In a separate bowl, whisk together the all-purpose flour, baking soda, baking powder, ground cinnamon, ground nutmeg, ground cloves, and salt.
  • Gradually add the dry ingredients to the wet ingredients, mixing until just combined. Avoid overmixing.
  • Fold in the semi-sweet chocolate chips using a spatula or wooden spoon.
  • Scoop the dough onto the prepared baking sheets using a tablespoon or cookie scoop, spacing them about 2 inches apart.
  • Bake the cookies in the preheated oven for 10-12 minutes, or until the edges are set and the centers look slightly soft. Do not overbake to keep them soft and moist.
  • Allow the cookies to cool on the baking sheets for 5 minutes, then transfer them to a wire rack to cool completely.

Notes

For extra flavor, consider adding a pinch of ginger or using dark chocolate chips instead of semi-sweet.
Calories: 120kcal
Cost: $8
Course: Dessert
Cuisine: American
Keyword: Chocolate Chip Cookies, fall baking, pumpkin cookies
A close-up view of soft batch pumpkin chocolate chip cookies stacked on a plate.

Loved this recipe? Save it to your favorite Pinterest board so you can easily find it later! ✨
This post contains affiliate links. As an Amazon Associate, I earn from qualifying purchases. This comes at no extra cost to you.


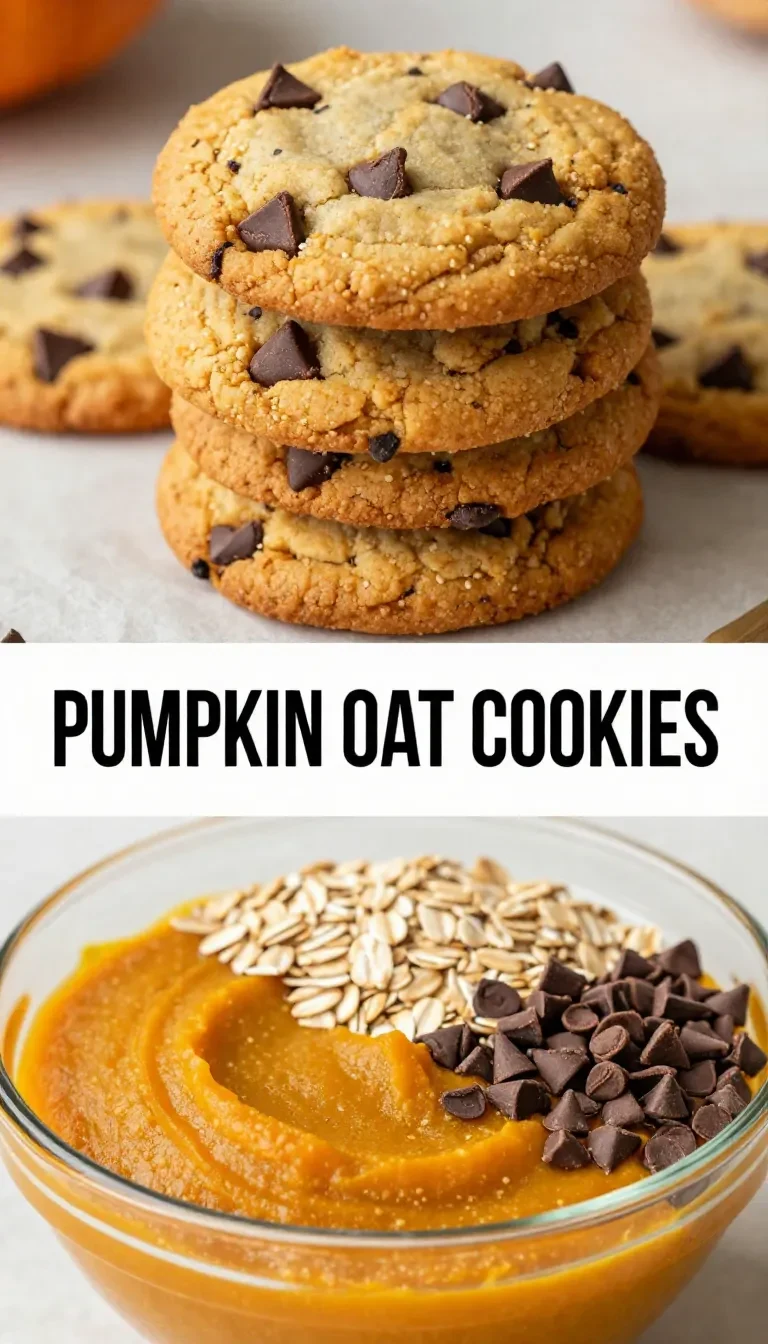
Healthy Pumpkin Oat Cookies Recipe

Healthy Pumpkin Oat Cookies are soft, chewy, and packed with the warm spices of cinnamon, nutmeg, and ginger. Made with wholesome ingredients like rolled oats, pumpkin puree, and almond butter, they make a perfect guilt-free treat or snack. Optional add-ins like dark chocolate chips or chopped nuts add texture and richness to every bite.

These cookies bake up in under 20 minutes and are naturally sweetened for a healthier indulgence. Whether you enjoy them with a warm drink or as a quick pick-me-up, their cozy flavors scream fall with every bite.

Table of Contents

Why You Should Make Healthy Pumpkin Oat Cookies

  • They are naturally sweetened with honey or maple syrup, which keeps the sugar content low while adding depth of flavor. This makes them perfect for clean eating pumpkin treats that satisfy your sweet tooth without guilt.
  • The combination of pumpkin puree and rolled oats delivers a soft, chewy texture that feels comforting and indulgent. You won’t miss the butter or refined sugar in these healthy pumpkin oatmeal cookies.
  • Quick to make with minimal prep, this pumpkin cookie recipe is easy enough for beginner bakers or busy families. You’ll have a batch of homemade cookies ready in just 25 minutes.
  • Optional mix-ins like dark chocolate chips or chopped nuts add versatility, allowing you to customize flavors and textures for your unique preferences. Perfect for snack time, lunchboxes, or sharing with loved ones.

Everything You Need for Healthy Pumpkin Oat Cookies

Pumpkin puree adds natural moisture and a hint of earthiness, while almond butter provides creaminess and a nutty undertone. Rolled oats create the chewy structure of these cookies, making them hearty and satisfying.

How To Make Healthy Pumpkin Oat Cookies Step by Step

  1. Preheat your oven to 350°F (175°C) and line a baking sheet with parchment paper. This ensures the cookies won’t stick and makes cleanup easier.
  2. In a large mixing bowl, combine the rolled oats, pumpkin puree, almond butter, honey (or maple syrup), and vanilla extract. Mix everything together until smooth and uniformly combined.
  3. Add the ground cinnamon, nutmeg, ginger, and salt to the mixture. Stir thoroughly to distribute the spices evenly throughout the dough.
  4. If desired, fold in dark chocolate chips and/or chopped nuts for additional flavor and texture. Mix lightly to avoid overworking the dough.
    A plate of freshly baked healthy pumpkin oat cookies on a wooden table.

    KitchenAid Artisan Stand Mixer

    Kitchen ApplianceKitchenAid Artisan Stand Mixer

    Makes mixing dough and batters effortless — a kitchen game-changer.

    View on Amazon →

    Nordic Ware Natural Aluminum Baking Sheet

    Essential CookwareNordic Ware Natural Aluminum Baking Sheet

    Durable and reliable baking sheet for cookies and other baked goods.

    View on Amazon →

  5. Using a spoon or cookie scoop, drop small spoonfuls of the dough onto the prepared baking sheet. Flatten each scoop slightly with the back of the spoon to shape them into cookies.
  6. Bake in the preheated oven for 12-15 minutes, or until the cookies are set and slightly golden around the edges. Be careful not to overbake to maintain their soft and chewy texture.
  7. Remove the cookies from the oven and let them cool on the baking sheet for 5 minutes before transferring to a wire rack. This helps them firm up while cooling completely.

Smart Ingredient Swaps to Try

For a vegan option, replace honey with maple syrup and use a plant-based nut butter. This keeps the pumpkin oatmeal cookies dairy-free and healthy.

You might also enjoy our best peach crisp recipe with.

To make these cookies gluten-free, opt for certified gluten-free rolled oats. The recipe remains identical in flavor and texture while accommodating dietary restrictions.

For more ideas, check out our watermelon sorbet ninja creami (healthy.

Swap chocolate chips for cacao nibs to reduce sugar and increase antioxidants. This tweak adds a subtle crunch with a rich cocoa flavor.

Looking for something similar? Try our healthy keto mug cake recipe.

How to Store and Meal Prep These Cookies

Once baked, store Healthy Pumpkin Oat Cookies in an airtight container at room temperature for up to 3 days. For longer storage, refrigerate them for up to a week.

To freeze, arrange cooled cookies in a single layer on a baking sheet, then transfer them to a freezer-safe bag or container after they’re frozen solid. They can be stored for up to 2 months.

Reheat frozen cookies in the microwave for 10-20 seconds or let them thaw at room temperature. Their texture remains soft and chewy after reheating.


Healthy Pumpkin Oat Cookies

Prep Time 10 minutes
Cook Time 15 minutes
Total Time 25 minutes
Servings 12 cookies
Calories 120
These healthy pumpkin oat cookies are soft, chewy, and packed with fall flavors. Perfect for a guilt-free treat!

Ingredients

Instructions 

  • Preheat your oven to 350°F (175°C) and line a baking sheet with parchment paper.
  • In a large mixing bowl, combine the rolled oats, pumpkin puree, almond butter, honey (or maple syrup), and vanilla extract. Mix until well combined.
  • Add the cinnamon, nutmeg, ginger, and salt to the mixture. Stir until the spices are evenly incorporated.
  • If desired, fold in the dark chocolate chips and/or chopped nuts for added texture and flavor.
  • Using a spoon or cookie scoop, drop spoonfuls of the mixture onto the prepared baking sheet. Flatten slightly with the back of the spoon to form cookie shapes.
  • Bake in the preheated oven for 12-15 minutes, or until the cookies are set and slightly golden around the edges.
  • Remove the cookies from the oven and allow them to cool on the baking sheet for 5 minutes before transferring to a wire rack to cool completely.

Notes

You can substitute almond butter with peanut butter or sunflower seed butter. For a vegan option, use maple syrup instead of honey.
Calories: 120kcal
Cost: $5
Course: Dessert, Snack
Cuisine: American
Keyword: Healthy Dessert, oat cookies, pumpkin
A plate of freshly baked healthy pumpkin oat cookies on a wooden table.

Loved this recipe? Save it to your favorite Pinterest board so you can easily find it later! ✨
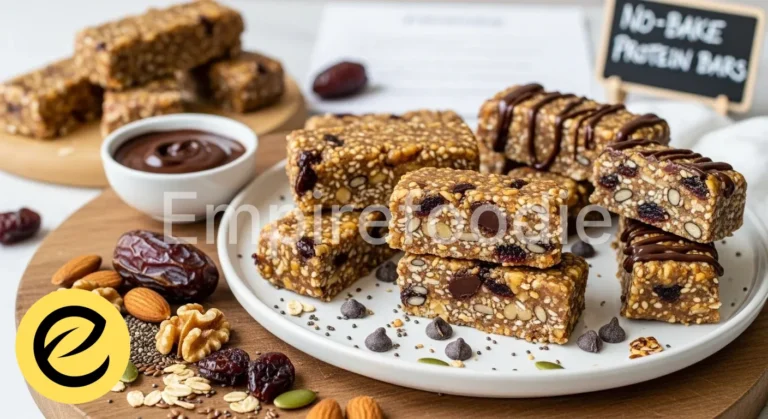
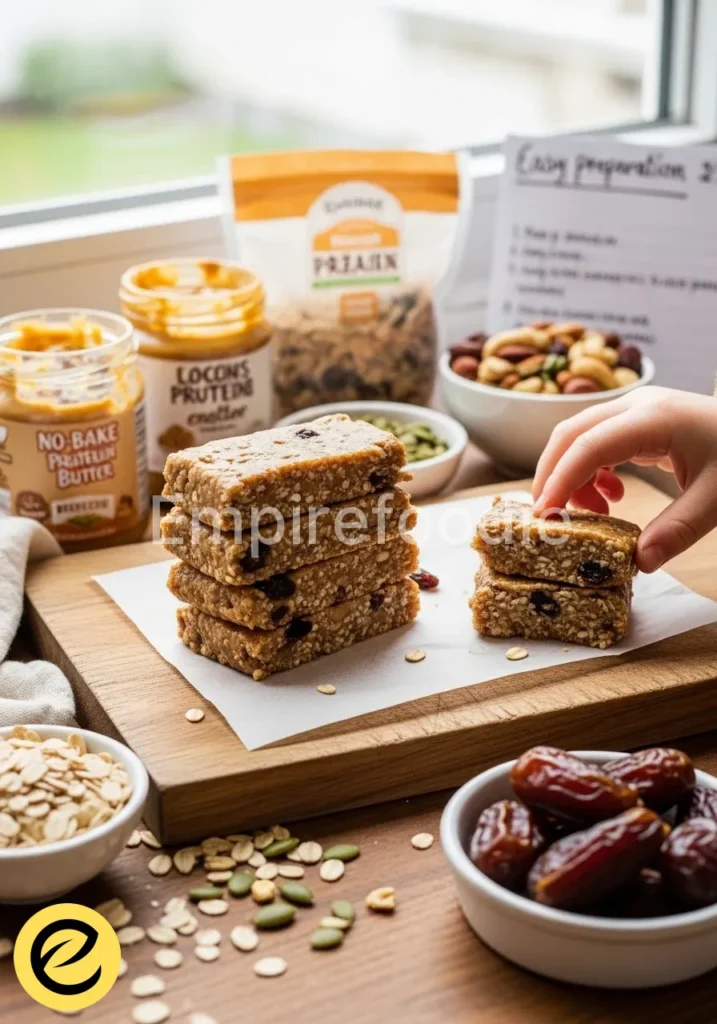
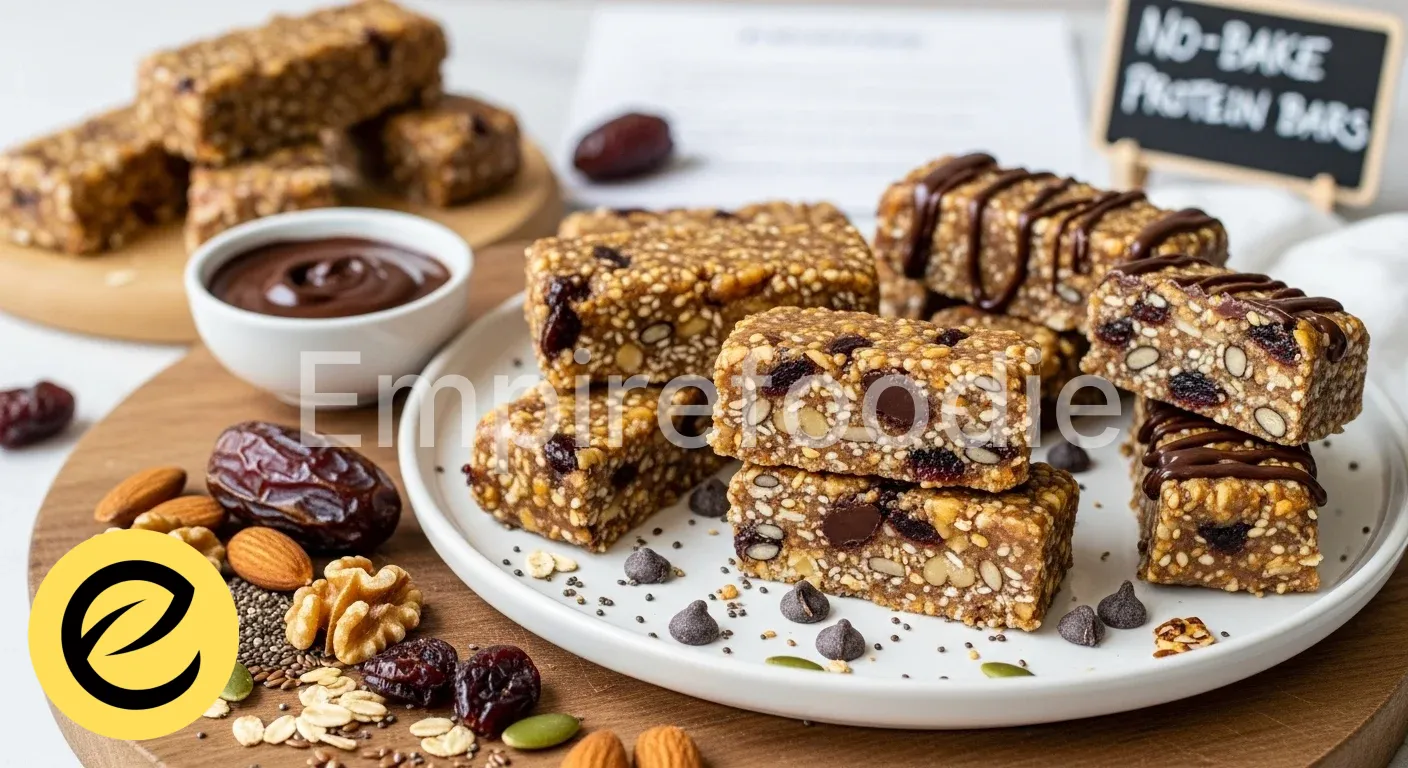
There’s something incredibly grounding about a wholesome snack made with love, much like the cherished recipes passed down through generations. These delightful no-bake protein bars bring a taste of home to your busy days, offering a perfect blend of rich, chewy texture and satisfying sweetness.

Crafted with simple, pure ingredients, these protein bars are not just a treat for your taste buds but a genuine boost for your well-being, keeping you energized throughout your day. Imagine a bite that transports you back to grandma’s kitchen, yet perfectly fits into your modern, active life.

Table of Contents

Why You’ll Love These Homemade Protein Bars

These truly exceptional protein bars offer everything you desire in a healthy, convenient snack. You will adore them for their:

  • Unmatched Flavor & Texture: A delightful combination of nutty, sweet, and perfectly chewy, reminiscent of classic farmhouse treats.
  • Effortless Preparation: No baking required! Just mix, press, and chill for quick, delicious protein bars.
  • Wholesome Goodness: Packed with natural protein, fiber, and healthy fats to fuel your body and mind.
  • Customizable Appeal: Easily adapt ingredients to suit your dietary needs and personal preferences, making these the best protein bars for everyone.

Ingredients You’ll Need

protein bars

To create these wonderful protein bars, focusing on quality ingredients makes all the difference. Just like my grandmother always said, “Good food starts with good things from the earth.”

  • 1 ½ cups (180g) Rolled Oats: Opt for old-fashioned rolled oats, not instant. They provide the perfect chewy texture and a boost of fiber.
  • 1 cup (100g) Vanilla Protein Powder: Choose a high-quality whey or plant-based protein powder. This is the core of our protein bars.
  • ½ cup (60g) Ground Flaxseed: A nutritional powerhouse, adding omega-3s, fiber, and helping to bind our protein bars.
  • ½ cup (120g) Nut Butter: Creamy peanut butter or almond butter works beautifully. Ensure it’s natural, with no added sugars or oils.
  • ½ cup (120g) Honey or Maple Syrup: For natural sweetness and binding. Adjust to your preferred sweetness level.
  • ¼ cup (60ml) Almond Milk (or any milk): Use unsweetened milk to control sweetness. You might need a little more or less to achieve the right consistency.
  • 1 teaspoon Vanilla Extract: A splash of good quality vanilla deepens the flavor profile, a trick my grandmother always used.
  • ¼ cup (30g) Mini Chocolate Chips (optional): Dark chocolate chips add a lovely touch without overwhelming the healthy nature of these protein bars.
  • Pinch of Sea Salt: Balances the sweetness and enhances all the other flavors.

Substitutions & Variations

[ra_display_video url=”https://www.youtube.com/watch?v=dB4zAA-pnAQ”]

Part of the joy of farmhouse baking is adapting to what you have on hand and tailoring recipes to fit every family member’s needs. These protein bars are incredibly versatile, allowing for many healthy swaps. If peanut allergies are a concern, swap peanut butter for sunflower seed butter or almond butter.

For a vegan option, ensure your protein powder is plant-based and use maple syrup instead of honey. You can also experiment with different nuts or seeds; try adding a handful of chopped walnuts or chia seeds for extra crunch and nutrients.

To boost the flavor and nutrient profile, consider incorporating a tablespoon of unsweetened shredded coconut or a sprinkle of cinnamon. These simple variations ensure your homemade protein bars always feel fresh and exciting, catering to all tastes while maintaining their wholesome integrity.

Experimenting with your protein bar ingredients can lead to fantastic results. If you’re looking for more ways to enjoy chocolate, don’t miss our delicious chocolate biscuits recipe that complements any sweet cravings.

Equipment You’ll Need

You won’t need anything fancy for these protein bars, just a few kitchen basics that every good home cook has.

  • Large Mixing Bowl
  • Sturdy Spatula or Wooden Spoon
  • 8×8 inch (20×20 cm) Baking Dish or Casserole Dish
  • Parchment Paper
  • Measuring Cups and Spoons

Step-by-Step Instructions

protein bars

Making these protein bars is a simple, satisfying process that yields delicious results every time. Just follow these steps, and you’ll have a batch of wholesome snacks ready to go.

  1. Prepare Your Dish: Line an 8×8 inch baking dish with parchment paper, leaving an overhang on the sides. This makes it much easier to lift out your finished protein bars later. A little preparation goes a long way, just like setting the table before a big family meal.
  2. Combine Dry Ingredients: In your large mixing bowl, combine the rolled oats, protein powder, ground flaxseed, and a pinch of sea salt. Use your spatula to mix everything thoroughly. You want all the dry ingredients evenly distributed to ensure every bite of your protein bars is perfectly balanced.
  3. Warm Wet Ingredients (Optional but Recommended): In a small saucepan or microwave-safe bowl, gently warm the nut butter and honey (or maple syrup) over low heat until just melted and smooth. This step makes mixing much easier and helps the protein bars bind better. My grandmother always said warming the fats helped everything come together more lovingly. Add the vanilla extract to this mixture.
  4. Combine Wet and Dry: Pour the warm wet ingredient mixture into the bowl with your dry ingredients. Add the almond milk. Mix vigorously with your sturdy spatula or wooden spoon until everything is thoroughly combined and forms a thick, cohesive dough. The mixture for these protein bars should be sticky and hold together when pressed. If it feels too dry, add a little more milk, one tablespoon at a time, until the desired consistency is reached.
  5. Fold in Chocolate Chips (Optional): If you’re using mini chocolate chips, fold them into the mixture now. Ensure they are evenly distributed throughout the protein bars.
  6. Press into Dish: Transfer the mixture into your prepared 8×8 inch dish. Using the back of your spatula or your clean hands, press the mixture down firmly and evenly into the pan. You want a compact, smooth layer for perfectly formed protein bars. Apply good, steady pressure, just like tamping down soil in a garden bed.
  7. Chill: Cover the dish with plastic wrap and refrigerate for at least 2 hours, or until the protein bars are firm enough to cut. Chilling is crucial for stability.
  8. Cut and Serve: Once firm, lift the parchment paper to remove the slab from the dish. Place it on a cutting board and cut it into 12-16 equally sized protein bars. Enjoy immediately or store for later!

Preparing your dish with care ensures a seamless baking experience and delightful results. For a similar treat, you might want to check out our simple and delicious chocolate chip biscuits recipe.

Pro Tips for Success

Achieving truly excellent protein bars often comes down to a few small, thoughtful details. These tips, gleaned from years in the kitchen, will elevate your snack game.

  • Don’t Over-Process Oats: While some recipes call for pulsing oats, resist the urge. Keeping them whole provides superior texture and a satisfying chew in your protein bars.
  • Achieve the Right Consistency: The mixture should be firm enough to press but not crumbly. If it’s too dry, add milk slowly. If too wet, a tablespoon of extra protein powder or ground flaxseed can help. Consistency is key for perfect protein bars.
  • Press Firmly: When pressing the mixture into the pan, use significant pressure. This compacts the protein bars, preventing them from crumbling when cut and ensuring a dense, satisfying bite.
  • Chill Thoroughly: Do not rush the chilling process. A minimum of 2 hours, or even overnight, in the refrigerator ensures the protein bars set properly and are easy to cut cleanly. This also improves their overall texture.
  • Quality Ingredients Matter: Especially with protein powder and nut butter, invest in good quality brands. The flavor and texture of your finished protein bars directly reflect the quality of your ingredients.

Storage & Reheating Tips

Proper storage ensures your homemade protein bars stay fresh and delicious, ready for whenever hunger strikes. Keep them in an airtight container in the refrigerator for up to 1-2 weeks. You can also wrap individual protein bars in plastic wrap or parchment paper before storing them, which makes grabbing a quick snack even easier.

For longer storage, these protein bars freeze beautifully. Place them in a freezer-safe bag or container, separated by parchment paper, and they will keep for up to 3 months. Thaw frozen protein bars overnight in the refrigerator or simply let them sit at room temperature for about 15-30 minutes before enjoying. No reheating is necessary; these are perfect straight from the fridge or freezer.

To maintain the freshness and flavor of your protein bars, proper storage is key. For more indulgent ideas, explore our peanut butter bars, which are a perfect snack to grab on the go.

What to Serve With This Recipe

protein bars

These protein bars are substantial enough to be a standalone snack, but they also pair wonderfully with other wholesome options to create a more complete meal or boost your energy further.

  • Fresh Fruit: A crisp apple, a handful of berries, or a sliced banana complements the richness of the protein bars beautifully, adding natural sweetness and extra vitamins.
  • Greek Yogurt: A dollop of plain Greek yogurt alongside your protein bar offers an additional protein punch and a creamy contrast.
  • A Warm Beverage: Pair a protein bar with a steaming mug of herbal tea or a comforting cup of coffee for a perfect morning or afternoon pick-me-up.
  • Smoothie: For an ultimate energy boost, enjoy your protein bars with a green smoothie packed with spinach, fruit, and plant-based milk.
  • Nut Milk: A glass of almond milk or oat milk makes a simple, satisfying accompaniment to these protein bars.

Frequently Asked Questions (FAQ)

Can I use a different type of protein powder?

Absolutely! The type of protein powder you use can certainly impact the final texture and flavor of your protein bars. Whey protein tends to yield a chewier, denser bar, while plant-based proteins like pea or brown rice protein might result in a slightly drier or more crumbly texture.

You might need to adjust the amount of liquid (almond milk) slightly, adding a tablespoon at a time until the mixture for your protein bars reaches the desired consistency. Always choose a protein powder you enjoy the taste of, as it forms a significant part of the overall flavor profile of these protein bars.

How can I make these protein bars vegan?

Making these protein bars vegan is quite straightforward. First, ensure you select a plant-based protein powder, such as pea, soy, or brown rice protein. Next, substitute honey with an equal amount of pure maple syrup or agave nectar.

Both options provide excellent binding and sweetness. Finally, confirm your chocolate chips (if using) are dairy-free. With these simple adjustments, you can enjoy delicious, entirely plant-based protein bars that are just as satisfying and nutritious.

What if my mixture is too dry or too wet?

Achieving the perfect consistency for these no-bake protein bars is crucial for them to hold together well. If your mixture feels too dry and crumbly, slowly add more almond milk, one tablespoon at a time, mixing well after each addition until the mixture comes together and is firm enough to press without falling apart. Conversely, if the mixture is too wet and sticky, add a tablespoon or two of extra ground flaxseed or even a little more protein powder.

These ingredients absorb moisture and will help firm up your protein bars. Adjust gradually until you reach a consistency that is easy to press into your dish.

Protein bars are a popular nutritional snack that can provide a concentrated source of protein, making them ideal for athletes and busy individuals alike. These convenient bars are often made with a mixture of protein sources, oats, nuts, and other healthy ingredients, giving you fuel for your day, especially when you need a quick meal on the go. Learn more about their nutritional value through this resource.

Final Thoughts

These wholesome protein bars carry more than just nutrients; they hold a whisper of the past, a connection to the simple, honest nourishment my grandmothers championed. Each chewy bite is a testament to the power of pure ingredients and the enduring comfort of a homemade snack. Make them for your family, and share a taste of tradition, infused with love.

Nutrition Information (per serving)

Based on 12 servings (approximate values)

NutrientAmount
Calories250 kcal
Protein15g
Total Fat12g
Saturated Fat3g
Carbohydrates22g
Fiber5g
Sugars10g
Sodium110mg

protein bars

Prep Time 20 minutes
Total Time 2 hours 20 minutes
Servings 12-16 protein bars servings
Calories 250
These no-bake protein bars are a wholesome snack made with love, featuring a rich, chewy texture and satisfying sweetness. Crafted with simple, pure ingredients, they provide a genuine boost for your well-being, perfect for busy days.

Ingredients

  • 1 ½ cups (180g) Rolled Oats
  • 1 cup (100g) Vanilla Protein Powder
  • ½ cup (60g) Ground Flaxseed
  • ½ cup (120g) Nut Butter
  • ½ cup (120g) Honey or Maple Syrup
  • ¼ cup (60ml) Almond Milk
  • 1 teaspoon Vanilla Extract
  • ¼ cup (30g) Mini Chocolate Chips (optional)
  • Pinch of Sea Salt

Instructions 

  • Prepare Your Dish: Line an 8×8 inch baking dish with parchment paper, leaving an overhang on the sides.
  • Combine Dry Ingredients: In a large mixing bowl, combine the rolled oats, protein powder, ground flaxseed, and a pinch of sea salt.
  • Warm Wet Ingredients (Optional): Gently warm the nut butter and honey (or maple syrup) over low heat until just melted and smooth, then add vanilla extract.
  • Combine Wet and Dry: Pour the warm wet mixture into the dry ingredients, adding almond milk, and mix vigorously until a thick dough forms.
  • Fold in Chocolate Chips (Optional): If using, fold in mini chocolate chips until distributed evenly.
  • Press into Dish: Transfer the mixture into the prepared dish, pressing down firmly and evenly.
  • Chill: Cover with plastic wrap and refrigerate for at least 2 hours until firm.
  • Cut and Serve: Once firm, lift out of the dish using the parchment paper, cut into bars, and enjoy.

Notes

Store in an airtight container in the refrigerator for up to 1-2 weeks. Freeze for longer storage.
Adjust liquid to achieve desired consistency.
Use quality ingredients for best results.
Calories: 250kcal
Course: Snack
Cuisine: American
Keyword: healthy snack, No-Bake, protein bars

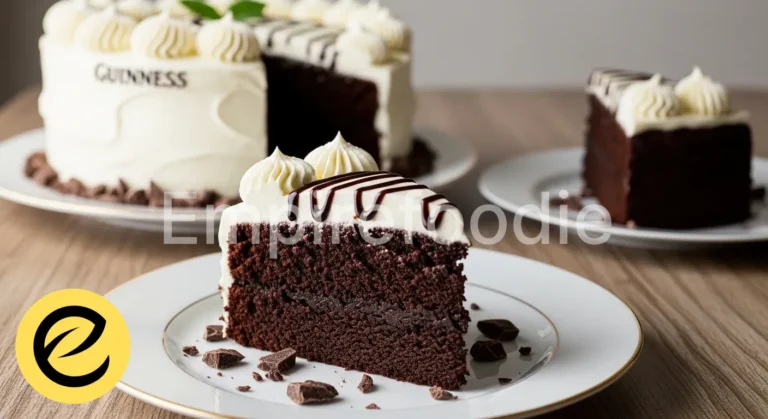
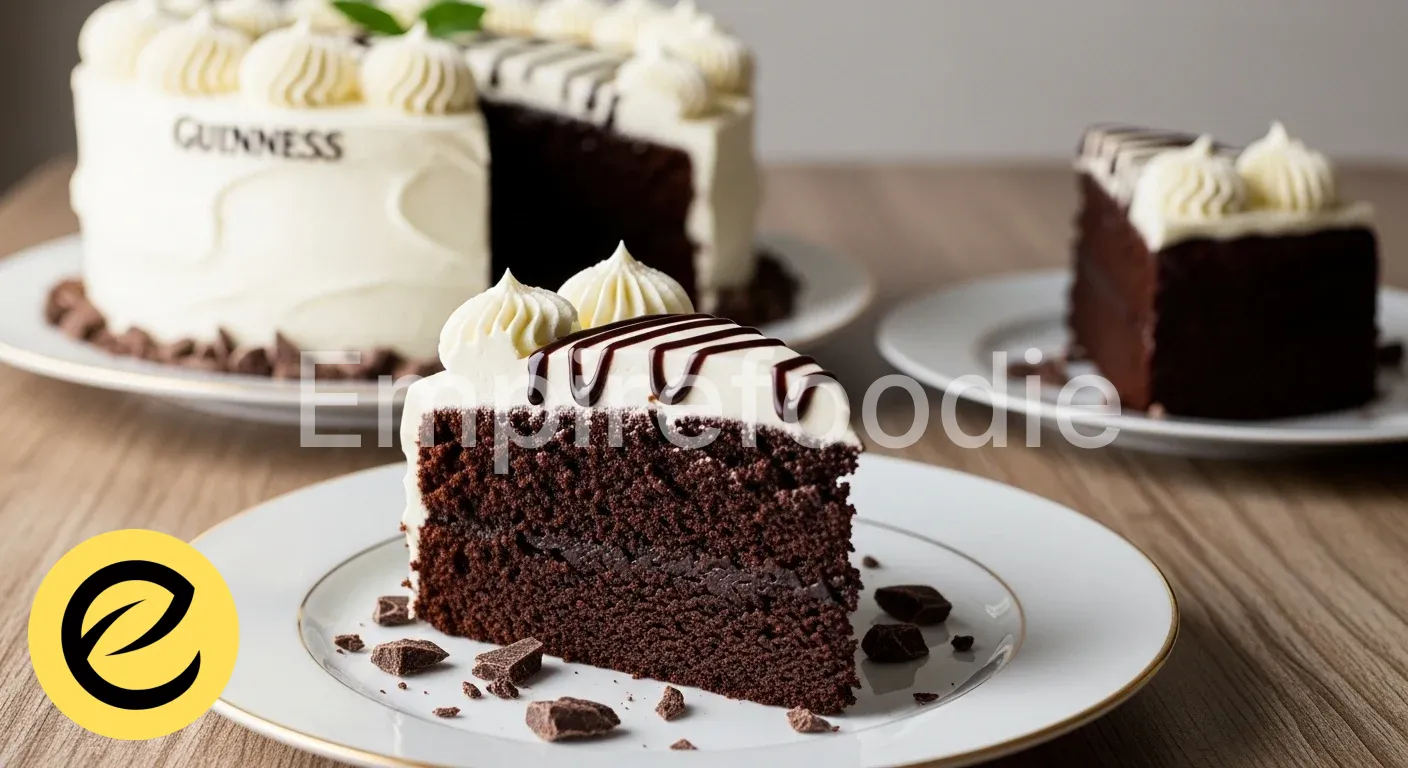
Indulge in the sublime richness of our Guinness chocolate cake. It offers an incredibly moist, velvety texture with deep cocoa notes, subtly enhanced by stout. This sophisticated yet comforting dessert is perfect for any gathering. Prepare for pure indulgence with every delectable slice.

Table of Contents

Why You’ll Love This Recipe

Here’s why this Guinness chocolate cake will become your new favorite:

  • Deep, complex chocolate flavor with a unique stout richness.
  • Consistently moist, tender crumb; stays fresh for days.
  • Surprisingly easy to prepare, welcoming for all skill levels.
  • An impressive, comforting dessert for any special occasion.

Ingredients You’ll Need

guinness chocolate cake

Baking, my dears, truly begins with the quality of your ingredients. Just as my grandmother always taught, fresh is best, and a good cake is built from the ground up with love and the finest provisions. For this heartwarming Guinness chocolate cake, gather these essentials:

  • For the Cake:
    • 1 cup (2 sticks) unsalted butter, softened
    • 1 cup Guinness stout (dark beer)
    • ¾ cup unsweetened cocoa powder (Dutch-processed for a darker cake)
    • 2 cups all-purpose flour
    • 2 cups granulated sugar
    • 1 ½ teaspoons baking soda
    • ½ teaspoon salt
    • 2 large eggs, at room temperature
    • ¾ cup sour cream, at room temperature
    • 1 teaspoon vanilla extract (pure extract, please!)
  • For the Cream Cheese Frosting:
    • 8 ounces cream cheese, softened
    • ½ cup (1 stick) unsalted butter, softened
    • 4 cups powdered sugar, sifted
    • 1 teaspoon vanilla extract
    • 1-2 tablespoons milk or cream (if needed for consistency)

Each ingredient plays its part in crafting the rich, deep flavors of this magnificent Guinness chocolate cake. The quality of your cocoa, the freshness of your eggs, and the richness of the stout truly make all the difference.

Substitutions & Variations

[ra_display_video url=”https://www.youtube.com/watch?v=ujNypsUX4iE”]

While this Guinness chocolate cake recipe is perfect as is, sometimes we need to adapt! For a slightly lighter touch, try substituting half the butter with unsweetened applesauce in the cake batter, or use whole wheat pastry flour for a portion of the all-purpose flour.

You can also experiment with a non-dairy stout and milk alternatives for a dairy-free version. Feel free to infuse your cake with a shot of espresso for an even deeper mocha flavor, or add a pinch of cinnamon for a hint of warmth.

If you’re looking to lighten up your baking, consider experimenting with what you have on hand. For example, while making this cake, you could try using peanut butter bars as a delicious alternative or addition to your dessert repertoire by checking out Peanut Butter Bars.

Equipment You’ll Need

Just as my mama had her trusty tools, you’ll want to gather a few reliable pieces for this delightful baking adventure. You don’t need anything fancy for this comforting Guinness chocolate cake, just the basics that make farmhouse baking a joy:

  • 9-inch springform pan (or two 8-inch round cake pans)
  • Parchment paper
  • Large mixing bowls (at least two)
  • Whisk
  • Rubber spatula
  • Electric mixer (stand mixer or hand mixer)
  • Measuring cups and spoons
  • Fine-mesh sieve (for cocoa and powdered sugar)
  • Cooling rack

Step-by-Step Instructions

guinness chocolate cake

Now, let’s get our hands dusty and bring this beautiful Guinness chocolate cake to life! Imagine yourself in my warm kitchen, following these steps with the same care and love passed down through generations.

  1. Prepare Your Pan: Preheat your oven to 350°F (175°C). Grease and flour your 9-inch springform pan, then line the bottom with a circle of parchment paper. If using two 8-inch round pans, grease, flour, and line both. This ensures your beautiful cake releases perfectly.
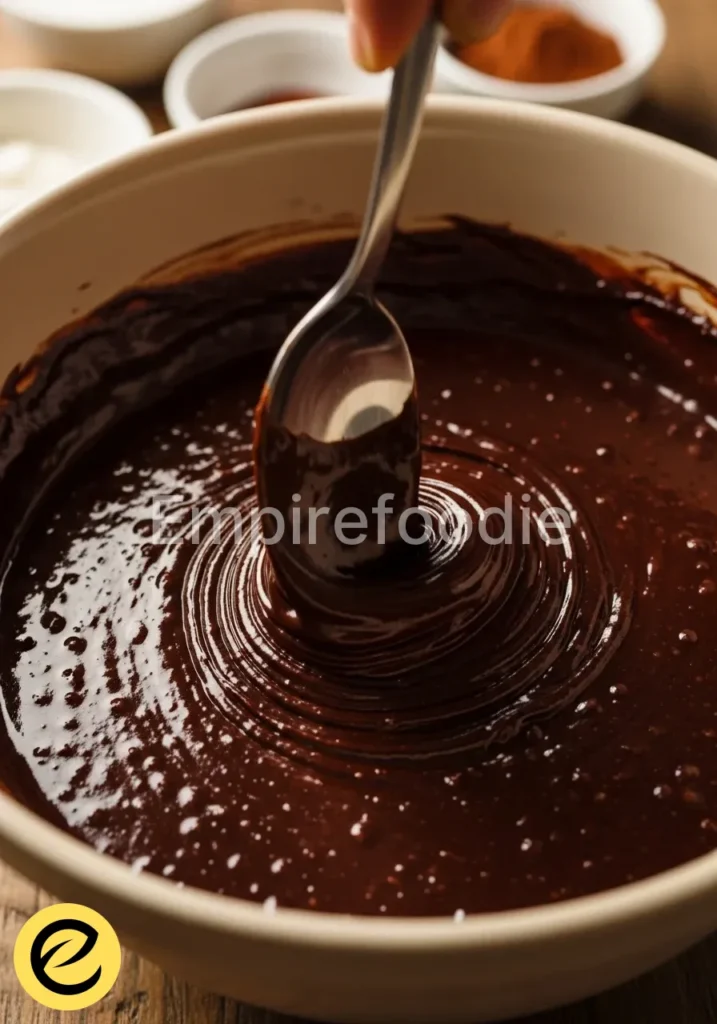
  2. Melt & Infuse: In a medium saucepan, combine the Guinness stout and butter. Heat gently over medium-low heat until the butter melts completely. Remove from heat and whisk in the cocoa powder until smooth. Set aside to cool slightly.
  3. Combine Dry Ingredients: In a large mixing bowl, whisk together the all-purpose flour, granulated sugar, baking soda, and salt. Make sure everything is well combined; this lays the foundation for your fluffy cake.
  4. Mix Wet Ingredients: In a separate medium bowl, whisk the eggs, sour cream, and vanilla extract until smooth. Sour cream is our secret for that incredibly moist texture in this Guinness chocolate cake.
  5. Combine Wet and Dry: Pour the slightly cooled Guinness-cocoa mixture into the dry ingredients. Stir gently with your spatula until just combined. Do not overmix; we want a tender crumb.
  6. Add Egg Mixture: Fold in the egg-sour cream mixture. Continue to mix gently until no streaks of flour remain. The batter for this Guinness chocolate cake will be fairly thin, and that’s perfectly normal.
  7. Bake the Cake: Pour the batter evenly into your prepared springform pan. Bake for 45-55 minutes, or until a wooden skewer inserted into the center comes out clean. If using two 8-inch pans, bake for 30-35 minutes.
  8. Cool Completely: Allow the cake to cool in the pan on a wire rack for about 15-20 minutes before carefully removing the sides of the springform pan. Let the cake cool completely on the wire rack before frosting. This is crucial for a stable, beautiful finish for your Guinness chocolate cake.
  9. Prepare the Frosting: While the cake cools, prepare the cream cheese frosting. In a large mixing bowl, beat the softened cream cheese and butter with an electric mixer until light and fluffy. Gradually add the sifted powdered sugar, one cup at a time, beating well after each addition. Stir in the vanilla extract. If the frosting is too thick, add a tablespoon or two of milk or cream until it reaches your desired spreading consistency.
  10. Frost Your Masterpiece: Once the Guinness chocolate cake is completely cool, spread the luscious cream cheese frosting evenly over the top. You can make elegant swirls for a rustic farmhouse look.
  11. Serve and Enjoy: Slice and serve your magnificent Guinness chocolate cake! Watch smiles appear as everyone savors this rich, comforting dessert.

As you dive into making this delectable Guinness chocolate cake, don’t forget that you can also explore other delightful chocolate treats. With a little inspiration from Chocolate Cookies with White Chips, you can satisfy your chocolate cravings even further.

Pro Tips for Success

Every baker, even the most seasoned, has little tricks up their sleeve. Here are some of my own, gathered over years of farmhouse baking, to ensure your Guinness chocolate cake turns out perfect every time:

  • Room Temperature Ingredients are Key: Ensure your butter, eggs, and sour cream are at room temperature. This allows them to emulsify properly, creating a smooth, uniform batter and a wonderfully tender crumb in your Guinness chocolate cake.
  • Sift Dry Ingredients: Always sift your cocoa powder and powdered sugar, especially for the frosting. This prevents lumps and ensures a silky-smooth texture, making your Guinness chocolate cake even more delightful.
  • Do Not Overmix: Overmixing develops the gluten in the flour, leading to a tough, dry cake. Mix just until the ingredients are combined. A few small lumps are better than an overmixed batter.
  • Cool Completely: Patience is a virtue, especially in baking! Frosting a warm cake will cause the frosting to melt and slide right off. Let your Guinness chocolate cake cool entirely before adding that glorious cream cheese topping.
  • Know Your Oven: Every oven is a little different. Invest in an oven thermometer to ensure your oven is truly at the temperature you set. This can significantly impact baking times and results.

Storage & Reheating Tips

This delectable Guinness chocolate cake is often even better the next day as the flavors meld. Here’s how to keep it fresh and delicious:

  • Room Temperature: If unfrosted, store the cooled cake in an airtight container at room temperature for up to 2-3 days.
  • Refrigerated: Once frosted with cream cheese frosting, this Guinness chocolate cake should be stored in an airtight container in the refrigerator for up to 4-5 days. Remove it from the fridge about an hour before serving to allow the flavors and frosting to soften to their best consistency.
  • Freezing Cake: For longer storage, you can freeze the unfrosted cake. Wrap cooled cake layers tightly in plastic wrap, then in foil. It will keep well in the freezer for up to 2-3 months. Thaw overnight in the refrigerator before frosting.
  • Freezing Frosted Cake: You can also freeze slices of frosted Guinness chocolate cake! Place individual slices on a baking sheet to flash freeze for an hour, then wrap each slice tightly and store in an airtight container. Thaw in the refrigerator or at room temperature.

To keep your rich Guinness chocolate cake fresh and delicious for days, try some useful storage tips. You can also draw inspiration from the flavors in Raspberry White Chocolate Cookies to create a sweet companion that pairs beautifully with this dessert.

What to Serve With This Recipe

guinness chocolate cake

My dears, a slice of this rich Guinness chocolate cake is a celebration in itself, but a few simple additions can elevate the experience. Think about balancing its deep, comforting flavors with something fresh and light. Here are a few lovely ideas:

  • Fresh Berries: A handful of vibrant raspberries or strawberries offers a delightful tart contrast to the cake’s sweetness and richness.
  • Unsweetened Whipped Cream: A dollop of freshly whipped cream, lightly sweetened or even unsweetened, provides a cloud-like texture and balances the density of the Guinness chocolate cake.
  • A Warm Beverage: A steaming cup of strong coffee, a classic black tea, or even a creamy latte makes a perfect companion, enhancing the chocolate notes.
  • Mint Sprig: A fresh mint sprig not only adds a beautiful visual touch but also a refreshing aroma.

Frequently Asked Questions (FAQ)

Can I make this Guinness chocolate cake ahead of time?

Absolutely! This Guinness chocolate cake is wonderfully suited for making ahead. You can bake the cake layers up to two days in advance, wrap them tightly, and store them at room temperature or even freeze them for longer.

The cream cheese frosting can also be made a day or two in advance and stored in the refrigerator. Assemble and frost the cake just a few hours before serving for the freshest taste.

What if I don’t like Guinness, or want an alcohol-free version?

If you’re hesitant about the Guinness, rest assured, the alcohol bakes out, leaving only a deep, malty flavor that perfectly complements the chocolate, not an overpowering beer taste.

However, if you prefer an alcohol-free version of this Guinness chocolate cake, you can substitute the Guinness with non-alcoholic stout, strong brewed coffee, or even a mix of strong coffee and a little malt extract for a similar depth of flavor. The texture might be slightly different, but it will still be a delicious chocolate cake.

How do I know when the Guinness chocolate cake is perfectly baked?

The best way to tell if your Guinness chocolate cake is done is to insert a wooden skewer or toothpick into the center. If it comes out clean or with only a few moist crumbs attached, your cake is ready. The top should also spring back gently when lightly pressed. Avoid opening the oven door too frequently during baking, especially in the first 30 minutes, as this can cause the cake to sink.

Guinness chocolate cake is a remarkable fusion of flavors that combines the deep richness of chocolate with the unique notes of stout, creating a dessert that is both comforting and sophisticated. This delightful cake has gained popularity for its moist texture and intense flavor, making it a favorite among dessert enthusiasts and bakers alike, as highlighted in its related discussions on cake.

Final Thoughts

Baking this Guinness chocolate cake is more than just a recipe; it’s an act of love, a connection to the warmth of home. Each slice carries the sweet story of generations, a reminder that the best things are shared around a cherished table. May this cake bring as much joy to your home as it does to mine.

Nutrition Information (per serving)

Here’s a general estimate for one generous slice of this decadent Guinness chocolate cake with frosting:

CaloriesApproximately 450-500 kcal
Total FatApproximately 25-30 g
Saturated FatApproximately 15-20 g
CholesterolApproximately 70-80 mg
SodiumApproximately 250-300 mg
Total CarbohydratesApproximately 60-70 g
Dietary FiberApproximately 2-3 g
Total SugarsApproximately 45-55 g
ProteinApproximately 5-6 g

guinness chocolate cake

Prep Time 20 minutes
Cook Time 55 minutes
Total Time 1 hour 15 minutes
Servings 12 servings servings
Calories 450
Indulge in the sublime richness of our Guinness chocolate cake. It offers an incredibly moist, velvety texture with deep cocoa notes, subtly enhanced by stout. This sophisticated yet comforting dessert is perfect for any gathering.

Ingredients

  • 1 cup (2 sticks) unsalted butter, softened
  • 1 cup Guinness stout (dark beer)
  • ¾ cup unsweetened cocoa powder (Dutch-processed for a darker cake)
  • 2 cups all-purpose flour
  • 2 cups granulated sugar
  • 1 ½ teaspoons baking soda
  • ½ teaspoon salt
  • 2 large eggs, at room temperature
  • ¾ cup sour cream, at room temperature
  • 1 teaspoon vanilla extract (pure extract, please!)
  • 8 ounces cream cheese, softened
  • ½ cup (1 stick) unsalted butter, softened
  • 4 cups powdered sugar, sifted
  • 1 teaspoon vanilla extract
  • 1-2 tablespoons milk or cream (if needed for consistency)

Instructions 

  • Preheat your oven to 350°F (175°C). Grease and flour your 9-inch springform pan, then line the bottom with a circle of parchment paper.
  • In a medium saucepan, combine the Guinness stout and butter. Heat gently over medium-low heat until the butter melts completely. Whisk in the cocoa powder until smooth.
  • In a large mixing bowl, whisk together the all-purpose flour, granulated sugar, baking soda, and salt.
  • In a separate bowl, whisk the eggs, sour cream, and vanilla extract until smooth.
  • Pour the slightly cooled Guinness-cocoa mixture into the dry ingredients and stir gently until just combined.
  • Fold in the egg-sour cream mixture until no streaks of flour remain.
  • Pour the batter into the prepared pan and bake for 45-55 minutes, or until a wooden skewer inserted into the center comes out clean.
  • Allow the cake to cool in the pan for 15-20 minutes before removing from the pan and letting cool completely on a wire rack.
  • For the frosting, beat the softened cream cheese and butter until light and fluffy. Gradually add sifted powdered sugar, beating well after each addition, and stir in the vanilla extract. If thick, add milk or cream as needed.
  • Once the cake is completely cool, spread the cream cheese frosting evenly over the top.

Notes

Ensure ingredients are at room temperature. Sift dry ingredients to prevent lumps. Do not overmix the batter. Cool completely before frosting.
Calories: 450kcal
Course: Dessert
Cuisine: American
Keyword: cake, chocolate, dessert, frosting, Guinness

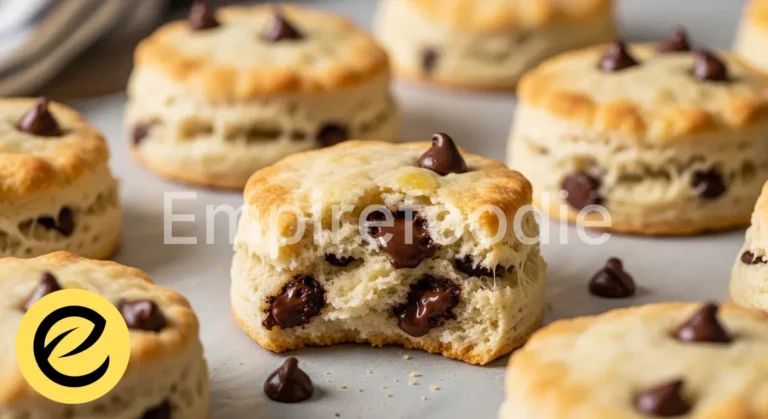
Nothing quite captures the essence of a cozy kitchen like freshly baked chocolate chip biscuits. Imagine that perfect bite: a golden-brown exterior, slightly crisp, giving way to a tender, chewy interior, studded with generous pools of melted chocolate. These delightful treats aren’t just a dessert; they are a comforting embrace, a moment of pure joy. Prepare to create the most incredible chocolate chip biscuits, guaranteed to bring warmth to any home.

Table of Contents

Why You’ll Love These Irresistible Chocolate Chip Biscuits

  • Pure Comfort: These chocolate chip biscuits offer a heartwarming taste of home.
  • Effortless Joy: Simple steps mean delicious results for everyone.
  • Wholesome Goodness: Crafted with quality ingredients for a delightful treat.

Ingredients You’ll Need

chocolate chip biscuits

My grandmother always said, the soul of a good chocolate chip biscuit lies in its ingredients. Opt for quality; fresh, unsalted butter and good vanilla truly make a difference. These simple, wholesome pantry staples create that comforting, rustic flavor everyone adores.

  • All-Purpose Flour: 2 ½ cups (300g), unbleached.
  • Baking Soda: 1 teaspoon, for rise and chew.
  • Salt: ½ teaspoon, sea salt preferred for balance.
  • Unsalted Butter: 1 cup (226g), softened.
  • Granulated Sugar: ¾ cup (150g), for crispness.
  • Light Brown Sugar: ¾ cup (160g), packed, for moisture and chew in these chocolate chip biscuits.
  • Large Eggs: 2, at room temperature.
  • Vanilla Extract: 2 teaspoons, pure vanilla for aroma.
  • Chocolate Chips: 1 ½ cups (250g), semi-sweet and dark mix.
  • Optional: Flaky sea salt for sprinkling.

Substitutions & Variations

[ra_display_video url=”https://www.youtube.com/watch?v=ZhpRORmQics”]

Embrace flexibility for your chocolate chip biscuits! For healthier options, swap half the all-purpose flour with whole wheat pastry flour, or use coconut sugar. Dark chocolate chips reduce sweetness, while a handful of chopped walnuts adds healthy fats and a delightful crunch. Simple tweaks for delicious results.

For those looking to diversify their biscuit-making skills, consider trying a variation with white chocolate. You can find a delicious recipe for these treats in our article on chocolate cookies with white chips.

Equipment You’ll Need

The right tools smooth the baking process, ensuring your chocolate chip biscuits are consistently delightful, a tradition from my family’s kitchen.

  • Large Mixing Bowls
  • Electric Mixer (stand or handheld)
  • Measuring Cups and Spoons
  • Rubber Spatula
  • Baking Sheets (lined with parchment)
  • Wire Rack
  • Cookie Scoop (optional, for uniform chocolate chip biscuits)

Step-by-Step Instructions

chocolate chip biscuits

Bringing the comforting aroma of fresh chocolate chip biscuits into your home is simple. This family method ensures perfect tenderness every time.

  1. Prepare Workspace: Preheat oven to 375°F (190°C). Line two baking sheets with parchment paper.
  2. Combine Dry: Whisk flour, baking soda, and salt in a medium bowl. Set aside.
  3. Cream Wet: In a large bowl, cream softened unsalted butter with granulated and light brown sugar until light and fluffy (2-3 minutes).
  4. Add Eggs/Vanilla: Beat in eggs one at a time, then vanilla. Scrape bowl sides.
  5. Gradually Add Dry: Slowly add dry ingredients to wet, mixing on low until just combined. Do not overmix these chocolate chip biscuits.
  6. Fold in Chocolate: Gently fold in chocolate chips with a spatula until evenly distributed.
  7. Scoop and Bake: Drop rounded tablespoons of dough 2 inches apart onto prepared sheets.
  8. Bake: Bake 9-12 minutes, until edges are golden and centers slightly soft. Watch your chocolate chip biscuits carefully.
  9. Cool: Remove from oven, cool on sheets for 5 minutes, then transfer to a wire rack to cool completely. Serve warm!

If you enjoy experimenting with flavors, you might want to try adding raspberry to your cookie dough for a delightful twist. Check out our recipe for raspberry white chocolate cookies that perfectly complements the classic chocolate chip biscuit.

Pro Tips for Success

These cherished secrets, passed down through my family, ensure your chocolate chip biscuits are a triumph, just like those from my grandmother’s farmhouse kitchen.

  • Room Temperature: Ensure butter and eggs are at room temperature for a lighter, fluffier texture in your chocolate chip biscuits.
  • Don’t Overmix: Mix flour only until just combined to avoid tough chocolate chip biscuits.
  • Chill Dough: For thicker, chewier biscuits, chill dough for 30 minutes or overnight. Flavors deepen, and spreading reduces.
  • Salt Sprinkle: A sprinkle of flaky sea salt on top before baking enhances chocolate.
  • Rotate Sheets: Rotate baking sheets halfway for even browning.
  • Underbake Slightly: Remove when edges are golden but centers are still slightly soft for gooey chocolate chip biscuits.

Storage & Reheating Tips

Preserving the deliciousness of your homemade chocolate chip biscuits is easy with these farmhouse kitchen tips.

  • Airtight Container: Store cooled chocolate chip biscuits at room temperature for 3-4 days to prevent drying.
  • Freezing Baked: Freeze baked chocolate chip biscuits in an airtight container for up to 3 months. Thaw or warm gently.
  • Freezing Dough: Scoop dough balls, freeze solid, then transfer to a freezer bag. Bake from frozen, adding a few minutes.
  • Reheating: Reheat in a 300°F (150°C) oven for 5-7 minutes, or microwave for 10-15 seconds for warm, gooey centers.

To keep your biscuits fresh for longer, consider incorporating some peanut butter for a richer flavor. Our tips on peanut butter chocolate cookies will help you preserve the goodness of your homemade creations.

What to Serve With Your Perfect Chocolate Chip Biscuits

chocolate chip biscuits

Elevate your chocolate chip biscuit experience with thoughtful pairings. Even sweet treats benefit from wholesome balance, a lesson from our farmhouse.

  • Fresh Fruit: A platter of berries or sliced apples offers a refreshing counterpoint.
  • Greek Yogurt: A dollop of plain Greek yogurt with honey adds protein and tang.
  • Herbal Tea/Coffee: A warm beverage is perfect for a cozy moment with your chocolate chip biscuits.
  • Roasted Carrots/Sweet Potatoes: A surprising sweet-savory balance for a unique dessert.

Frequently Asked Questions (FAQ) About Chocolate Chip Biscuits

Can I make chocolate chip biscuits gluten-free?

Absolutely! For gluten-free chocolate chip biscuits, substitute the all-purpose flour with a 1:1 gluten-free baking flour blend that contains xanthan gum. You might notice a slightly different texture, but they will still be wonderfully delicious. Always ensure your other ingredients are certified gluten-free.

Why are my chocolate chip biscuits flat and spreading too much?

Several factors can cause flat chocolate chip biscuits. Your butter might have been too soft or even melted, or you might not have used enough flour. Ensure your baking soda is fresh and active.

Chilling the dough is also a fantastic way to prevent excessive spreading, allowing the butter to firm up and the flavors to deepen. Make sure your oven temperature is accurate; a too-low oven can also contribute to spreading.

Can I use different types of chocolate in my chocolate chip biscuits?

Certainly! My family loves to experiment. While semi-sweet is classic, feel free to use milk chocolate, dark chocolate, white chocolate, or even a combination.

You can also chop up a chocolate bar for uneven, melty puddles, adding a sophisticated touch to your chocolate chip biscuits. Remember, the quality of your chocolate significantly impacts the final taste.

Chocolate chip biscuits are a beloved treat enjoyed by many, often associated with warm memories of baking in the kitchen. Their versatility and comforting flavor have made them a staple in dessert recipes, making them a must-try for any baking enthusiast. You can learn more about these delectable treats through this link.

Final Thoughts

Baking these chocolate chip biscuits is more than just following a recipe; it’s an act of love, a connection to the warmth of home and the cherished memories of generations past. Each batch carries the whispers of my grandmother’s kitchen, a comforting legacy. Share these farmhouse treats, and watch them become a treasured part of your own family’s story.

Nutrition Information (per serving)

This approximate nutritional breakdown is for one chocolate chip biscuit, based on 24 servings per recipe. Please note, values can vary based on specific ingredients and brands used.

NutrientAmount
Calories210 kcal
Total Fat12g
Saturated Fat7g
Cholesterol35mg
Sodium110mg
Total Carbohydrates25g
Dietary Fiber1g
Total Sugars17g
Protein2g

chocolate chip biscuits

Prep Time 20 minutes
Cook Time 12 minutes
Total Time 32 minutes
Servings 24 biscuits servings
Calories 210
These chocolate chip biscuits feature a golden-brown exterior with a slightly crisp texture and a tender, chewy interior, filled with generous pools of melted chocolate. A perfect treat for any occasion, bringing warmth and joy to your kitchen.

Ingredients

  • 2 ½ cups all-purpose flour
  • 1 teaspoon baking soda
  • ½ teaspoon sea salt
  • 1 cup unsalted butter, softened
  • ¾ cup granulated sugar
  • ¾ cup light brown sugar, packed
  • 2 large eggs, at room temperature
  • 2 teaspoons vanilla extract
  • 1 ½ cups chocolate chips, semi-sweet and dark mix
  • Optional: Flaky sea salt for sprinkling

Instructions 

  • Preheat oven to 375°F (190°C) and line two baking sheets with parchment paper.
  • Whisk flour, baking soda, and salt in a medium bowl and set aside.
  • In a large bowl, cream softened butter with granulated and brown sugar until light and fluffy, about 2-3 minutes.
  • Beat in eggs one at a time, then add vanilla and scrape the sides of the bowl.
  • Gradually add dry ingredients to wet ingredients and mix on low until just combined.
  • Gently fold in chocolate chips with a spatula until evenly distributed.
  • Drop rounded tablespoons of dough onto prepared sheets, spaced 2 inches apart.
  • Bake for 9-12 minutes until edges are golden and centers are slightly soft.
  • Cool on sheets for 5 minutes, then transfer to a wire rack to cool completely.

Notes

For thicker biscuits, chill the dough for 30 minutes or overnight. For gluten-free options, substitute all-purpose flour with a gluten-free baking blend.
Calories: 210kcal
Course: Dessert
Cuisine: American
Keyword: baking, biscuits, Chocolate Chip, cookies, dessert

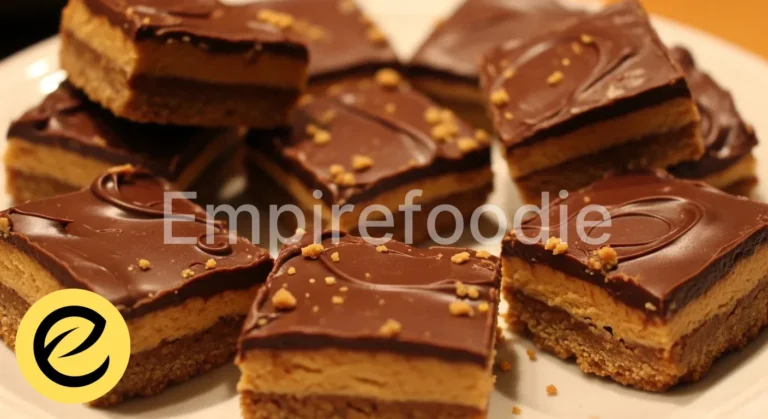
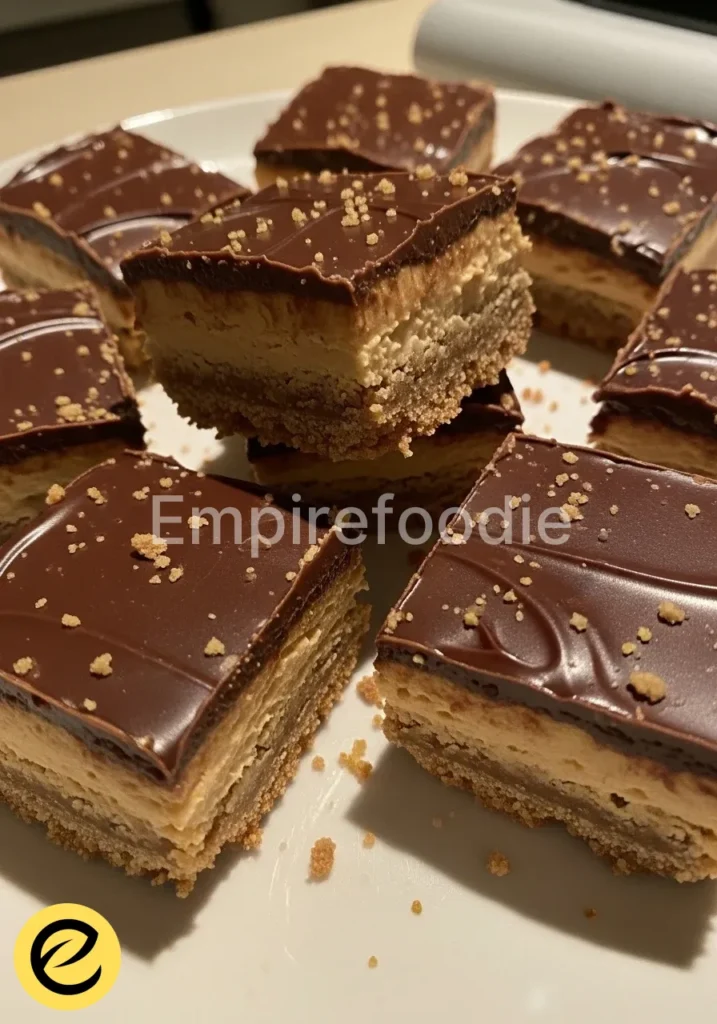
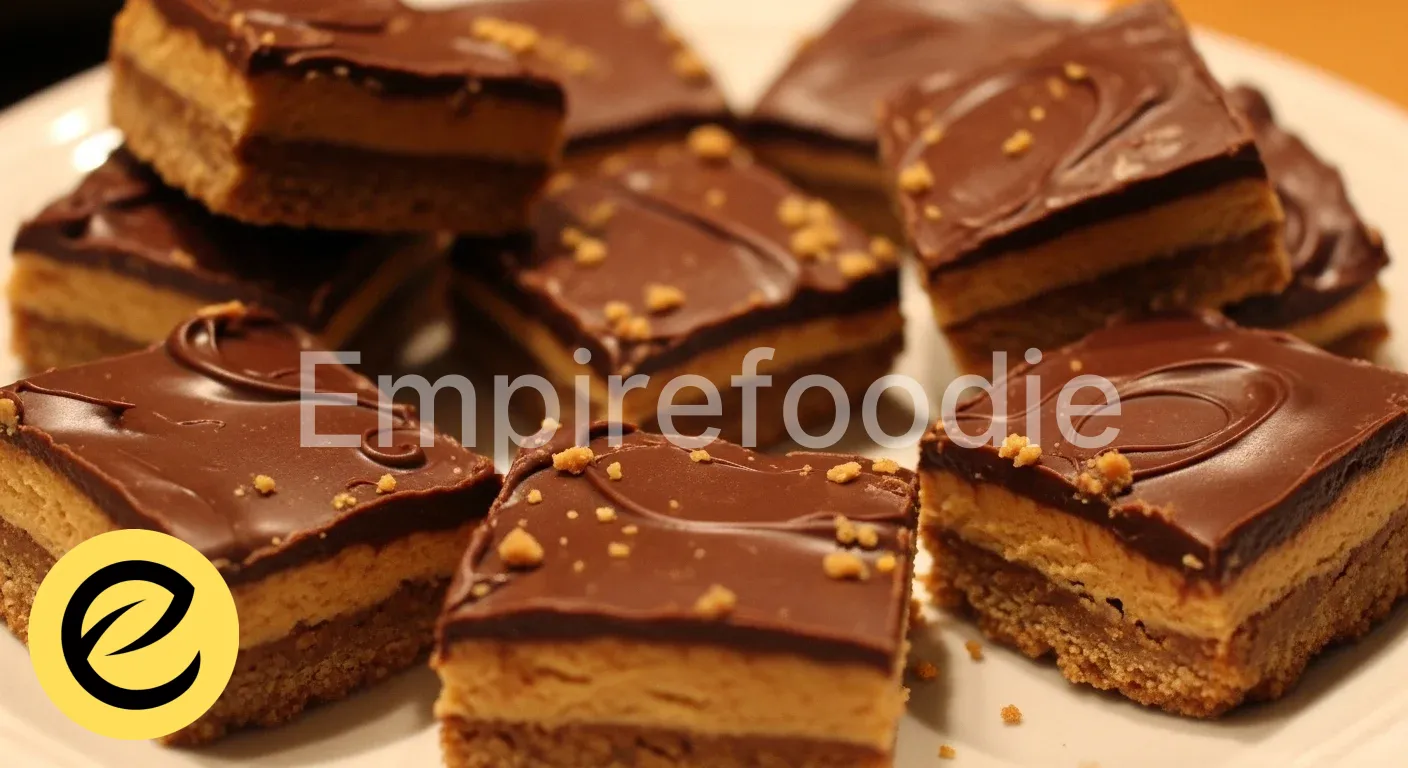
There’s a certain magic in a treat that instantly transports you back to simpler times, to grandma’s kitchen filled with warmth and the comforting scent of baking. These peanut butter bars are exactly that – a slice of pure, unadulterated nostalgia. Imagine a buttery, crumbly base that melts in your mouth, topped with a rich, creamy peanut butter layer, and finished with a dreamy chocolate ganache.

Each bite offers the perfect balance of salty and sweet, soft and slightly chewy, making them an irresistible farmhouse favorite. This beloved recipe for peanut butter bars brings joy and a taste of home, perfect for sharing or savoring a quiet moment with a cup of tea.

Table of Contents

Why You’ll Love These Peanut Butter Bars

As a grandmother who cherishes the heritage of farmhouse baking, I can tell you these peanut butter bars are more than just a dessert; they are a legacy. Their simplicity and heartwarming flavor make them a treasured part of any family gathering. These bars truly embody comfort and joy, just like a warm hug from someone you love.

  • Unforgettable Flavor: Experience the perfect harmony of rich peanut butter and decadent chocolate, a truly classic combination that satisfies every craving.
  • Effortless Preparation: No complex techniques or fancy equipment needed. This recipe for peanut butter bars comes together quickly with minimal fuss.
  • Wholesome Goodness: Using quality ingredients, these bars offer a delightful treat that you can feel good about sharing with your loved ones.
  • Crowd-Pleasing: From potlucks to family dinners, these peanut butter bars consistently disappear first, making them a guaranteed hit.

Ingredients You’ll Need

peanut butter bars

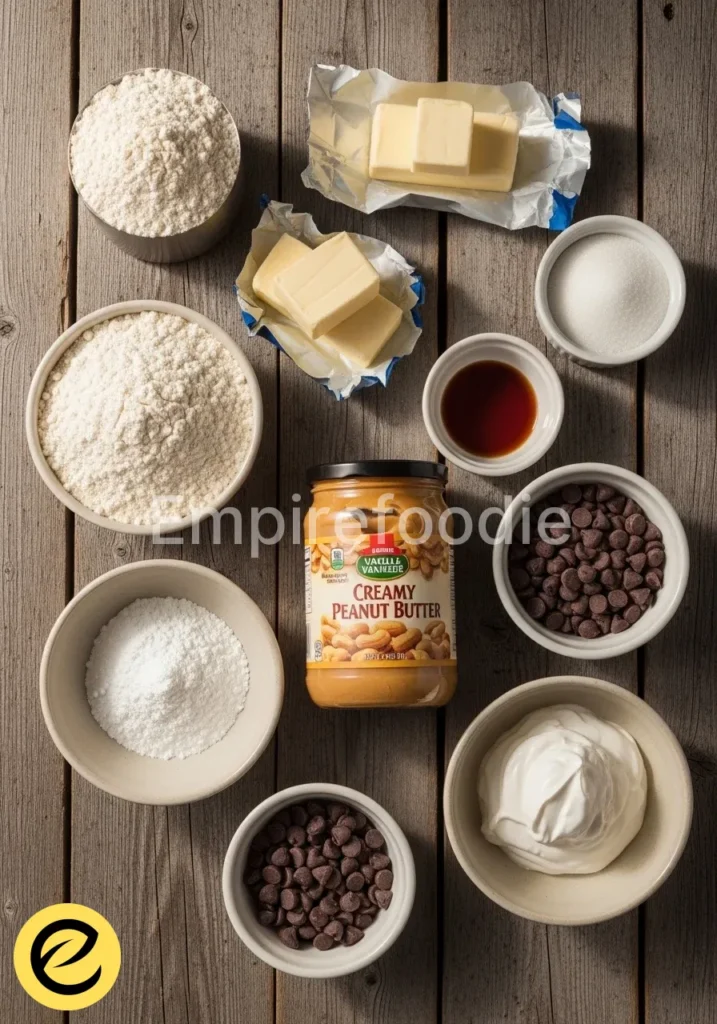
Gathering your ingredients is the first step in creating these delightful peanut butter bars. Just like selecting the freshest produce from the garden, choosing quality components makes all the difference in the final taste and texture. I always say, good food starts with good ingredients, and these bars are no exception.

  • For the Crust:
    • 2 cups all-purpose flour: Unbleached all-purpose flour creates a tender, buttery base for our peanut butter bars.
    • 1 cup unsalted butter: Softened to room temperature, good quality butter lends richness and a melt-in-your-mouth texture.
    • 1/2 cup granulated sugar: Provides the perfect touch of sweetness to balance the salty peanut butter.
    • 1 teaspoon vanilla extract: A hint of pure vanilla elevates the overall flavor of the crust.
    • 1/4 teaspoon salt: Just a pinch to enhance all the other flavors.
  • For the Peanut Butter Layer:
    • 1 cup creamy peanut butter: Choose a natural, creamy peanut butter for the best texture and flavor. It’s the star of these peanut butter bars!
    • 1/2 cup unsalted butter: Softened, this helps create a smooth, rich peanut butter filling.
    • 2 cups powdered sugar: Essential for achieving that silky-smooth, melt-in-your-mouth texture in the filling.
    • 1 teaspoon vanilla extract: Deepens the sweet and nutty notes.
  • For the Chocolate Topping:
    • 1 cup semi-sweet chocolate chips: High-quality chocolate chips melt beautifully for a glossy, decadent topping.
    • 1/2 cup heavy cream: Provides the luscious, pourable consistency for our ganache.
    • 1 tablespoon unsalted butter: Adds extra shine and richness to the chocolate layer.

Substitutions & Variations

[ra_display_video url=”https://www.youtube.com/watch?v=hCbgs8zHYHs”]

Just like a patchwork quilt, a recipe can always be adapted with a few creative touches. While these peanut butter bars are perfect as they are, sometimes you want to make a dish your own, or cater to different dietary needs. Here are a few healthy, mindful swaps you can consider to keep these peanut butter bars a beloved treat for everyone.

  • For the Flour: You can substitute up to half of the all-purpose flour with whole wheat pastry flour for a slightly nuttier flavor and added fiber. Gluten-free all-purpose flour blends also work wonderfully to make these peanut butter bars friendly for those with sensitivities.
  • For the Butter: Plant-based butter alternatives perform beautifully in both the crust and the peanut butter layer, maintaining that rich taste. For a dairy-free chocolate topping, use full-fat coconut cream (chilled overnight, scoop out the thick cream) instead of heavy cream.
  • For the Sugar: Reduce the granulated sugar in the crust by a quarter for a less sweet option. In the peanut butter layer, you can experiment with a portion of powdered erythritol or monk fruit sweetener, adjusting to taste.
  • For the Peanut Butter: While these are called peanut butter bars, you can certainly try almond butter or cashew butter for a different flavor profile. Always opt for natural, unsweetened varieties.
  • Add-ins: Fold in a handful of chopped walnuts or pecans into the peanut butter layer for added crunch and nutrients. A sprinkle of sea salt flakes over the finished chocolate topping enhances the flavors beautifully.

Equipment You’ll Need

Baking these peanut butter bars doesn’t require a lot of specialized equipment. Just like my grandmother used to say, a few good, sturdy tools are all you need to create something wonderful. These are the essentials that will help you whip up these fantastic peanut butter bars with ease.

  • 9×13 inch baking pan: A standard glass or metal baking pan is perfect for these bars.
  • Parchment paper: Lines the pan for easy lifting and clean slices.
  • Large mixing bowls: Several bowls are handy for preparing the different layers.
  • Electric mixer (handheld or stand mixer): Makes quick work of creaming butter and sugar, and mixing the peanut butter layer.
  • Rubber spatula: Essential for scraping down bowls and spreading layers evenly.
  • Saucepan: For gently heating the heavy cream for the chocolate ganache.
  • Whisk: To ensure a smooth, lump-free chocolate topping.
  • Measuring cups and spoons: For accurate ingredient proportions.

Step-by-Step Instructions

peanut butter bars

Creating these peanut butter bars is a simple, joyful process, a culinary journey that always fills my kitchen with a comforting aroma. Follow these steps carefully, and you’ll soon have a batch of the most delicious peanut butter bars, ready to bring smiles to everyone around your table.

  1. Prepare Your Pan: First, preheat your oven to 350°F (175°C). Line a 9×13 inch baking pan with parchment paper, leaving an overhang on the sides. This creates “handles” for easy removal of the peanut butter bars later. Lightly grease the parchment paper if desired.
  2. Make the Crust: In a large mixing bowl, cream together the softened butter and granulated sugar with an electric mixer until light and fluffy. Beat in the vanilla extract. Gradually add the all-purpose flour and salt, mixing on low speed until just combined and a crumbly dough forms. Do not overmix.
  3. Press the Crust: Press the crumbly dough evenly into the bottom of the prepared baking pan. Use the back of a spoon or your clean hands to create a firm, compact layer.
  4. Bake the Crust: Bake the crust for 15-18 minutes, or until lightly golden brown around the edges. Remove from the oven and let it cool completely on a wire rack while you prepare the next layer for your peanut butter bars.
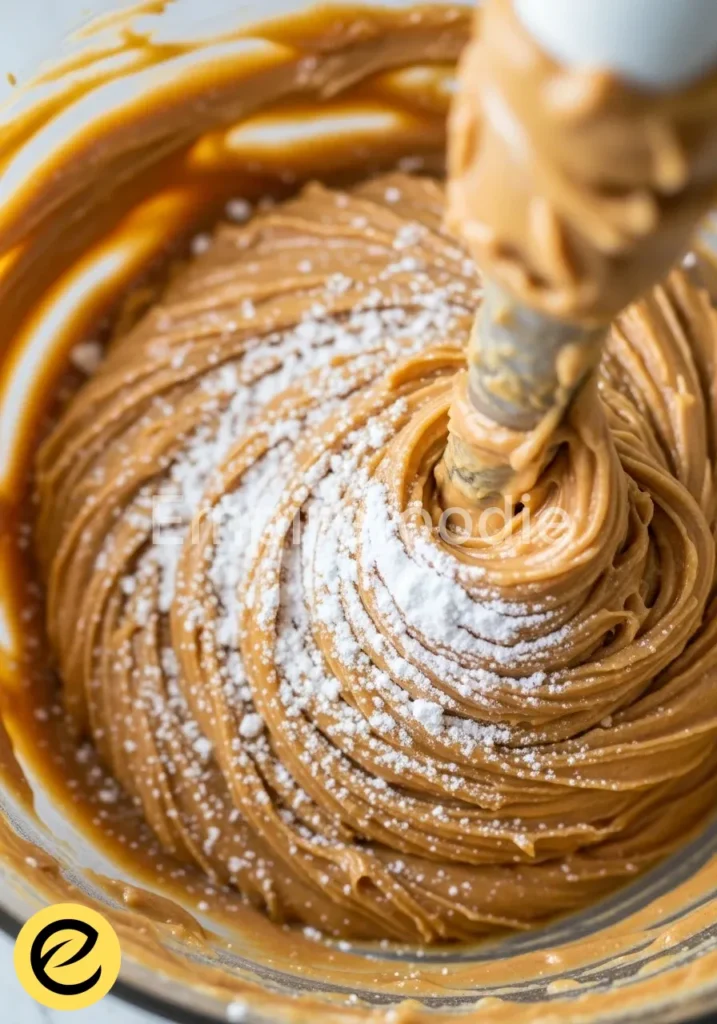
  5. Prepare the Peanut Butter Layer: In a separate large mixing bowl, combine the creamy peanut butter and softened butter. Beat with an electric mixer until smooth and well combined. Gradually add the powdered sugar, one cup at a time, beating until fully incorporated and smooth. Stir in the vanilla extract. The mixture should be thick and creamy, perfect for your peanut butter bars.
  6. Spread the Peanut Butter Layer: Once the crust is completely cool, evenly spread the peanut butter mixture over the baked crust. Use a rubber spatula to smooth the surface. Place the pan in the refrigerator for at least 30 minutes to allow the peanut butter layer to firm up. This step is crucial for neat slices of your peanut butter bars.
  7. Make the Chocolate Topping: In a small saucepan, heat the heavy cream over medium-low heat until it just begins to simmer around the edges. Do not boil. Remove from heat and immediately pour the hot cream over the chocolate chips and tablespoon of butter in a heatproof bowl. Let it sit undisturbed for 5 minutes to melt the chocolate.
  8. Whisk the Ganache: After 5 minutes, whisk the chocolate and cream mixture gently until it’s smooth, glossy, and completely combined, forming a rich ganache.
  9. Pour the Topping: Remove the chilled peanut butter bars from the refrigerator. Pour the warm chocolate ganache evenly over the peanut butter layer. Gently tilt the pan to ensure full coverage.
  10. Chill to Set: Return the pan to the refrigerator and chill for at least 2-3 hours, or until the chocolate topping is completely set. For best results, chill overnight.
  11. Slice and Serve: Once fully chilled and set, use the parchment paper overhang to lift the entire slab of peanut butter bars from the pan. Place on a cutting board. Use a sharp, warm knife (run under hot water and wipe dry) to cut the bars into desired squares or rectangles. Enjoy your homemade peanut butter bars!

Pro Tips for Success

Baking is truly an art and a science, and these little tricks, passed down from my own grandmother, will ensure your peanut butter bars turn out perfectly every single time. They elevate a good recipe to an unforgettable one.

  • Room Temperature Ingredients: Always ensure your butter and peanut butter are at true room temperature. This allows them to cream together smoothly with the sugar, creating a light and airy texture in both the crust and the peanut butter layer. Cold ingredients lead to lumpy mixtures.
  • Don’t Overmix the Crust: Mix the flour into the butter mixture only until just combined. Overmixing develops the gluten in the flour, which can lead to a tough, chewy crust instead of a tender, crumbly one for your peanut butter bars.
  • Cool Completely: Allow the baked crust to cool entirely before adding the peanut butter layer. A warm crust will melt the butter in the peanut butter mixture, resulting in a greasy, unstable layer. Patience here is key for perfect peanut butter bars.
  • Chill Thoroughly: Do not rush the chilling process for any of the layers. Chilling the peanut butter layer helps it set firmly before the warm ganache is added. Chilling the finished bars until fully firm makes for clean, neat cuts and prevents a messy experience. Overnight chilling is ideal for these peanut butter bars.
  • Warm Knife for Cutting: For perfectly clean slices, especially through the chocolate topping, run your knife under hot water, wipe it dry, and then make your cut. Repeat this process for each slice. This warms the blade, allowing it to glide through the chocolate without cracking or dragging.
  • Quality Peanut Butter: Opt for a good quality, creamy peanut butter that doesn’t have a lot of added sugar or oils. Natural peanut butter (that you stir) often works best for flavor and texture, though regular creamy varieties are fine. Avoid crunchy peanut butter unless you specifically want that texture.

Storage & Reheating Tips

These peanut butter bars are so delightful, they rarely last long in my home! But when you do manage to squirrel some away, proper storage ensures every bite remains as fresh and delicious as the first. This way, you can extend the joy these peanut butter bars bring.

  • Countertop Storage: You can store these peanut butter bars at room temperature in an airtight container for up to 2-3 days. Make sure they are in a cool, dry place away from direct sunlight, especially if your kitchen is warm, as the chocolate can soften.
  • Refrigerator Storage: For longer freshness and a firmer texture, store the peanut butter bars in an airtight container in the refrigerator for up to one week. The chocolate and peanut butter layers will firm up considerably when chilled, providing a delightful chew.
  • Freezer Storage: These peanut butter bars freeze beautifully! Wrap individual bars or small batches tightly in plastic wrap, then place them in a freezer-safe airtight container or heavy-duty freezer bag. They will keep well for up to 2-3 months.
  • Reheating (Thawing): To enjoy frozen peanut butter bars, simply remove them from the freezer and let them thaw at room temperature for 30-60 minutes, or in the refrigerator overnight. There’s no need for actual “reheating” in the microwave or oven, as these bars are best enjoyed chilled or at room temperature.

What to Serve With This Recipe

peanut butter bars

While these peanut butter bars are a complete treat on their own, pairing them with the right accompaniments can elevate the experience, offering a lovely balance to their sweetness. When I serve these at family gatherings, I always think about how to complement their rich flavor without overpowering it.

  • A Warm Beverage: A classic pairing is a hot cup of coffee or a comforting mug of tea. The slight bitterness of coffee beautifully cuts through the sweetness of the peanut butter bars, while a herbal tea offers a gentle contrast.
  • Cold Milk: For a truly nostalgic treat, serve these peanut butter bars with a tall glass of cold milk. It’s a simple, perfect combination that children and adults alike adore.
  • Fresh Fruit Salad: To balance the richness, a light and refreshing fruit salad featuring berries, melon, or sliced apples provides a vibrant, healthy counterpoint. The natural sweetness and acidity of the fruit cleanse the palate.
  • Vanilla Bean Ice Cream: For an extra indulgent dessert, a small scoop of good quality vanilla bean ice cream alongside a peanut butter bar is simply heavenly. The melting ice cream and firm bar create a delightful textural contrast.
  • A Light Green Salad: Believe it or not, a simple, lightly dressed green salad can be a refreshing precursor to these bars, especially if serving them after a meal. It prepares the palate for the rich dessert to come.

Frequently Asked Questions (FAQ)

Can I use crunchy peanut butter for these peanut butter bars?

While this recipe for peanut butter bars traditionally calls for creamy peanut butter to achieve a smooth, uniform texture in the filling, you can certainly use crunchy peanut butter if you prefer. Just know that it will introduce a noticeable nutty crunch to the peanut butter layer, which some people absolutely love! It’s a delightful variation that adds extra texture.

Do I need to refrigerate these peanut butter bars?

Yes, I highly recommend refrigerating these peanut butter bars. Chilling is essential for the chocolate topping to set properly and for the peanut butter layer to firm up, making the bars much easier to slice neatly. Once set, you can store them in an airtight container in the refrigerator for up to a week. For a firmer texture and longer shelf life, always keep them chilled.

Can I make these peanut butter bars ahead of time?

Absolutely! These peanut butter bars are an excellent make-ahead dessert. You can prepare the entire batch up to 2-3 days in advance and store them in an airtight container in the refrigerator.

This allows the flavors to meld beautifully and ensures they are perfectly chilled and firm for serving, making them ideal for parties or holidays. They also freeze wonderfully for longer storage.

Final Thoughts

These peanut butter bars are more than just a recipe; they are a taste of home, a connection to the kitchens of my ancestors. Every bite evokes memories of family gatherings, shared laughter, and the simple joy of farmhouse baking. May these bars bring as much warmth and happiness to your family as they have to mine, creating new, cherished memories with every delicious square.

Nutrition Information (per serving)

Please note that these values are estimates and can vary based on specific ingredients and portion sizes. This is for one typical bar when cut into 24 pieces.

Calories350 kcal
Total Fat25g
Saturated Fat13g
Cholesterol45mg
Sodium90mg
Total Carbohydrates30g
Dietary Fiber2g
Total Sugars20g
Protein5g

peanut butter bars

Prep Time 30 minutes
Cook Time 18 minutes
Total Time 3 hours 30 minutes
Servings 24 bars servings
Calories 350
These peanut butter bars are a nostalgic treat featuring a buttery, crumbly base topped with a rich, creamy peanut butter layer and a dreamy chocolate ganache, perfect for sharing or savoring in a quiet moment.

Ingredients

  • 2 cups all-purpose flour
  • 1 cup unsalted butter, softened
  • 1/2 cup granulated sugar
  • 1 teaspoon vanilla extract
  • 1/4 teaspoon salt
  • 1 cup creamy peanut butter
  • 1/2 cup unsalted butter, softened
  • 2 cups powdered sugar
  • 1 teaspoon vanilla extract
  • 1 cup semi-sweet chocolate chips
  • 1/2 cup heavy cream
  • 1 tablespoon unsalted butter

Instructions 

  • Preheat oven to 350°F (175°C) and line a 9×13 inch baking pan with parchment paper.
  • In a large mixing bowl, cream together the softened butter and granulated sugar until light and fluffy. Beat in the vanilla extract.
  • Gradually add the all-purpose flour and salt until just combined.
  • Press the dough into the bottom of the prepared baking pan and bake for 15-18 minutes until golden brown.
  • Let the crust cool completely on a wire rack.
  • In a separate bowl, combine creamy peanut butter and softened butter, mixing until smooth.
  • Gradually add powdered sugar and stir in vanilla extract until creamy.
  • Spread the peanut butter mixture evenly over the cooled crust and chill in the refrigerator for at least 30 minutes.
  • Heat heavy cream in a saucepan until simmering, then pour over chocolate chips and butter in a heatproof bowl.
  • After 5 minutes, whisk until smooth to make the ganache.
  • Pour the ganache over the peanut butter layer and chill for 2-3 hours until set.
  • Lift the bars from the pan using parchment overhang and cut into squares.

Notes

Ensure all ingredients are at room temperature. Chilling layers is crucial for neat cuts.
Calories: 350kcal
Course: Dessert
Cuisine: American
Keyword: bars, chocolate, dessert, farmhouse, peanut butter

There’s something truly special about a homemade cookie, and these triple chocolate cookies elevate comfort to an art form. Imagine biting into a crisp edge yielding to a perfectly chewy center, each mouthful bursting with a symphony of dark, milk, and white chocolate. This recipe delivers unparalleled richness and a delightful texture. Perfect for sharing or quiet indulgence, these triple chocolate cookies promise a rewarding experience and an irresistible treat.

Table of Contents

Why You’ll Love These Triple Chocolate Cookies

  • Rich Flavor: Dark, milk, white chocolate explosion.
  • Easy Bake: Simple steps for perfect triple chocolate cookies.
  • Chewy Texture: Soft centers, crisp edges.
  • Pure Joy: A comforting, heartwarming homemade treat.

Ingredients You’ll Need

triple chocolate cookies

In our family, we believe good baking starts with good ingredients. Grandma always said, “A handful of quality makes a world of difference!” For these triple chocolate cookies, choosing the best butter, eggs, and, of course, chocolate, will truly make them shine. Gather your pantry staples and prepare for a farmhouse favorite.

  • All-Purpose Flour: 2 ¼ cups (270g), sifted to ensure a light texture.
  • Unsweetened Cocoa Powder: ½ cup (45g), a good quality Dutch-processed cocoa enhances the deep chocolate base.
  • Baking Soda: 1 teaspoon, for that perfect lift.
  • Salt: ½ teaspoon, a pinch to balance the sweetness.
  • Unsalted Butter: 1 cup (226g), softened to room temperature. This is essential for a creamy dough.
  • Granulated Sugar: ¾ cup (150g), for crisp edges and sweetness.
  • Light Brown Sugar: ¾ cup (150g), packed, for chewiness and moisture.
  • Large Eggs: 2, at room temperature.
  • Vanilla Extract: 1 teaspoon, pure vanilla elevates all the chocolate notes.
  • Dark Chocolate Chips: 1 cup (170g), high-quality, 60% cacao or higher for intense flavor.
  • Milk Chocolate Chips: 1 cup (170g), for classic sweetness and creaminess.
  • White Chocolate Chips: 1 cup (170g), good quality to avoid a waxy texture.

Substitutions & Variations

[ra_display_video url=”https://www.youtube.com/watch?v=svNOr4tslnM”]

A touch of ingenuity makes these triple chocolate cookies even better. Consider these healthy variations for your next batch:

  • Swap half the butter for unsweetened apple sauce.
  • Reduce sugar slightly or use coconut sugar.
  • Incorporate whole wheat pastry flour for fiber.
  • Opt for higher cacao dark chocolate chips.
  • Add ground flaxseed for an omega-3 boost.

If you’re looking to enhance your triple chocolate cookies, consider classic flavors with a twist. Check out the Classic Chocolate Cookies Recipe for inspiration on how to make your next batch even better.

Equipment You’ll Need

Having the right tools makes baking these incredible triple chocolate cookies a joy, not a chore. Most of these you likely already have tucked away in your kitchen drawers, ready for a warm batch of homemade goodness.

  • Large Mixing Bowls: For combining dry and wet ingredients.
  • Electric Mixer: Stand mixer or hand mixer for creaming butter and sugars.
  • Rubber Spatula: For scraping down bowls and folding in chocolate.
  • Measuring Cups and Spoons: Accurate measurements are key for consistent results.
  • Parchment Paper: Prevents sticking and ensures even baking.
  • Baking Sheets: Heavy-gauge sheets for consistent heat distribution.
  • Wire Rack: For cooling cookies completely.
  • Cookie Scoop (1.5-2 tbsp): Ensures uniformly sized triple chocolate cookies.

Step-by-Step Instructions

triple chocolate cookies

Baking these triple chocolate cookies is a cherished ritual in our family, a dance of flour and sugar, a symphony of chocolate. Follow these steps carefully, and you’ll create a batch that carries the warmth of a farmhouse kitchen and the sweetness of shared memories. Patience and love are your most important ingredients here.

  1. Prepare Your Workspace: Preheat your oven to 375°F (190°C). Line two large baking sheets with parchment paper. This simple step ensures your beautiful triple chocolate cookies won’t stick and cook evenly.
  2. Whisk Dry Ingredients: In a medium bowl, whisk together the sifted all-purpose flour, unsweetened cocoa powder, baking soda, and salt. Whisking ensures everything is evenly distributed. Set this aside for a moment.
  3. Cream Butter and Sugars: In a large mixing bowl, using an electric mixer, cream the softened unsalted butter with both the granulated sugar and packed light brown sugar. Beat on medium-high speed until the mixture is light, fluffy, and pale, about 2-3 minutes. This creaming process incorporates air, giving your triple chocolate cookies their wonderful texture.
  4. Add Eggs and Vanilla: Beat in the two large eggs, one at a time, mixing well after each addition. Scrape down the sides of the bowl to ensure everything is fully incorporated. Then, stir in the pure vanilla extract. The mixture should be smooth and glossy.
  5. Combine Wet and Dry: Gradually add the dry ingredient mixture to the wet ingredients, mixing on low speed until just combined. Be careful not to overmix; overmixing can lead to tough cookies. Stop as soon as no streaks of flour remain.
  6. Fold in the Chocolate: Now for the best part! Gently fold in the dark chocolate chips, milk chocolate chips, and white chocolate chips using a rubber spatula. Ensure the chocolate is evenly distributed throughout the dough. These are triple chocolate cookies, so every bite should be loaded!
  7. Scoop and Bake: Use a 1.5-2 tablespoon cookie scoop to drop rounded balls of dough onto the prepared baking sheets, leaving about 2 inches between each cookie. This allows them room to spread without merging.
  8. Bake to Perfection: Bake for 9-11 minutes, or until the edges are set and lightly golden, but the centers still look soft and slightly underdone. This is key for achieving that chewy, gooey texture characteristic of perfect triple chocolate cookies.
  9. Cool and Enjoy: Remove the baking sheets from the oven and let the cookies cool on the sheets for 5-10 minutes. This allows them to set up without breaking. Then, carefully transfer the warm triple chocolate cookies to a wire rack to cool completely. Enjoy these delightful treats with a glass of milk, just like we do on the farm.

Baking is all about tradition, and creating these triple chocolate cookies can become a cherished family ritual. Discover more delicious chocolate treats by following this guide to a healthy chocolate cake that everyone will love.

Pro Tips for Success

Achieving bakery-quality triple chocolate cookies at home involves a few simple tricks I’ve learned over the years. These aren’t just steps; they’re whispers from generations of bakers in my family, designed to elevate your baking from good to truly unforgettable.

  • Room Temperature Ingredients: Ensure butter and eggs are at room temperature. This allows them to cream together properly, creating a smooth, emulsified dough that results in tender, evenly baked triple chocolate cookies.
  • Don’t Overmix: Once you add the flour, mix until just combined. Overmixing develops gluten, leading to tougher cookies. A gentle hand makes all the difference for a chewy texture.
  • Chill the Dough (Optional but Recommended): If time allows, chilling the dough for at least 30 minutes, or even overnight, deepens the flavors and prevents excessive spreading, yielding thicker, chewier triple chocolate cookies.
  • Quality Chocolate Matters: Invest in good quality chocolate chips or chunks. The flavor of your triple chocolate cookies will largely depend on the quality of your chocolate. Consider chopping up a high-quality chocolate bar for varied textures.
  • Underbake Slightly: For that coveted gooey center, remove the triple chocolate cookies from the oven when the edges are set but the centers still look slightly soft and underdone. They will continue to cook on the hot baking sheet.

Storage & Reheating Tips

We always make a big batch of triple chocolate cookies on the farm because they disappear quickly! Knowing how to store them properly ensures every bite tastes as fresh as the first. Here’s how to keep your delicious treats at their best.

Store cooled triple chocolate cookies in an airtight container at room temperature for up to 3-5 days. For longer storage, you can freeze baked cookies for up to 3 months. Wrap them individually in plastic wrap, then place them in a freezer-safe bag or container. To reheat, simply let them thaw at room temperature or warm them in a preheated oven at 300°F (150°C) for 5-7 minutes until soft and warm, just like fresh from the oven.

Storing your cookies correctly ensures that they retain their delightful taste and texture. For quick and easy dessert options, learn how to whip up a delicious chocolate mug cake that complements your cookie experience.

What to Serve With These Triple Chocolate Cookies

triple chocolate cookies

While these triple chocolate cookies are a decadent treat on their own, pairing them with lighter, healthier options can create a balanced and satisfying experience. It’s all about finding that sweet spot between indulgence and wellness, a philosophy we embrace in our farmhouse kitchen.

  • Fresh Fruit Platter: A vibrant array of seasonal berries, sliced apples, or oranges offers a refreshing contrast to the rich chocolate. The natural sweetness and tartness cleanse the palate beautifully.
  • A Glass of Milk (or Almond Milk): The classic pairing! A cold glass of milk, dairy or plant-based, provides a creamy counterpoint that enhances the chocolate flavors of your triple chocolate cookies without overwhelming them.
  • Herbal Tea: A warm cup of peppermint or chamomile tea offers a calming, aromatic pairing. The subtle flavors won’t compete with the cookies but will provide a gentle, comforting accompaniment.
  • Light Yogurt Parfait: Layer Greek yogurt with a sprinkle of granola and a few berries. This adds protein and probiotics, offering a nutritious balance to your delicious triple chocolate cookie.
  • Small Green Salad: Believe it or not, a small, lightly dressed green salad can be a surprising palate cleanser before or after enjoying your cookie, adding a crisp, fresh element.

Frequently Asked Questions (FAQ)

Absolutely! Preparing the dough for your triple chocolate cookies in advance is a wonderful time-saver, a trick my mother taught me for busy farm days. You can store the unbaked dough in an airtight container in the refrigerator for up to 3 days.

Before baking, let it sit at room temperature for about 15-20 minutes to soften slightly, making it easier to scoop and ensuring even baking. This also allows the flavors to meld beautifully, often resulting in even more delicious triple chocolate cookies.

Why are my cookies spreading too much?

Cookie spreading is a common concern, especially with rich recipes like triple chocolate cookies. Several factors can cause this. Ensure your butter is softened but not melted; melted butter leads to flat cookies.

Also, make sure your oven temperature is accurate; a too-low oven can contribute to spreading. Chilling the dough for at least 30 minutes before baking can significantly help prevent over-spreading, allowing your triple chocolate cookies to retain their delightful chewiness.

What’s the best way to get perfect round cookies?

Achieving perfectly round triple chocolate cookies is simpler than you might think! My grandmother had a clever trick. Immediately after removing the cookies from the oven, while they’re still hot and pliable, use a large round cookie cutter or the rim of a glass that’s slightly larger than your cookies.

Place it over each hot cookie and gently swirl it around the edges. This coaxes the cookie into a perfectly round shape, making your triple chocolate cookies look professionally baked.

Triple chocolate cookies are a delightful dessert that combines three types of chocolate, typically dark, milk, and white chocolate, into one delicious baked good. These cookies are celebrated for their rich flavor and chewy texture, making them a popular choice among chocolate lovers and home bakers alike, as noted in this cookie article.

Final Thoughts

Baking these triple chocolate cookies is more than just following a recipe; it’s an act of love, a connection to the warmth of generations past. Each chewy bite carries the stories of farmhouse kitchens, creating new memories around a timeless treat. May these decadent triple chocolate cookies bring as much joy to your home as they do to ours.

Nutrition Information (per serving)

Serving Size: 1 cookie

NutrientAmount
Calories280 kcal
Total Fat17g
Saturated Fat10g
Cholesterol45mg
Sodium120mg
Total Carbohydrates30g
Dietary Fiber2g
Total Sugars20g
Protein4g

triple chocolate cookies

Prep Time 20 minutes
Cook Time 11 minutes
Total Time 31 minutes
Servings 24 cookies servings
Calories 280
These triple chocolate cookies elevate comfort to an art form, with a crisp edge yielding to a perfectly chewy center, each mouthful bursting with dark, milk, and white chocolate.

Ingredients

  • 2 ¼ cups all-purpose flour, sifted
  • ½ cup unsweetened cocoa powder
  • 1 teaspoon baking soda
  • ½ teaspoon salt
  • 1 cup unsalted butter, softened
  • ¾ cup granulated sugar
  • ¾ cup light brown sugar, packed
  • 2 large eggs
  • 1 teaspoon vanilla extract
  • 1 cup dark chocolate chips
  • 1 cup milk chocolate chips
  • 1 cup white chocolate chips

Instructions 

  • Preheat your oven to 375°F (190°C) and line baking sheets with parchment paper.
  • In a medium bowl, whisk together all-purpose flour, cocoa powder, baking soda, and salt.
  • In a large mixing bowl, cream the softened butter with granulated sugar and brown sugar until light and fluffy.
  • Beat in the eggs one at a time and add vanilla extract until smooth.
  • Gradually add the dry ingredients to the wet ingredients, mixing until just combined.
  • Fold in dark, milk, and white chocolate chips.
  • Use a cookie scoop to drop rounded balls of dough onto the prepared baking sheets.
  • Bake for 9-11 minutes, until edges are set but centers are still soft.
  • Cool on baking sheets for 5-10 minutes before transferring to a wire rack.

Notes

Ensure ingredients are at room temperature for best results. Chilling dough can enhance flavor and texture.
Calories: 280kcal
Course: Dessert
Cuisine: American
Keyword: baking, chocolate, cookies, dessert, homemade

Imagine a perfectly baked chocolate exterior yielding to a warm, molten center. This iconic lava cake delivers an exquisite textural contrast and intense flavor. Elegant yet simple, it suits any special occasion.

Each bite of this luscious dessert offers deep chocolate satisfaction. Master this beloved farmhouse classic in your kitchen today.

Table of Contents

Why You’ll Love This Recipe

You’ll adore this dessert for many reasons:

  • Decadent Flavor: Rich, deep chocolate and a molten core offer unparalleled indulgence.
  • Effortless Elegance: Achieve gourmet results quickly with simple instructions.
  • Thoughtful Ingredients: Enjoy a satisfying treat crafted from quality components.

Ingredients You’ll Need

Every magnificent dessert begins with the finest ingredients. Just as my grandmother always said, ‘Good food starts with good quality.’ Seek out the best you can find, and your efforts will shine through in every bite of this molten lava cake.

lava cake
  • Unsalted Butter: 1/2 cup (113g), high-quality, melted.
  • Dark Chocolate: 6 oz (170g), premium baking chocolate (70% cocoa+), chopped. This forms the heart of your lava cake.
  • Large Eggs: 2, at room temperature.
  • Egg Yolks: 2, from large eggs, also at room temperature.
  • Granulated Sugar: 1/4 cup (50g), organic cane sugar.
  • All-Purpose Flour: 1/4 cup (30g), sifted, unbleached.
  • Vanilla Extract: 1 teaspoon, pure vanilla extract.
  • Pinch of Salt: 1/8 teaspoon, sea salt.
  • Optional for dusting: Cocoa powder or powdered sugar.

Substitutions & Variations

[ra_display_video url=”https://www.youtube.com/watch?v=gW3JtHpuzrk”]

Adapt this delicious lava cake with these healthy swaps:

  • Gluten-Free: Use 1:1 GF flour.
  • Dairy-Free: Plant-based butter/chocolate.
  • Sugar Reduced: Less sugar or natural sweetener.
  • Flavor: Espresso powder or orange zest for your molten lava cake.

If you’re looking to lighten up your dessert, consider trying some healthier chocolate chip cookie bars. These substitutions can elevate your lava cake while maintaining that rich flavor you love, so check out our delicious chocolate chip cookie bars here.

Equipment You’ll Need

Having the right tools makes all the difference when crafting this special dessert. These simple items help ensure your lava cake turns out perfectly every time.

  • Ramekins: Four 4-oz (1/2 cup) oven-safe ramekins.
  • Mixing Bowls: A few sizes.
  • Whisk: For smooth incorporation.
  • Rubber Spatula: For gentle folding.
  • Small Saucepan: For melting butter and chocolate.
  • Baking Sheet: To hold ramekins.

Step-by-Step Instructions

Baking, like life, unfolds beautifully one step at a time. Follow these instructions carefully, and soon you’ll unveil a truly magnificent molten lava cake. My grandmother always said, ‘Patience is a baker’s best friend.’

lava cake
  1. Prepare Your Ramekins: Preheat your oven to 425°F (220°C). Generously butter and lightly flour four 4-oz ramekins, tapping out excess. This prevents sticking.
  2. Melt Chocolate and Butter: In a heatproof bowl over simmering water, melt unsalted butter and chopped dark chocolate. Stir until smooth, then cool slightly. This forms the rich base.
  3. Whisk Eggs and Sugar: In a separate bowl, whisk large eggs, egg yolks, and granulated sugar until pale and slightly thickened (this takes about 2-3 minutes).
  4. Combine Mixtures: Slowly pour the cooled chocolate mixture into the egg mixture, whisking constantly until just combined. Do not overmix.
  5. Fold in Flour and Vanilla: Gently fold in sifted all-purpose flour, vanilla extract, and a pinch of salt. Mix until just incorporated. Overmixing creates toughness.
  6. Fill Ramekins: Divide the batter evenly among the prepared ramekins. Place them on a baking sheet.
  7. Bake to Perfection: Bake for 12-14 minutes. Edges should appear set, but the center should still be quite jiggly. This ensures a molten heart of your lava cake.
  8. Serve Immediately: Carefully remove from oven. Cool 1-2 minutes. Run a thin knife around each, then invert onto serving plates. Dust with cocoa or powdered sugar if desired. Serve your warm lava cake immediately.

To achieve that perfect texture in your lava cake, the quality of chocolate you use is crucial. Ensure you have the best ingredients by using premium milk chocolate bars from our selection here.

Pro Tips for Success

Baking a perfect dessert is an art refined with practice and a few trusted secrets. These tips are little whispers from my grandmother’s kitchen, ensuring your lava cake is always a triumph.

  • Room Temperature Eggs: Use room temperature eggs; they emulsify better for a smoother batter.
  • Don’t Overmix: Mix batter only until just combined to prevent toughness.
  • Exact Baking Time: Ideal bake time means set edges but a jiggly center. Adjust for your oven, ensuring a molten lava cake.
  • Test One First: If unsure, bake a single portion first to gauge timing.
  • Quality Chocolate Matters: Invest in good quality dark chocolate. It’s the star of this dessert.
  • Grease Thoroughly: Don’t skimp on buttering and flouring ramekins. This ensures easy unmolding.

Storage & Reheating Tips

A fresh lava cake is best, but storage is simple. While truly molten when fresh, you can still enjoy this treat later.

  • Storage: Store cooled lava cake in an airtight container in the refrigerator for 2-3 days. The center solidifies.
  • Reheating: To regain the molten center, reheat. Place in a microwave for 20-30 seconds, or in a preheated oven at 350°F (175°C) for 5-7 minutes, until gooey.

Even though enjoying a fresh lava cake is ideal, you can still savor this dessert later. For a delightful quick snack, consider pairing your leftovers with our homemade granola bars; find the recipe here.

What to Serve With This Recipe

A truly memorable dessert often shines brightest when paired with simple, wholesome accompaniments. My grandmother believed in balance. These suggestions complement this lava cake beautifully.

lava cake
  • Fresh Berries: A medley of raspberries, strawberries, or blueberries adds bright, tart contrast.
  • A Dollop of Cream: A small spoonful of freshly whipped cream or light Greek yogurt.
  • Mint Sprig: A fresh mint leaf garnishes beautifully and refreshes.
  • Dusting of Cocoa: A simple sprinkle of high-quality cocoa powder enhances chocolate notes.

Frequently Asked Questions (FAQ)

I often get asked about this molten lava cake. Here are common questions:

Can I prepare the lava cake batter ahead of time?

Yes! Prepare batter, cover ramekins, and refrigerate for up to 24 hours. Before baking, let them sit at room temperature for 15-20 minutes, then bake as usual. This simplifies entertaining.

Why didn’t my lava cake have a molten center?

Overbaking is the usual culprit. Oven temperatures vary, so watch closely. Edges should be set, but the center still jiggly. Reduce bake time by a minute or two next time for a perfect molten lava cake.

What if I don’t have ramekins for this chocolate lava cake?

No ramekins? No problem! Use other small, oven-safe dishes like custard cups or ceramic mugs.

Muffin tins also work, but adjust bake time. Ensure they are generously buttered and floured for easy removal.

Lava cake, often referred to as molten chocolate cake, is a beloved dessert that features a gooey, molten center and a delicate outer layer. This dessert’s unique texture and flavor continue to captivate dessert lovers around the world; learn more about its history in this informative article.

Final Thoughts

This lava cake is more than a recipe; it’s a legacy. It brings warmth, comfort, and generations of joy to your table, just like those treasured farmhouse memories. Sharing this simple, decadent lava cake creates new stories, nourishing both body and soul. May every molten bite remind you of home.

Nutrition Information (per serving)

Understanding what goes into our food is part of responsible baking. Here’s an approximate nutritional breakdown for one serving of this lava cake, based on the ingredients listed, assuming 4 servings.

NutrientAmount
Calories450 kcal
Total Fat32g
Saturated Fat19g
Cholesterol180mg
Sodium60mg
Total Carbohydrates35g
Dietary Fiber3g
Total Sugars25g
Protein8g

lava cake

Prep Time 20 minutes
Cook Time 14 minutes
Total Time 34 minutes
Servings 4 servings servings
Calories 450
Imagine a perfectly baked chocolate exterior yielding to a warm, molten center. This iconic lava cake delivers an exquisite textural contrast and intense flavor.

Ingredients

  • 1/2 cup (113g) unsalted butter, melted
  • 6 oz (170g) dark chocolate, chopped
  • 2 large eggs, at room temperature
  • 2 egg yolks, at room temperature
  • 1/4 cup (50g) granulated sugar
  • 1/4 cup (30g) all-purpose flour, sifted
  • 1 teaspoon vanilla extract
  • 1/8 teaspoon sea salt
  • Optional: cocoa powder or powdered sugar for dusting

Instructions 

  • Preheat your oven to 425°F (220°C). Generously butter and lightly flour four 4-oz ramekins.
  • Melt the unsalted butter and chopped dark chocolate in a heatproof bowl over simmering water until smooth, then cool slightly.
  • In a separate bowl, whisk large eggs, egg yolks, and granulated sugar until pale and slightly thickened.
  • Slowly pour the cooled chocolate mixture into the egg mixture, whisking constantly until just combined.
  • Gently fold in sifted all-purpose flour, vanilla extract, and a pinch of salt until just incorporated.
  • Divide the batter evenly among the prepared ramekins and place them on a baking sheet.
  • Bake for 12-14 minutes until edges appear set but the center is still jiggly.
  • Cool for 1-2 minutes, run a knife around each, then invert onto serving plates. Dust with cocoa or powdered sugar if desired.

Notes

Store cooled lava cake in an airtight container in the refrigerator for 2-3 days. Reheat in the microwave for 20-30 seconds or in a preheated oven at 350°F (175°C) for 5-7 minutes.
Calories: 450kcal
Course: Dessert
Cuisine: American
Keyword: chocolate, dessert, molten lava cake