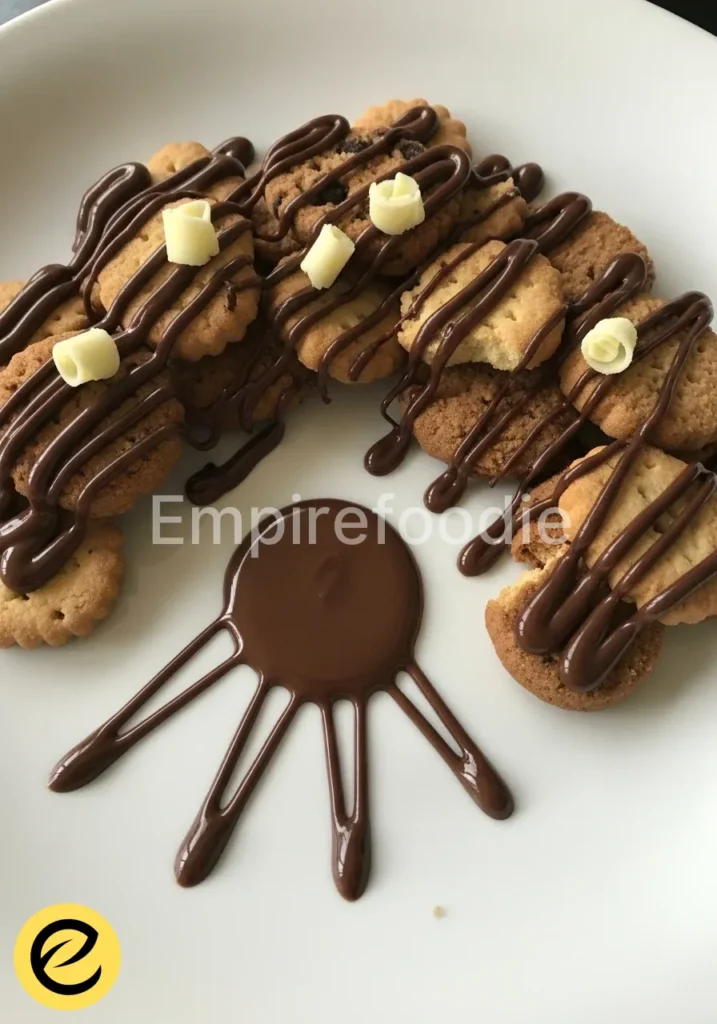
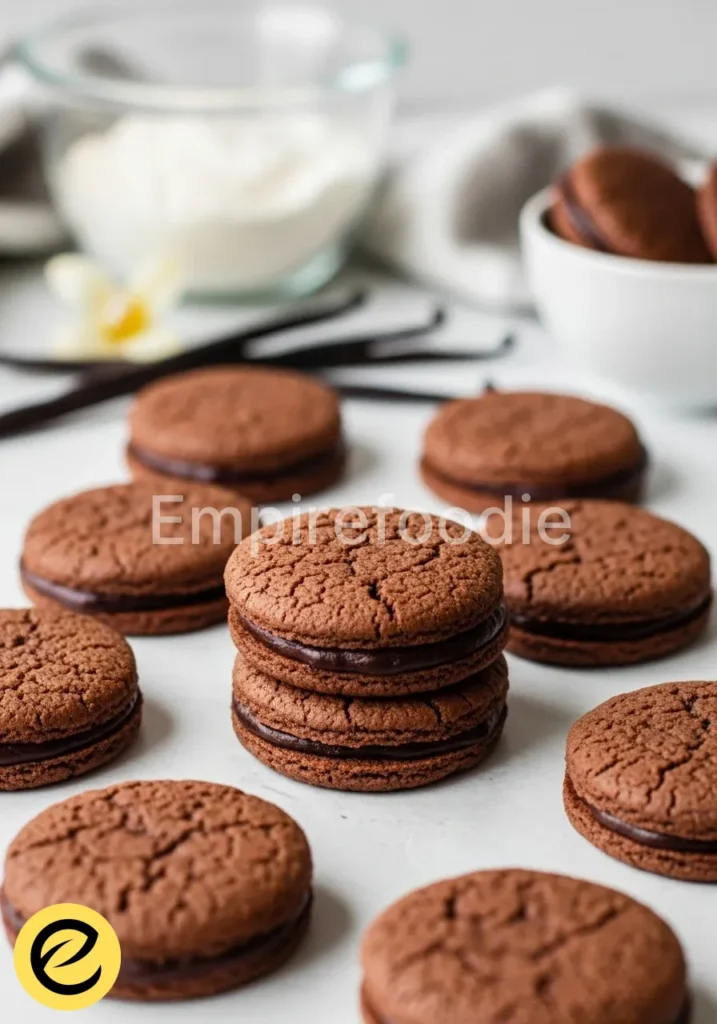
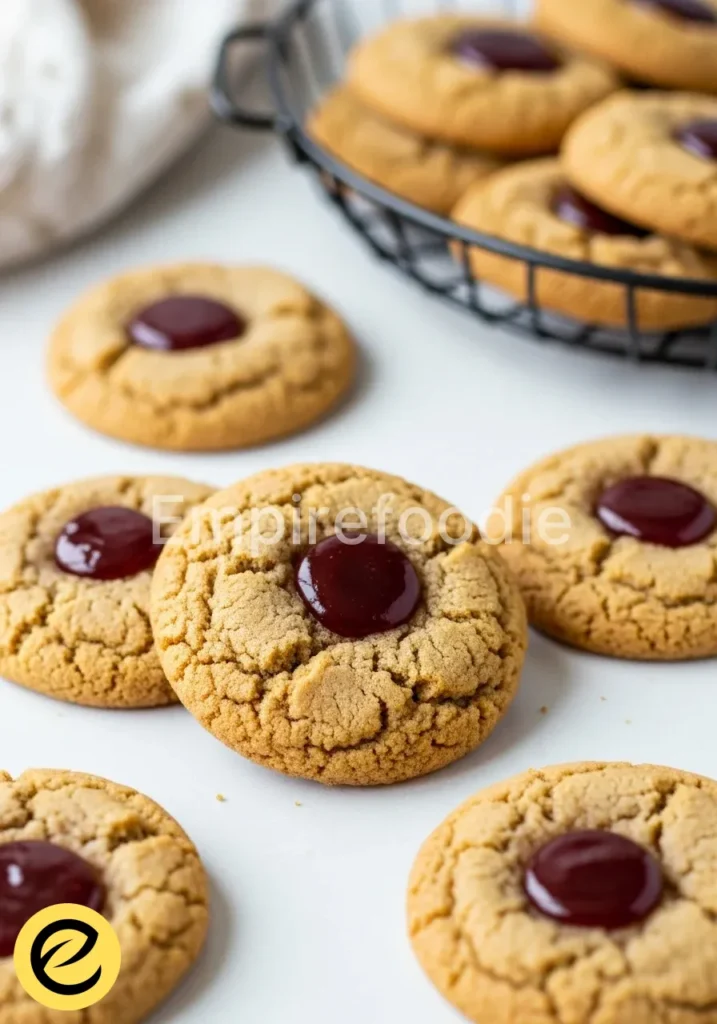
Experience the profound delight of truly exceptional chocolate sugar cookies. This recipe meticulously guides you through crafting treats that boast an intense cocoa flavor and a perfectly tender, melt-in-your-mouth texture. We delve into the precise techniques and culinary science required, ensuring your chocolate sugar cookies achieve consistent, professional-grade results every time. Prepare to bake cookies that are both profoundly satisfying and technically perfect.
Table of Contents
Why You’ll Love This Recipe
- Achieve consistently tender, deeply flavored chocolate sugar cookies.
- Master precise baking techniques for professional-grade results effortlessly.
- Utilize wholesome ingredients for a balanced treat, offering nuanced flavor.
- Demystify the scientific principles behind perfect cookie structure and texture.
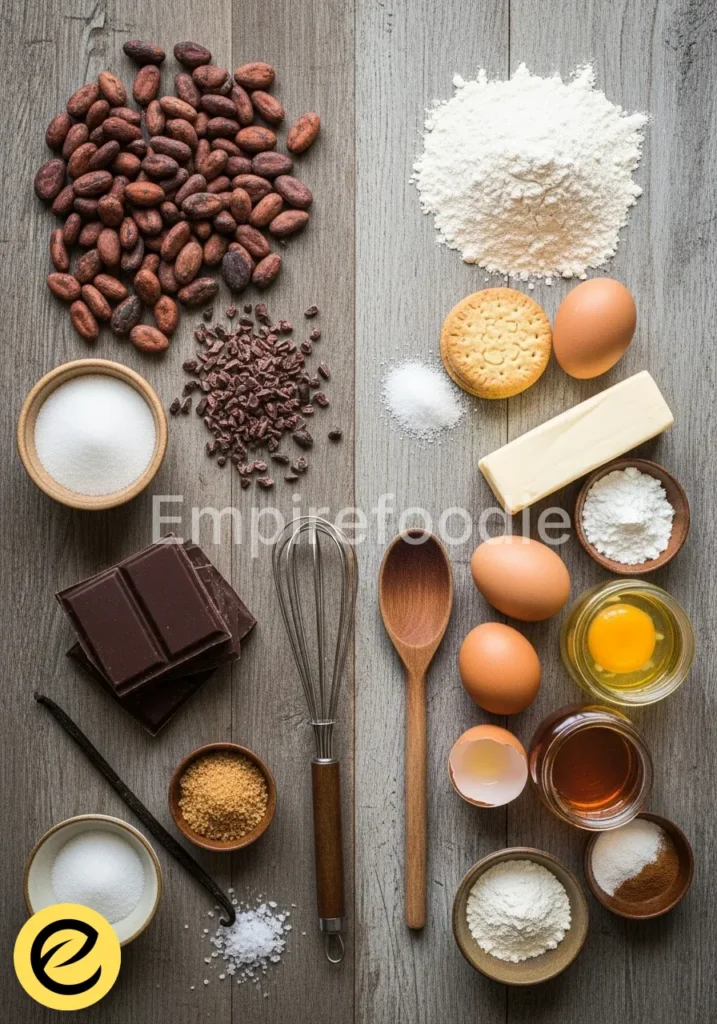
Ingredients You’ll Need
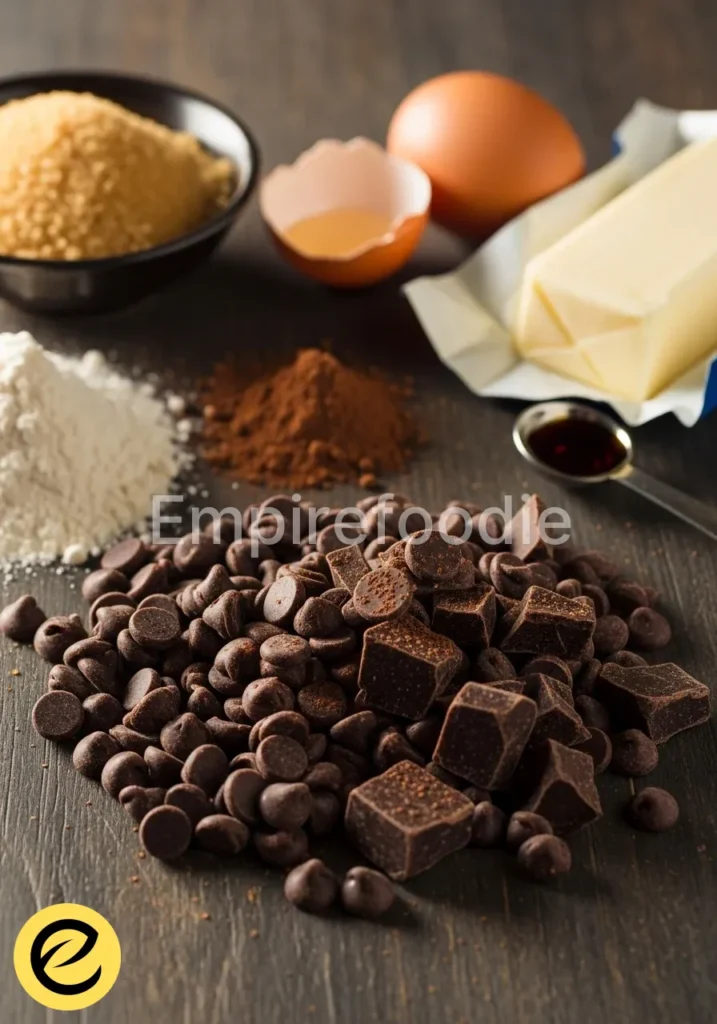
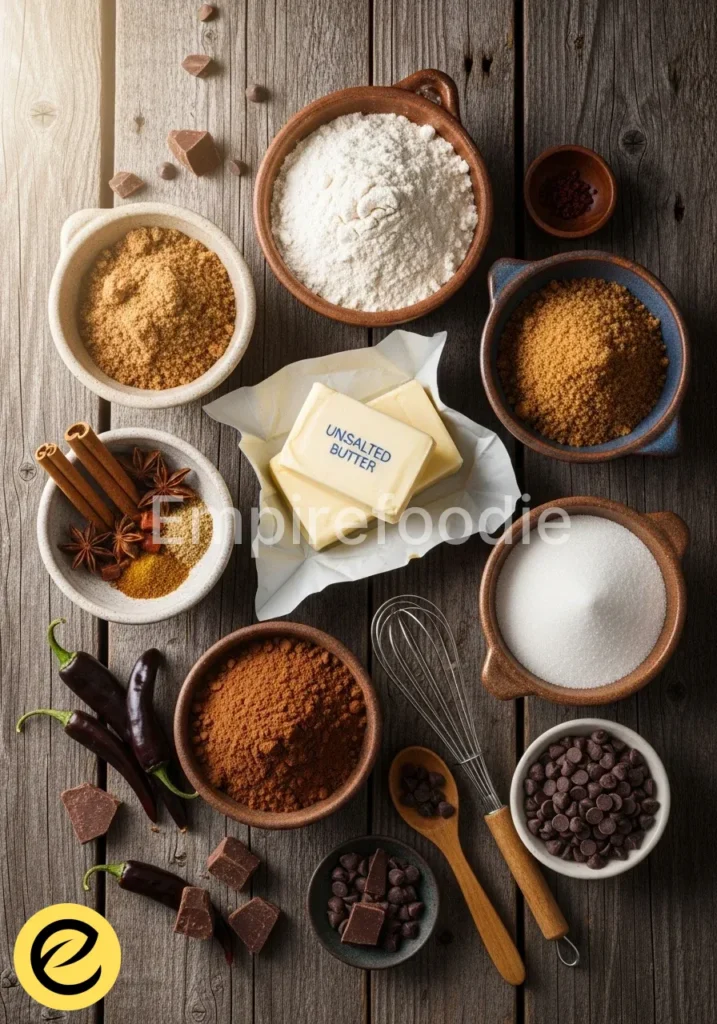
Ingredient quality directly correlates with final product excellence. Choose premium cocoa for profound chocolate flavor and fresh dairy for optimal emulsion stability. Precision in measurement is paramount.
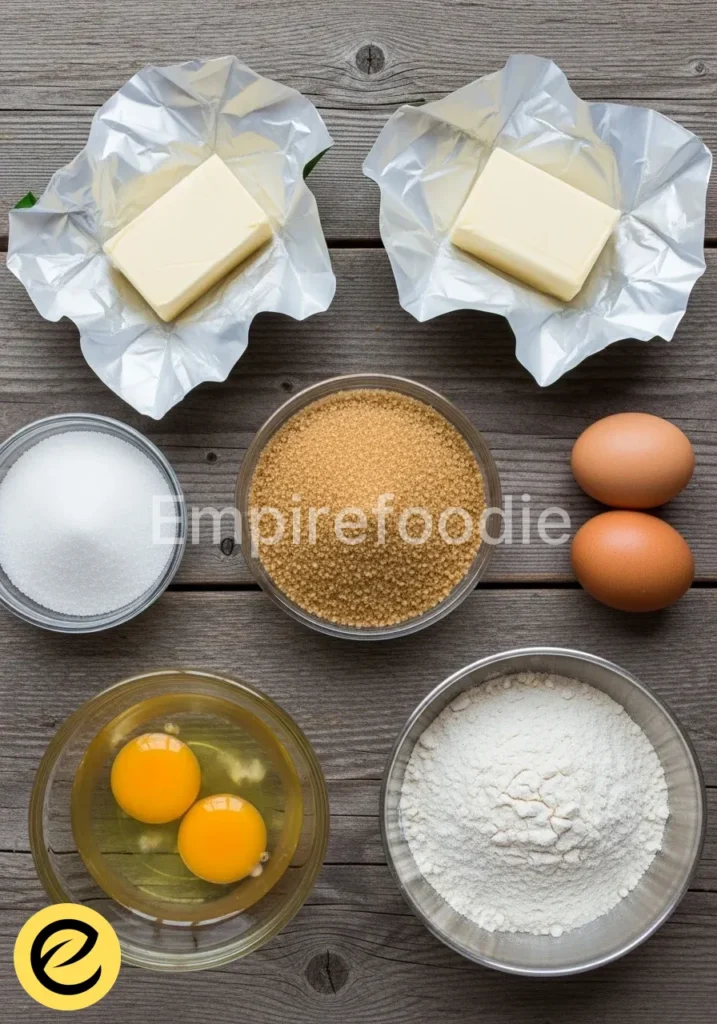
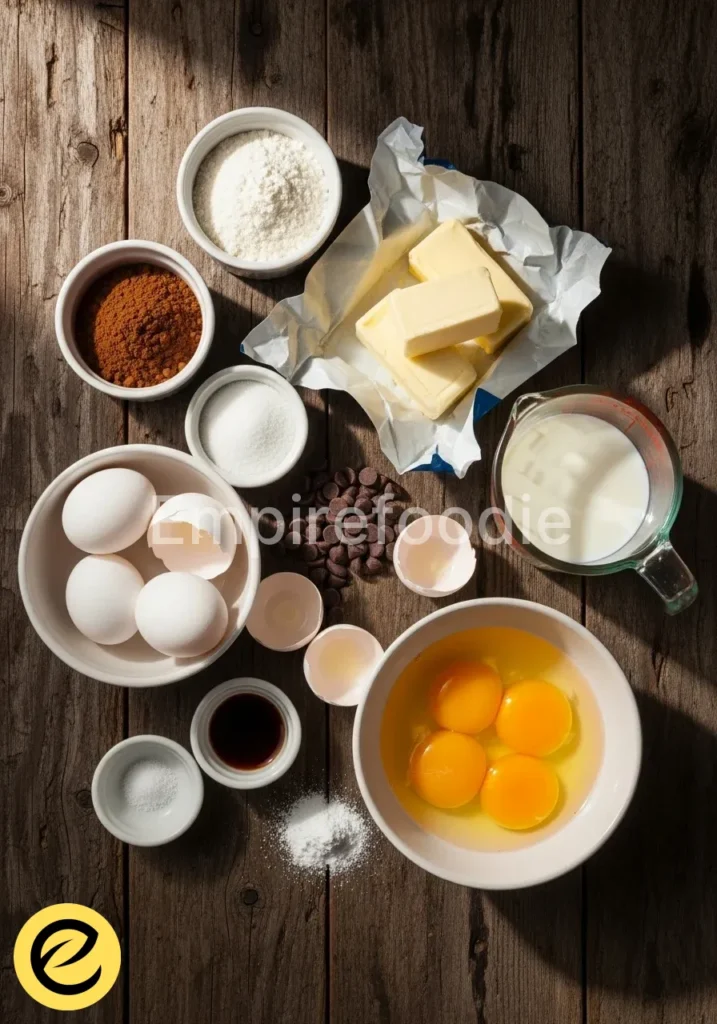
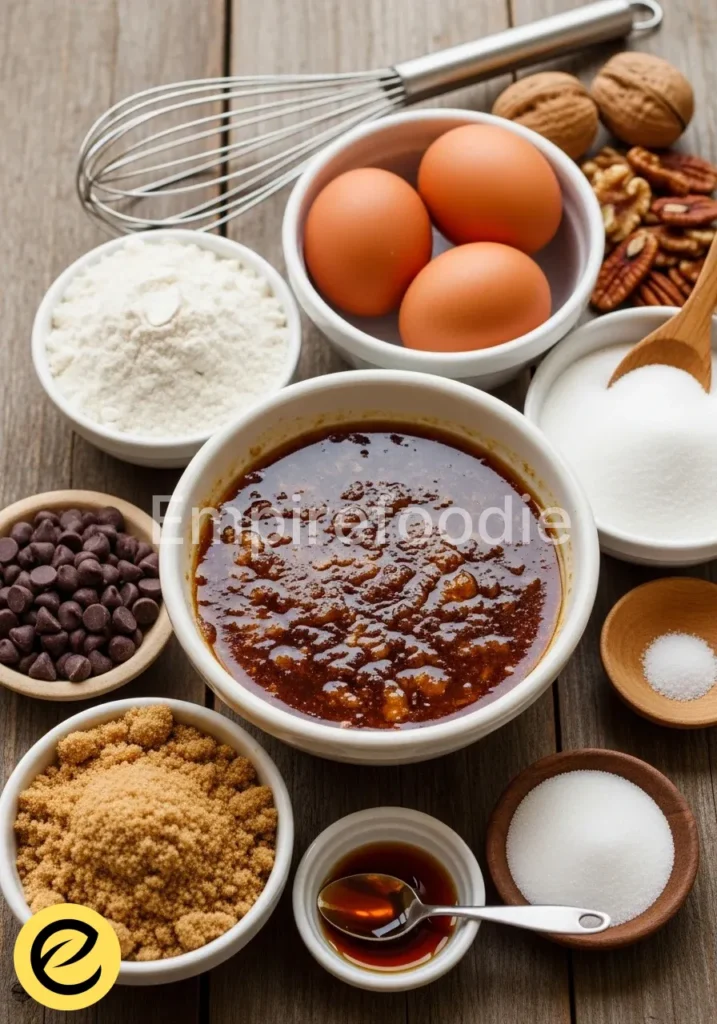
- Unsalted Butter: 1 cup (226g), softened to precisely 68°F (20°C). This specific temperature ensures proper creaming and aeration without compromising emulsion stability.
- Granulated Sugar: 1 ½ cups (300g). Its crystalline structure contributes to spread and browning through the Maillard reaction.
- Light Brown Sugar: ½ cup (100g), packed. The molasses content adds moisture, chewiness, and a subtle caramel note, complementing the deep chocolate.
- Large Eggs: 2, at room temperature. Emulsifiers, they bind ingredients and add richness; room temperature facilitates even incorporation.
- Vanilla Extract: 2 teaspoons. Essential for enhancing chocolate’s complexity, not merely masking flavors.
- All-Purpose Flour: 2 ¾ cups (350g), spooned and leveled. The primary structural component, its protein content dictates chewiness versus tenderness.
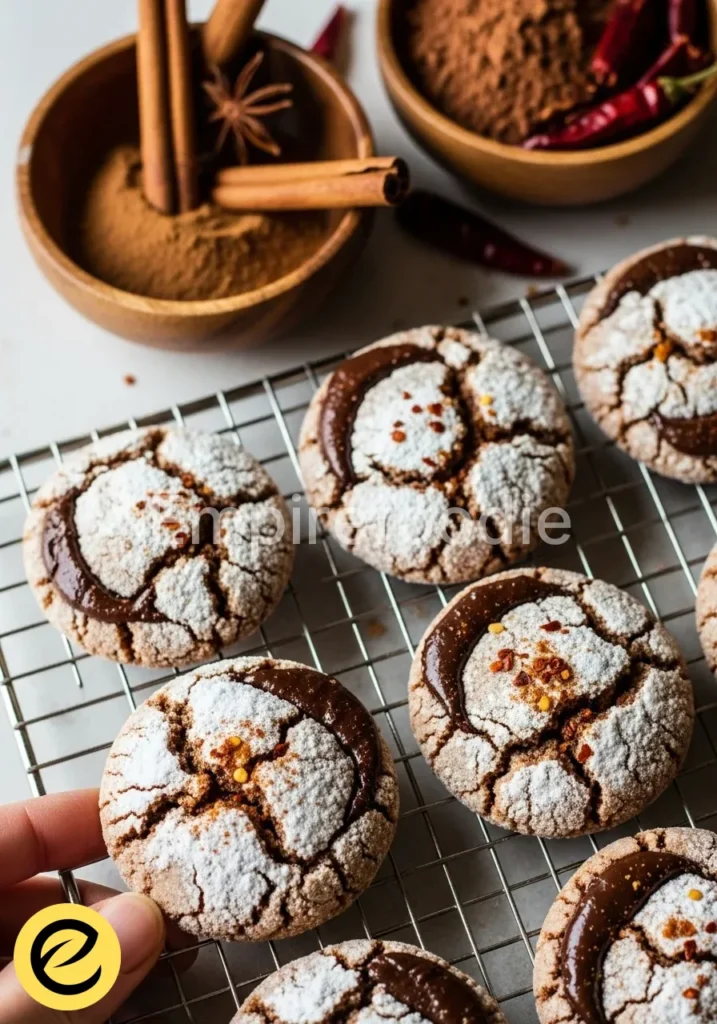
- Unsweetened Cocoa Powder: ¾ cup (64g), Dutch-processed for a darker color and milder, less acidic flavor profile. This choice significantly impacts the intensity of your chocolate sugar cookies.
- Baking Soda: 1 teaspoon. A leavening agent that reacts with acidic components (even in Dutch-processed cocoa, residual acidity can activate it) to create lift and tenderness.
- Salt: 1 teaspoon. Crucial for balancing sweetness and intensifying other flavors, particularly chocolate.
- Optional: Chocolate Chips or Chunks: 1 cup (170g), high-quality semi-sweet or dark chocolate. Adds textural variation and pockets of molten chocolate.
Substitutions & Variations
[ra_display_video url=”https://www.youtube.com/watch?v=VHkQEw_2fKo”]
Modifying this recipe requires an understanding of ingredient functionality to maintain structural integrity and flavor balance in your chocolate sugar cookies. For a healthier profile, consider these precise adjustments. To increase fiber, substitute up to 50% of the all-purpose flour with whole wheat pastry flour.
This retains tenderness while boosting nutritional content. For reduced sugar, use a high-quality granulated erythritol blend, adjusting to taste, though texture may vary slightly due to sugar’s role in moisture retention and browning. Enhance the depth of flavor by incorporating espresso powder (1-2 teaspoons) with the dry ingredients; it magnifies chocolate notes without imparting a coffee flavor.
To introduce a textural element, finely chop nuts like almonds or walnuts and fold them into the dough with the optional chocolate chips. Always remember that substitutions can alter the precise scientific balance of your chocolate sugar cookies, so adjust incrementally.
If you’re looking to modify your cookie recipe while still achieving perfect results, consider the adjustments outlined here. To explore a delicious variation, check out these chocolate chip cookie bars that use a similar technique.
Equipment You’ll Need
- Stand mixer with paddle attachment or electric hand mixer
- Large mixing bowls
- Measuring cups and spoons
- Rubber spatula
- Parchment paper
- Baking sheets
- Wire cooling rack
- Rolling pin
- Cookie cutters (optional)
- Oven thermometer (highly recommended for precise temperature control)
Step-by-Step Instructions
Precision is key to successful baking. Follow these steps meticulously to achieve perfectly structured and flavored chocolate sugar cookies.
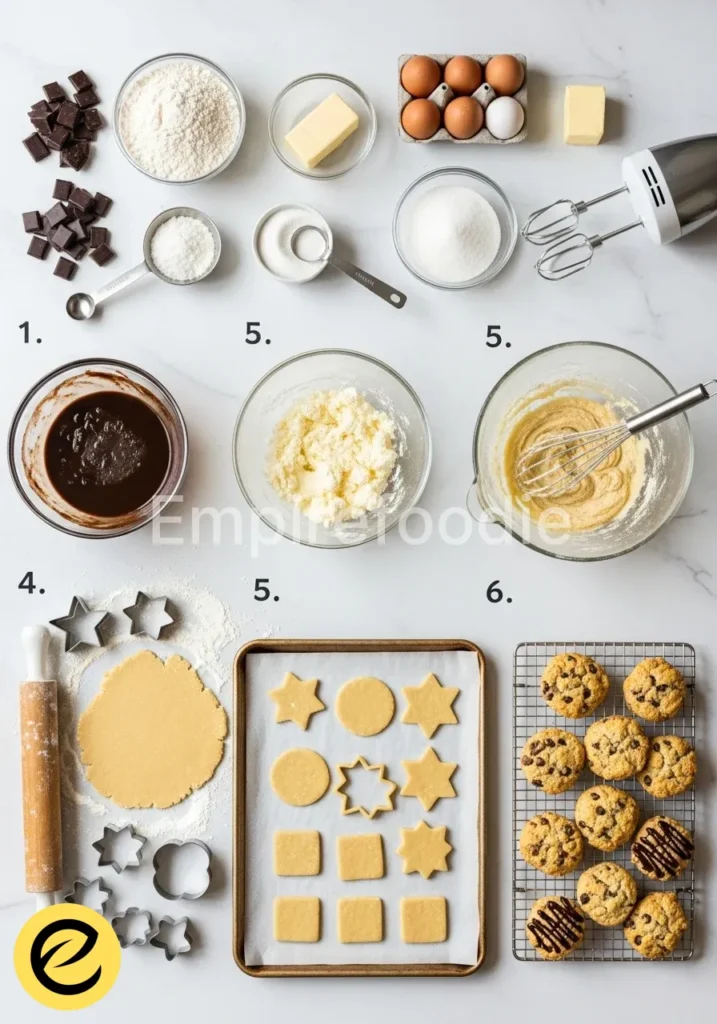
- Cream Butter and Sugars: In the bowl of a stand mixer fitted with the paddle attachment, or using an electric hand mixer, cream the softened butter, granulated sugar, and brown sugar on medium speed for 3-5 minutes. This process, known as creaming, incorporates air into the butter, creating pockets that will expand during baking, contributing to a lighter texture in your chocolate sugar cookies. The mixture should be light, fluffy, and pale in color.
- Add Eggs and Vanilla: Incorporate the eggs one at a time, beating well after each addition until fully combined. Scrape down the sides of the bowl to ensure even distribution. Add the vanilla extract and mix until just incorporated. Overmixing at this stage can develop gluten too early.
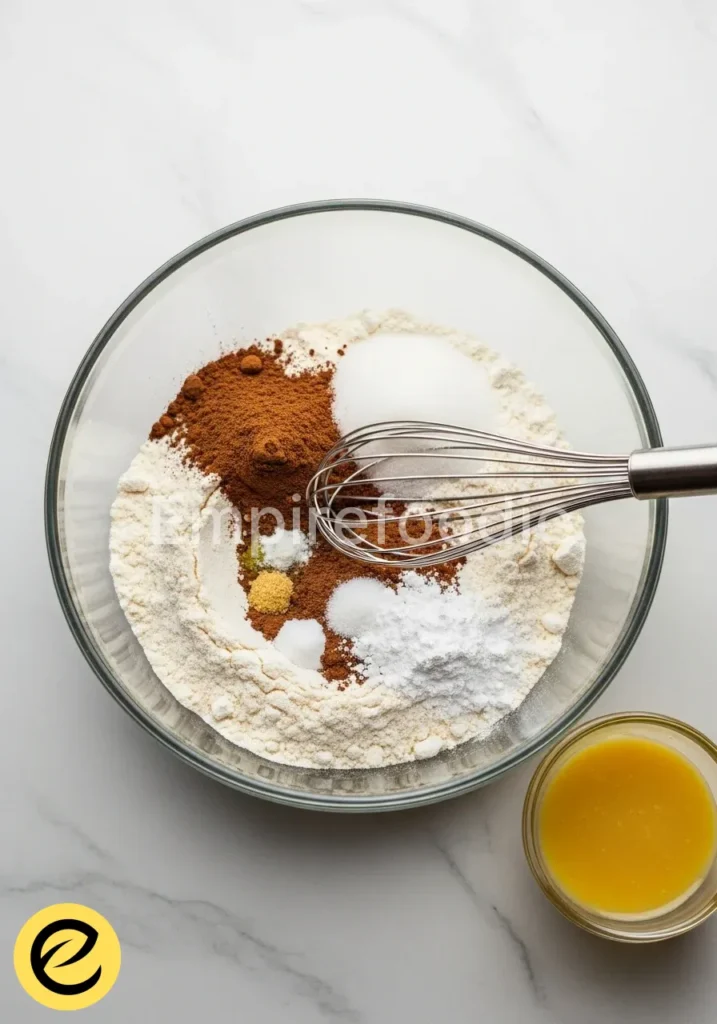
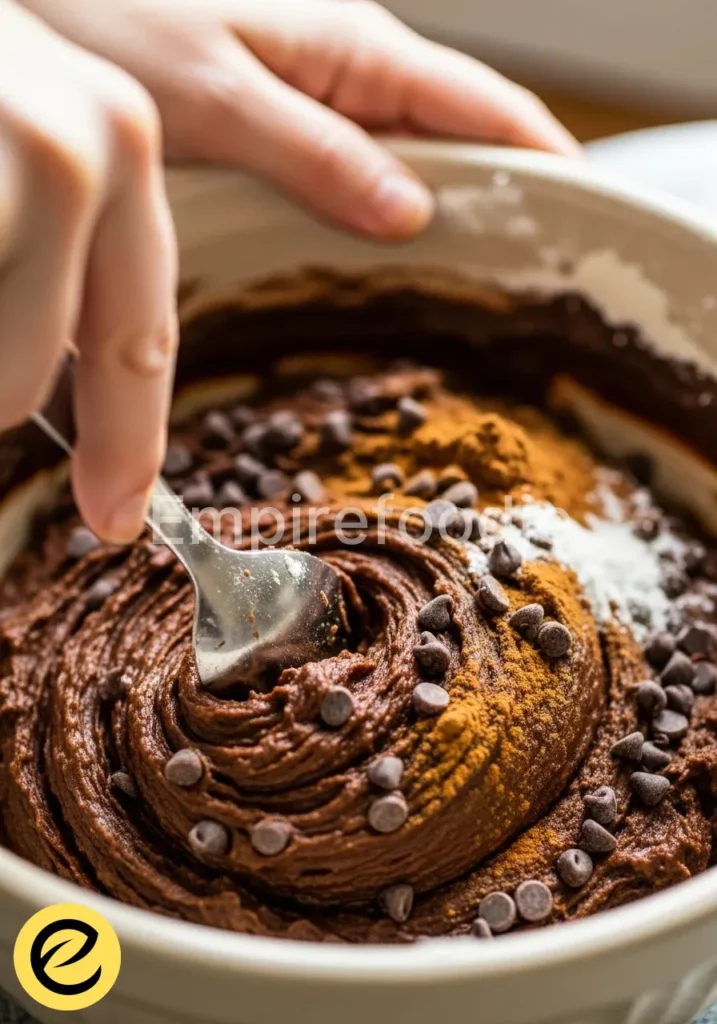
- Whisk Dry Ingredients: In a separate large bowl, whisk together the all-purpose flour, Dutch-processed cocoa powder, baking soda, and salt. Whisking ensures these dry ingredients are uniformly distributed, preventing clumps of leavening agent or cocoa in your finished chocolate sugar cookies.
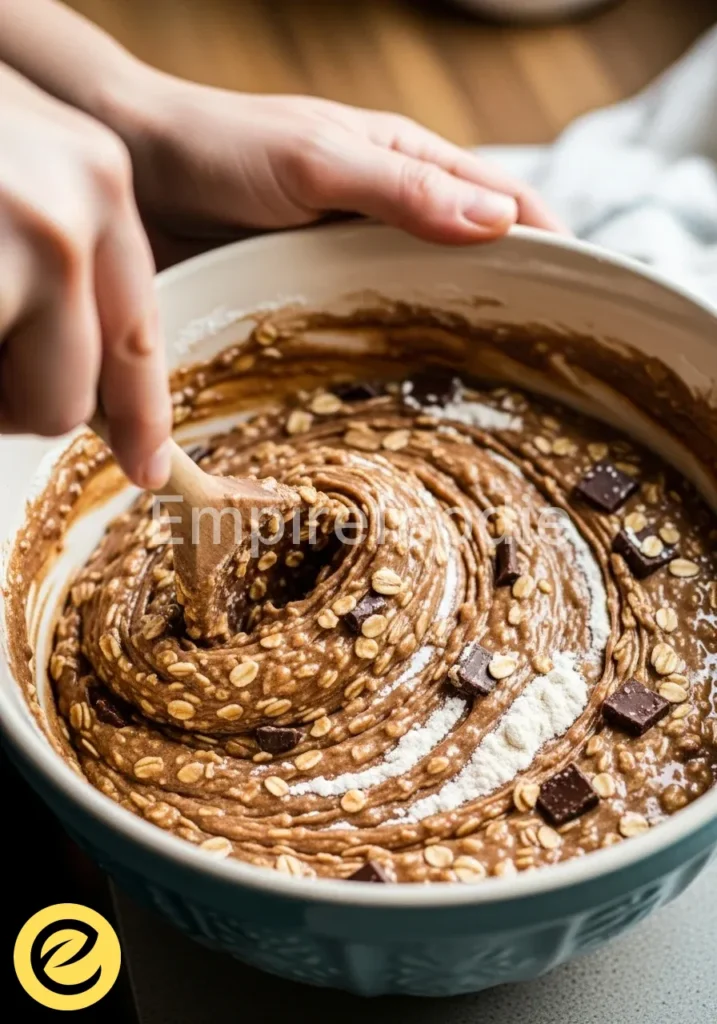
- Combine Wet and Dry: Gradually add the dry ingredient mixture to the wet ingredients in three additions, mixing on low speed until just combined after each. The key here is to mix until no streaks of flour remain; overmixing develops gluten, leading to tough cookies.
- Optional Add-ins: If using, fold in chocolate chips or chunks with a rubber spatula until evenly distributed. This ensures consistent chocolate distribution throughout your chocolate sugar cookies.
- Chill the Dough: Divide the dough in half, flatten each half into a disk, wrap tightly in plastic wrap, and refrigerate for at least 1 hour, or preferably 2-3 hours. Chilling solidifies the butter, reducing spread, and allows the flour to fully hydrate, resulting in a more tender and flavorful cookie.
- Preheat Oven and Prepare Baking Sheets: Preheat your oven to 375°F (190°C) with racks positioned in the center. Line baking sheets with parchment paper. This prevents sticking and promotes even heat distribution.
- Roll and Cut Dough: On a lightly floured surface, roll out one disk of chilled dough to a thickness of ¼ inch (0.6 cm). Use your desired cookie cutters to cut shapes. Reroll scraps gently, chilling them briefly if they become too warm, to maintain dough integrity.
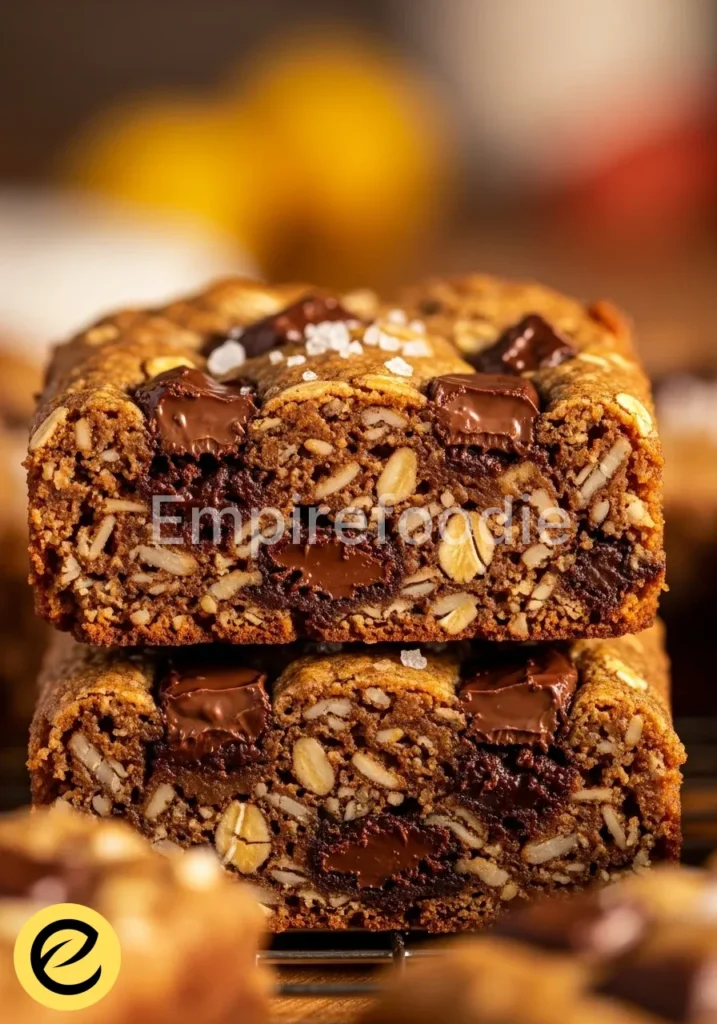
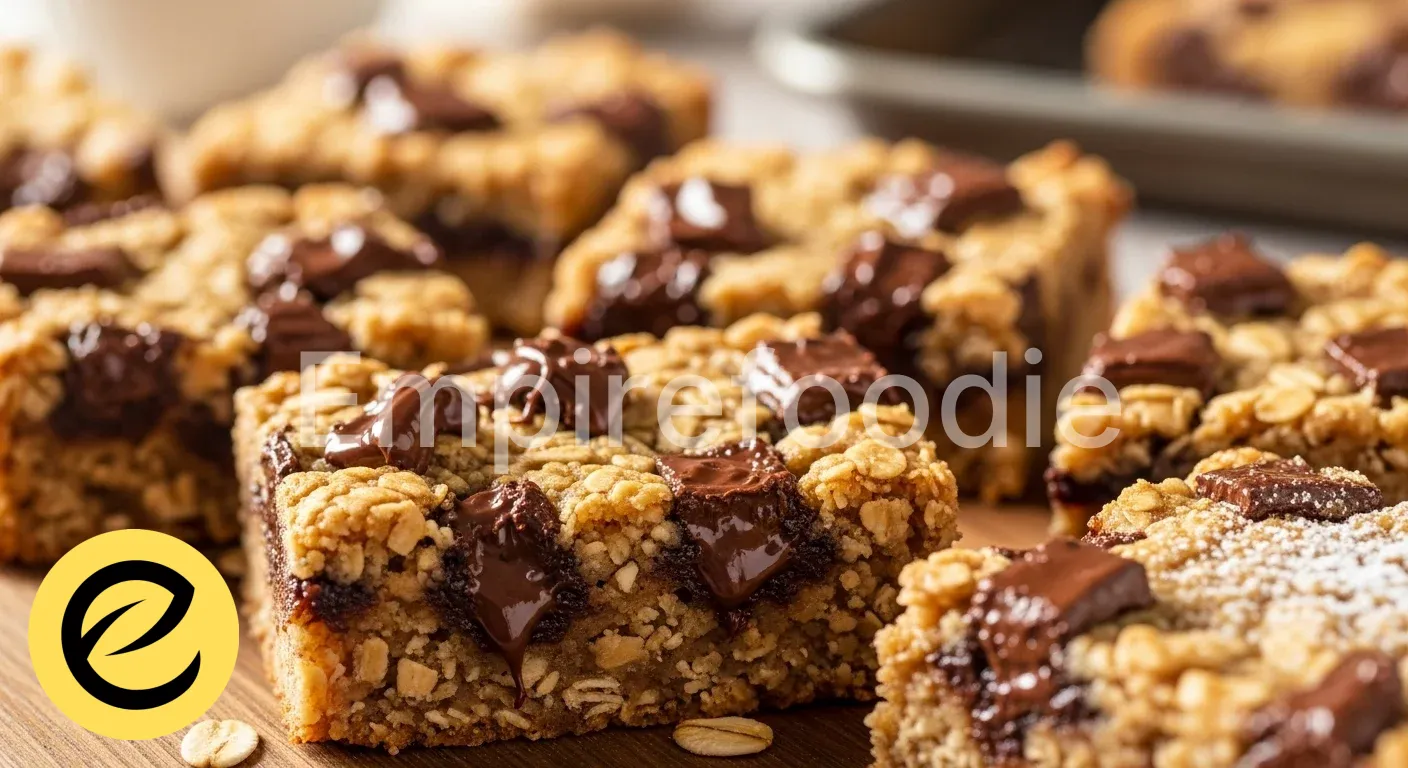
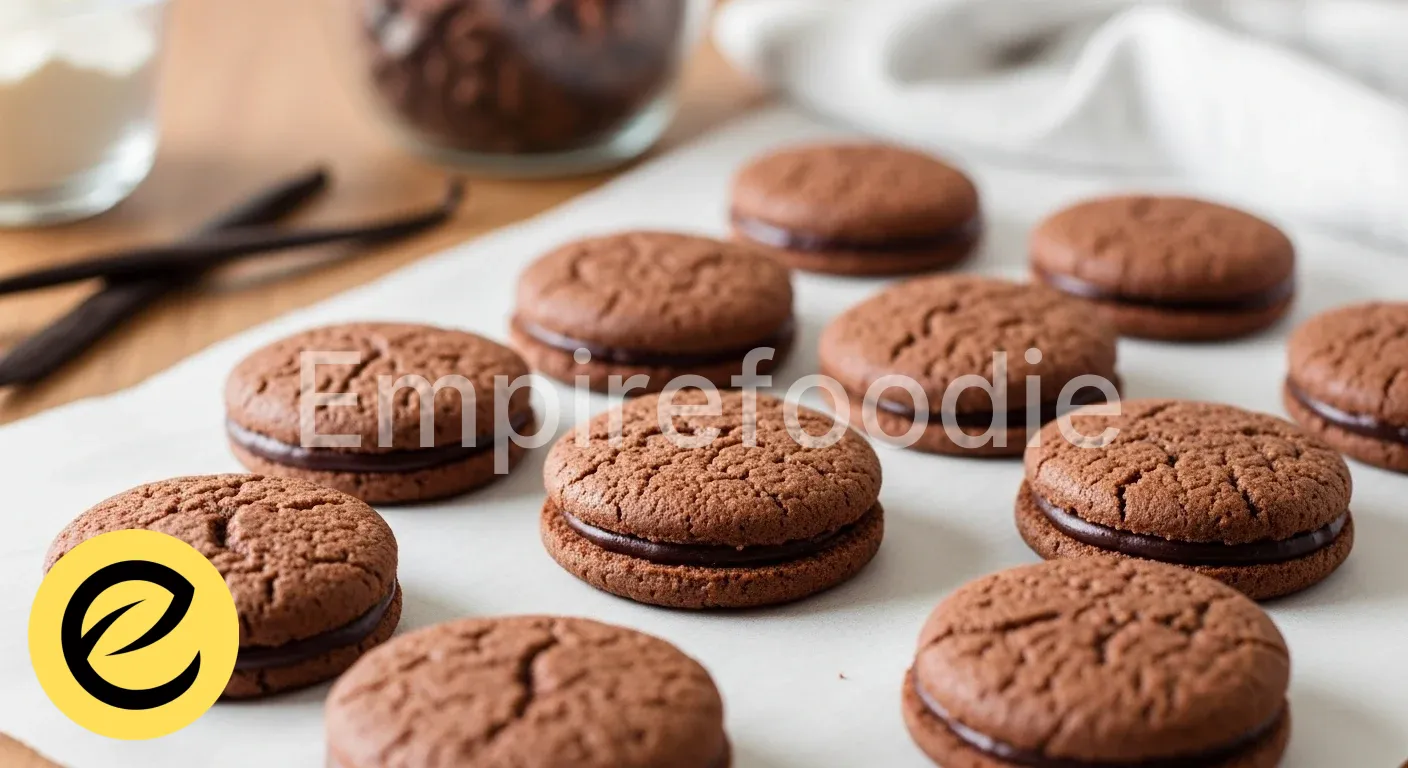
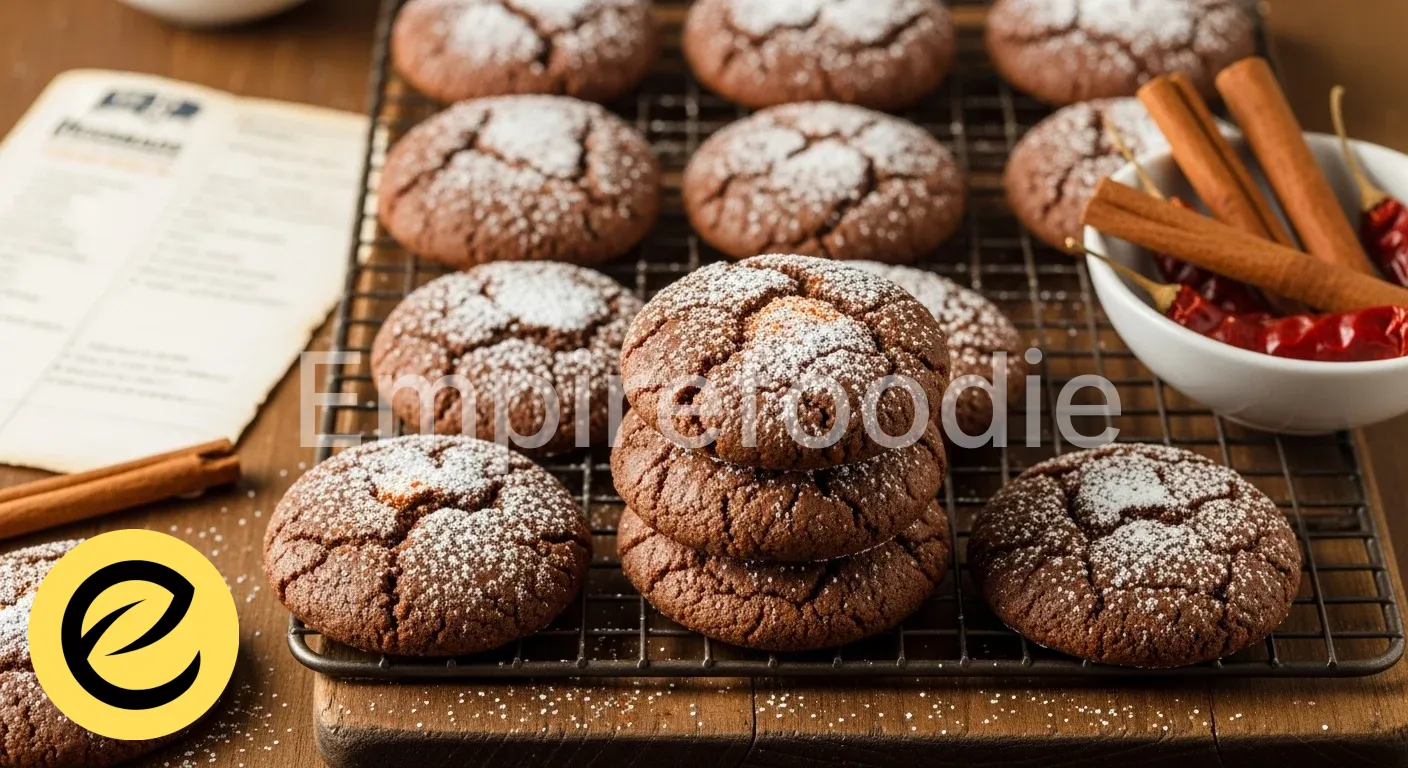
- Bake: Place the cut chocolate sugar cookies 1 inch apart on the prepared baking sheets. Bake for 8-10 minutes, or until the edges are just set but the centers still look slightly soft. Overbaking leads to dry, crumbly cookies.
- Cool: Remove the baking sheets from the oven and let the cookies cool on the sheet for 5 minutes before transferring them to a wire rack to cool completely. This crucial step allows the cookies to firm up and prevents breakage.
Baking is all about precision, and mastering your methods can significantly enhance your results. For a delightful chocolate experience, incorporate these tips while making milk chocolate bars alongside your cookies.
Pro Tips for Success
Achieving superlative chocolate sugar cookies hinges on understanding the underlying scientific principles:
- Butter Temperature is Non-Negotiable: Softened butter at 68°F (20°C) is critical. Colder butter won’t cream properly, leading to a dense cookie. Warmer butter will melt too quickly, causing excessive spread. The precise temperature facilitates optimal air incorporation during creaming.
- Accurate Flour Measurement: Always use the spoon-and-level method. Scooping flour directly with a measuring cup compacts it, adding up to 25% more flour than intended. Excess flour leads to dry, tough chocolate sugar cookies.
- The Science of Chilling: Chilling the dough serves multiple functions. Firstly, it solidifies the butter, which retards spread during baking. Secondly, it allows the gluten strands to relax, preventing a tough texture. Thirdly, it gives the flour time to fully hydrate, intensifying flavor and resulting in a more tender crumb. Do not skip this step for truly professional chocolate sugar cookies.
- Oven Thermometer: Your oven’s internal thermostat is often inaccurate. An external oven thermometer provides a true reading, allowing you to bake at the precise temperature required for consistent results and optimal browning (Maillard reaction) without burning.
- Don’t Overmix: Once flour is added, mix only until just combined. Overmixing develops gluten, leading to a dense, chewy, and less tender cookie, detracting from the desired delicate texture of your chocolate sugar cookies.
Storage & Reheating Tips
Proper storage is essential to maintain the texture and flavor of your expertly crafted chocolate sugar cookies.
- Room Temperature: Store cooled cookies in an airtight container at room temperature for up to 3-5 days. To prevent them from drying out, consider placing a slice of bread in the container; the bread’s moisture will transfer to the cookies.
- Freezing Dough: Unbaked cookie dough can be wrapped tightly in plastic wrap and then placed in a freezer-safe bag for up to 3 months. Thaw in the refrigerator overnight before rolling and baking. Alternatively, roll out the dough, cut shapes, and freeze the cutouts on a parchment-lined tray. Once frozen solid, transfer to a freezer-safe bag. Bake directly from frozen, adding 2-4 minutes to the baking time.
- Freezing Baked Cookies: Fully cooled chocolate sugar cookies can be frozen in a single layer on a baking sheet until solid, then transferred to an airtight freezer-safe container or bag for up to 3 months. Thaw at room temperature for optimal texture. Reheating is generally not recommended as it can dry them out.
Proper storage is key to keep your chocolate sugar cookies fresh and delicious. For additional insights on maintaining quality, learn about the ideal conditions for chocolate and biscuits.
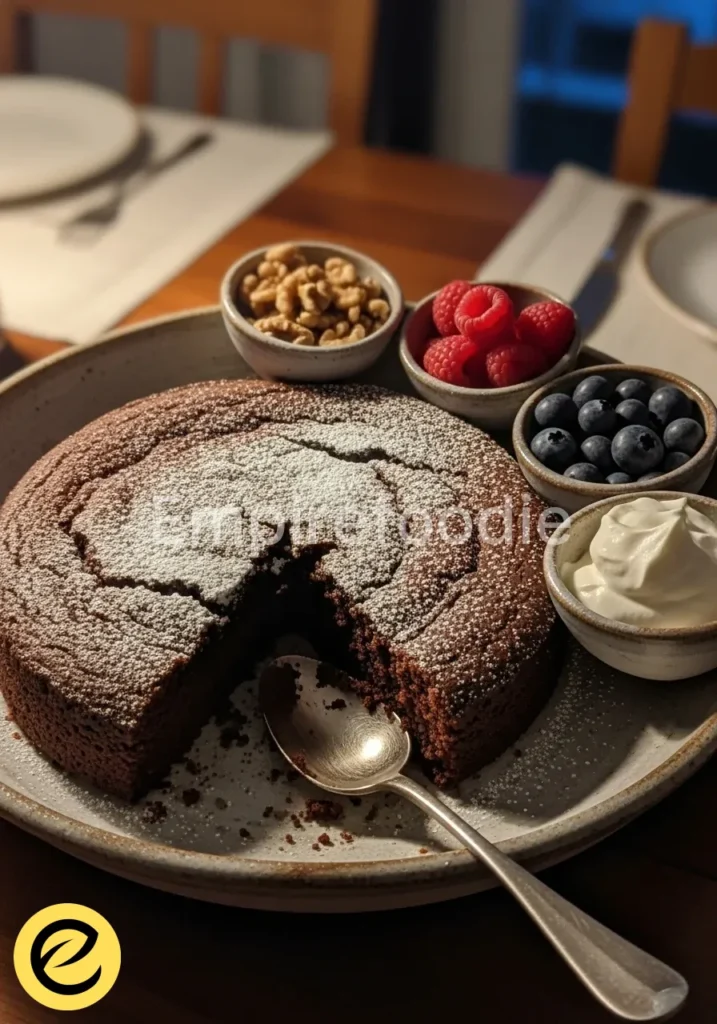
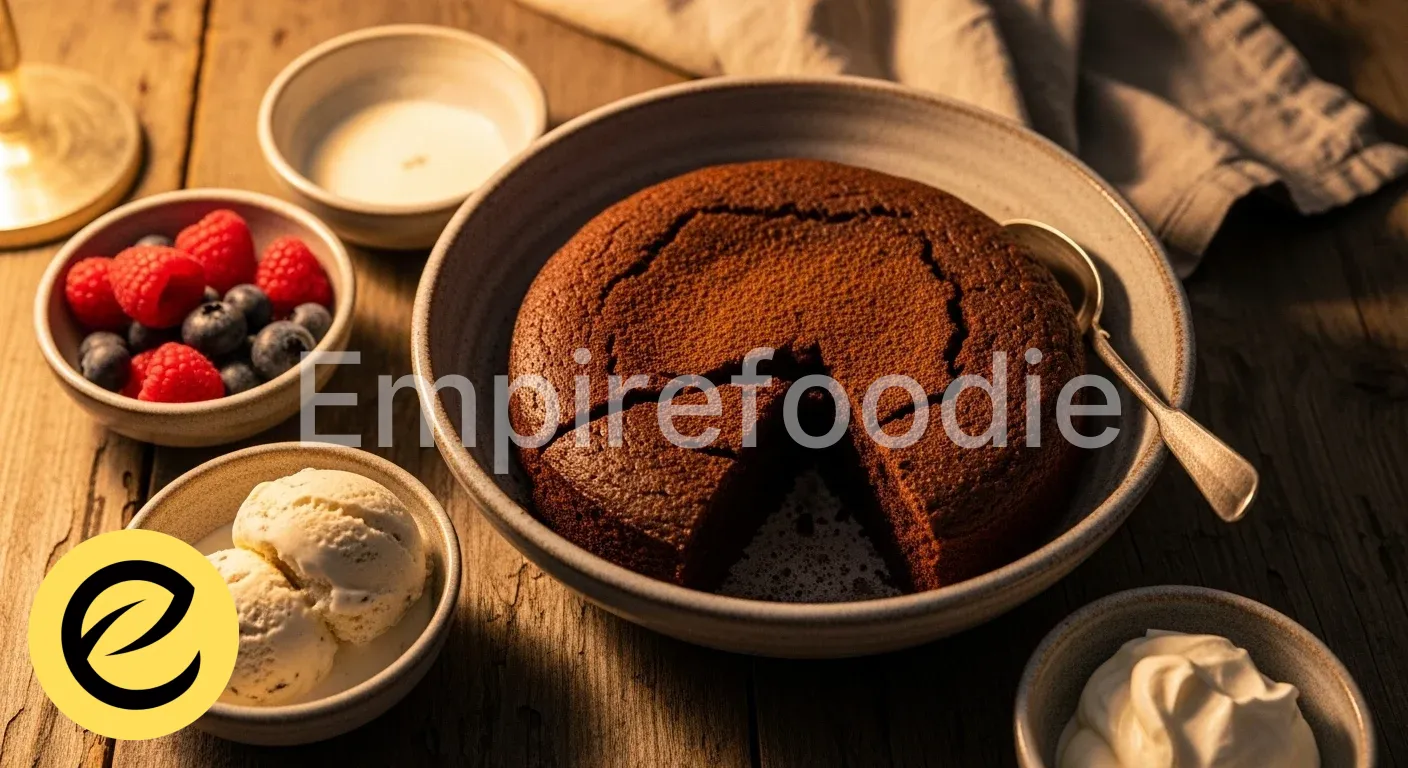
What to Serve With This Recipe
To complement the rich intensity of these chocolate sugar cookies, choose pairings that offer textural contrast or palate cleansing freshness.
- Fresh Berries: A bowl of mixed berries (strawberries, raspberries, blueberries) provides a vibrant, acidic counterpoint that cuts through the richness of the chocolate.
- Unsweetened Almond Milk: A glass of chilled, unsweetened almond milk offers a clean, neutral beverage that balances the cookie’s sweetness without adding extra sugar.
- Plain Greek Yogurt: A dollop of plain Greek yogurt, perhaps with a drizzle of honey, introduces a tangy, creamy element that contrasts beautifully with the cookie’s texture and flavor.
- Herbal Tea: A light, unsweetened herbal tea, such as peppermint or chamomile, can provide a refreshing interlude, cleansing the palate between bites of your delectable chocolate sugar cookies.
Frequently Asked Questions (FAQ)
Why did my chocolate sugar cookies spread too much?
Excessive spread typically results from butter that was too warm, insufficient chilling time for the dough, or an incorrect flour-to-fat ratio. Ensure your butter is precisely softened, not melted, and always chill the dough for the recommended duration. Also, verify your flour measurement is accurate using the spoon-and-level method to ensure proper structure.
Can I use natural cocoa powder instead of Dutch-processed?
While possible, it will significantly alter the flavor and appearance of your chocolate sugar cookies. Natural cocoa powder is acidic and lighter in color, reacting strongly with baking soda to create more lift but also a different flavor profile. Dutch-processed cocoa is alkalized, yielding a darker, milder, and less acidic chocolate flavor, which is what this recipe is calibrated for.
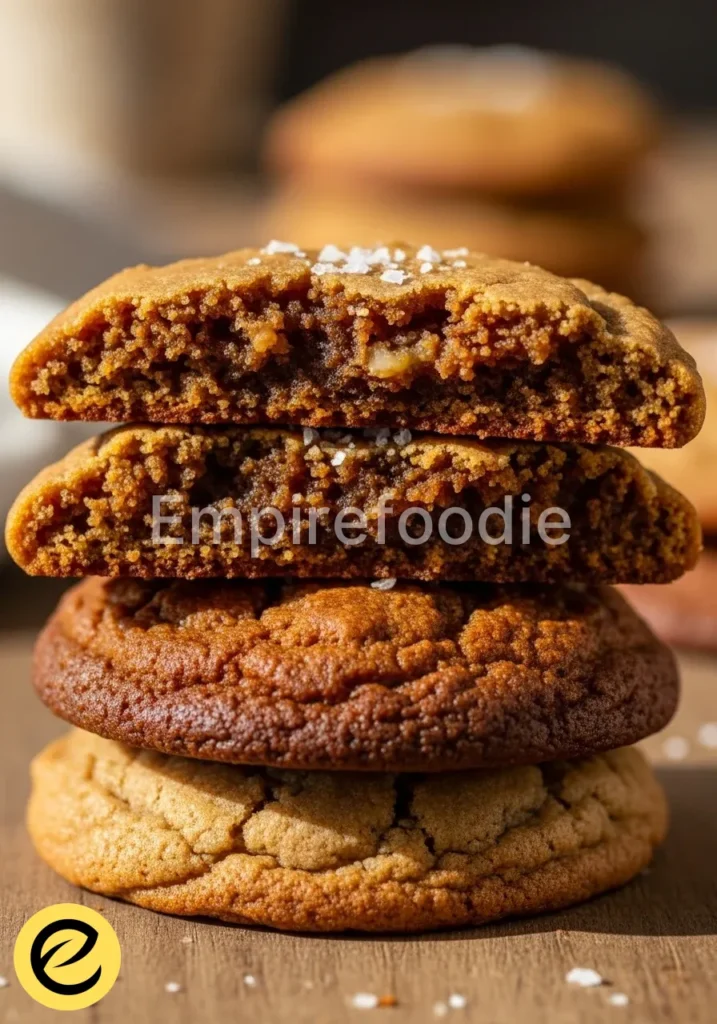
How can I make my chocolate sugar cookies chewier?
To achieve a chewier texture, you can slightly increase the proportion of brown sugar to granulated sugar, as the molasses in brown sugar adds moisture. Additionally, underbaking the cookies by a minute or two will result in a chewier center. Ensure proper chilling, as this also affects the cookie’s final texture and chewiness. Experimenting with a higher ratio of egg yolk to egg white can also contribute to chewiness.
Chocolate sugar cookies are a delightful variation of traditional sugar cookies that incorporate rich cocoa powder, producing a deep chocolate flavor and a tender texture. These cookies, which blend sweetness with chocolate richness, are often celebrated in baking communities for their versatility and satisfying taste, as detailed in cookie lore.
Final Thoughts
These chocolate sugar cookies represent a harmonious blend of precise technique and profound flavor. Mastering this recipe empowers you to create consistently perfect treats, appreciating the science behind every exquisite bite. Elevate your baking confidence with every batch.
Nutrition Information (per serving)
Based on approximately 24 cookies per batch (values are approximate and can vary based on specific ingredient brands and portion sizes).
| Nutrient | Amount |
|---|---|
| Calories | 200 kcal |
| Total Fat | 10 g |
| Saturated Fat | 6 g |
| Cholesterol | 35 mg |
| Sodium | 100 mg |
| Total Carbohydrates | 25 g |
| Dietary Fiber | 1 g |
| Total Sugars | 15 g |
| Protein | 2 g |

chocolate sugar cookies
Ingredients
- 1 cup (226g) unsalted butter, softened to 68°F (20°C)
- 1 ½ cups (300g) granulated sugar
- ½ cup (100g) light brown sugar, packed
- 2 large eggs, at room temperature
- 2 teaspoons vanilla extract
- 2 ¾ cups (350g) all-purpose flour, spooned and leveled
- ¾ cup (64g) unsweetened cocoa powder, Dutch-processed
- 1 teaspoon baking soda
- 1 teaspoon salt
- 1 cup (170g) chocolate chips or chunks (optional)
Instructions
- In a stand mixer or with an electric hand mixer, cream the softened butter, granulated sugar, and brown sugar on medium speed for 3-5 minutes until light and fluffy.
- Incorporate the eggs one at a time, mixing well after each. Add the vanilla extract and mix until just incorporated.
- In a separate bowl, whisk together the flour, cocoa powder, baking soda, and salt until well combined.
- Gradually add the dry ingredients to the wet ingredients in three additions, mixing on low speed until just combined.
- Fold in chocolate chips or chunks if using, ensuring even distribution.
- Divide the dough in half, flatten each half into a disk, wrap tightly in plastic wrap, and refrigerate for at least 1 hour.
- Preheat your oven to 375°F (190°C) and line baking sheets with parchment paper.
- Roll out one disk of chilled dough to ¼ inch thick, cut shapes with cookie cutters, and place on baking sheets 1 inch apart.
- Bake for 8-10 minutes until edges are set but centers still look slightly soft.
- Cool cookies on the baking sheet for 5 minutes before transferring to a wire rack to cool completely.