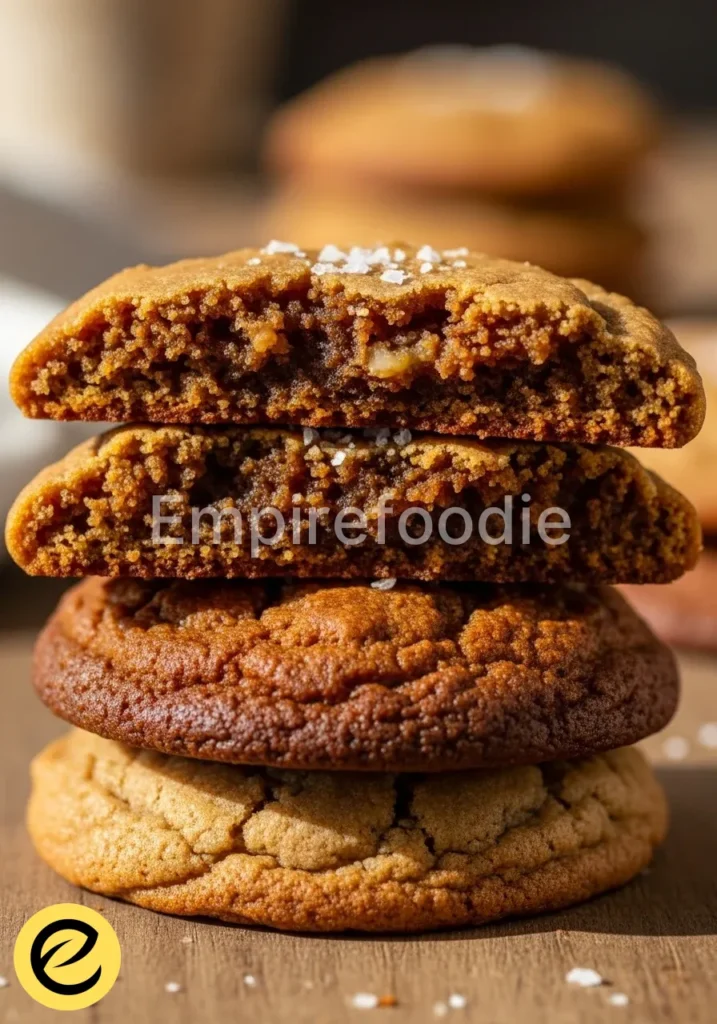
Crafting the perfect chocolate biscuit recipe involves a precise understanding of ingredient interaction to achieve an optimal balance of flavor and texture. This definitive guide to a superior chocolate biscuits recipe ensures a treat that is both deeply satisfying and texturally complex, with a crisp exterior yielding to a tender, crumbly interior.
We delve into the foundational principles that elevate a simple cookie to a culinary delight, focusing on scientific accuracy. Master this chocolate biscuits recipe to consistently produce professional-grade results from your kitchen.
Table of Contents
Why You’ll Love This Recipe
This chocolate biscuits recipe stands out for its meticulous approach, guaranteeing both flavor and consistency. Its clear methodology simplifies complex baking, while a focus on quality ingredients ensures a nutritious indulgence. You will appreciate the precise instructions and the deeply satisfying outcome.
- Achieve a perfect balance of rich chocolate flavor with a delightful crumbly texture.
- Streamlined process makes this chocolate biscuits recipe accessible for all skill levels.
- Incorporate mindful ingredient choices for a comparatively wholesome treat.
- Understand the ‘why’ behind each step, enhancing your overall baking acumen.
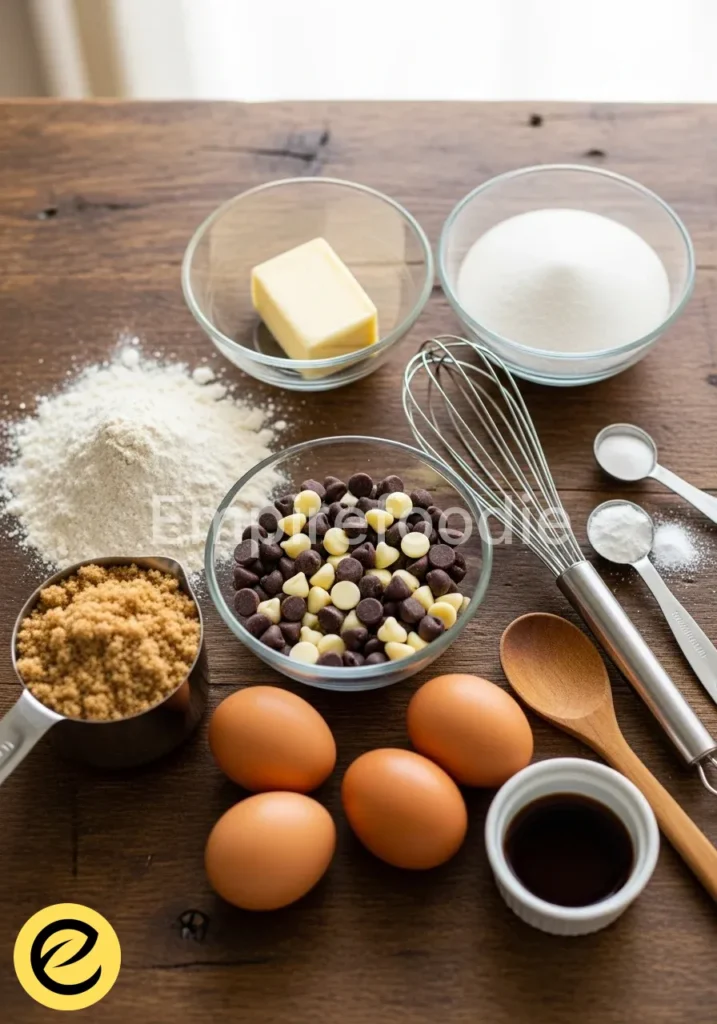
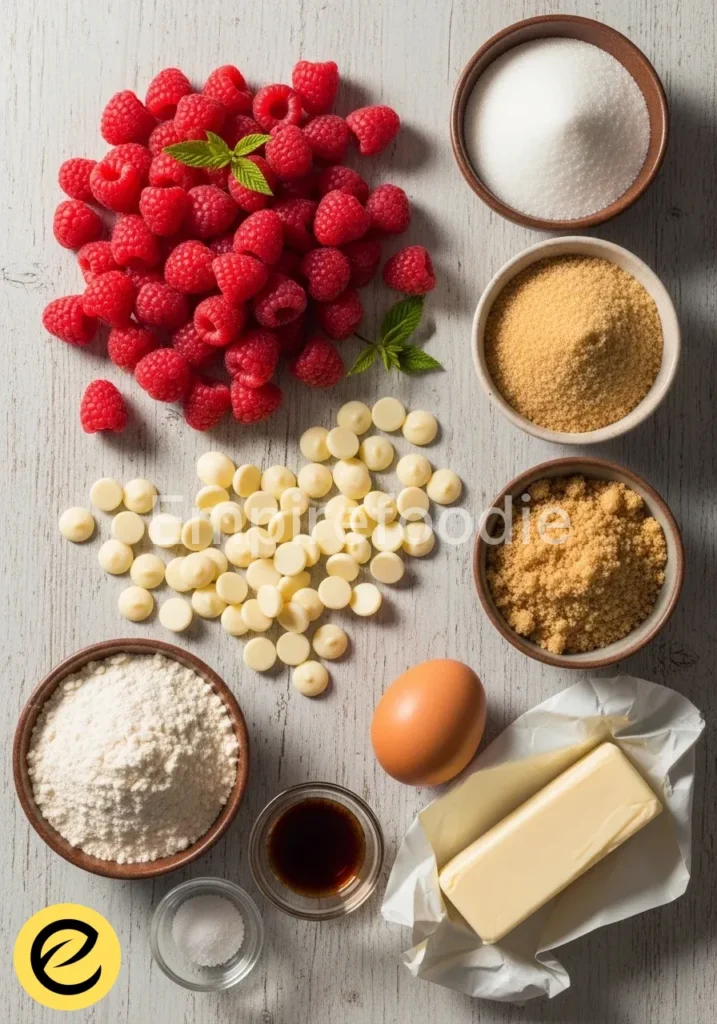
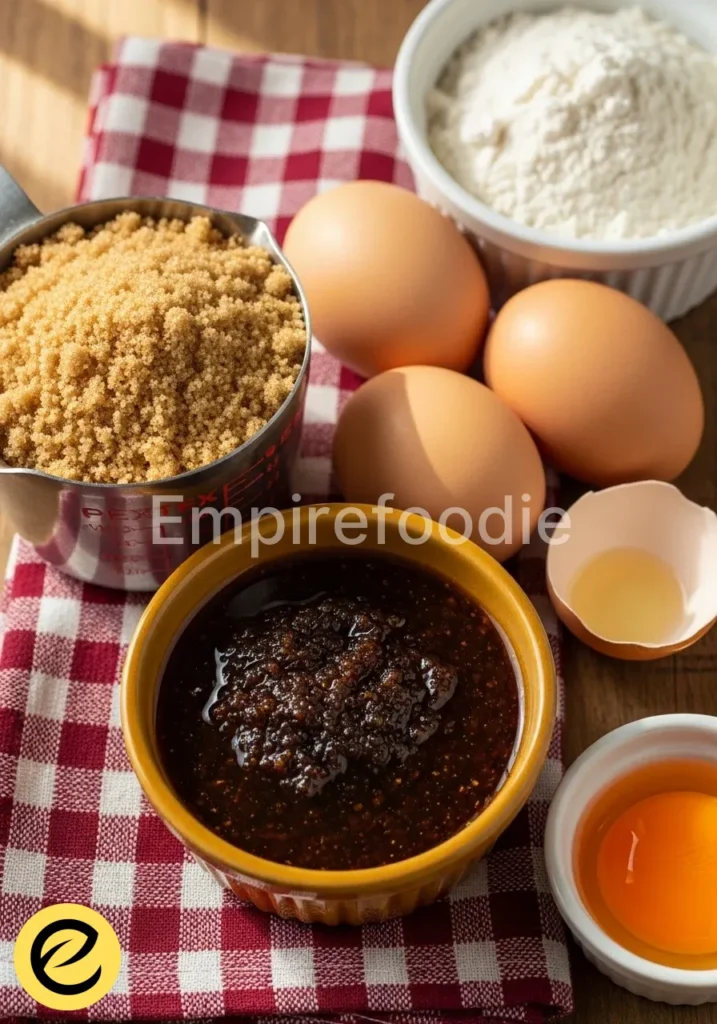
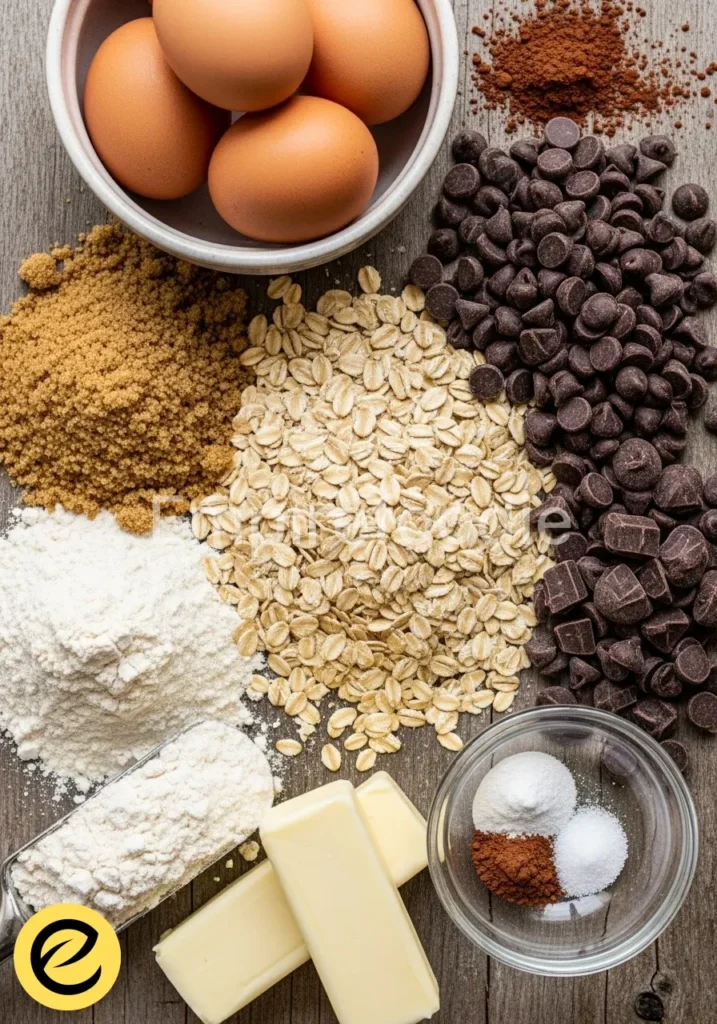
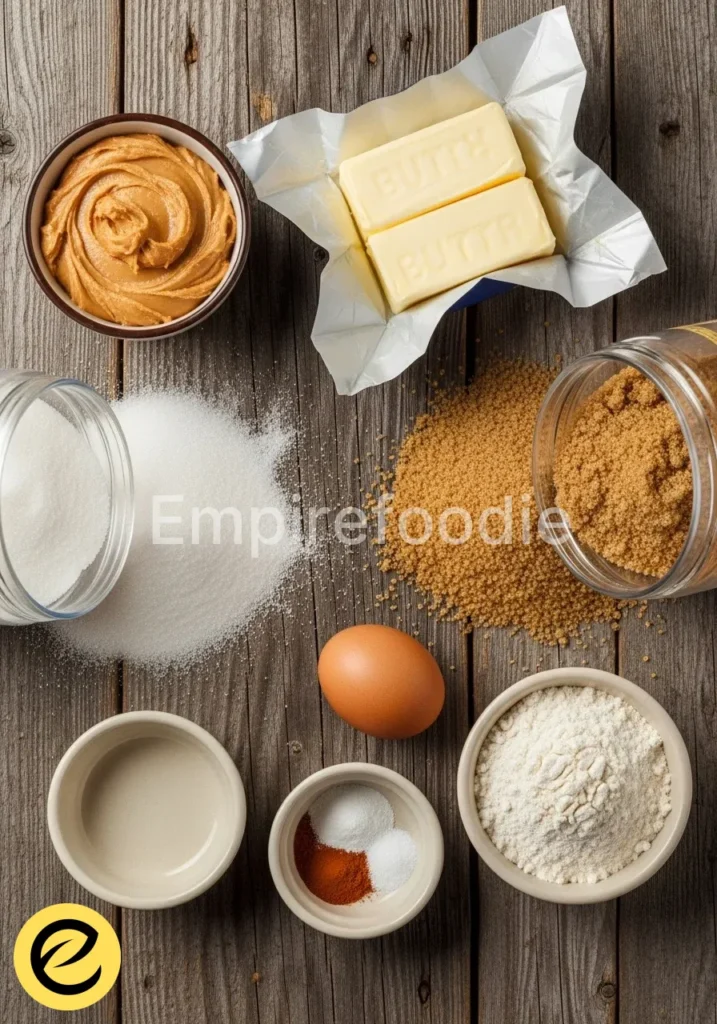
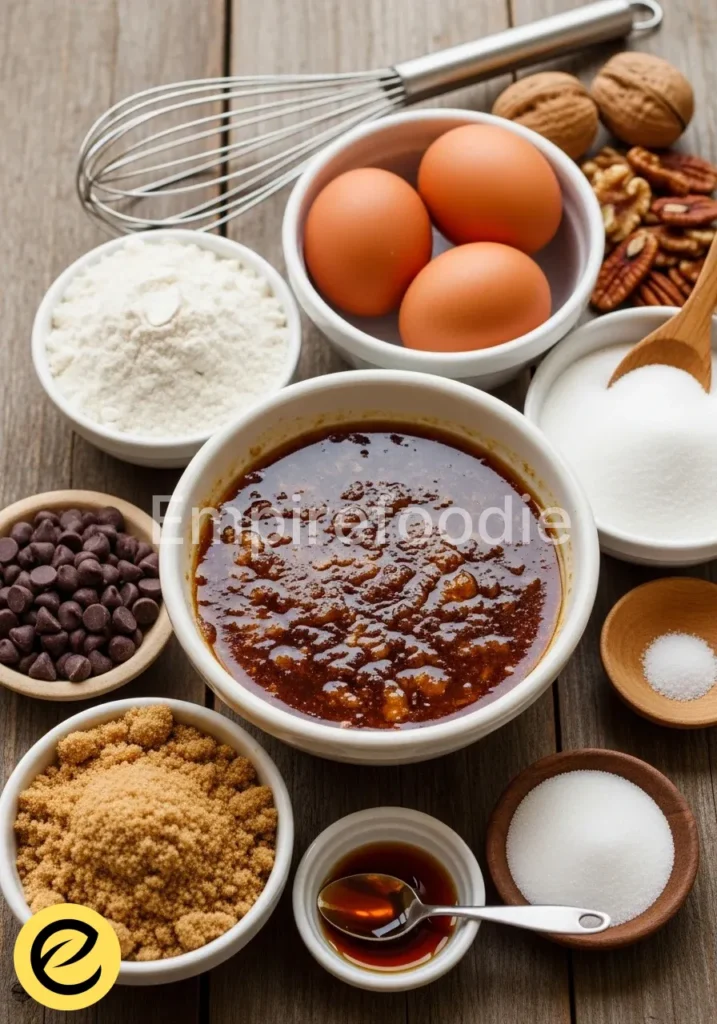
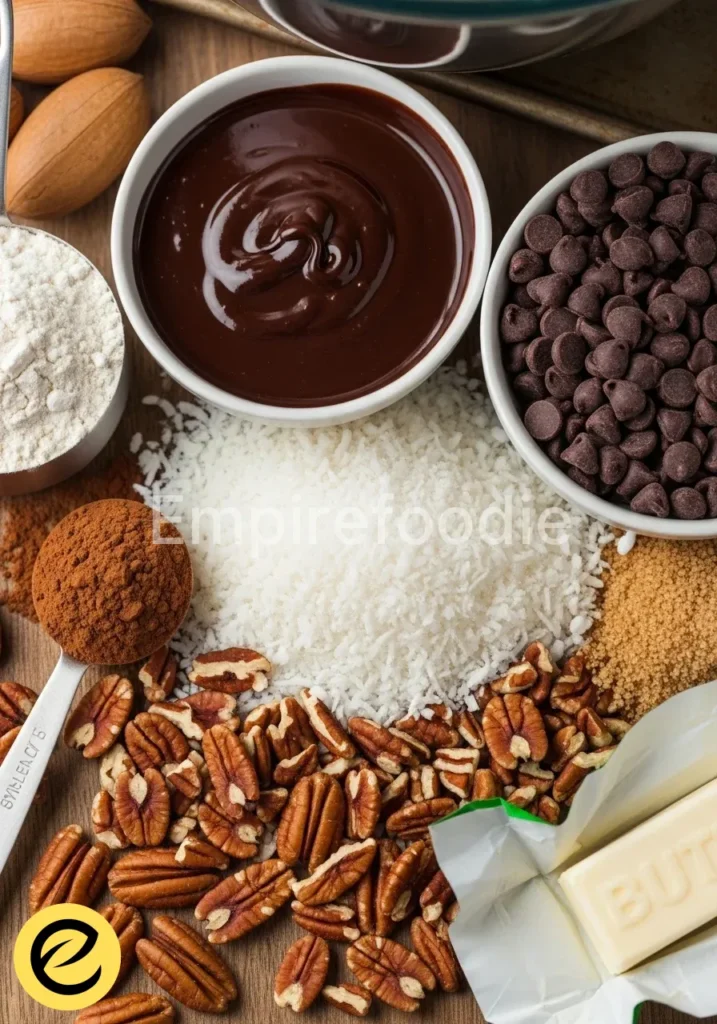
Ingredients You’ll Need

Ingredient quality is paramount to the success of this chocolate biscuits recipe. Each component plays a specific chemical role, influencing texture, flavor, and shelf life. Opt for the finest available to ensure the best outcome.
- Unsalted Butter: 225g (1 cup), softened. Ensure it’s truly at room temperature for proper creaming, which incorporates air and creates a tender crumb.
- Granulated Sugar: 150g (3/4 cup). Provides sweetness and contributes to the biscuit’s spread and crispness through caramelization.
- Light Brown Sugar: 100g (1/2 cup), packed. Adds moisture and a subtle molasses flavor, contributing to chewiness.
- Large Egg: 1, at room temperature. Acts as an emulsifier and binder, adding structure and richness.
- Vanilla Extract: 1 teaspoon. Enhances the chocolate flavor and adds aromatic depth.
- All-Purpose Flour: 300g (2 1/3 cups). The primary structural component. Sifted flour prevents lumps and ensures even distribution.
- Cocoa Powder: 50g (1/2 cup), unsweetened natural cocoa. Provides the intense chocolate flavor. Natural cocoa reacts with baking soda.
- Baking Soda: 1 teaspoon. A leavening agent that reacts with acidic ingredients (like brown sugar and natural cocoa) to produce carbon dioxide, creating lift.
- Salt: 1/2 teaspoon. Balances sweetness and enhances all other flavors.
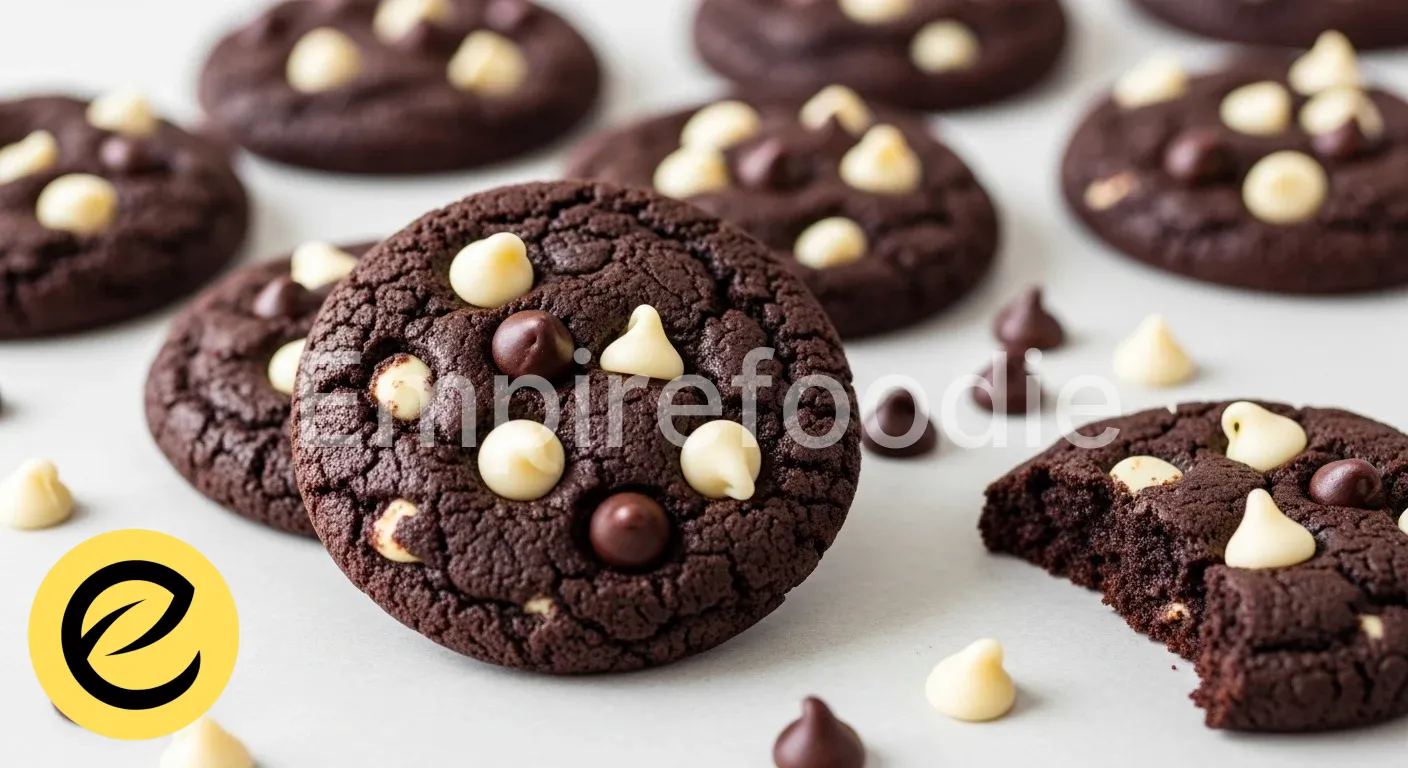
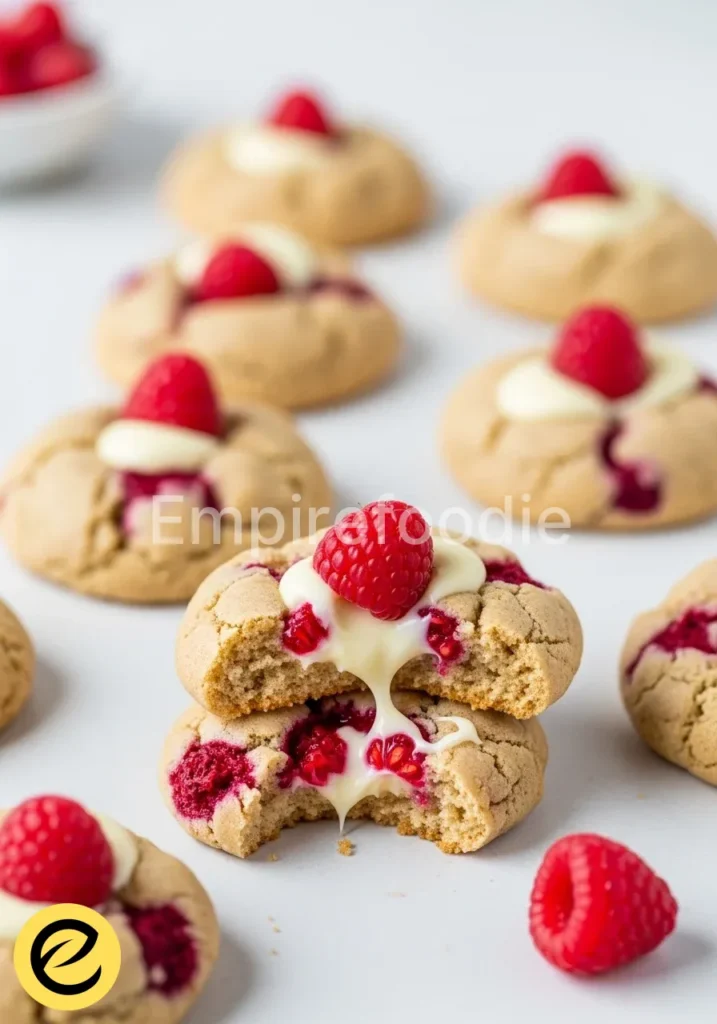
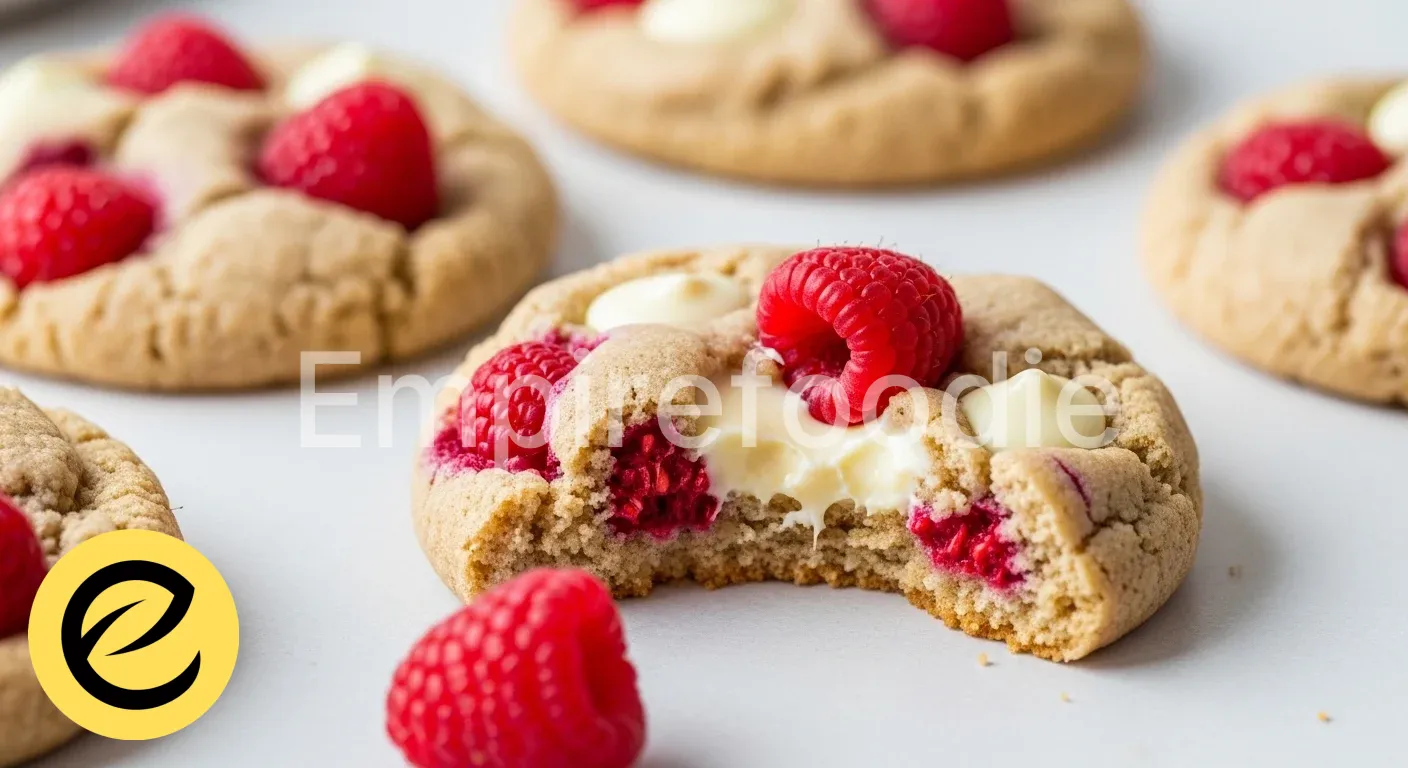
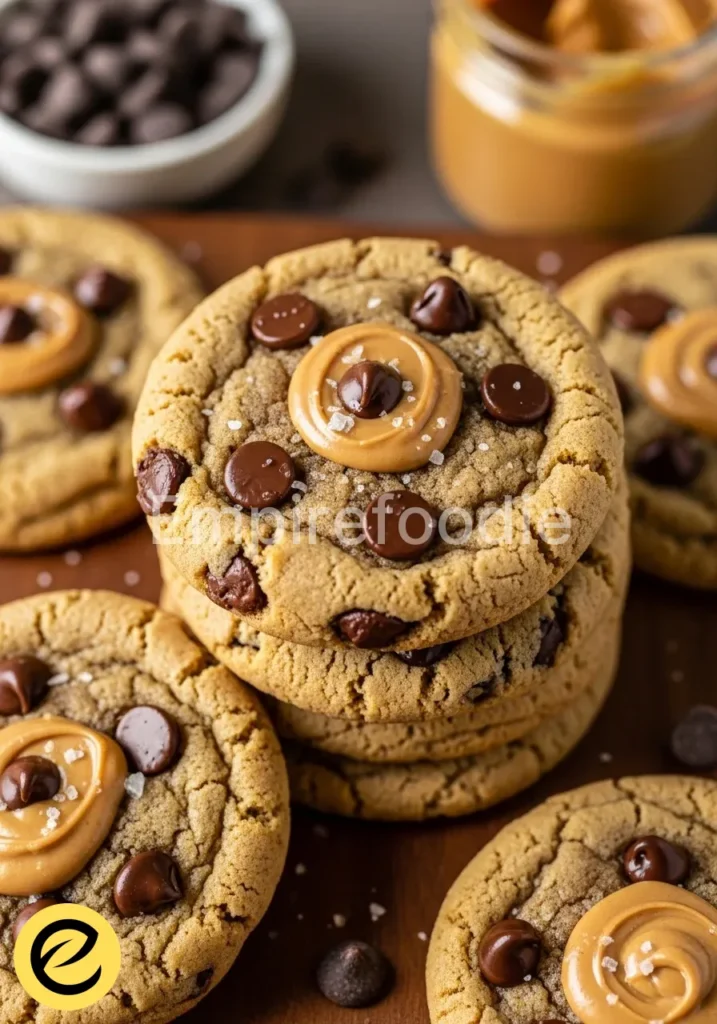
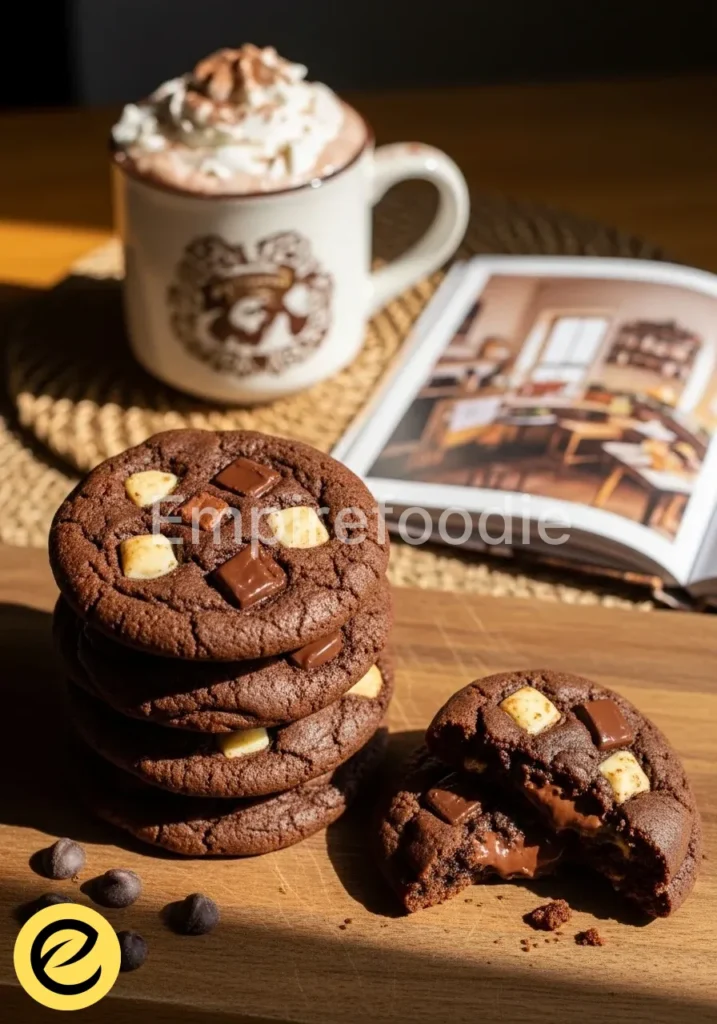
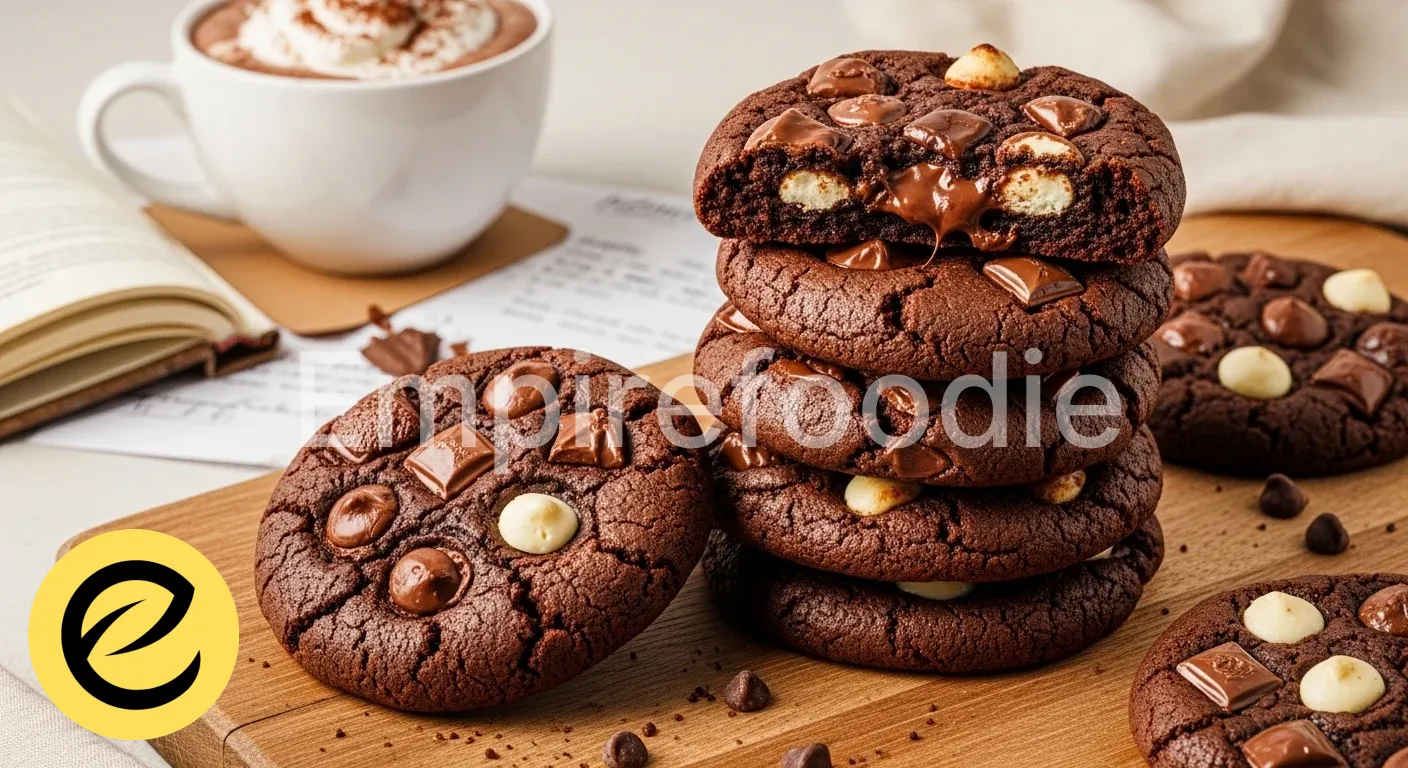
- Chocolate Chips or Chunks: 200g (1 1/4 cups), semi-sweet or dark. The star of our chocolate biscuits recipe, choose quality chocolate for superior melt and flavor.
Substitutions & Variations
While the classic chocolate biscuits recipe is perfect, thoughtful substitutions can align with dietary preferences or expand flavor profiles. Remember that altering ingredients can impact the final texture and requires careful consideration of their chemical properties.
[ra_display_video url=”https://www.youtube.com/watch?v=mLYy-f18664″]
- For a Gluten-Free Option: Substitute all-purpose flour with a 1:1 gluten-free baking blend that includes xanthan gum.
- Dairy-Free Butter: Use a high-quality plant-based butter alternative, ensuring it has a similar fat content to dairy butter for comparable results.
- Reduced Sugar: For a less sweet chocolate biscuits recipe, slightly decrease the amount of granulated sugar. Avoid drastic reductions, as sugar also contributes to texture.
- Nut-Free: This chocolate biscuits recipe is inherently nut-free, but always check chocolate chip labels for allergen information.
- Additional Flavors: Consider adding a pinch of espresso powder (1/2 teaspoon) to deepen the chocolate flavor, or a sprinkle of flaky sea salt on top before baking for a salty-sweet contrast.
While the classic chocolate biscuits recipe is perfect, thoughtful substitutions can align with dietary preferences or expand flavor profiles. For those interested in a different flavor dimension, consider trying out our recipe for chocolate cookies with white chips.
Equipment You’ll Need
The right tools ensure precision and efficiency when making this chocolate biscuits recipe, leading to more consistent and satisfying outcomes.
- Stand mixer or hand mixer
- Large mixing bowls
- Rubber spatula
- Whisk
- Measuring cups and spoons
- Parchment paper
- Baking sheets
- Wire cooling rack
- Cookie scoop (optional, for uniform sizing)
Step-by-Step Instructions
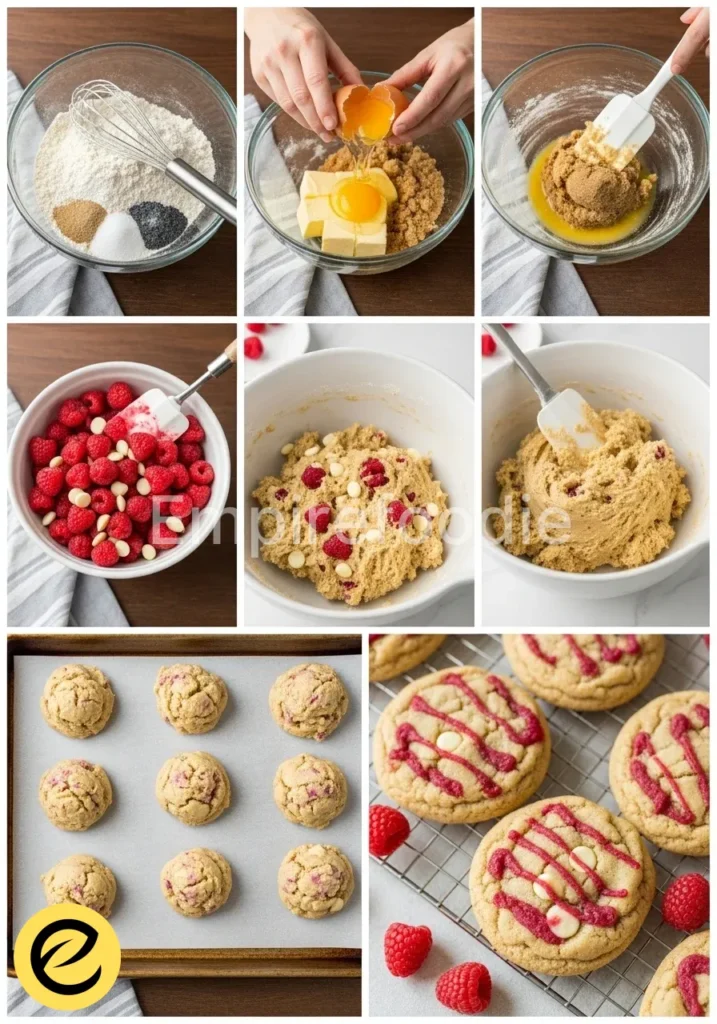
Adherence to these precise steps is crucial for the scientific success of your chocolate biscuits recipe. Each stage has a purpose, contributing to the final texture and flavor.
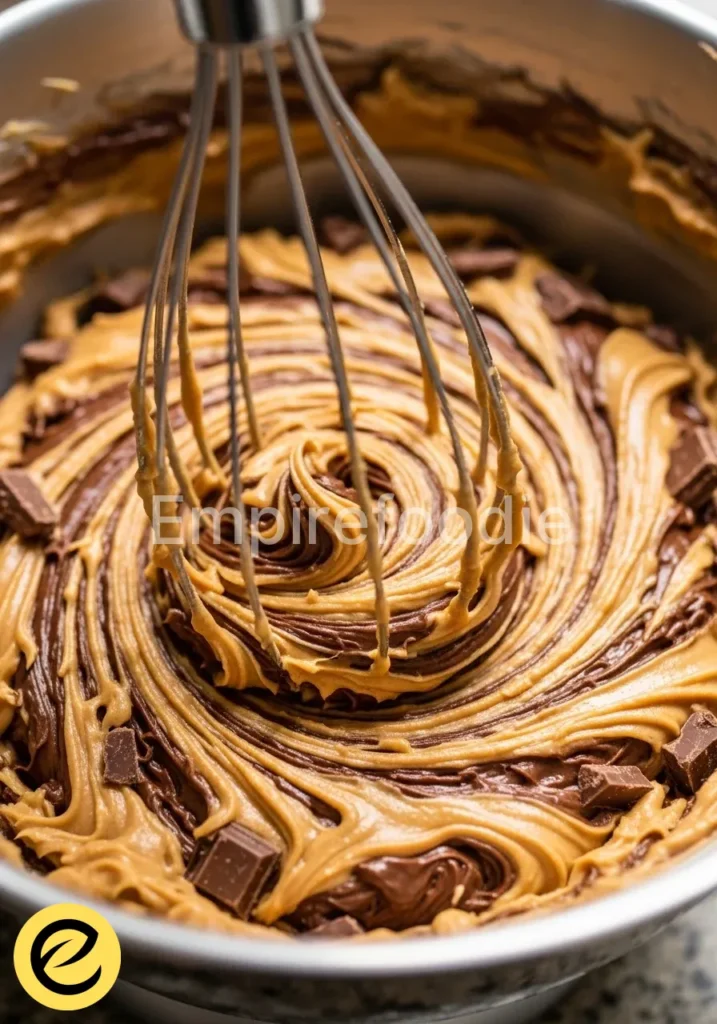
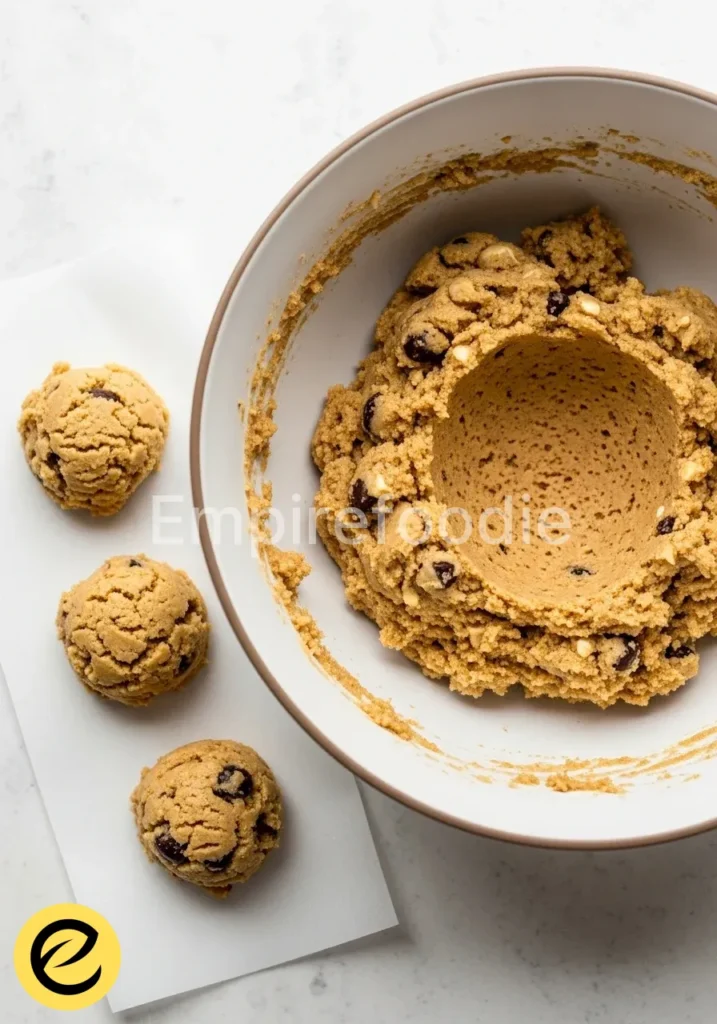
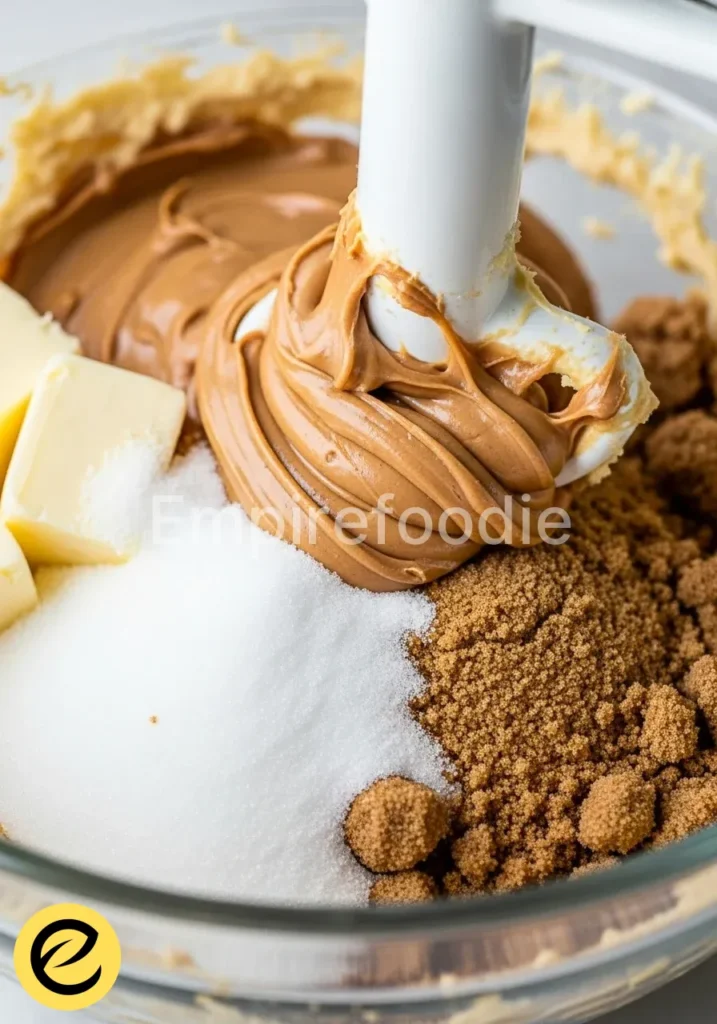
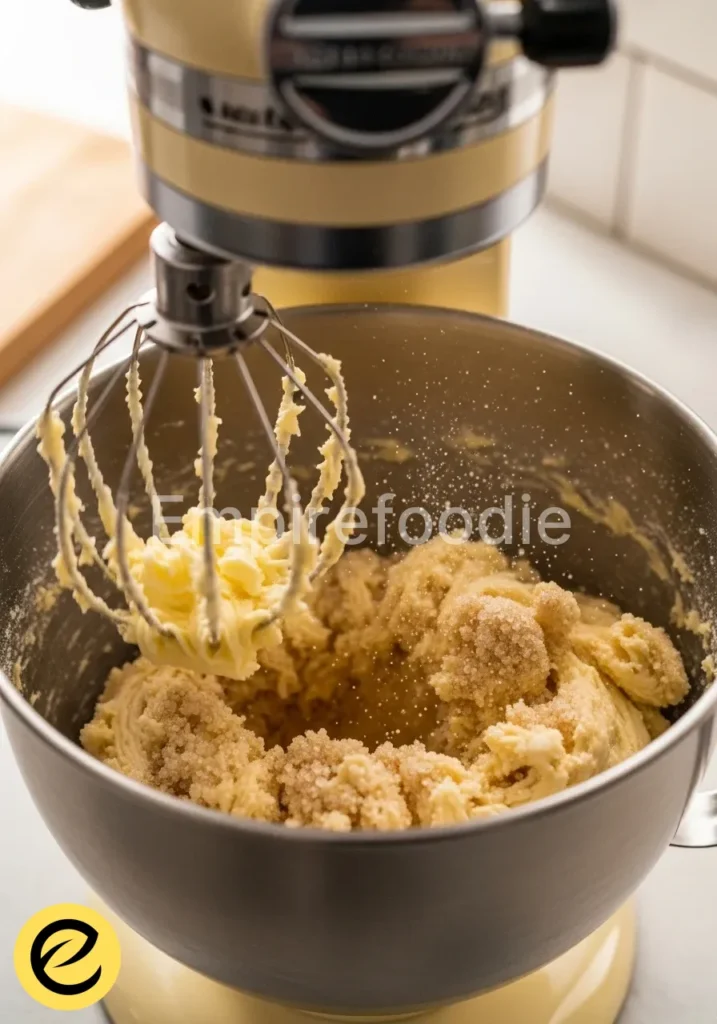
- Cream Butter and Sugars: In a large mixing bowl, using a stand mixer with the paddle attachment or a hand mixer, beat the softened unsalted butter, granulated sugar, and light brown sugar on medium-high speed until light and fluffy. This aeration process, known as creaming, is critical for incorporating air, which contributes to the biscuit’s tender texture. Scrape down the sides of the bowl as needed.
- Add Egg and Vanilla: Beat in the large egg until fully incorporated, then stir in the vanilla extract. Continue mixing until the mixture is smooth and emulsified. Overmixing at this stage can develop gluten too early.
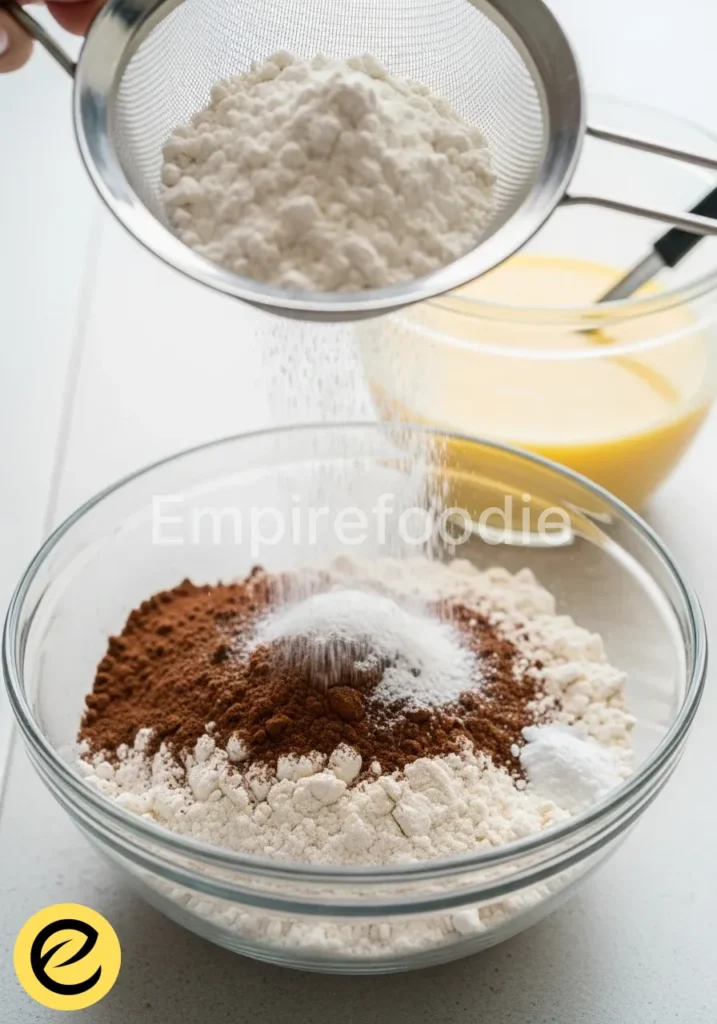
- Combine Dry Ingredients: In a separate medium bowl, whisk together the all-purpose flour, cocoa powder, baking soda, and salt. Whisking ensures these ingredients are evenly distributed, which is vital for consistent leavening and flavor in our chocolate biscuits recipe.
- Gradually Add Dry to Wet: With the mixer on low speed, gradually add the dry ingredient mixture to the wet ingredients, mixing only until just combined. Overmixing flour develops gluten, resulting in tough biscuits. The goal is to hydrate the flour without overworking it.
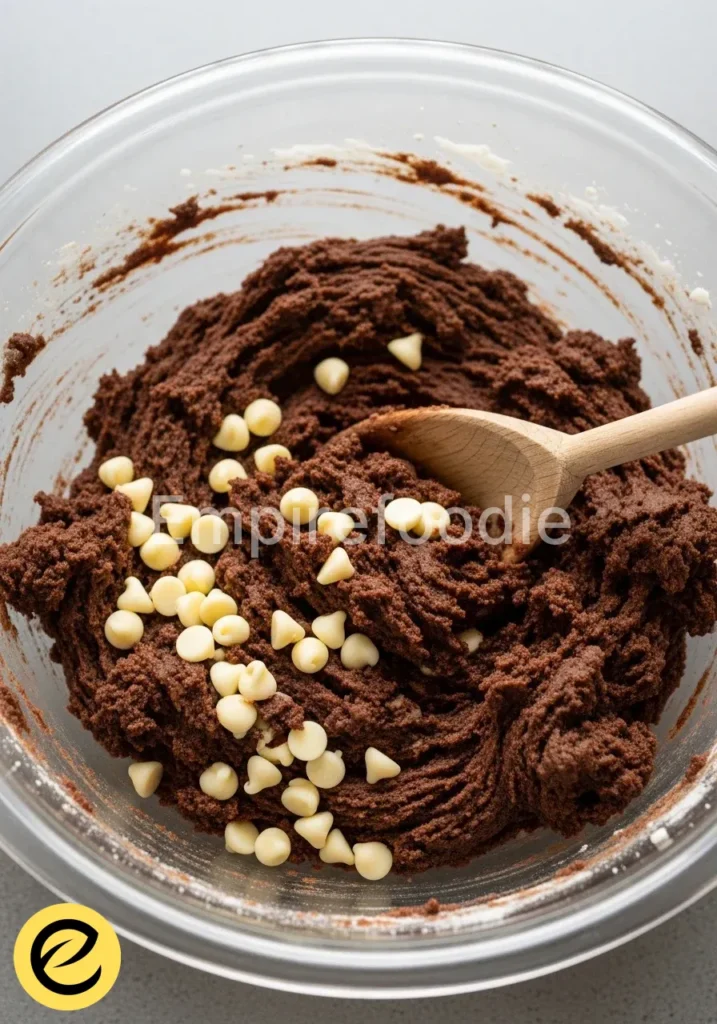
- Fold in Chocolate: Remove the bowl from the mixer and, using a rubber spatula, gently fold in the chocolate chips or chunks until evenly distributed throughout the dough.
- Chill the Dough (Crucial Step): Cover the bowl with plastic wrap and refrigerate the dough for at least 30 minutes, or up to 2 hours. Chilling allows the flour to fully hydrate, prevents excessive spreading, and concentrates the flavors, making this chocolate biscuits recipe superior.
- Preheat Oven & Prepare Sheets: Preheat your oven to 180°C (350°F). Line baking sheets with parchment paper to prevent sticking and promote even baking.
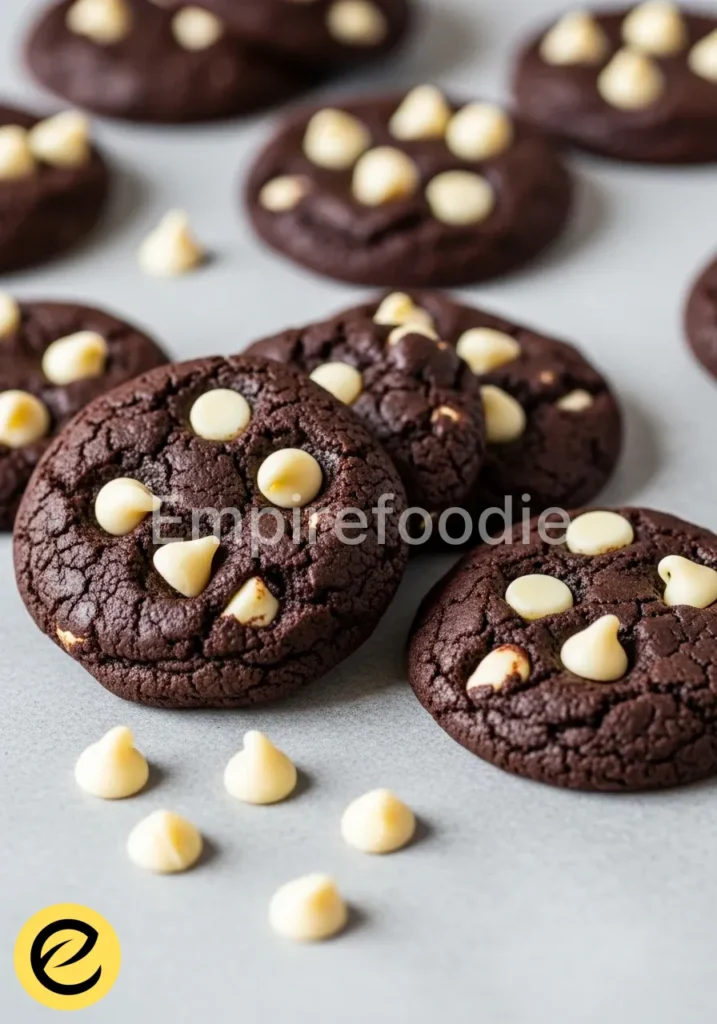
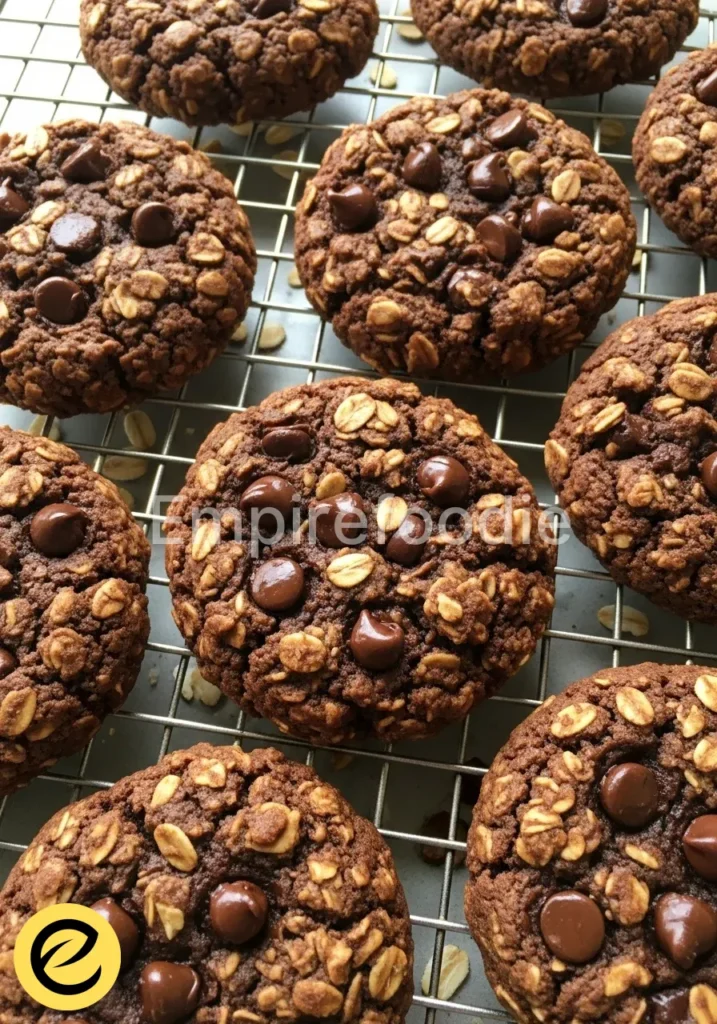
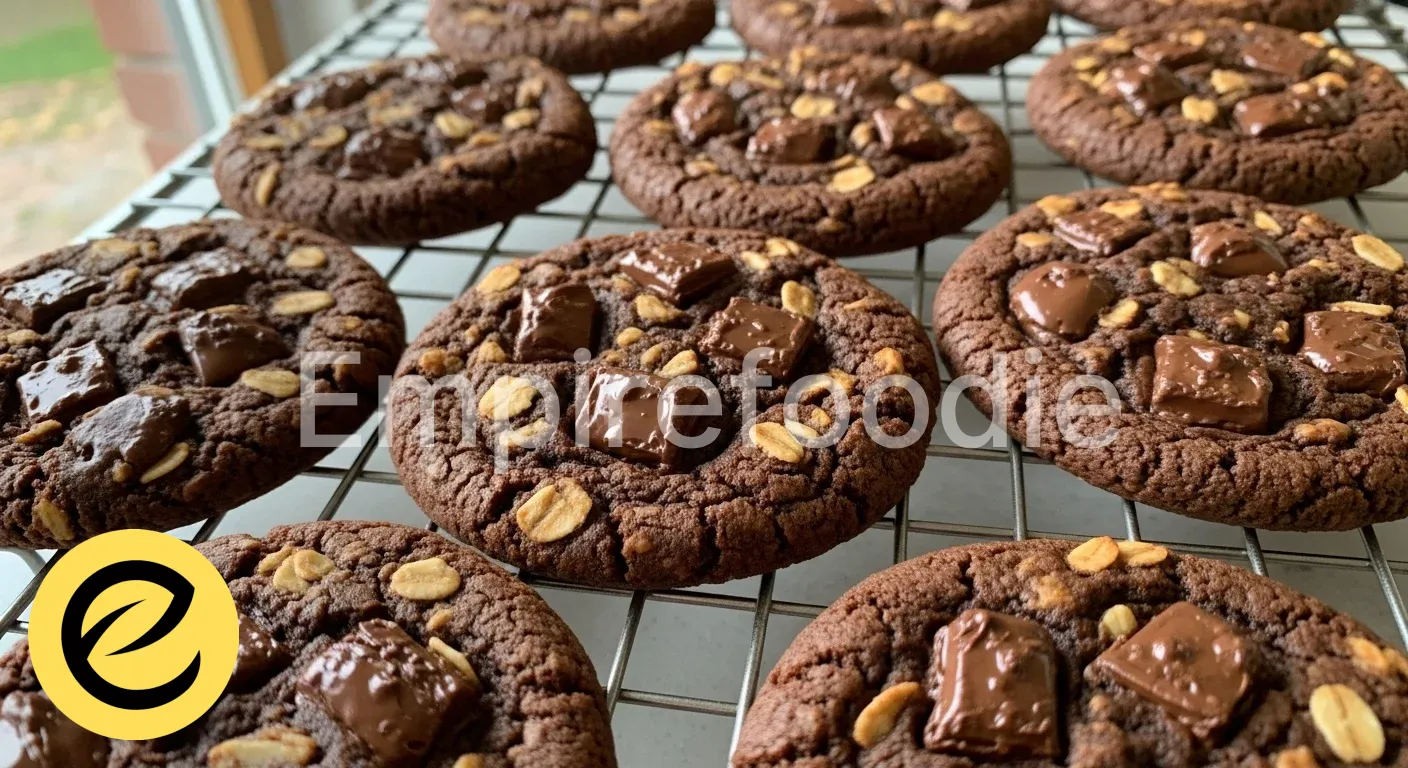
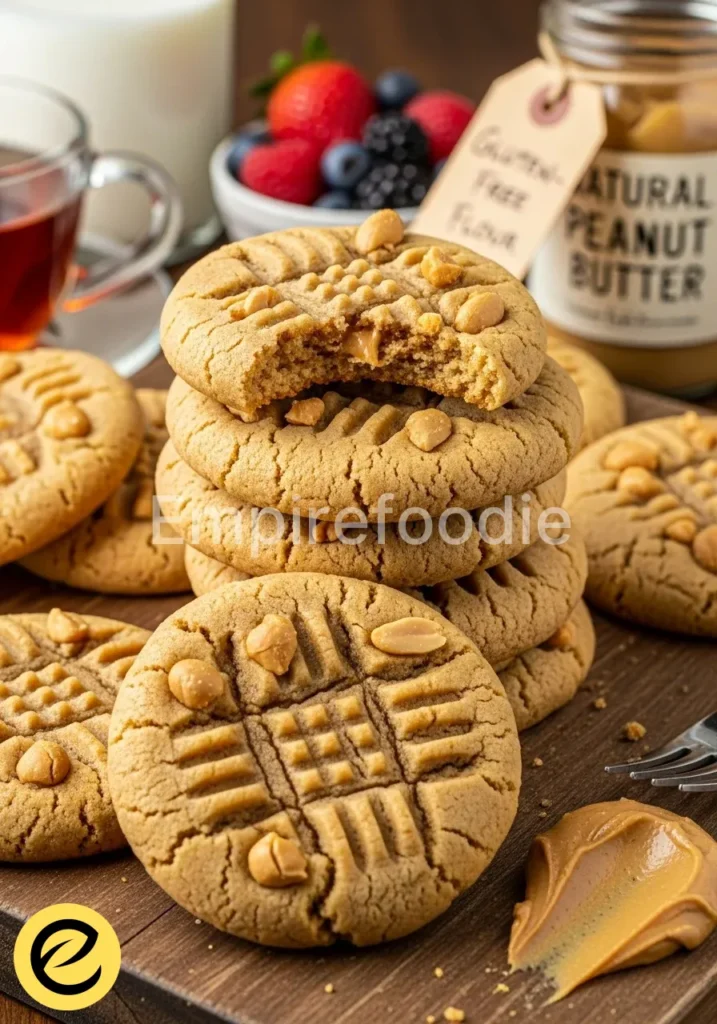
- Scoop and Bake: Scoop rounded tablespoons of dough onto the prepared baking sheets, leaving about 5 cm (2 inches) between each biscuit to allow for spread.
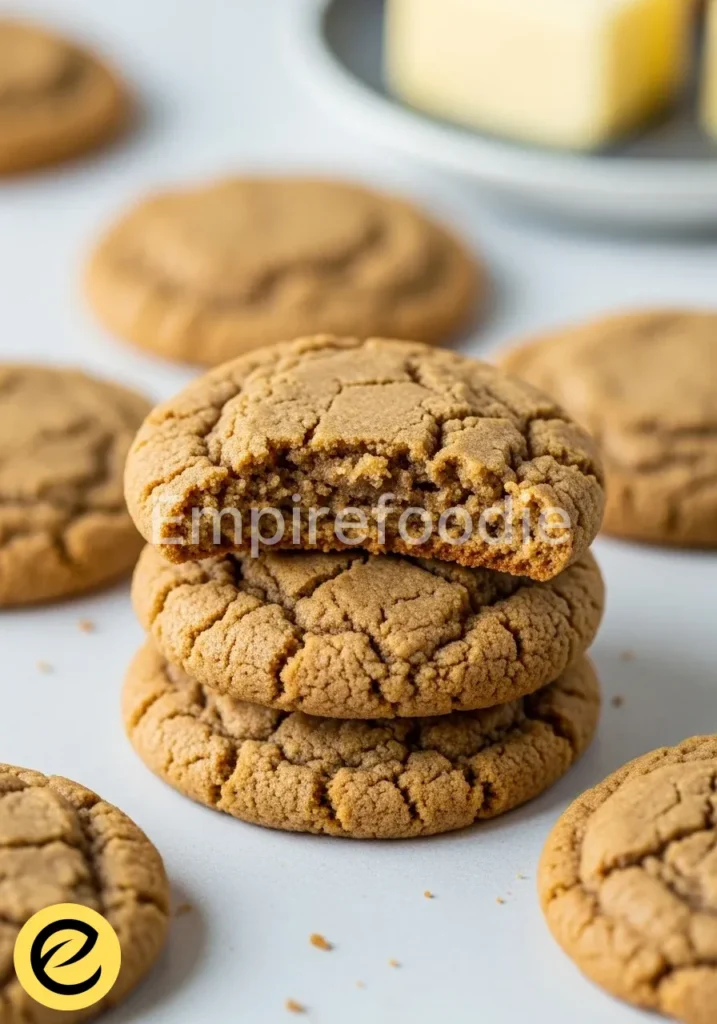
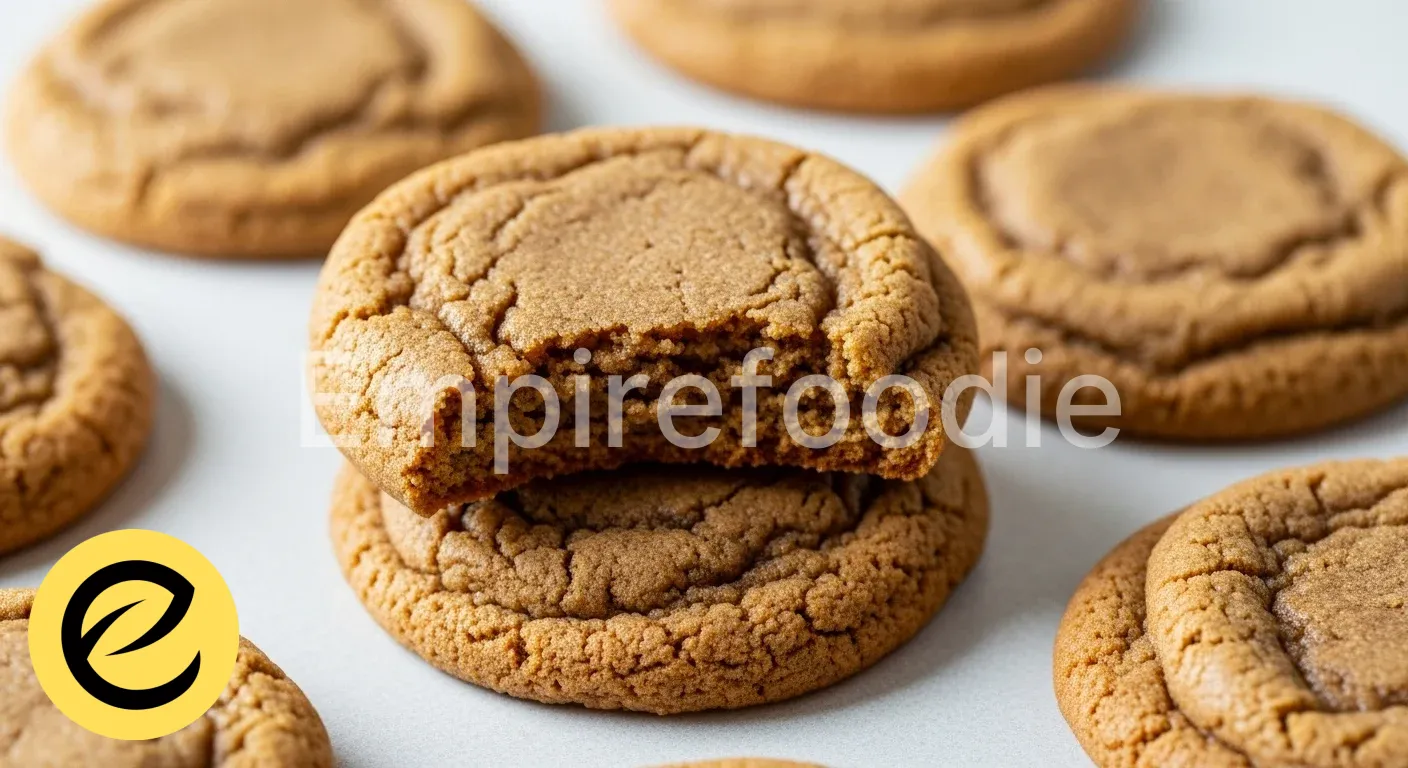
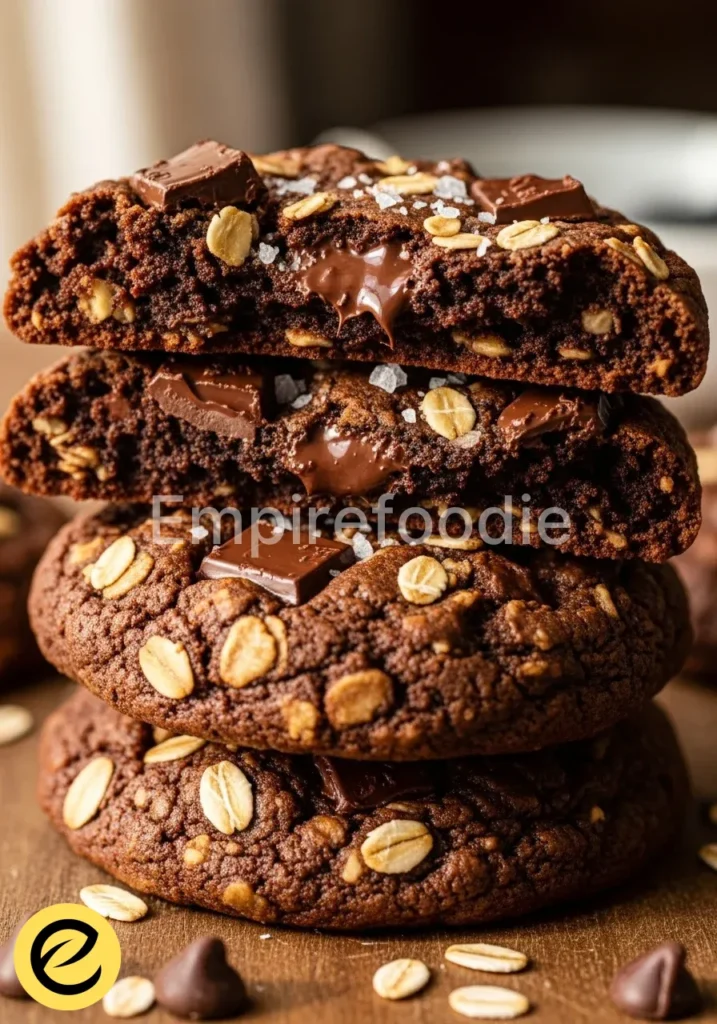
- Bake: Bake for 10-12 minutes, or until the edges are set and lightly golden, but the centers still look slightly soft. The residual heat will continue to cook them as they cool, preventing over-baking and ensuring a tender interior for this chocolate biscuits recipe.
- Cool: Let the biscuits cool on the baking sheets for 5 minutes before transferring them to a wire rack to cool completely. This allows them to firm up without breaking.
Adherence to these precise steps is crucial for the scientific success of your chocolate biscuits recipe. To explore a delightful variation, check out our raspberry white chocolate cookies that offer a burst of fruity flavor.
Pro Tips for Success
Elevate your chocolate biscuits recipe with these scientifically-backed techniques, ensuring optimal texture and flavor every time.
- Butter Temperature is Key: Softened butter, not melted, is critical for proper creaming. If your butter is too cold, it won’t aerate effectively; too warm, and it will result in greasy biscuits that spread too much. Aim for 18-20°C (65-68°F).
- Don’t Overmix: Once flour is added, mix only until just combined. Excessive mixing develops gluten, leading to tough, chewy biscuits instead of tender ones.
- Chill the Dough: This isn’t optional for this chocolate biscuits recipe. Chilling allows the butter to re-solidify, preventing excessive spread. It also gives the flour time to fully hydrate, improving texture and intensifying flavor.
- Use a Cookie Scoop: For uniform size and even baking, a cookie scoop is invaluable. Consistent size ensures all biscuits bake at the same rate.
- Salt Matters: A touch of flaky sea salt sprinkled on top immediately after baking can dramatically enhance the chocolate flavor, balancing the sweetness.
Storage & Reheating Tips
Proper storage is essential to maintain the freshness and texture of your chocolate biscuits recipe creations. These methods will help preserve their quality.
- Airtight Container: Store cooled biscuits in an airtight container at room temperature for up to 3-4 days. This prevents them from drying out.
- Freezing Dough: Scoop dough balls onto a parchment-lined baking sheet and freeze until solid. Transfer frozen dough balls to a freezer-safe bag or container for up to 3 months. Bake from frozen, adding 2-4 minutes to the baking time.
- Freezing Baked Biscuits: Once completely cooled, place baked biscuits in a single layer in an airtight freezer-safe container or bag for up to 2 months. Thaw at room temperature.
- Reheating: For a fresh-baked experience, gently warm biscuits in a preheated oven at 150°C (300°F) for 5-7 minutes, or until just warm and slightly soft.
Proper storage is essential to maintain the freshness and texture of your chocolate biscuits recipe creations. For a delicious twist on storing, don’t miss our article on peanut butter chocolate cookies, perfect for a sweet surprise.
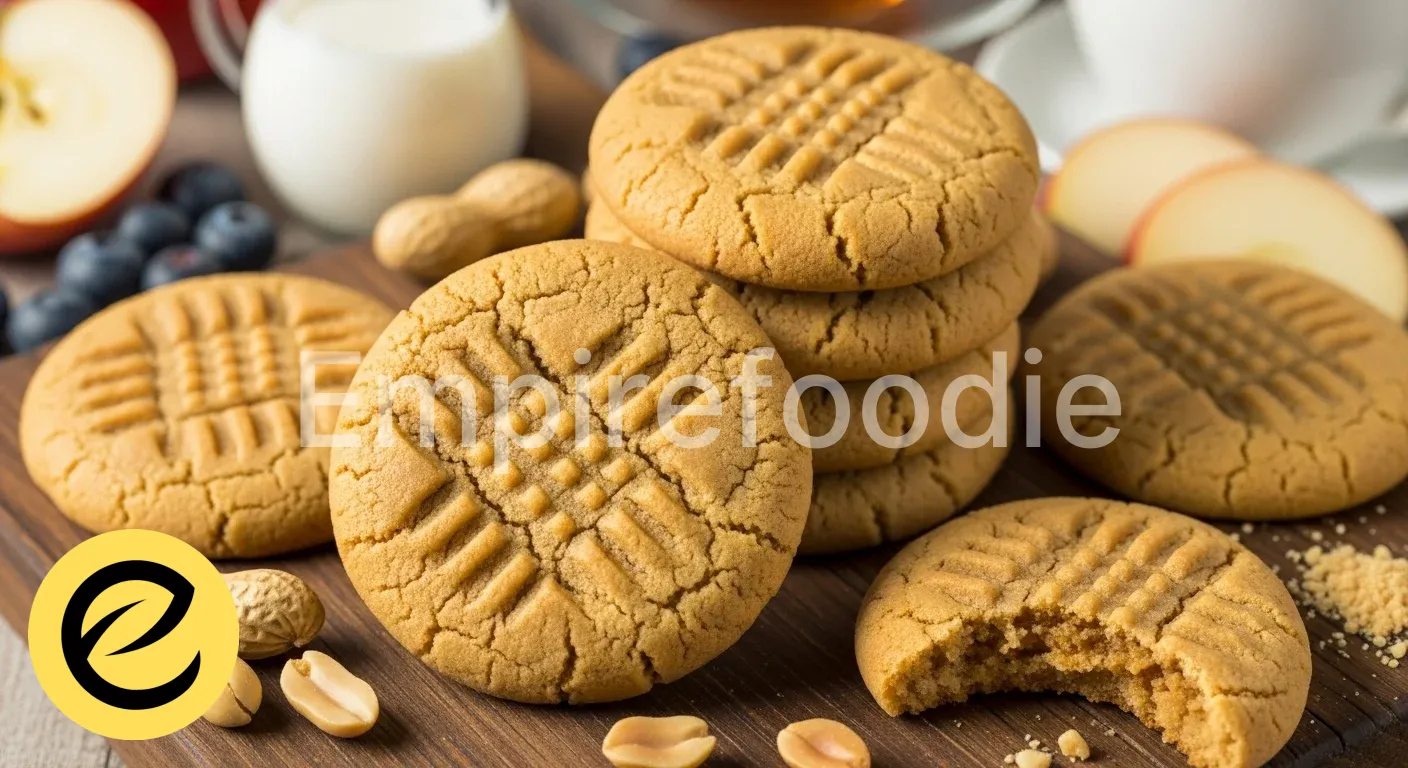
What to Serve With This Recipe

While this chocolate biscuits recipe is a standalone delight, pairing it with complementary items can elevate the experience. Consider options that balance the richness of the chocolate.
- Fresh Berries: A vibrant bowl of strawberries, raspberries, or blueberries provides a refreshing contrast and adds antioxidants.
- Plain Greek Yogurt: A dollop of unsweetened Greek yogurt offers a creamy, tangy counterpoint, balancing the sweetness and adding protein.
- Milk: A classic pairing, a cold glass of milk cuts through the richness and enhances the chocolate flavor.
- Coffee or Tea: A warm cup of black coffee or unsweetened tea offers a sophisticated pairing, providing a pleasant bitterness that complements the chocolate.
Frequently Asked Questions (FAQ)
Why did my chocolate biscuits spread too much?
Excessive spreading in a chocolate biscuits recipe usually stems from several factors. The butter might have been too warm when creamed, leading to insufficient air incorporation and a looser dough structure. Insufficient chilling time also contributes, as cold butter resists spreading more effectively in the oven. Additionally, an incorrect flour-to-fat ratio or an oven temperature that is too low can exacerbate spreading.
Can I make this chocolate biscuits recipe ahead of time?
Absolutely. Preparing this chocolate biscuits recipe dough in advance is highly recommended. You can store the dough, covered tightly, in the refrigerator for up to 3 days.
This extended chilling period actually enhances the flavor development, as the ingredients meld together over time. Alternatively, you can scoop the dough into individual balls and freeze them for up to 3 months, baking directly from frozen with a slight increase in baking time.
What type of cocoa powder is best for this chocolate biscuits recipe?
This chocolate biscuits recipe specifies unsweetened natural cocoa powder. Natural cocoa is acidic, which reacts with baking soda (an alkaline leavening agent) to produce carbon dioxide, providing lift. Dutch-processed cocoa, which has been treated to reduce its acidity, would require a different leavening agent (like baking powder) to achieve the same rise. Using natural cocoa ensures the correct chemical reaction and texture for this specific chocolate biscuits recipe.
A chocolate biscuits recipe offers an excellent opportunity to explore the intersection of chemistry and baking. Understanding how various ingredients interact can elevate simple biscuits into gourmet treats, providing deeper satisfaction in every bite. For more on this topic, see the detailed information on cookies.
Final Thoughts
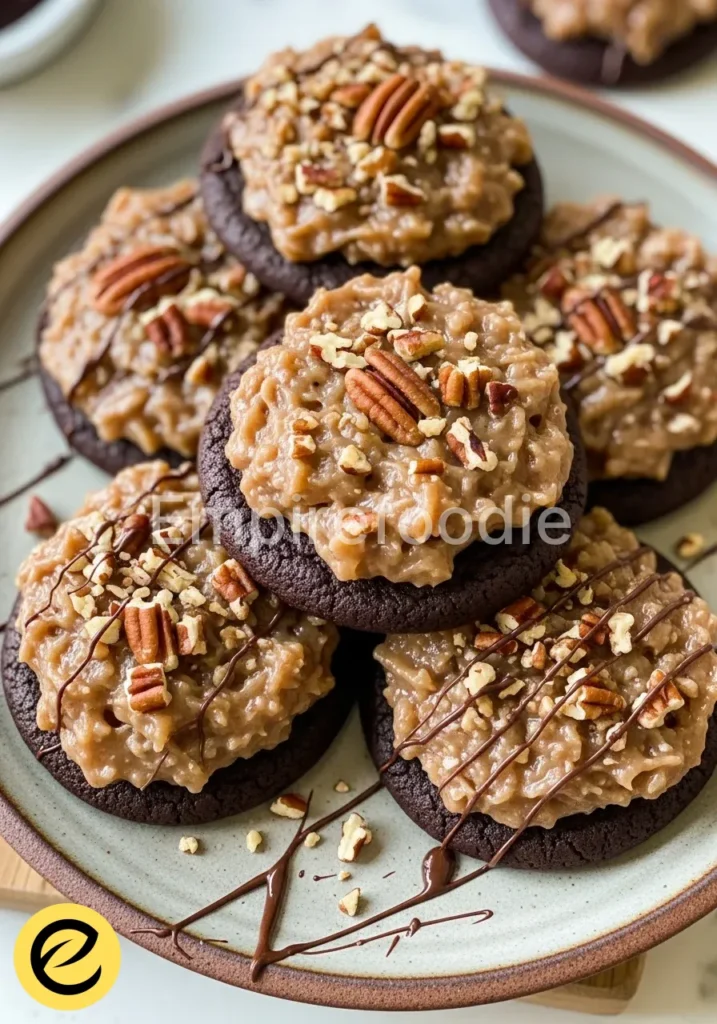
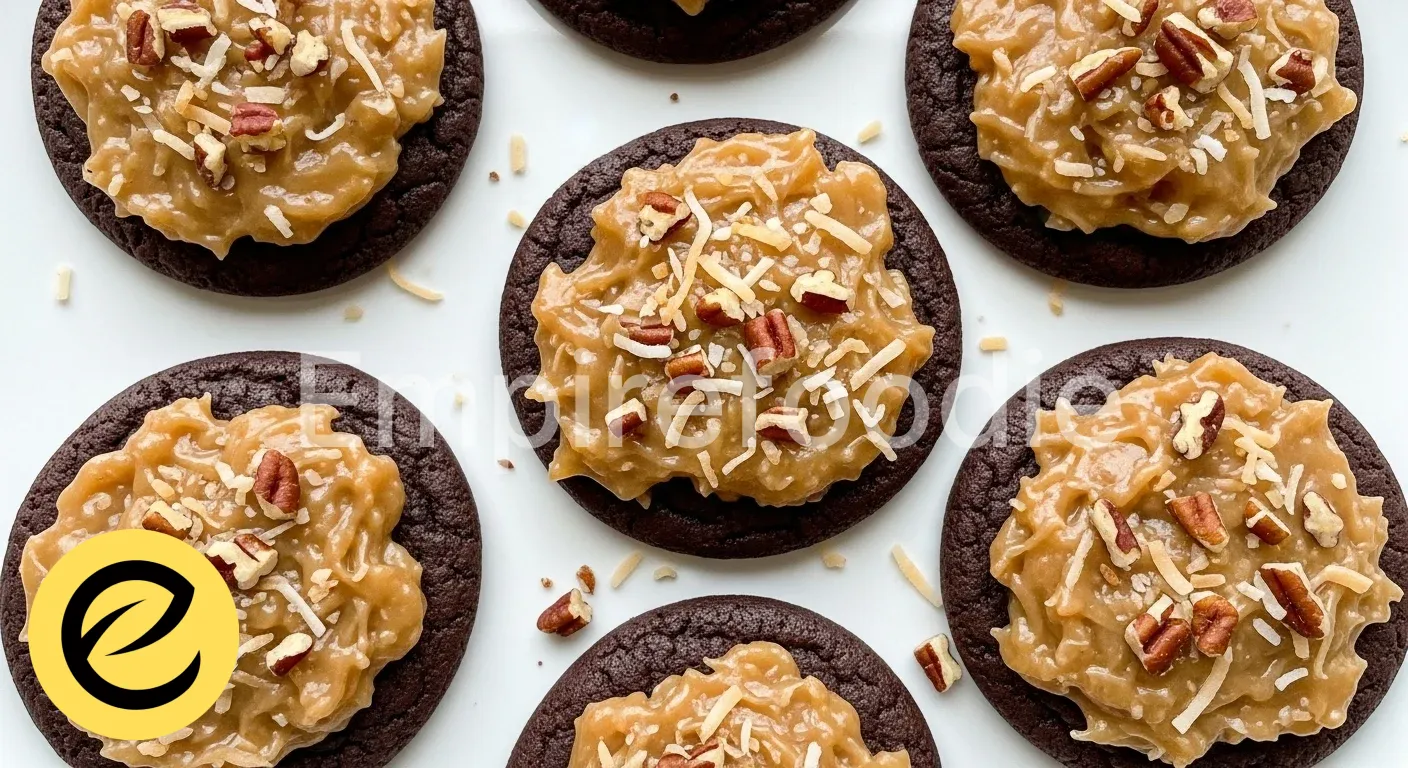
Mastering this chocolate biscuits recipe is more than baking; it’s a journey into culinary precision. Each step, grounded in scientific principles, ensures consistent excellence. The result is a biscuit that transcends expectation—rich, perfectly textured, and deeply satisfying. This chocolate biscuits recipe provides the foundation for countless moments of shared joy and simple indulgence.
Nutrition Information (per serving)
(Based on approximately 24 servings per recipe, values are approximate)
| Calories | 190 kcal |
| Total Fat | 11g |
| Saturated Fat | 7g |
| Cholesterol | 30mg |
| Sodium | 80mg |
| Total Carbohydrates | 22g |
| Dietary Fiber | 1g |
| Total Sugars | 15g |
| Protein | 2g |

chocolate biscuits recipe
Ingredients
- 225g unsalted butter, softened
- 150g granulated sugar
- 100g light brown sugar, packed
- 1 large egg, at room temperature
- 1 teaspoon vanilla extract
- 300g all-purpose flour
- 50g unsweetened cocoa powder
- 1 teaspoon baking soda
- 1/2 teaspoon salt
- 200g semi-sweet or dark chocolate chips or chunks
Instructions
- Cream butter and sugars until light and fluffy.
- Add egg and vanilla, mix until incorporated.
- Combine dry ingredients and whisk together.
- Gradually add dry ingredients to wet ingredients and mix until just combined.
- Fold in chocolate chips until evenly distributed.
- Chill the dough for at least 30 minutes.
- Preheat oven to 180°C (350°F) and prepare baking sheets.
- Scoop rounded tablespoons of dough onto baking sheets.
- Bake for 10-12 minutes until edges are set and centers are slightly soft.
- Cool on the baking sheets for 5 minutes before transferring to a wire rack.